ThinkNode M7 Meshtastic Wireless Communication Gateway, Support PoE Power, Powered By ESP32-S3 and LR1110
Model LMM15507D

Introduction to the ThinkNode M7
The ThinkNode M7 is a LoRa gateway device based on the ESP32-S3 and LR1110.Compared with the ThinkNode M1, M2, and M5, the M7 supports not only native Meshtastic mesh communication but also MQTT Gateway mode. Using Wi-Fi or Ethernet, two LoRa networks located far apart can be interconnected to enable cross-network data forwarding. The M7 supports PoE power supply, 100 Mbps Ethernet, and wired/wireless networking, making it ideal for deployment as a fixed gateway.
The ThinkNode M7 supports two communication modes:
① Meshtastic Mesh Communication
Meshtastic is an open-source mesh communication system based on LoRa technology. It enables long-range communication between devices without relying on cellular networks, Wi-Fi, or the internet. Each node can not only send and receive data but also automatically relay messages from other nodes, thereby extending the overall coverage of the mesh network.
In a mesh network, when two nodes cannot communicate directly, other Meshtastic nodes in between automatically act as relays, forwarding messages hop-by-hop to the destination node. As a result, the network’s coverage area continues to expand as the number of nodes increases.
This mode works exactly the same as on the ThinkNode M1, M2, and M5.. If you have already used the M1, M2, or M5, you can configure it directly using the same steps as before. If this is your first time using it, please refer to the instructions below.
② How the M7 MQTT Gateway Works
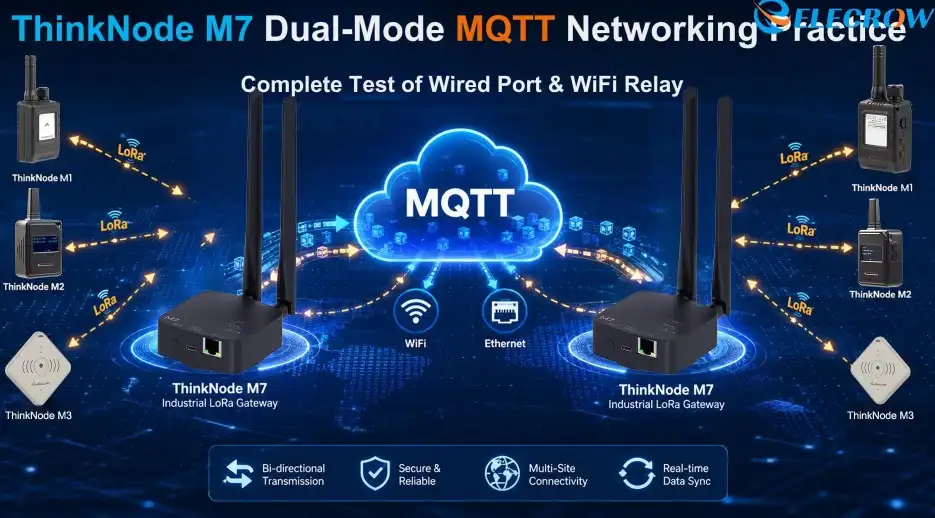
In MQTT Gateway mode, the ThinkNode M7 connects simultaneously to both the Meshtastic LoRa network and the MQTT broker, acting as a bridge between the two. When the M7 receives Meshtastic data from the local LoRa network, it uploads the data to the MQTT broker; at the same time, it subscribes to MQTT topics from the MQTT broker and forwards messages from remote M7 devices back to the local LoRa network.
With the help of the MQTT broker, two or more M7 devices—even if located in different places—can interconnect multiple independent Meshtastic networks as long as they have an internet connection, enabling cross-regional and long-distance data transmission.
The communication path is::
This way, standard LoRa nodes do not need to connect directly to the internet; they simply need to connect to a nearby M7 to communicate with devices in remote Meshtastic networks.
Advantages of Using the M7 as a Relay
By configuring the ThinkNode M7 as an MQTT Gateway relay, you can easily connect two or more independent LoRa Mesh networks.
LoRa nodes such as the M1, M2, and M5 do not need to connect to the internet; they simply need to connect to a nearby M7 to communicate with remote networks.
The ThinkNode M7 provides several advantages when used as an MQTT Gateway:
• Extends communication beyond the normal LoRa range, enabling communication across cities, regions, or even countries.
• Simple deployment. Standard LoRa nodes (M1/M2/M5) do not require Internet access. They only need to communicate with a nearby M7 gateway.
• Stable and reliable transmission. MQTT uses TCP/IP, providing reliable message delivery and better resistance to packet loss than long-distance LoRa links.
• LoRa Mesh Network A LoRa Mesh Network B Internet MQTT broker M2 M1 ThinkNode M7 ThinkNode M7 (MQTT Gateway) (MQTT Gateway) M5 Uploaded via the M7 to the MQTT broker.
As shown in the figure above, when any node in LoRa Mesh Network A sends a message, it is first received by the local M7 gateway, uploaded to the MQTT broker, then forwarded to the remote M7 gateway, and finally broadcast into LoRa Mesh Network B. The same process works in the opposite direction.
Next, we will introduce two ways to use the M7: configuring two M7 devices for MQTT communication and Mesh communication.
①Guide to MQTT Communication Between Meshtastic Devices
This guide primarily explains how to use the mobile app to connect to a Meshtastic device via the ThinkNode M7 device's Wi-Fi/Ethernet port, and how to set up network MQTT communication between Meshtastic devices.
1. Device Preparation
① Two ThinkNode M7 devices
② Two smartphones with the Meshtastic app installed
③ Internet access via Wi-Fi or Ethernet
2. Wi-Fi/Ethernet Connection Methods
Note: The Bluetooth name, Wi-Fi name, and Ethernet name of the Meshtastic device are all the same.
Ethernet Connection:
① Connect the network cable to the ThinkNode M7 device and to the router. Internet access via Wi-Fi or Ethernet.
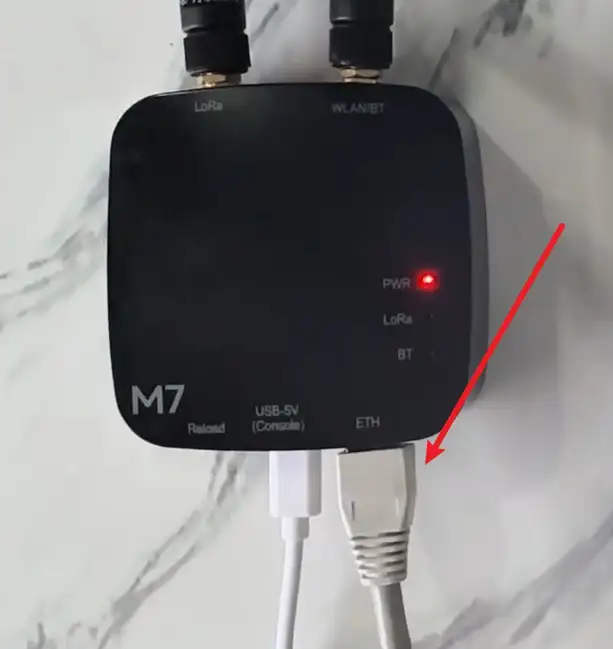
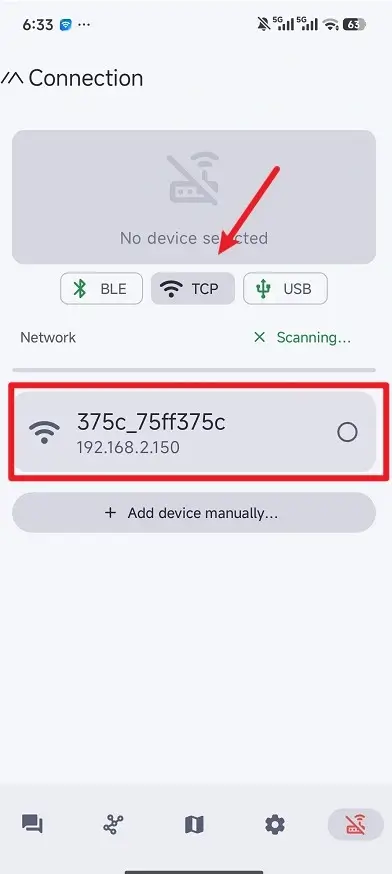
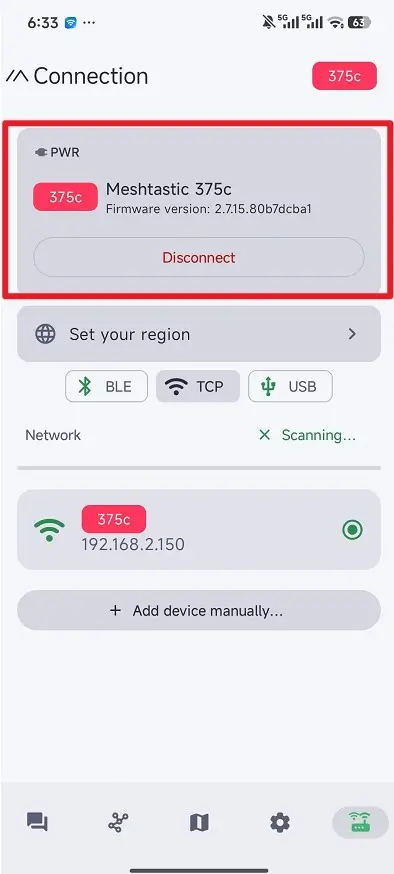
② Select the network connection option. All Meshtastic devices on the current network will be displayed. Click on the desired device to establish a connection. Once connected, you will see a connection icon that is different from the Bluetooth icon.
Wi-Fi Connection:
① Before using Wi-Fi, you must first configure the Wi-Fi credentials through either Bluetooth or Ethernet.
② In the network device settings, enable Wi-Fi and enter the router's Wi-Fi SSID and password. (Note: After enabling Wi-Fi, once Wi-Fi is enabled, Bluetooth management will be disabled..)
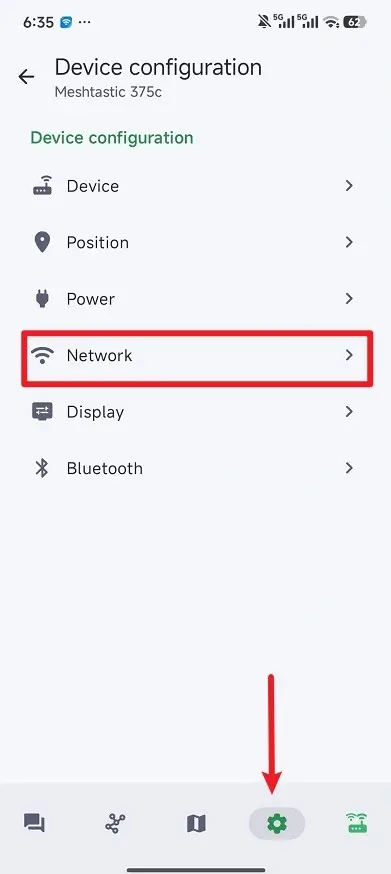
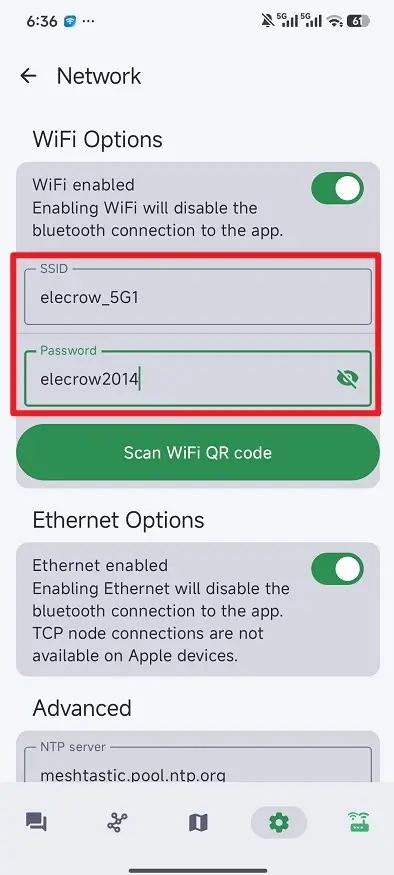
③ Similar to the Ethernet connection method, ensure the smartphone and the Meshtastic device are on the same router. In the network connection options, click on the corresponding Meshtastic device name.
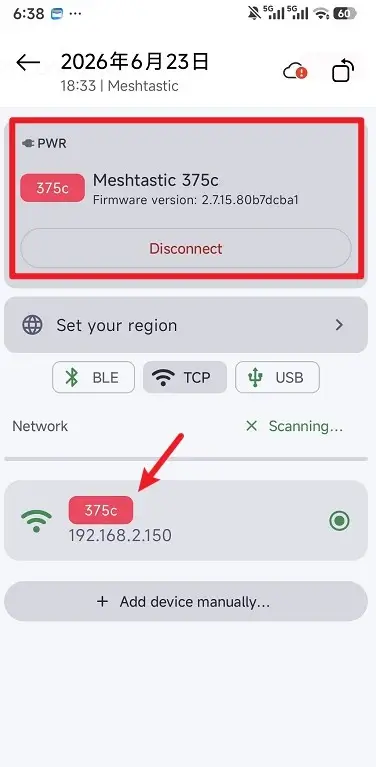
3. Network MQTT Transmission
For MQTT transmission, both ThinkNode M7 devices must use the same LoRa configuration and MQTT configuration. The two ThinkNode M7 devices can be connected to different routers via Wi-Fi.
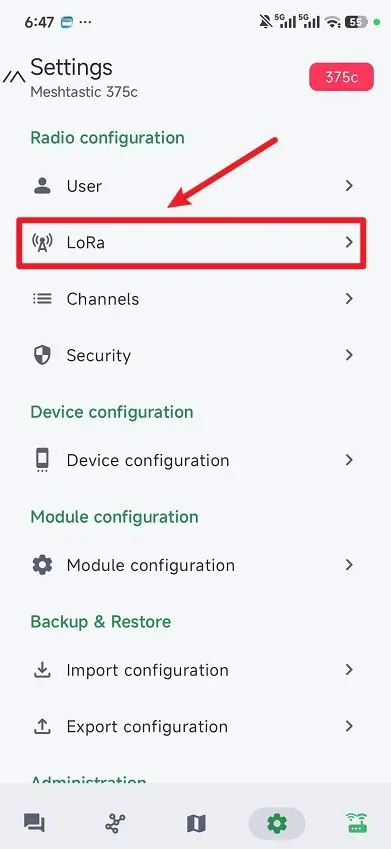
① In LoRa settings, enable the "Ok to MQTT" option and the "Transmit Enable " option. Keep other settings as per normal transmission configuration.
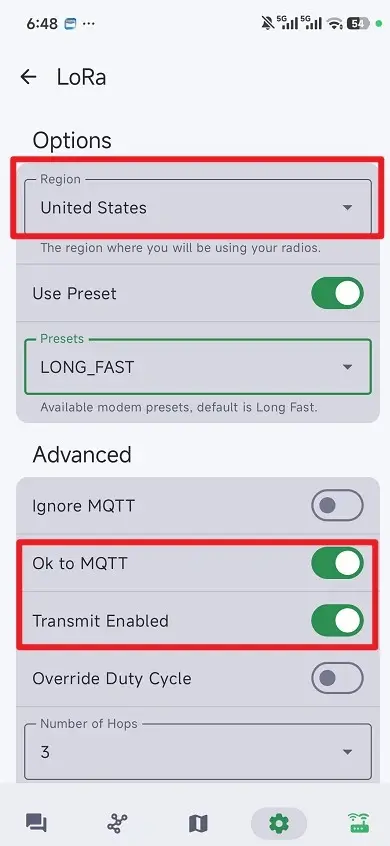
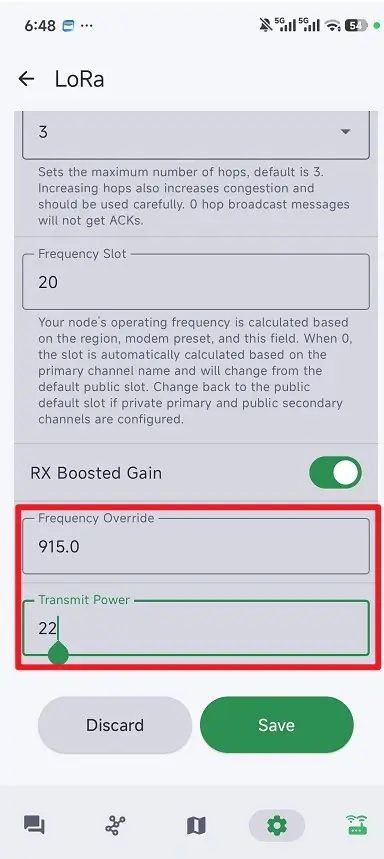
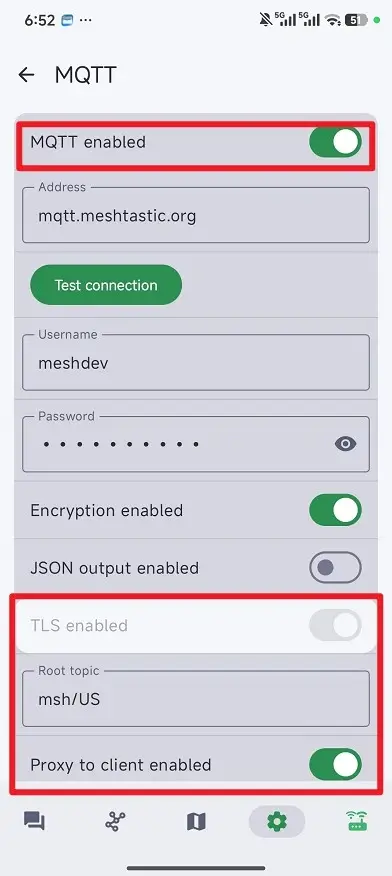
② Go to Module Configuration, then enter "MQTT Options". Enable "MQTT enabled ", " TLS enabled", and " Proxy to client enabled". Leave all other settings at their default values.. If they are not default, revert them to default. (Note: The MQTT configurations on both M7 devices must be identical. If communication fails, check these settings.)
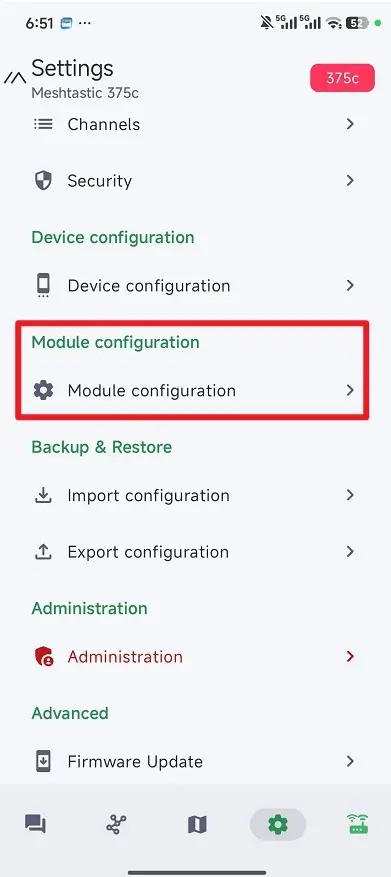
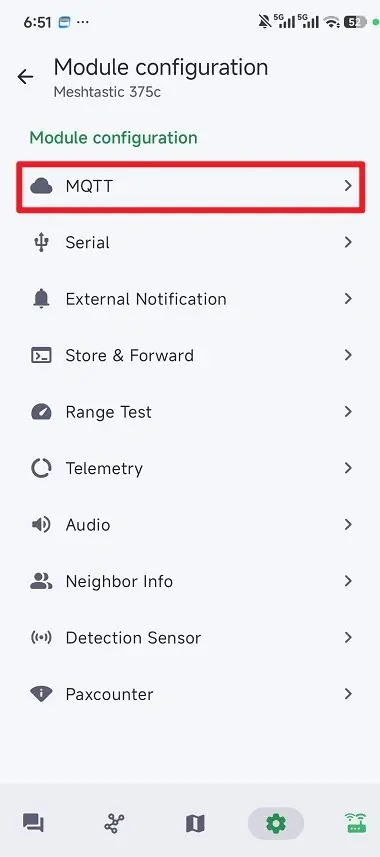
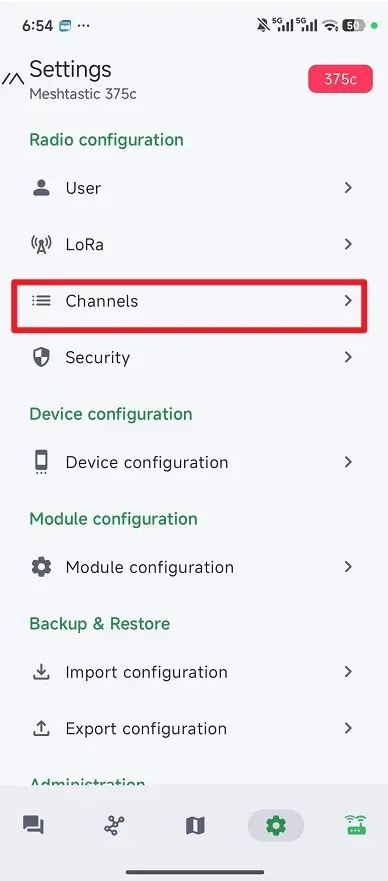
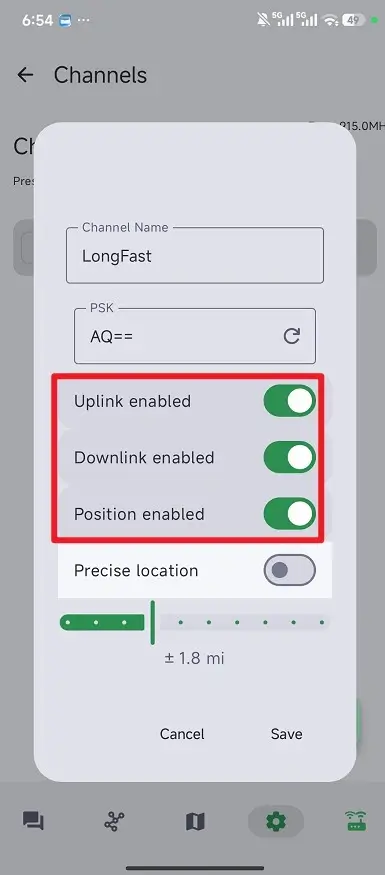
③ Go to "Channels", open the default "LongFast" channel, and enable "Enable Upload", " Downlink Enabled", and "Position Enabled". Leave all other settings at their default values..
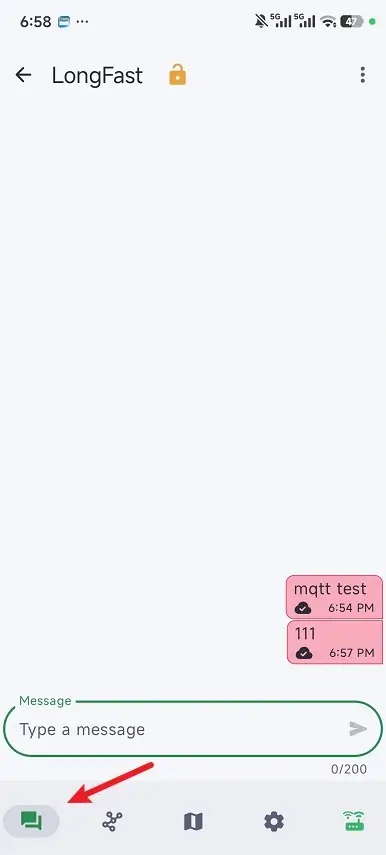
④ After this, data sent in the message channel will be transmitted via network MQTT to other Meshtastic devices that share the same LoRa configuration, channel configuration, and MQTT configuration. (Note:If the two gateways are close enough to communicate directly over LoRa. To confirm, temporarily remove the LoRa antenna2 to ensure normal Meshtastic LoRa communication is not possible, then test again with MQTT configured.)
②Guide to Mesh Communication Between Meshtastic Devices
Prepare two smartphones with Meshtastic APP installed and two thinknode M5\M1\M2 devices.
First go to the app store to download and install the Meshtastic APP
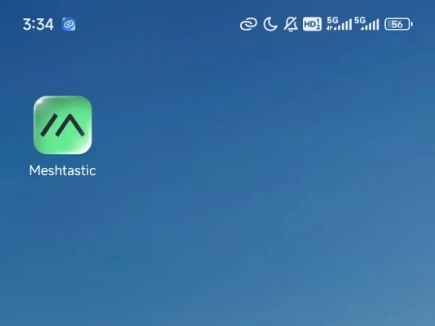
Same settings on the receiving side as on the transmitting side
After opening the app, tap the icon in the lower-right corner and select the corresponding device.
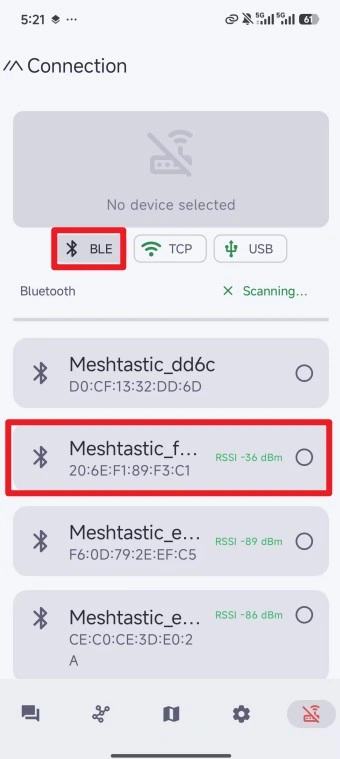
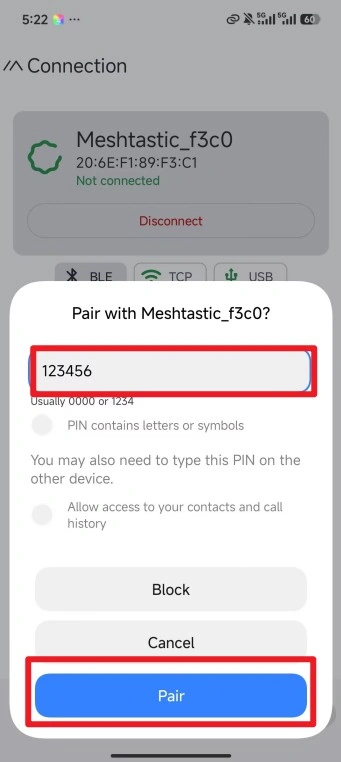
2)The default PIN for the ThinkNode M7 is “123456.” After selecting the corresponding device, an input field will automatically appear; enter the PIN to pair the devices.
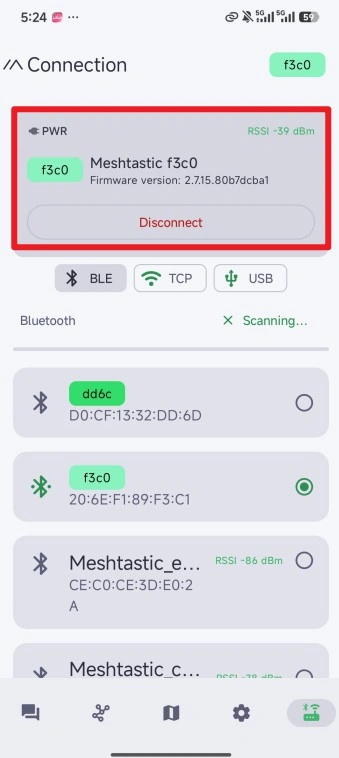
3)If the connection is successful, some basic information about the device will be displayed.
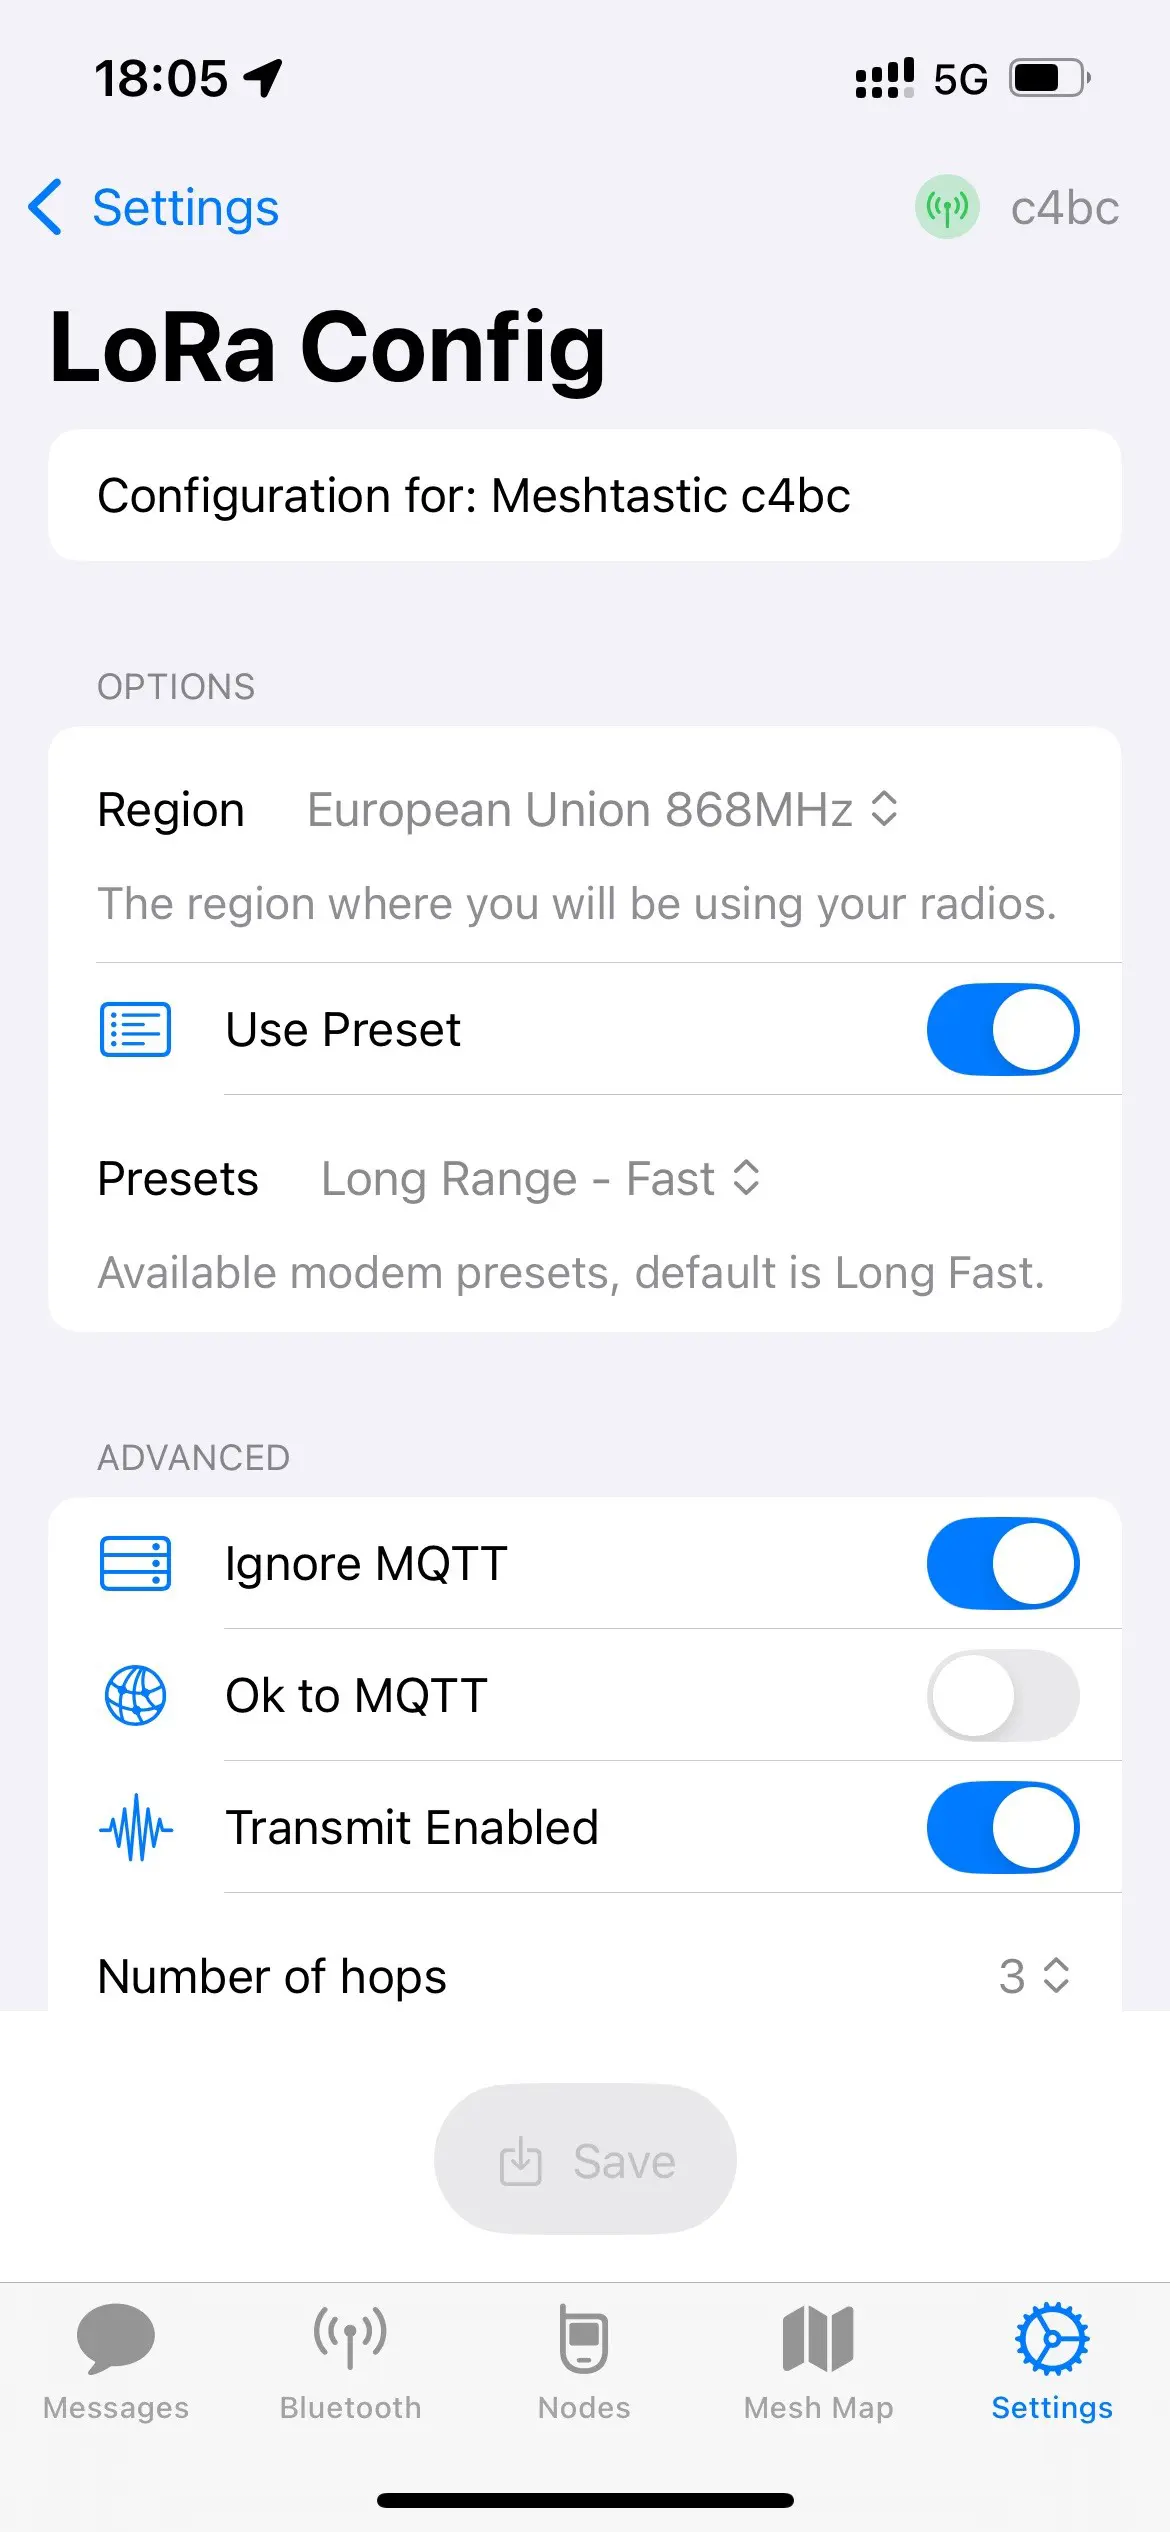
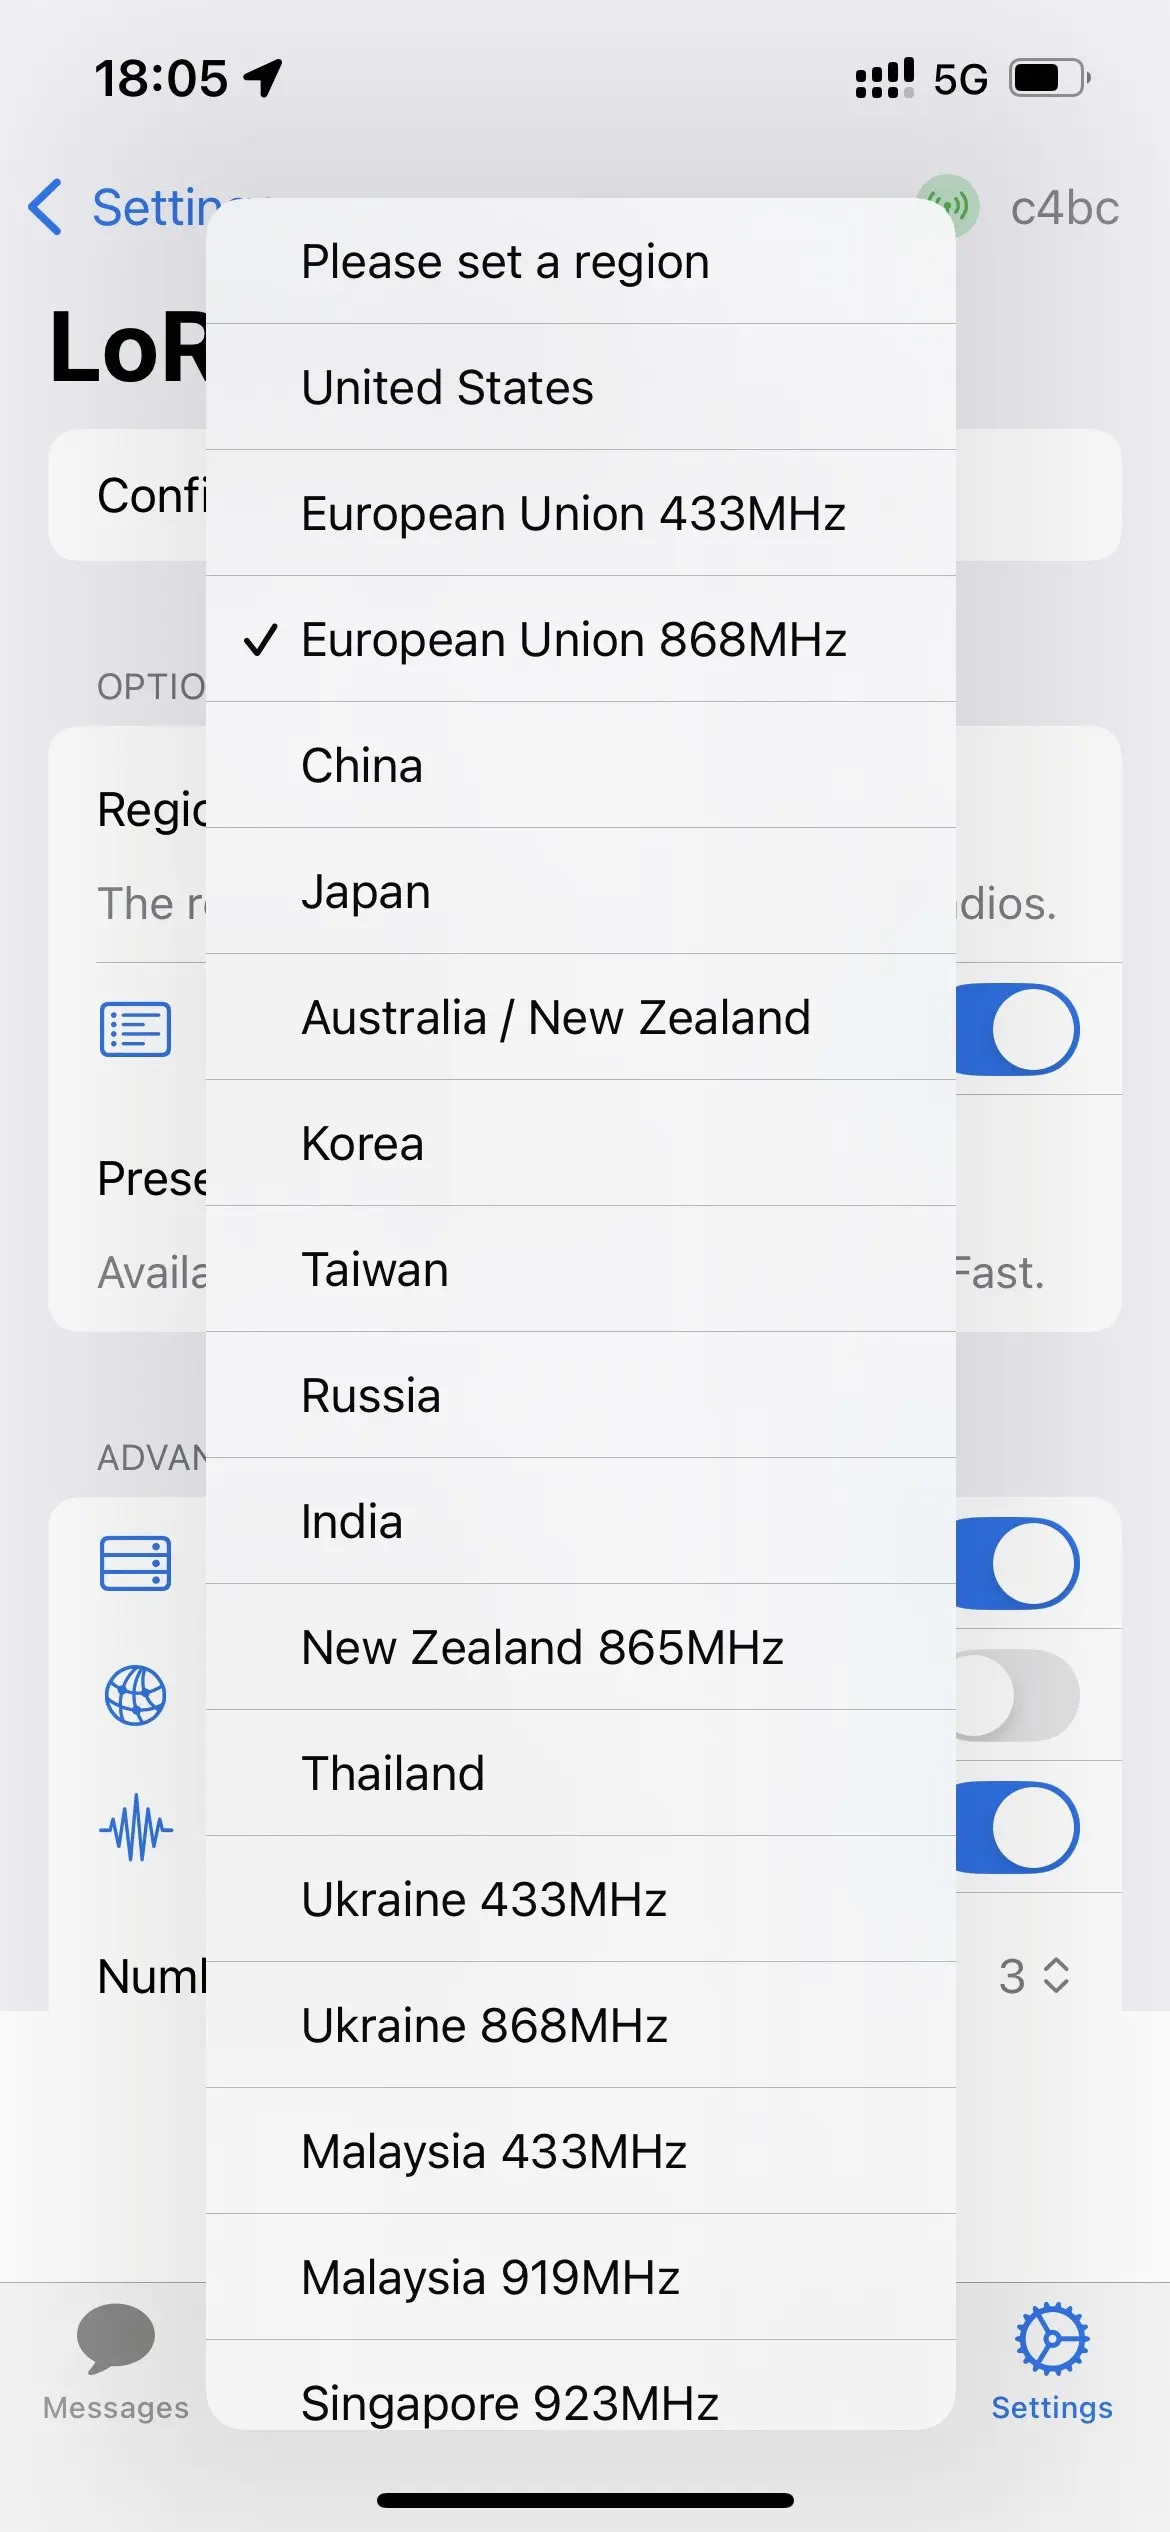
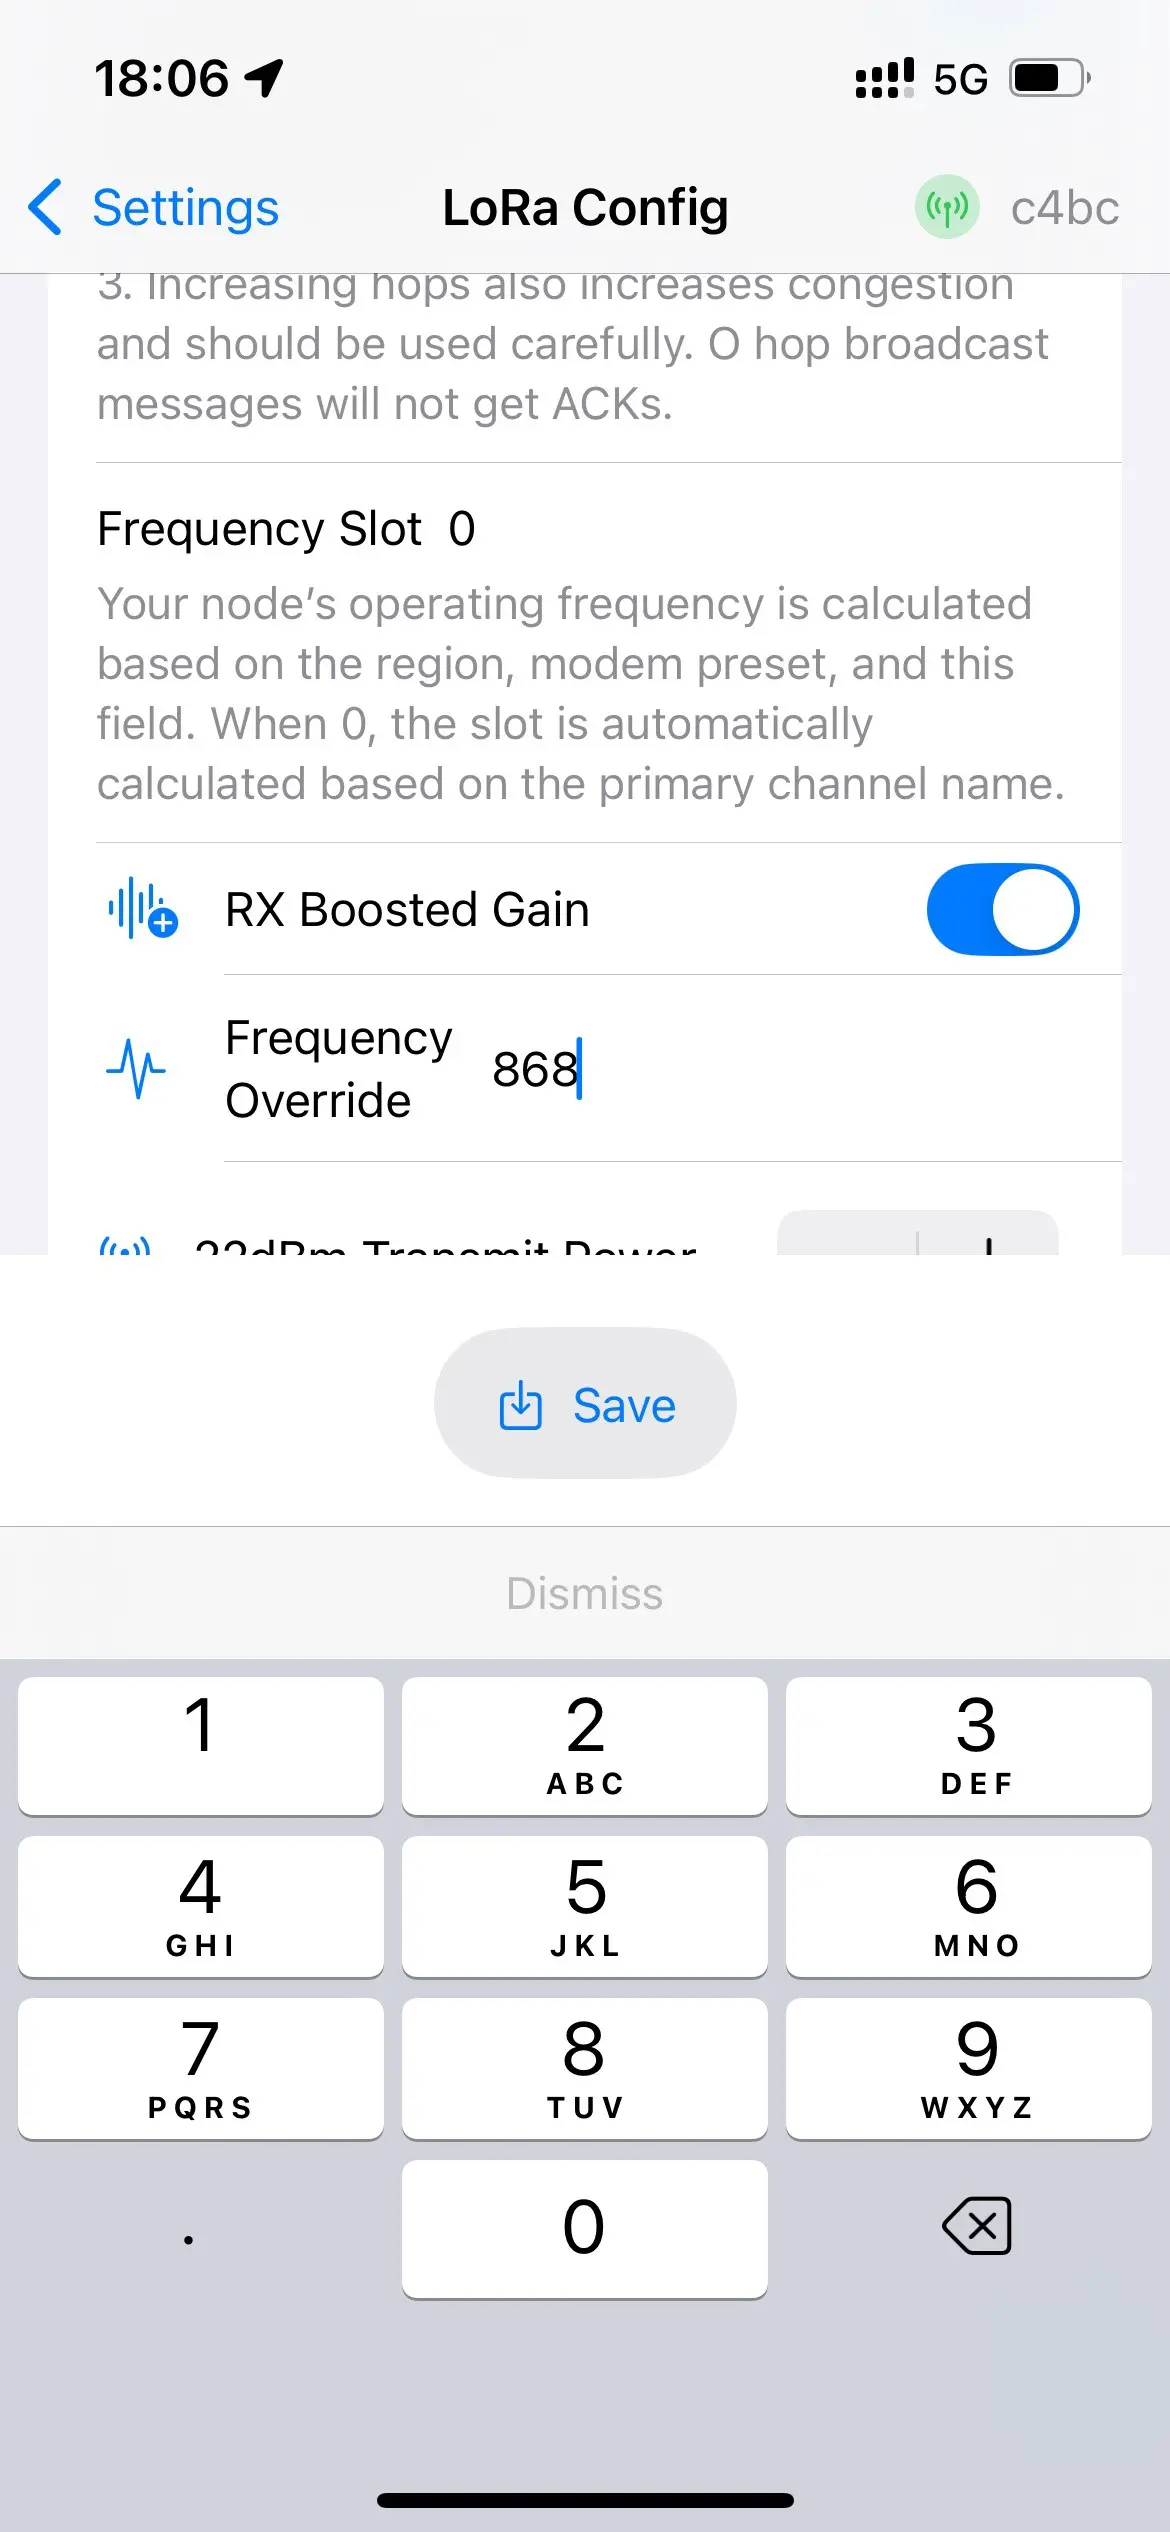
4) Go to Settings, set the LoRa region, and select the preset “LONG_FAST modem preset”. Leave the other options at their default settings, and enter the appropriate frequency value in the “Frequency Override” field.
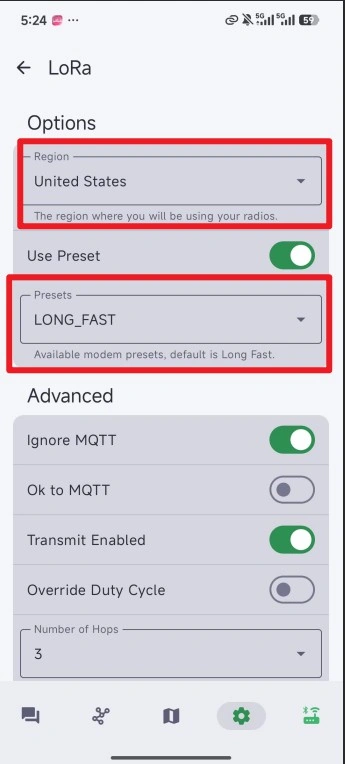
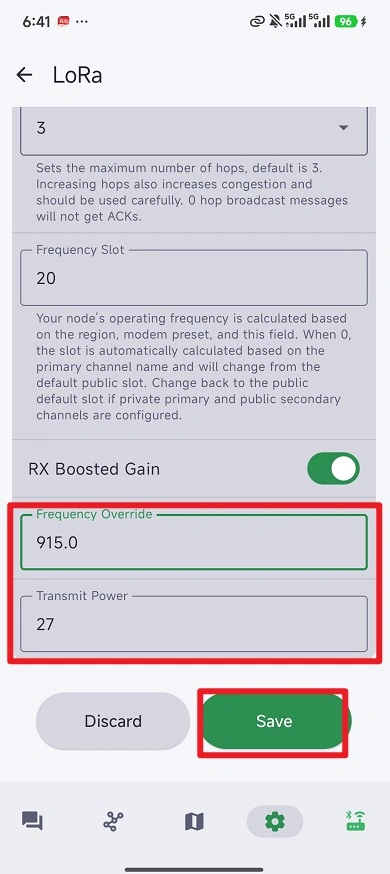
5)If two devices want to communicate, they need to join the same channel, this time you need to select the fourth of the five options above, the other end of the phone needs to join the same channel by scanning the code or entering the link, the channel can be customized name and so on.
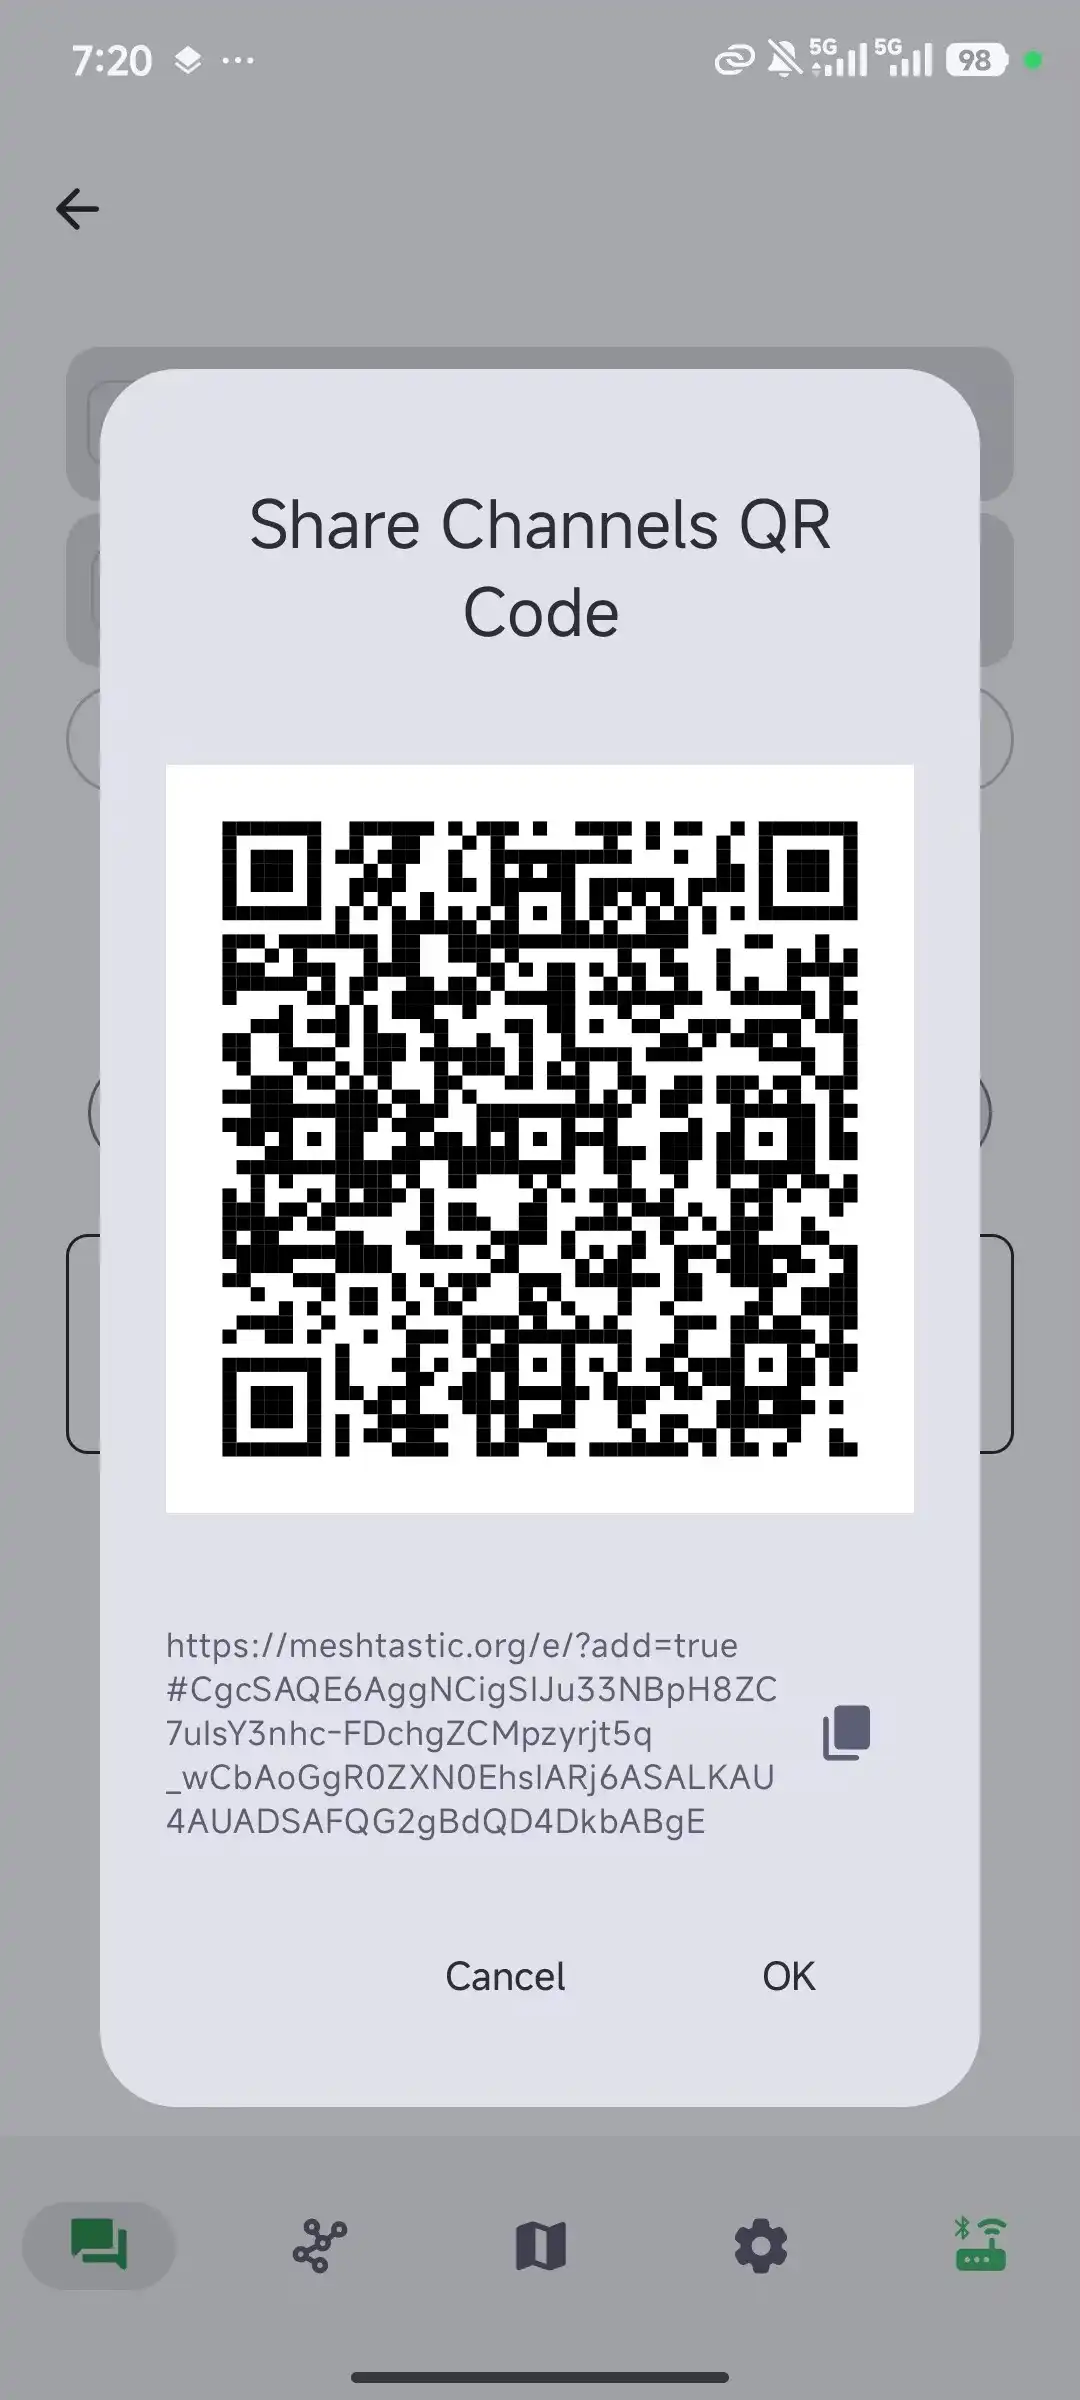
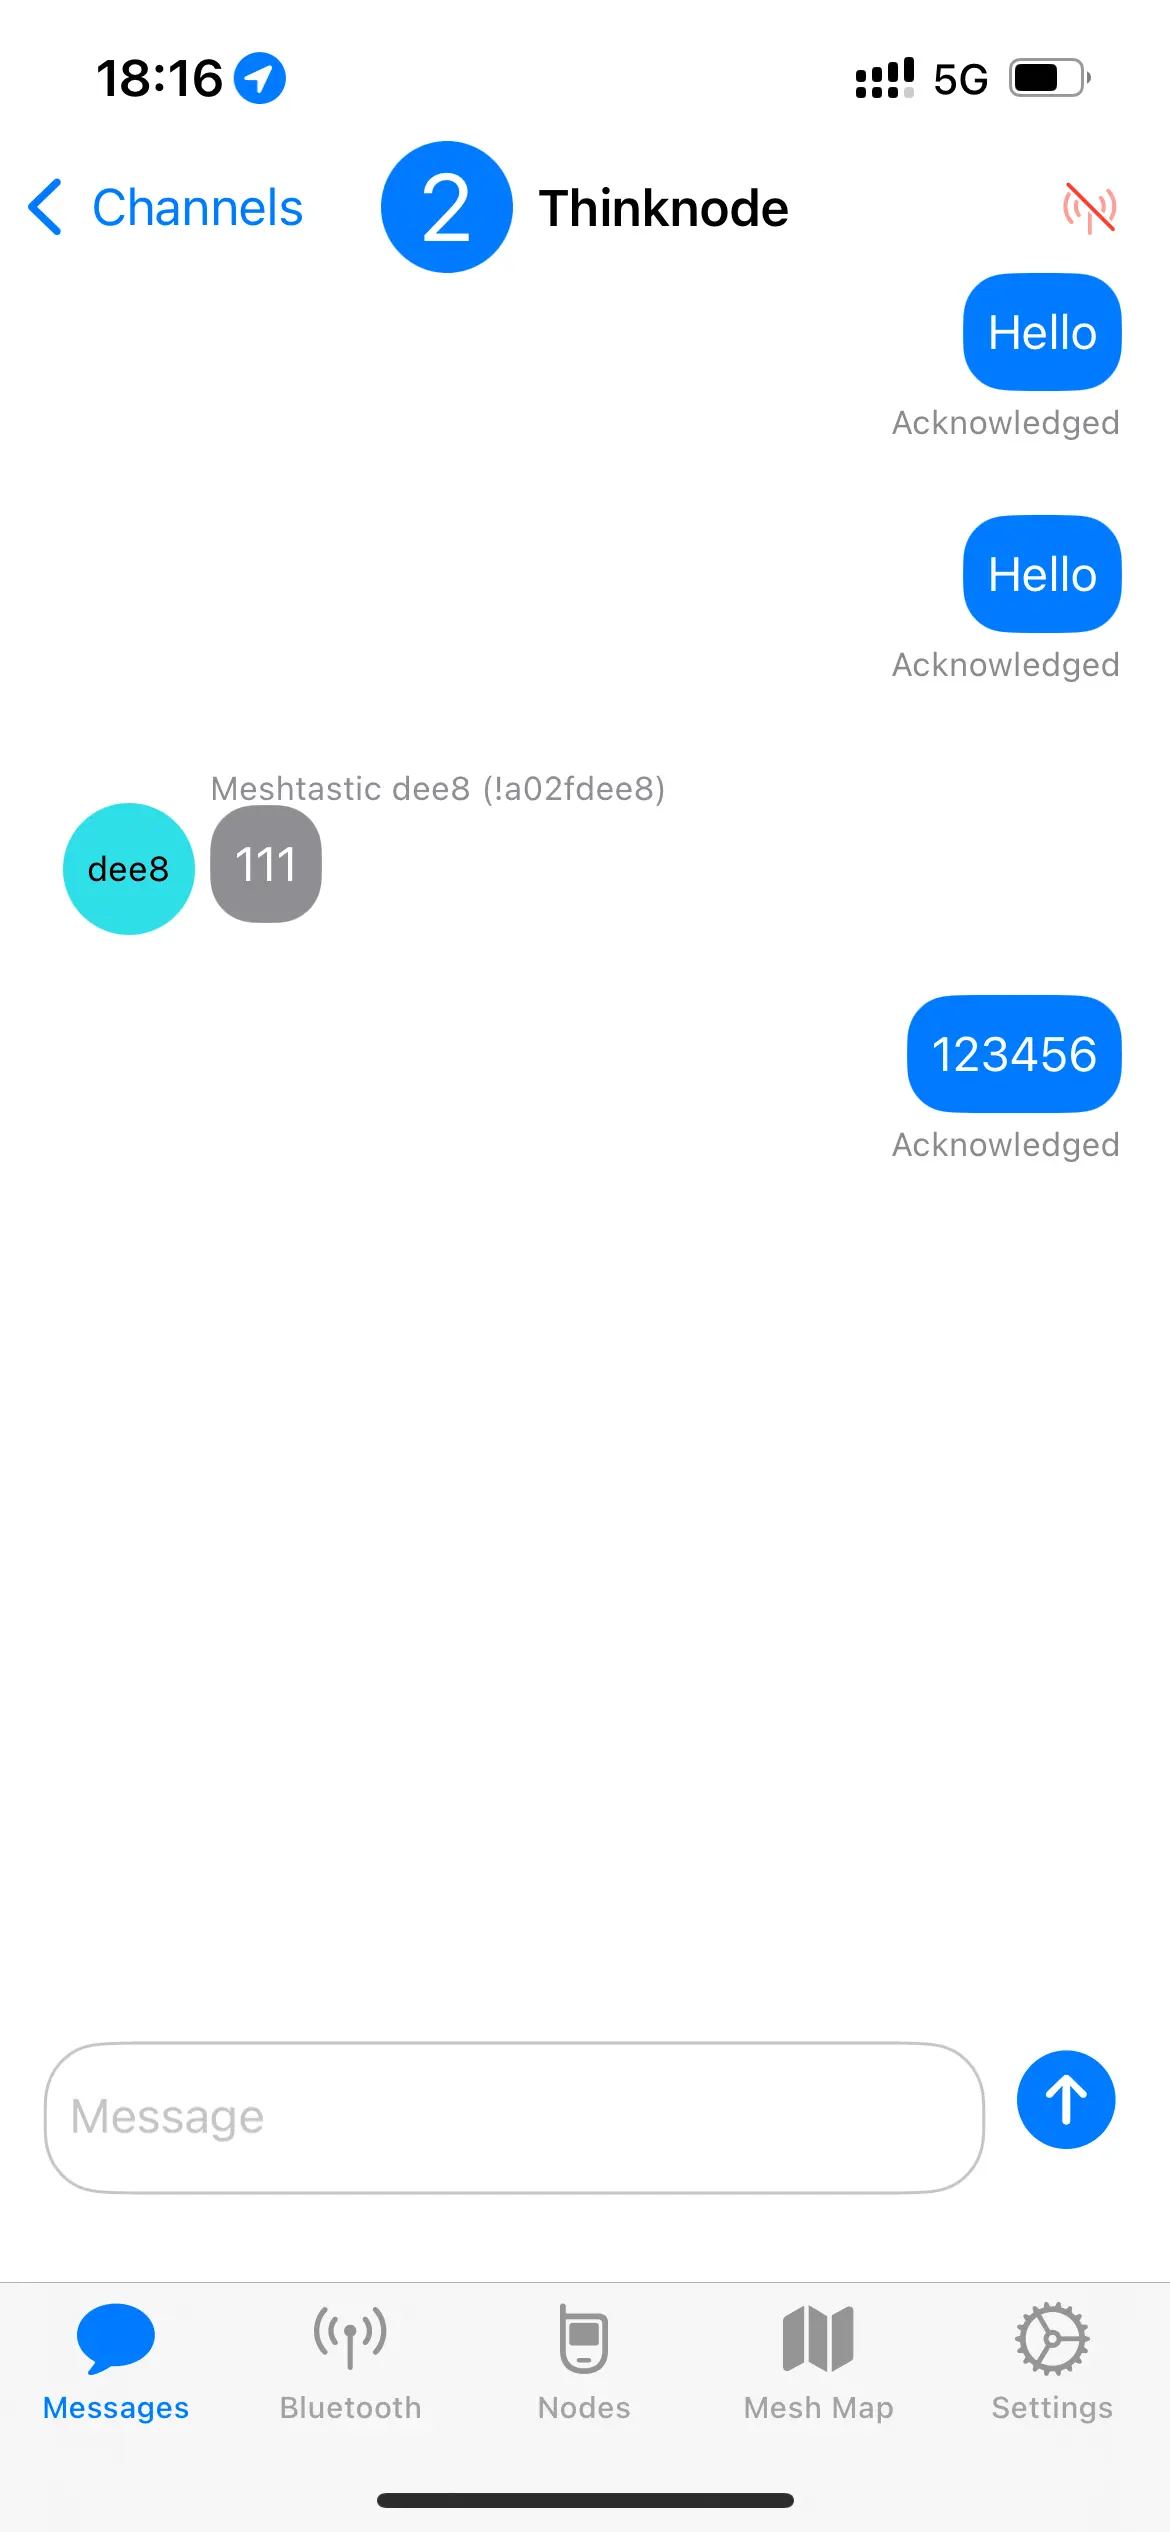
6)After joining, the two devices can now chat in the first screen by selecting Group Chat.
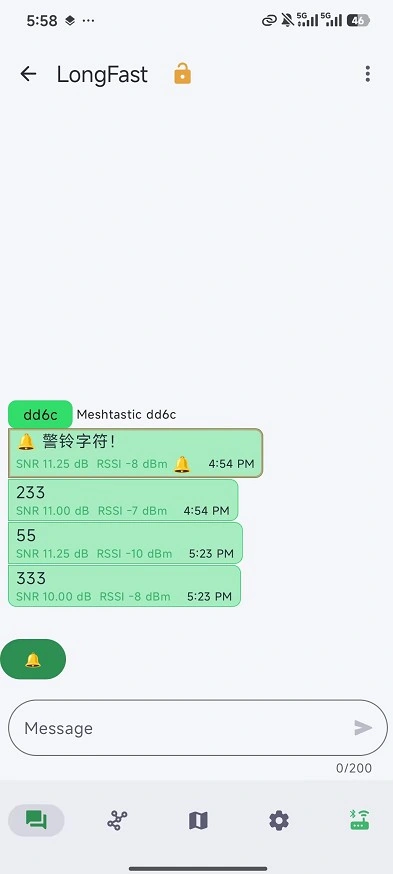
Same settings on the receiving side as on the transmitting side
1)Open the app, tap Bluetooth on the home page and see the device you want to connect. Click on Pairing.
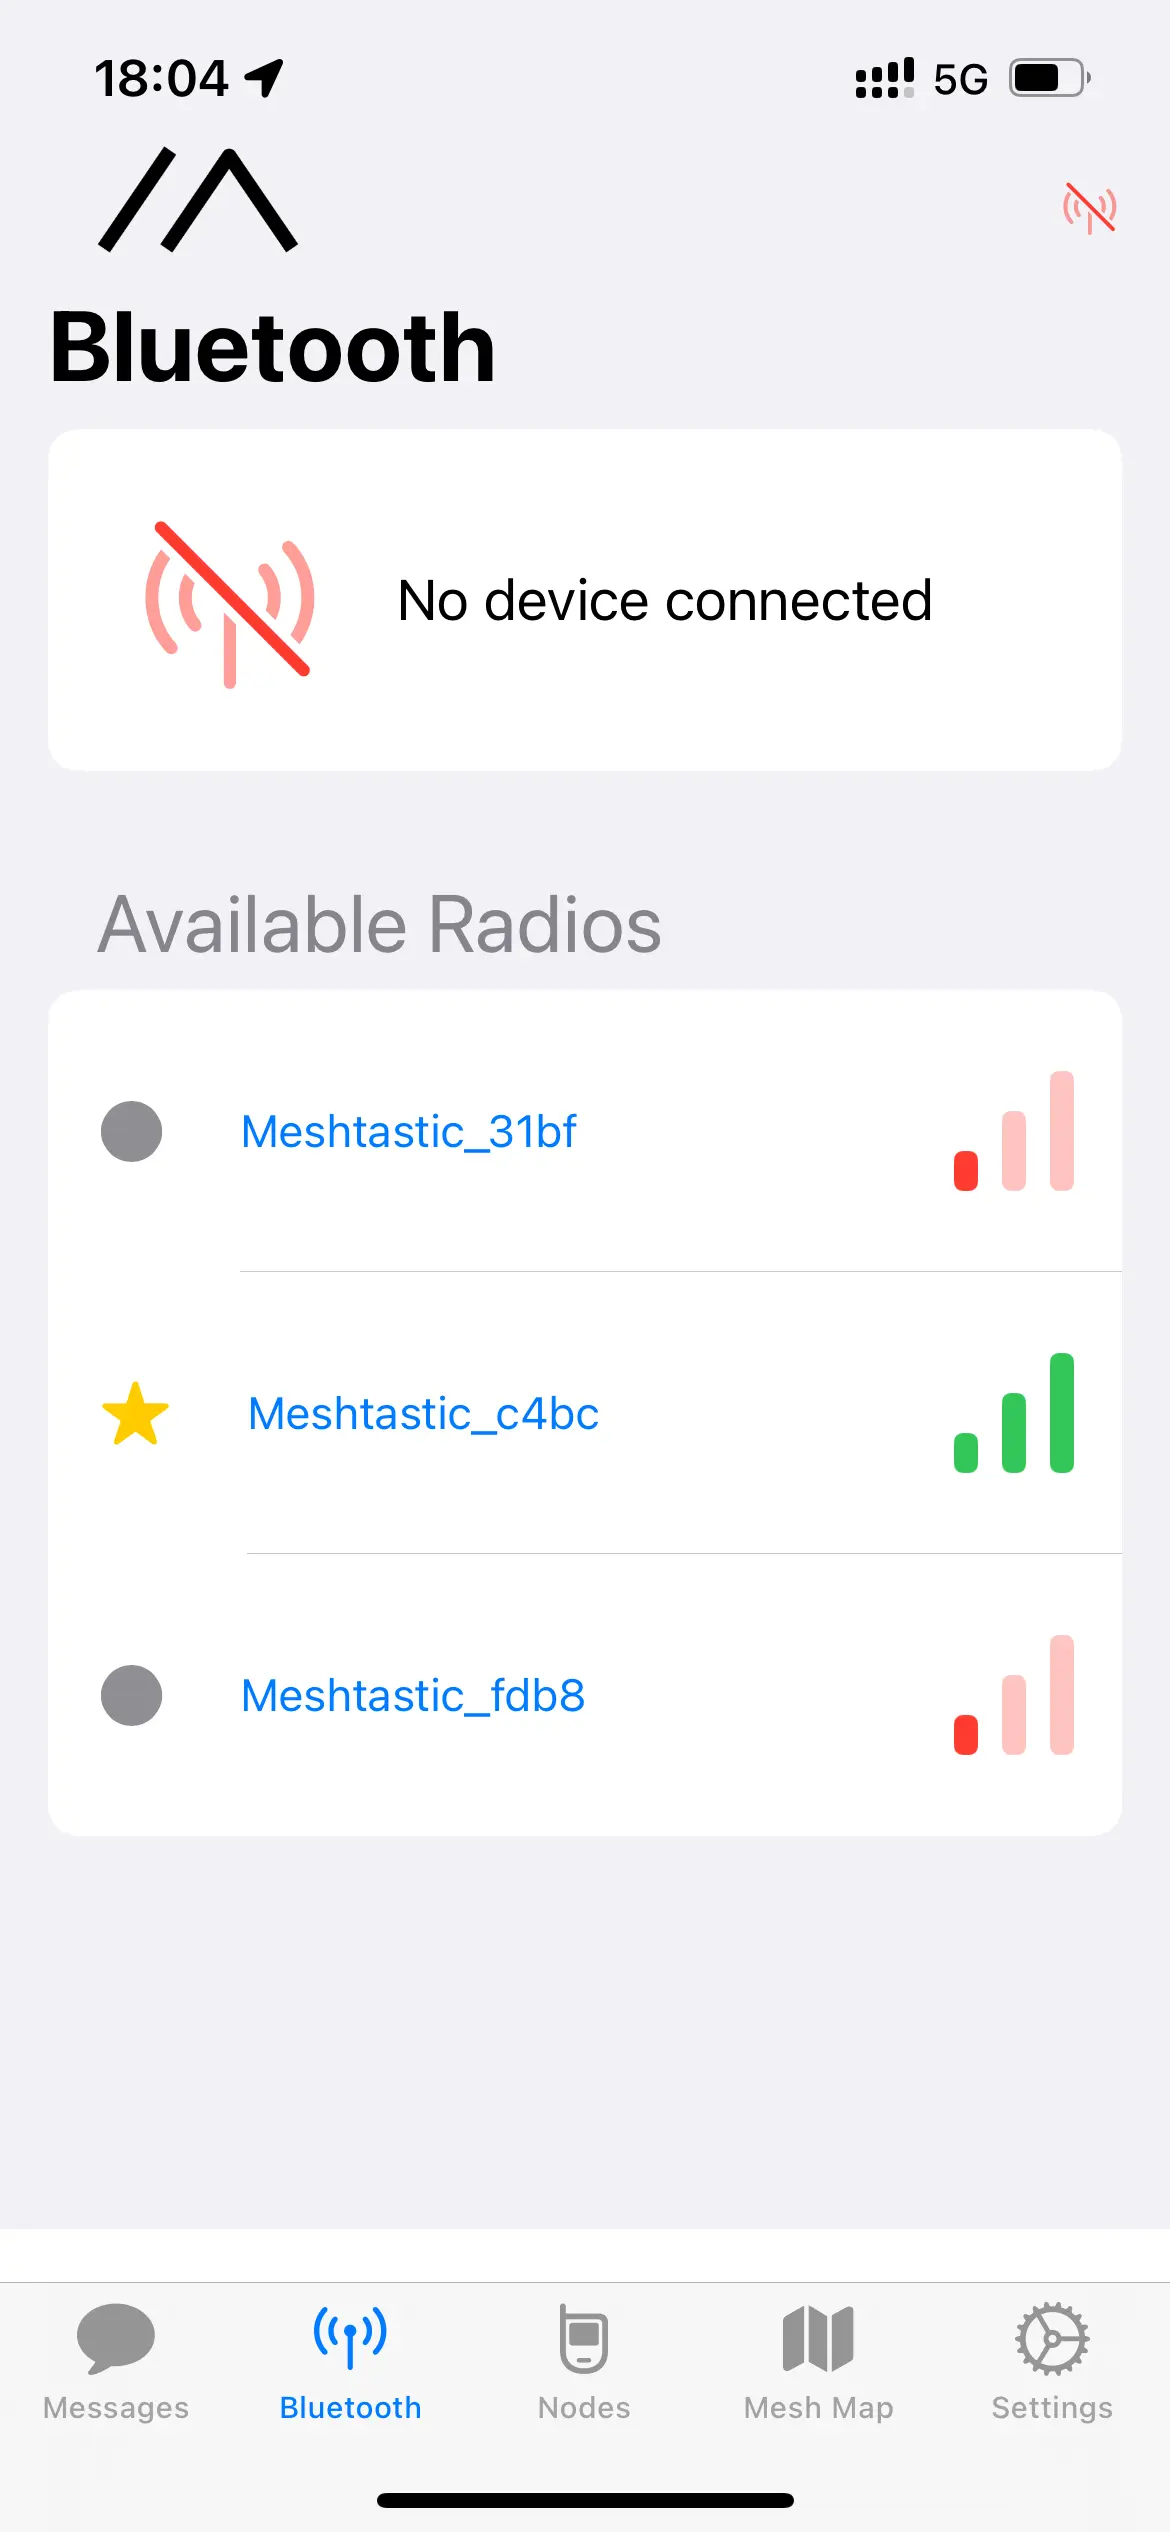
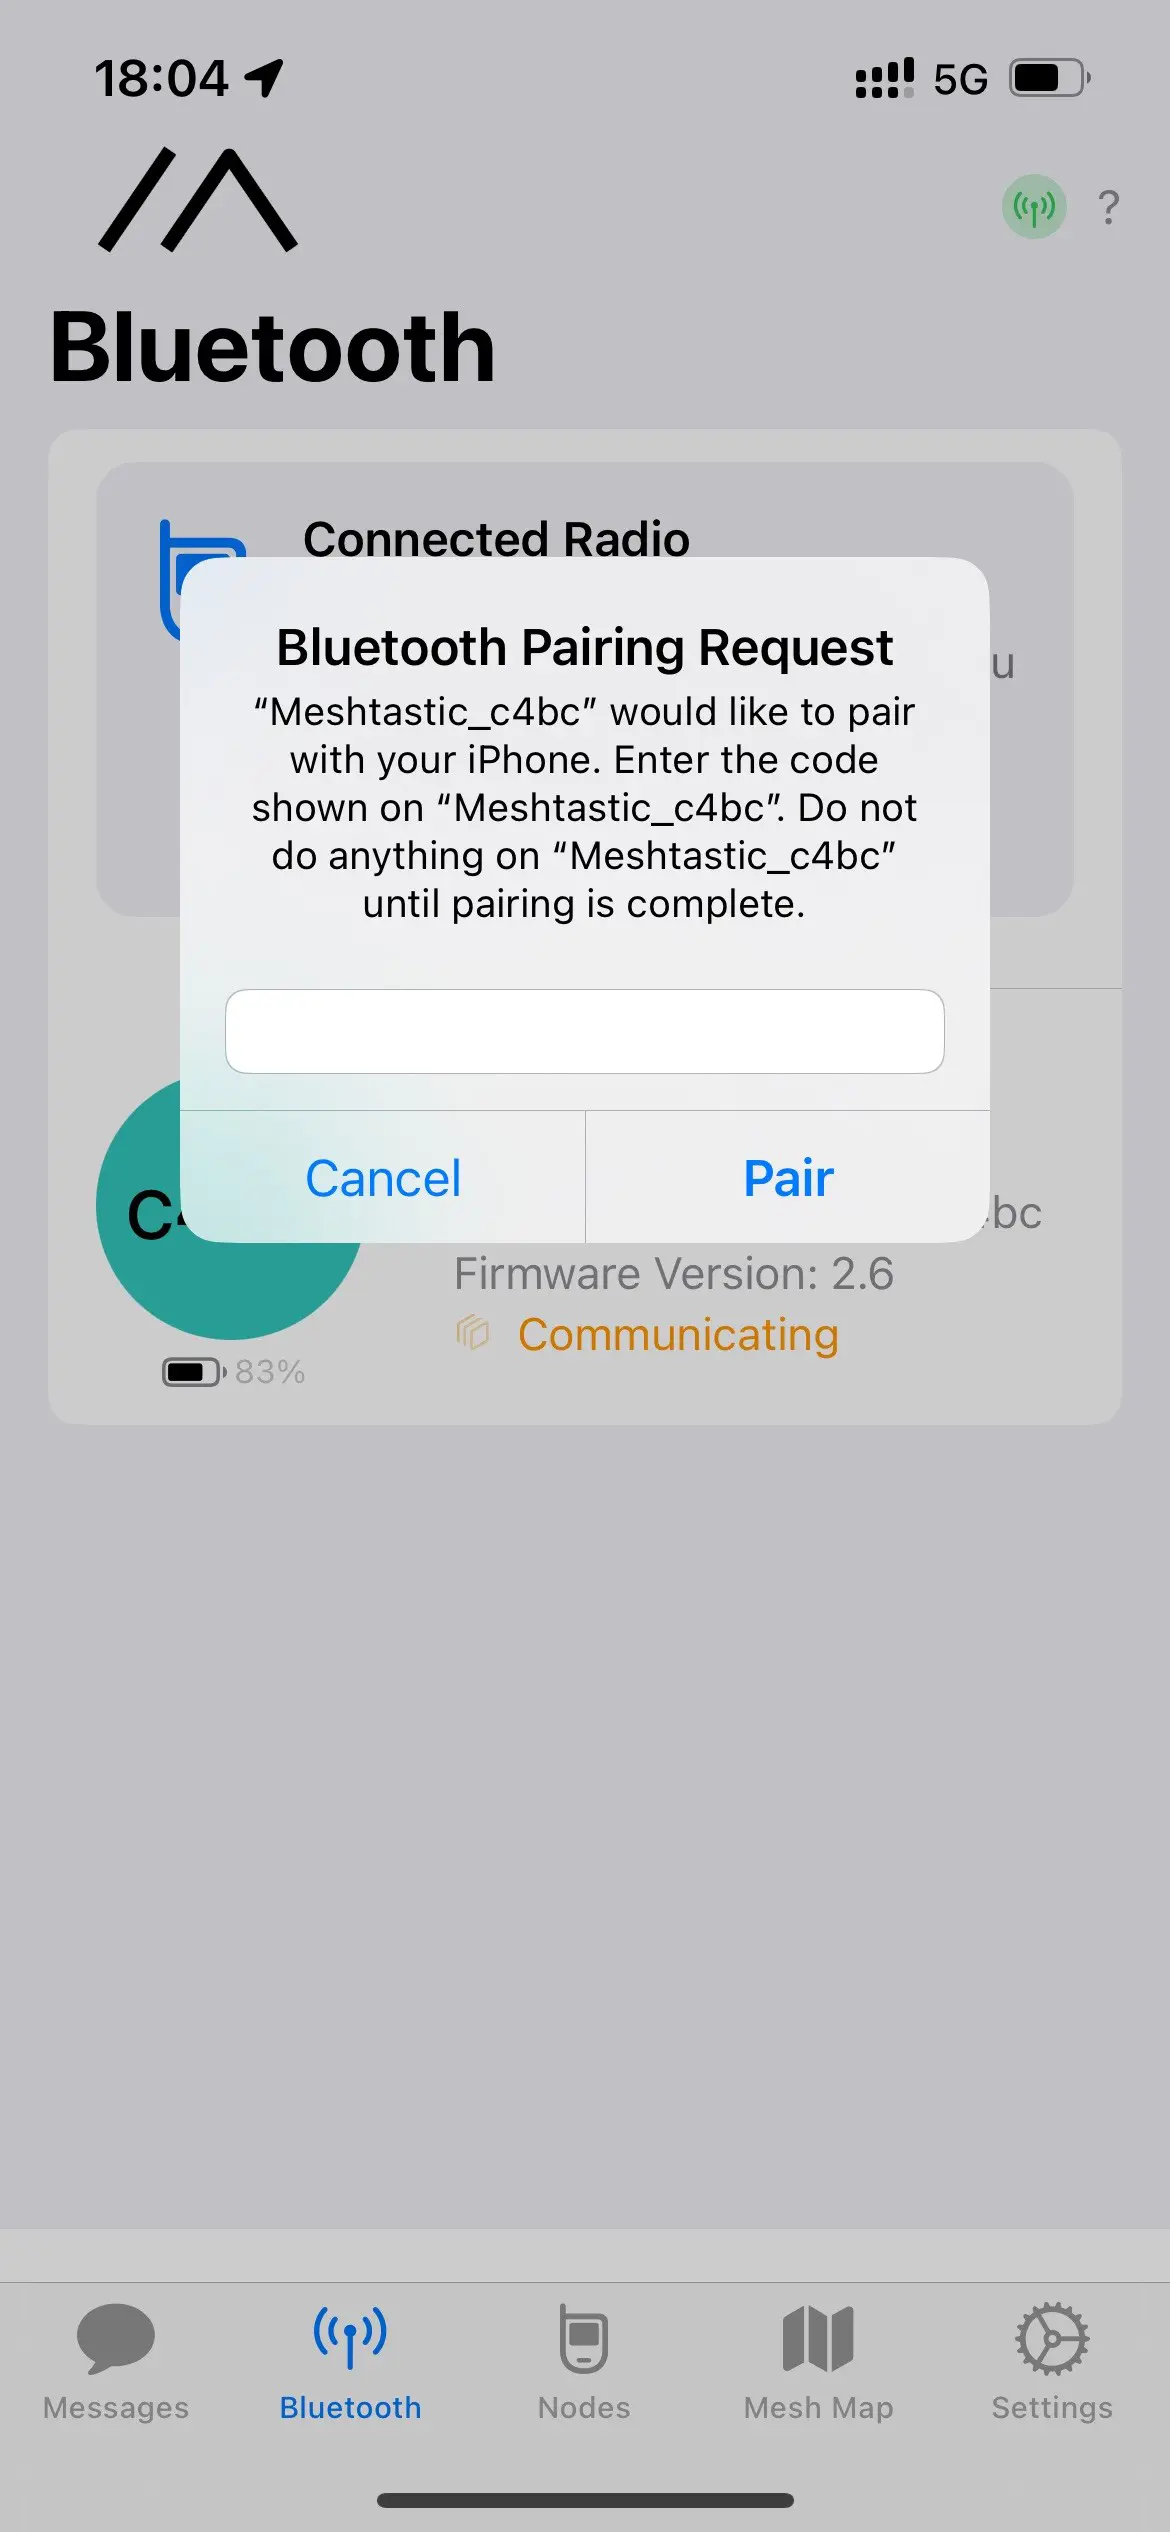
2)The default PIN is “123456.” Enter the PIN to complete pairing.
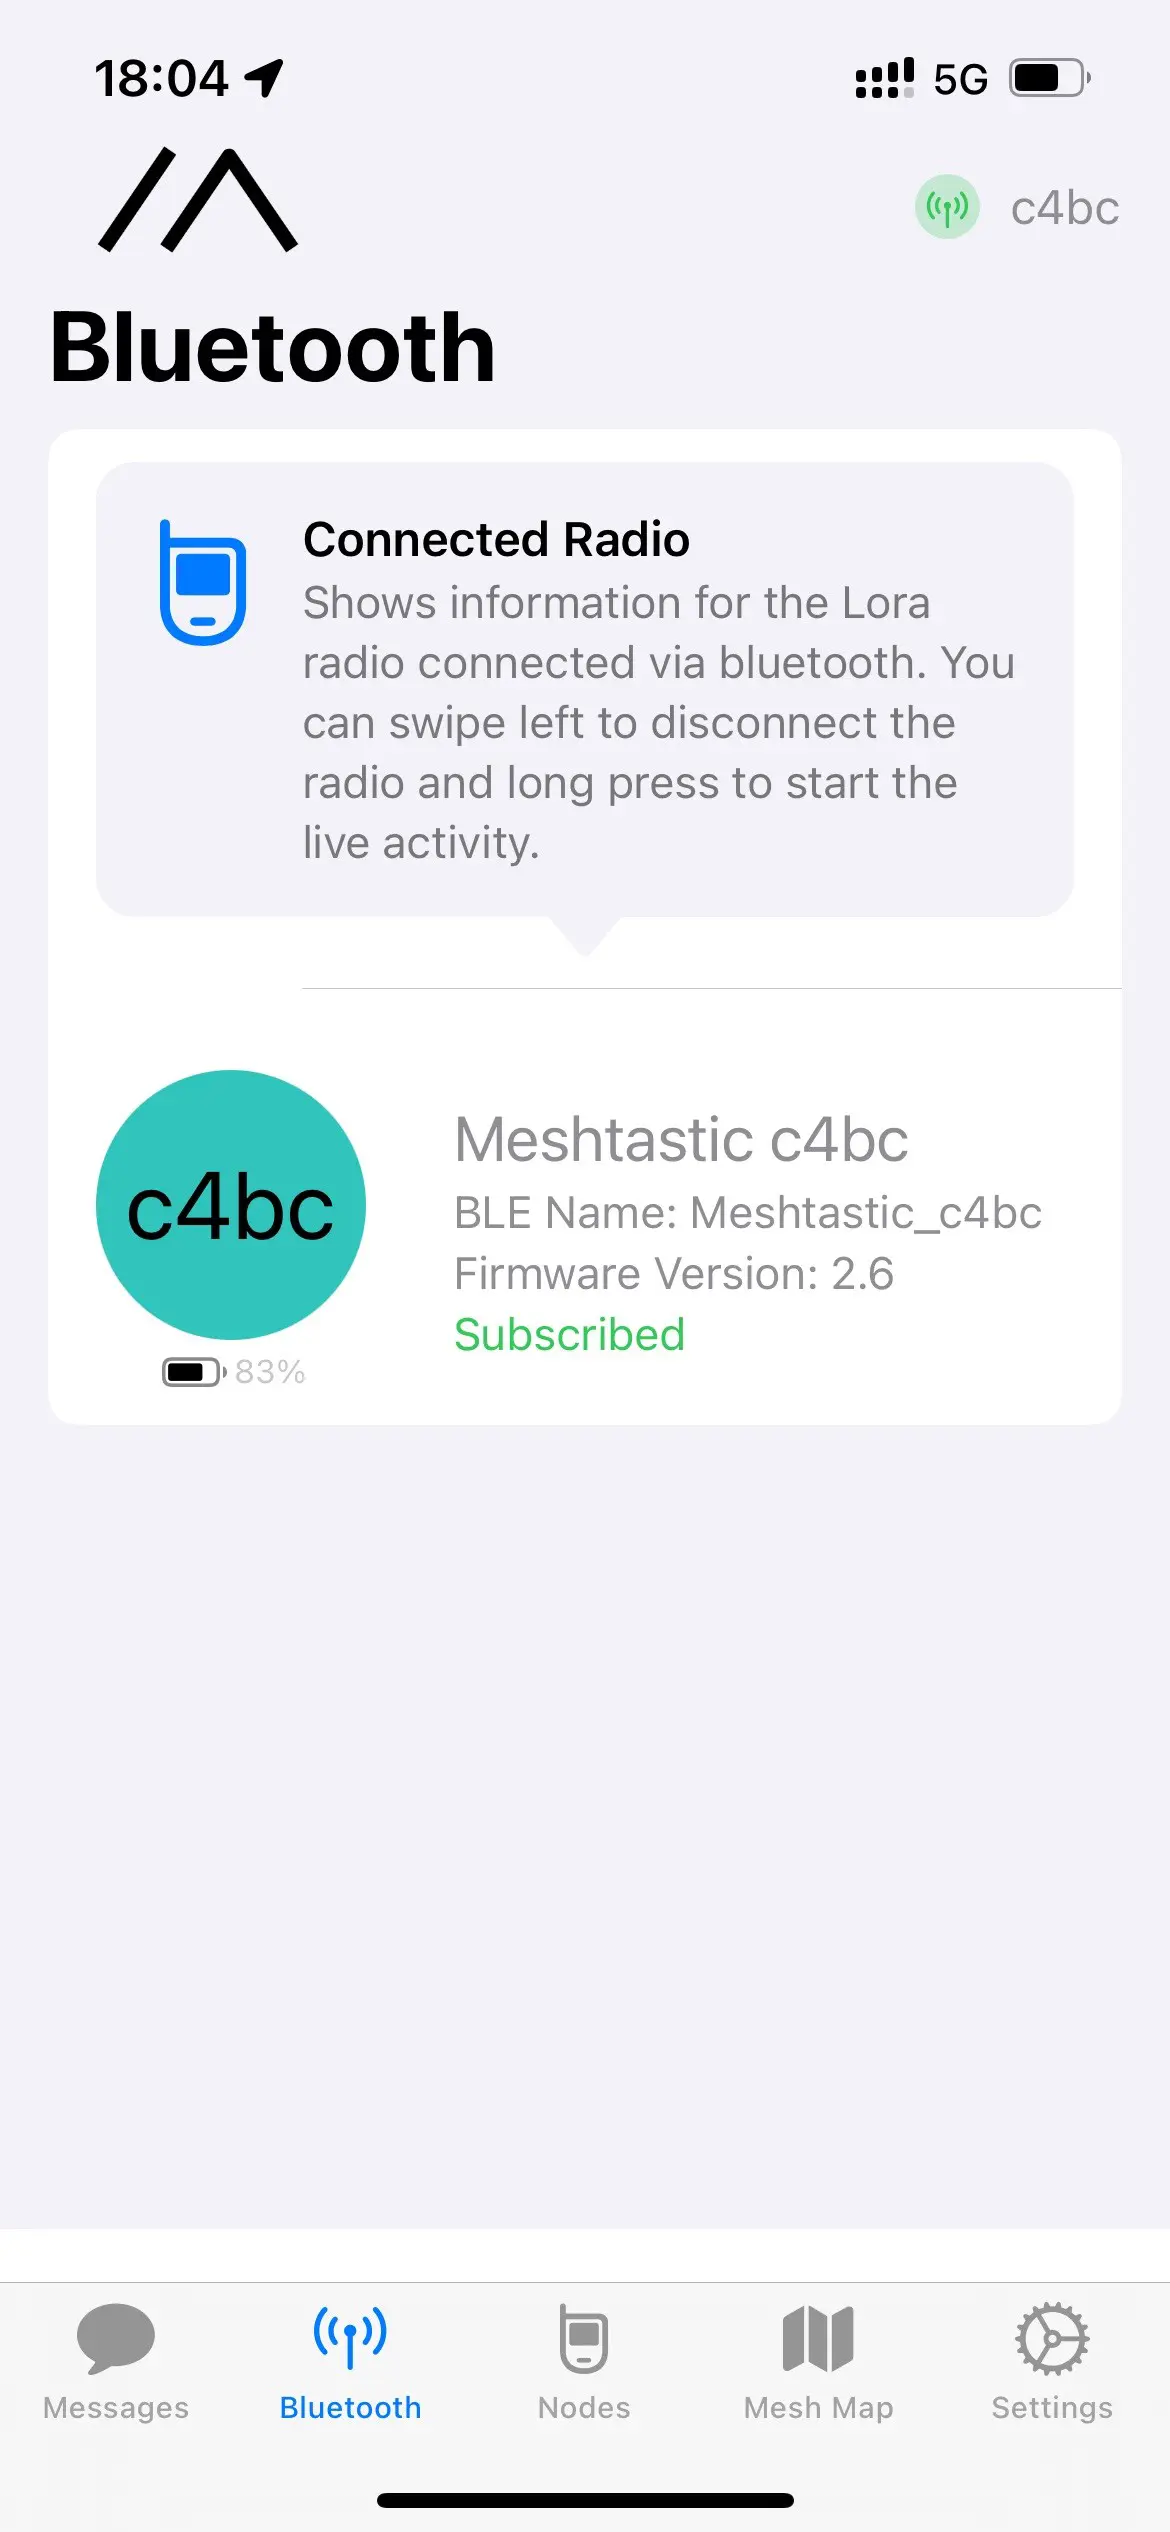
3)After successful Bluetooth pairing, You need to go to Settings and click on LoRa Settings.
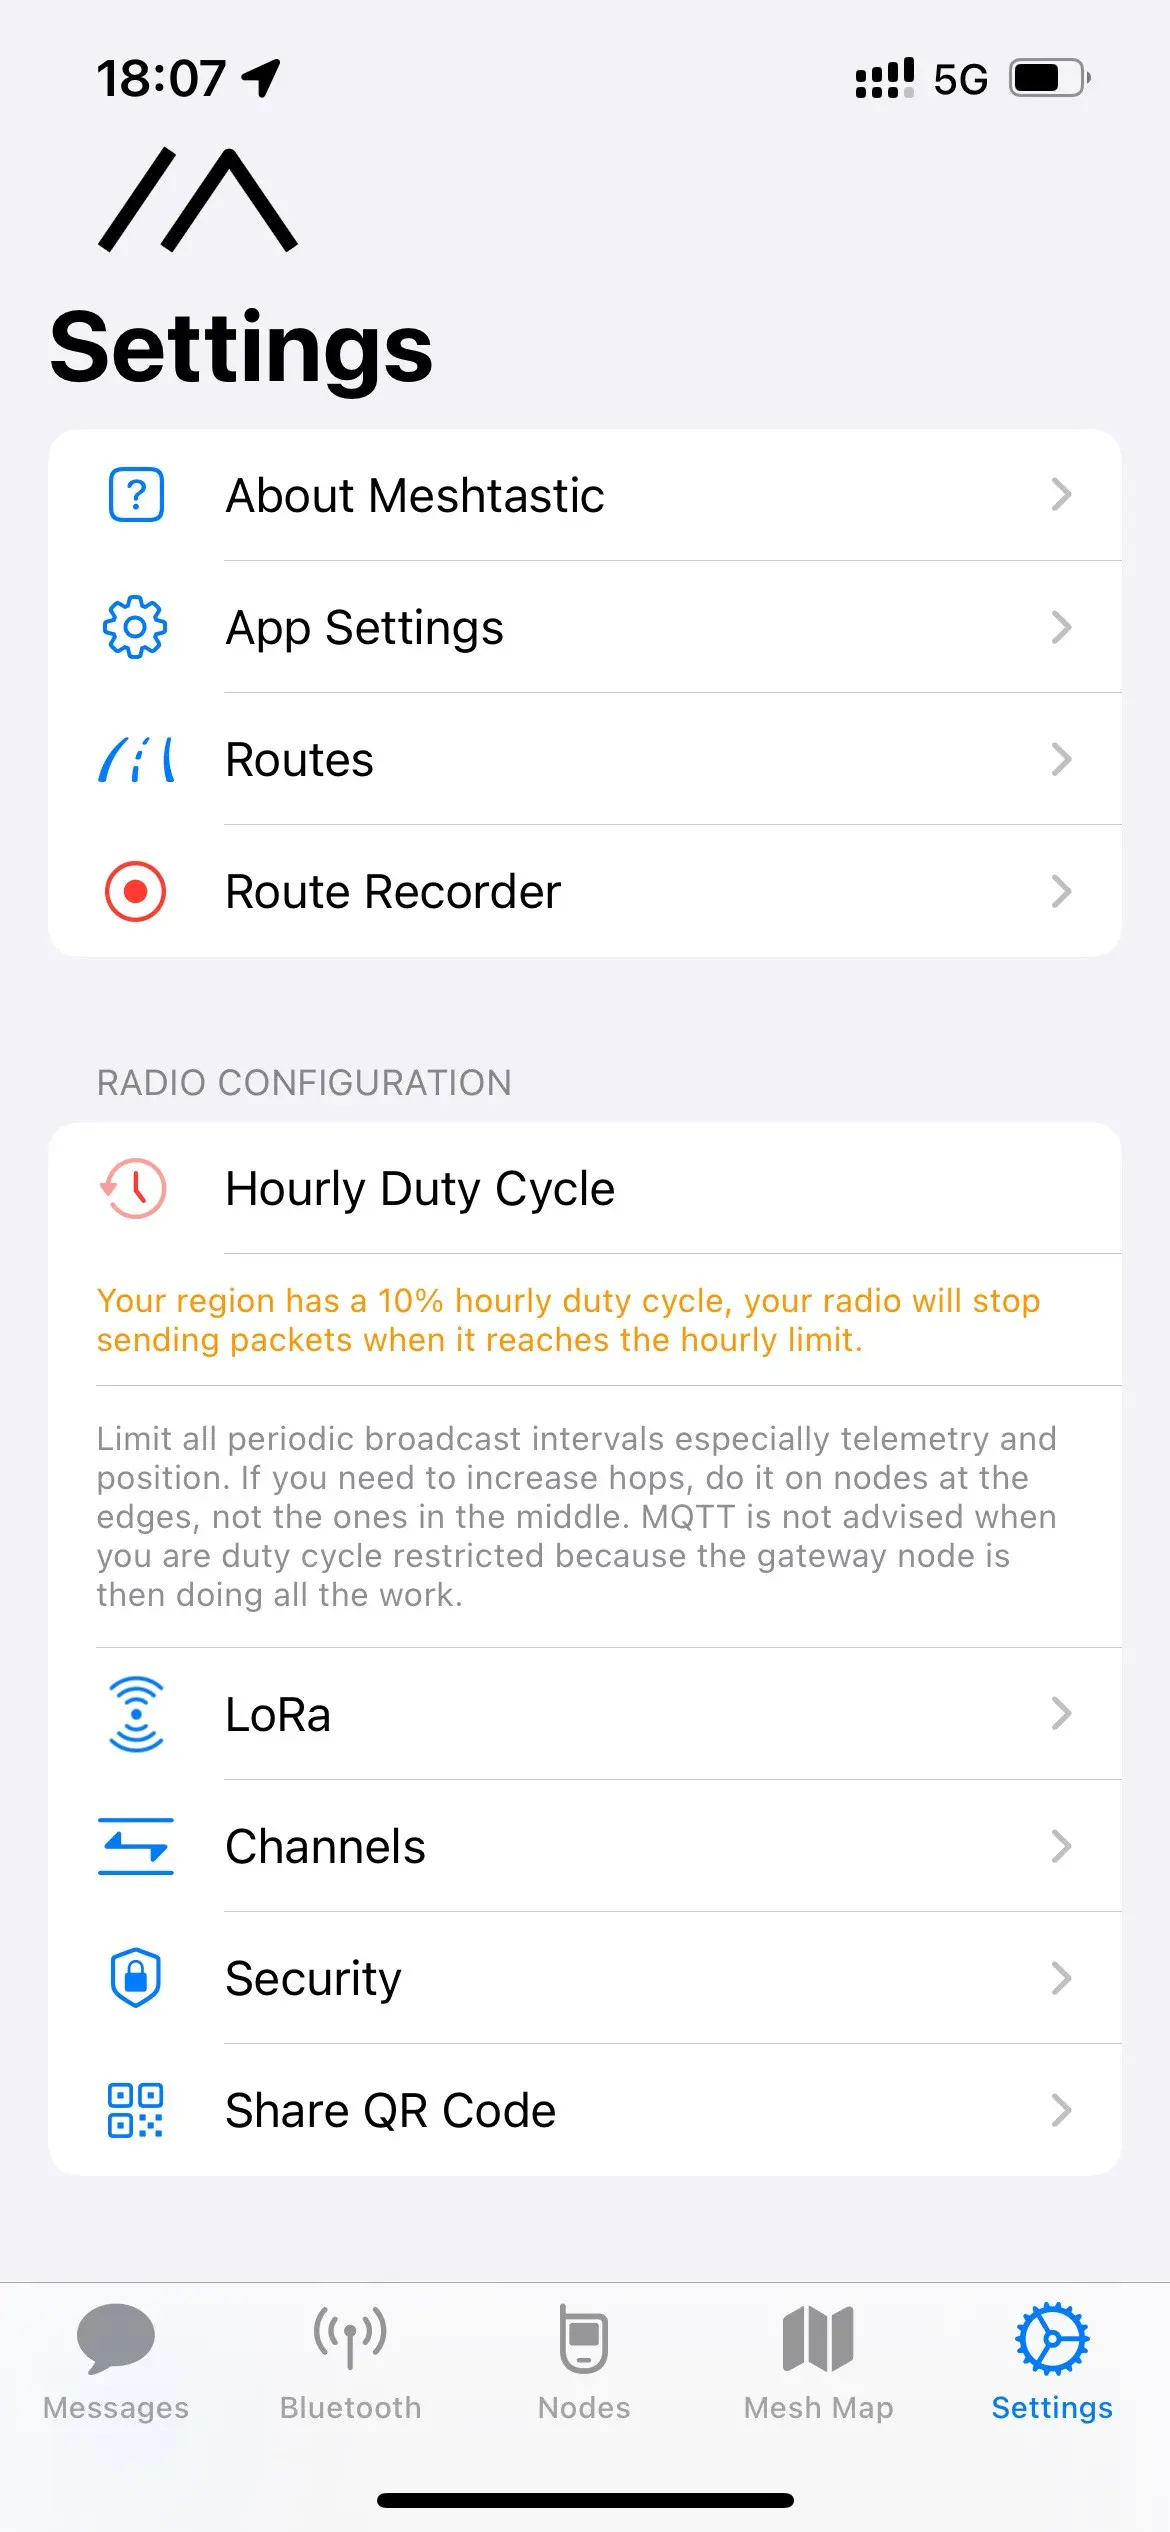
4) Set LoRa Region. and then scroll down to set the frequency. consistent with the previous settings for the region. Finally, check Ignore MQTT and save.


5)Just like on Android, you can join a chat channel by scanning a QR code or clicking a link. Once you've joined, you can start sending and receiving messages.
Updating/Flashing Firmware
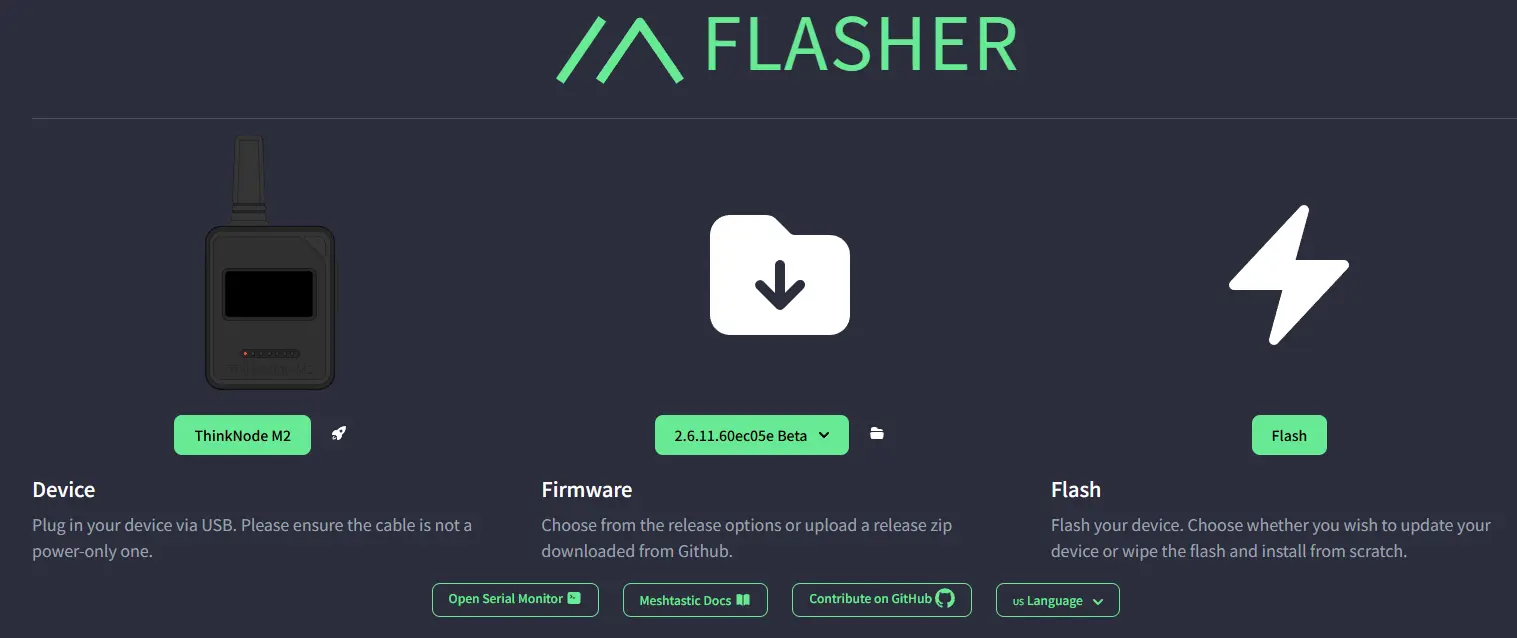
ClickMeshtastic firmware(For now, please refer to the ThinkNode M5. Dedicated firmware support for the ThinkNode M7 will be available soon.)
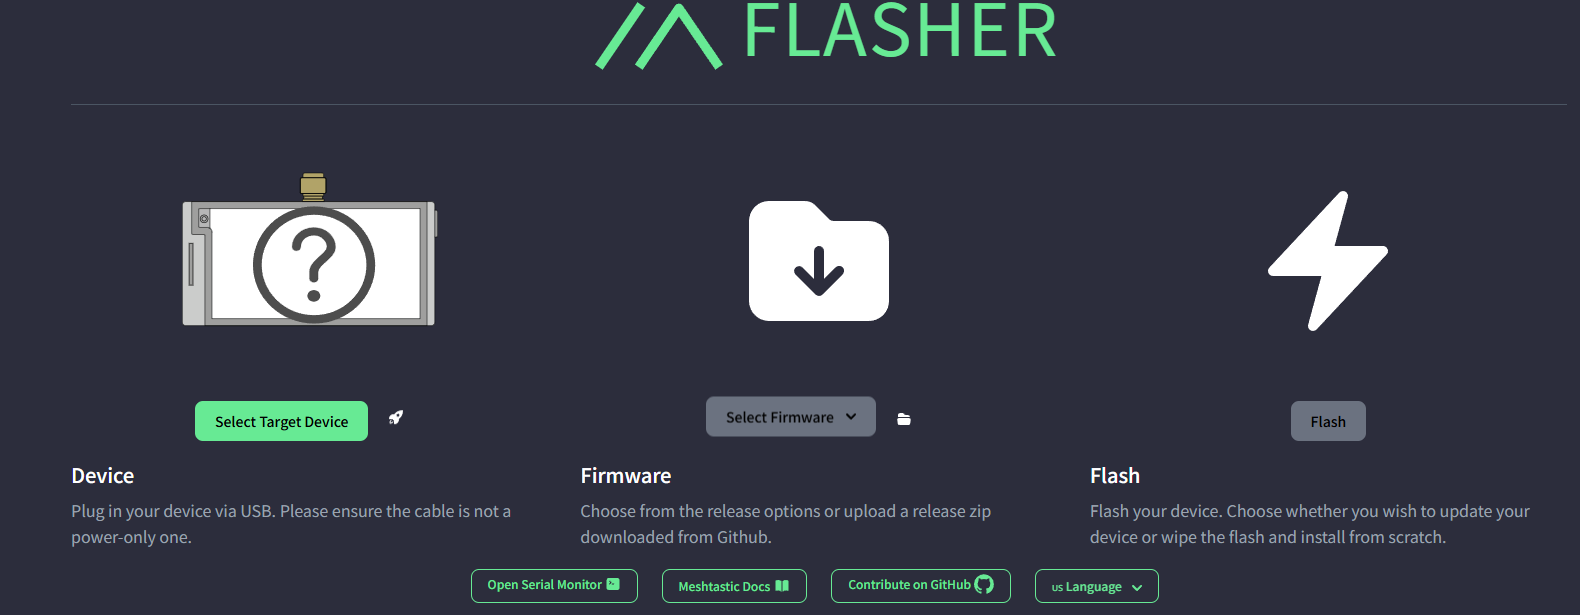
1,Select the corresponding firmware.
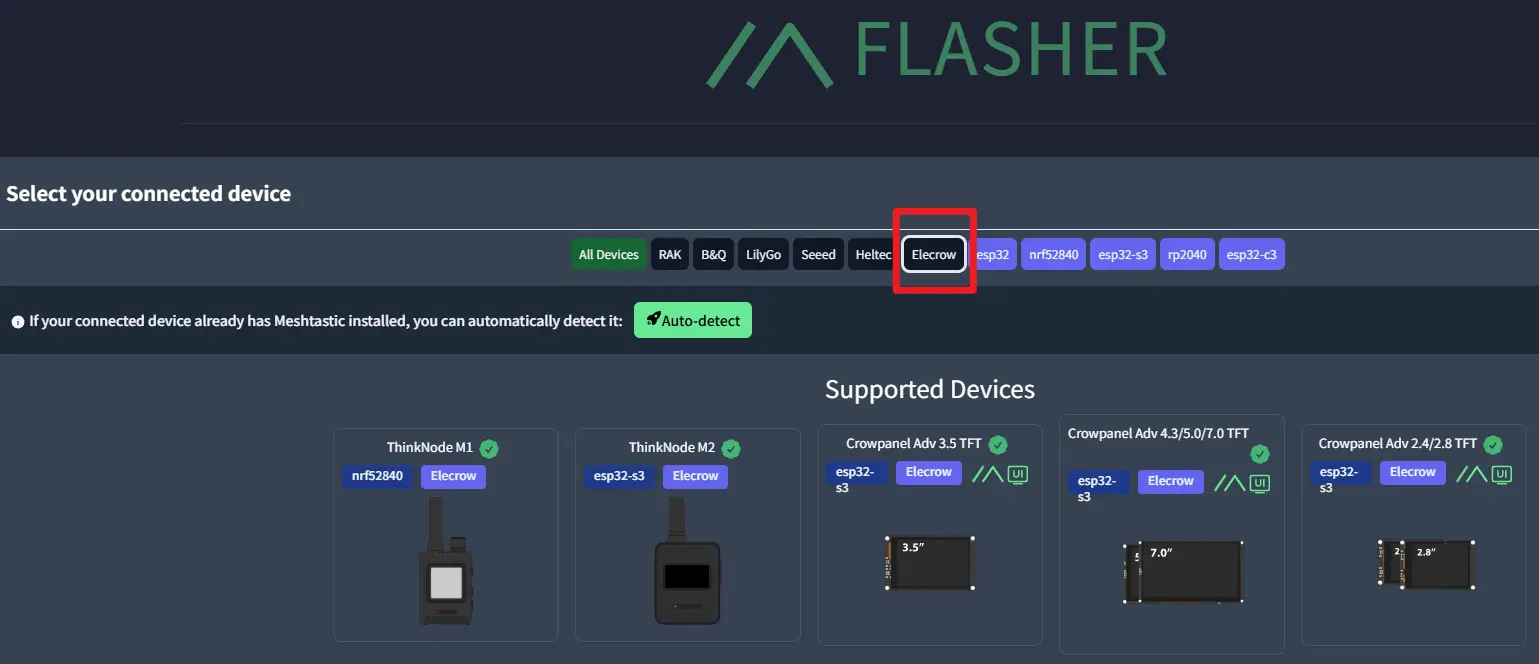
2, follow the steps to download the firmware.
How to buy
Please visit this page to purchase ThinkNode M7 meshtastic.
Support
If you encounter any issues while using the product, you can contact us via the social media links in the bottom-right corner of elecrow or send an email to techsupport@elecrow.com for technical support.