1602 LCD Display Module
Description
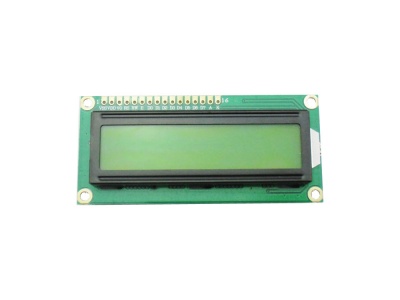
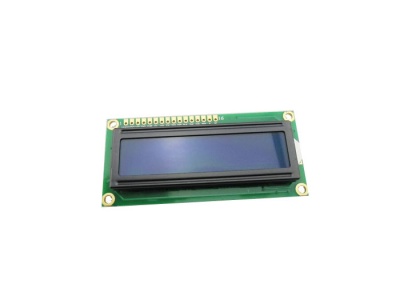
This is a basic 16 character by 2 line display. Black text on Green/Blue background. Interface code is freely available. You will need 7 or 11 general I/O pins to interface to this LCD screen. Includes LED backlight.
Model:CT0001BS
Model:DLC01602B


pin mapping of LCD module
| Pin Number | Sign | Remark | Pin Number | Sign | Remark |
|---|---|---|---|---|---|
| 1 | VSS | GND | 9 | D2 | Data I/O |
| 2 | VDD | VCC | 10 | D3 | Data I/O |
| 3 | VL | Contrast ratio | 11 | D4 | Data I/O |
| 4 | RS | Data/Command Choice | 12 | D5 | Data I/O |
| 5 | R/W | Write/Read Choice | 13 | D6 | Data I/O |
| 6 | E | Enble | 14 | D7 | Data I/O |
| 7 | D0 | Data I/O | 15 | BLA | Back light anode |
| 8 | D1 | Data I/O | 16 | BLK | Back light cathanode |
How to control
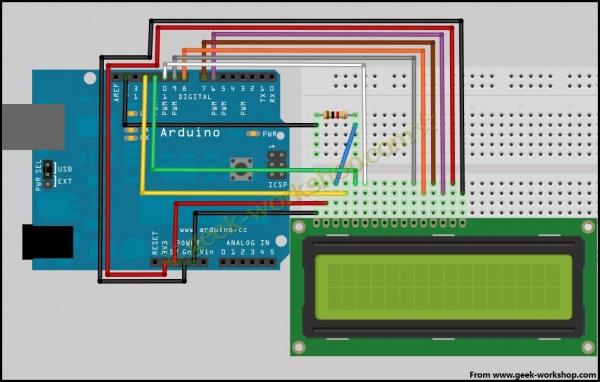
Hardware Install
Connect the LCD module with Arduino following picture.
Software upload
Upload the following code to the Arduino or download the Arduino library
int LCD1602_RS=12;
int LCD1602_RW=11;
int LCD1602_EN=10;
int DB[] = { 6, 7, 8, 9};
char str1[]="Welcome to";
char str2[]="Elecrow";
char str3[]="this is the";
char str4[]="4-bit interface";

void LCD_Command_Write(int command)
{
 int i,temp;
 digitalWrite( LCD1602_RS,LOW);
 digitalWrite( LCD1602_RW,LOW);
 digitalWrite( LCD1602_EN,LOW);

 temp=command & 0xf0;
 for (i=DB[0]; i <= 9; i++)
 {
   digitalWrite(i,temp & 0x80);
   temp <<= 1;
 }

 digitalWrite( LCD1602_EN,HIGH);
 delayMicroseconds(1);
 digitalWrite( LCD1602_EN,LOW);

 temp=(command & 0x0f)<<4;
 for (i=DB[0]; i <= 9; i++)
 {
   digitalWrite(i,temp & 0x80);
   temp <<= 1;
 }

 digitalWrite( LCD1602_EN,HIGH);
 delayMicroseconds(1);
 digitalWrite( LCD1602_EN,LOW);
}

void LCD_Data_Write(int dat)
{
 int i=0,temp;
 digitalWrite( LCD1602_RS,HIGH);
 digitalWrite( LCD1602_RW,LOW);
 digitalWrite( LCD1602_EN,LOW);

 temp=dat & 0xf0;
 for (i=DB[0]; i <= 9; i++)
 {
   digitalWrite(i,temp & 0x80);
   temp <<= 1;
 }

 digitalWrite( LCD1602_EN,HIGH);
 delayMicroseconds(1);
 digitalWrite( LCD1602_EN,LOW);

 temp=(dat & 0x0f)<<4;
 for (i=DB[0]; i <= 9; i++)
 {
   digitalWrite(i,temp & 0x80);
   temp <<= 1;
 }

 digitalWrite( LCD1602_EN,HIGH);
 delayMicroseconds(1);
 digitalWrite( LCD1602_EN,LOW);
}

void LCD_SET_XY( int x, int y )
{
  int address;
  if (y ==0)    address = 0x80 + x;
  else          address = 0xC0 + x;
  LCD_Command_Write(address);
}

void LCD_Write_Char( int x,int y,int dat)
{
  LCD_SET_XY( x, y );
  LCD_Data_Write(dat);
}

void LCD_Write_String(int X,int Y,char *s)
{
    LCD_SET_XY( X, Y );    //设置地址
    while (*s)             //写字符串
    {
      LCD_Data_Write(*s);
      s ++;
    }
}

void setup (void)
{
  int i = 0;
  for (i=6; i <= 12; i++)
   {
     pinMode(i,OUTPUT);
   }
  delay(100);
  LCD_Command_Write(0x28);//4线 2行 5x7
  delay(50);
  LCD_Command_Write(0x06);
  delay(50);
  LCD_Command_Write(0x0c);
  delay(50);
  LCD_Command_Write(0x80);
  delay(50);
  LCD_Command_Write(0x01);
  delay(50);

}

void loop (void)
{
   LCD_Command_Write(0x01);
   delay(50);
   LCD_Write_String(3,0,str1);//第1行,第4个地址起
   delay(50);
   LCD_Write_String(4,1,str2);//第2行,第2个地址起
   delay(5000);
   LCD_Command_Write(0x01);
   delay(50);
   LCD_Write_String(0,0,str3);
   delay(50);
   LCD_Write_String(0,1,str4);
   delay(5000);

}
