CrowBot-BOLT Programmable Smart Robot Car STEAM Robot Kit
Description
CrowBot BOLT is a programmable educational car that can be easily used. It is small and beautiful in shape and easy to install. It uses ESP32-WROVER-B as the MCU, with Bluetooth and WiFi functions. It has a wealth of sensors(such as photodiode, ultrasonic sensor, line Tracking Sensor), can quickly realize functions such as light chasing, line tracking, obstacle avoidance, remote control, and light show. As an entry-level ESP32 programmed educational robot, the cool and cute Bolt makes robot programming learning, and teaching easy and fun. It comes with 16 lessons in three languages (Letscode, Ardunio, MicroPython), provides rich programming, and allows programming beginner to learn to program in the fun of creativity. It has reserved 2 expansion interfaces, which can be expanded and used with 150+ kinds of Crowtail modules. Unlimited creativity, waiting for you to discover!
Model: CRB00157C 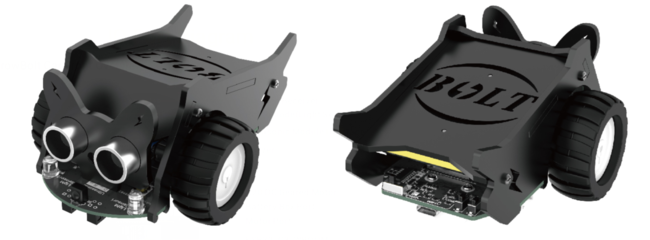
Features
- Support for Letscode, Arduino and Python
- Can be controlled by IR remote control, Bluetooth/WiFi control
- The car is equipped with ultrasonic, infrared tracking, photodiode and other sensors
- With 16 courses, it is the best choice for the entry of ESP32
- Equipped with on board indicator LED , through which you can intuitively understand the working condition of the car
- 4Pin I2C and A/D ports are reserved to connect Crowtail sensors, creating more possibilities
- Compatible with CrowBot Joystick, provides various methods to play
Specifications
| Item | Description |
|---|---|
| MCU | ESP32-WROVER-B(8MB) |
| Programmatically | Letscode,Ardunio,Micropython |
| Control method | Bluetooth Remote Control/Infrared Remote Control |
| Input | Button, Photodiode, Infrared Receiving Module, Ultrasonic Sensor, Line Tracking Sensor |
| Output | Buzzer, Programmable RGB_LED, Motor |
| Wifi&Bluetooth | Supported |
| Photodiode | Can realize the function of chasing light or avoiding light |
| Ultrasonic Sensor(with RGB; 4Pin interface) | When an obstacle is detected, the driving route of the car can be corrected to avoid the obstacle |
| RPR220 Line Tracking Sensor | Can make the car move along the dark/black lines, intelligently judge and correct the driving path |
| Buzzer | Can make the car sing, bringing a more direct sensory experience |
| Programmable RGB_LED | Through programming, it can show colorful lights in different scenes |
| Infrared receiver(3Pin interface) | Receive infrared remote control signals to realize remote control |
| Interface | Type c x1,I2C port x1,A/D port x1 |
| Motor type | N20 Gear Motor(drive: L9110S) |
| Operating Voltage | 3.3V~5V(AAA battery x4) |
| Work Temperature | -10℃~+55℃ |
| Dimension | 128*92*64mm |
| Weight | 200g |
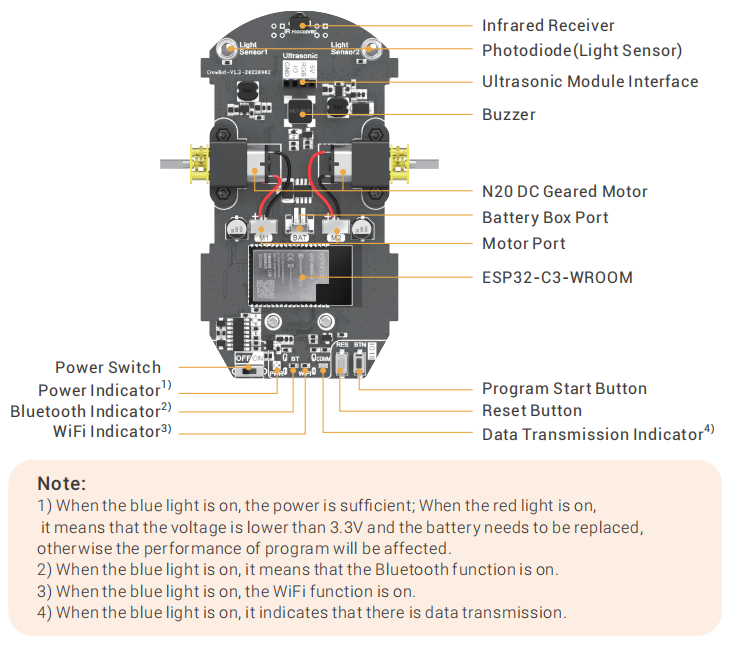
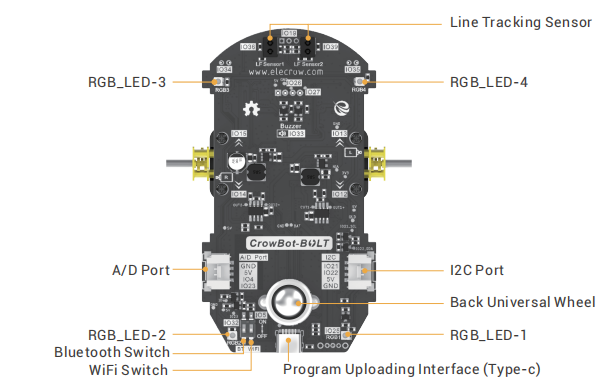
IO Port Diagram
Top Overview
Bottom Overview
Usage
CrowBot-BOLT Assambly Instrustion
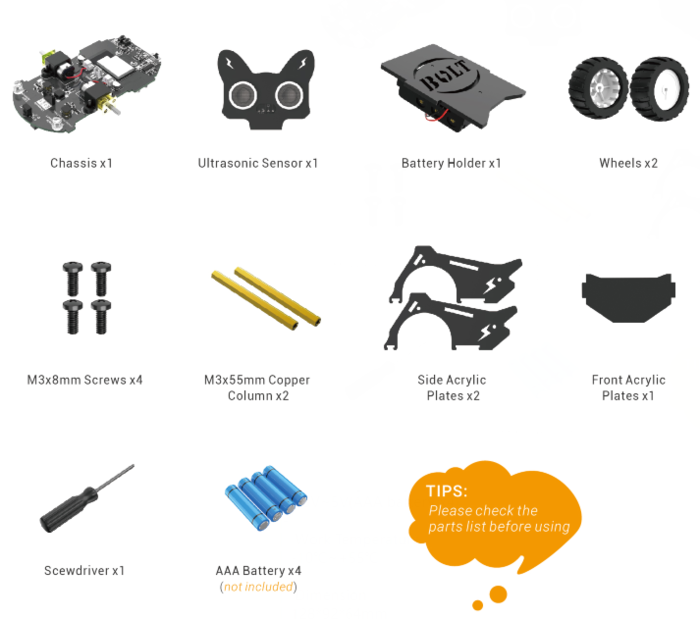
STEP 1: Preparation
STEP 2: Install battery holder
Install 4 AAA batteries into the battery holder, and plug the cable of the battery holder into the 2pin battery(BAT) interface on the chassis. 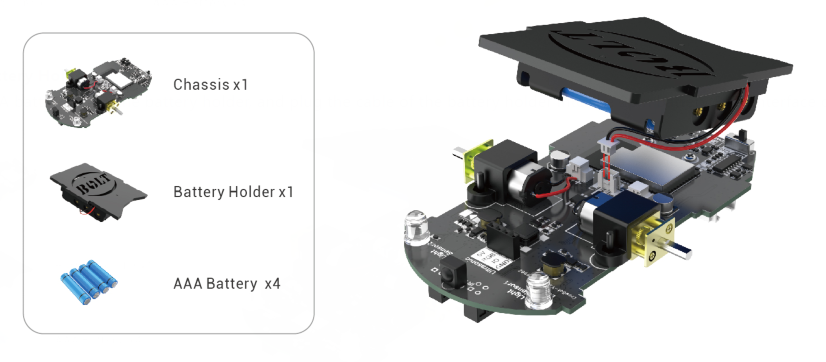 STEP 3: Install acrylic plates
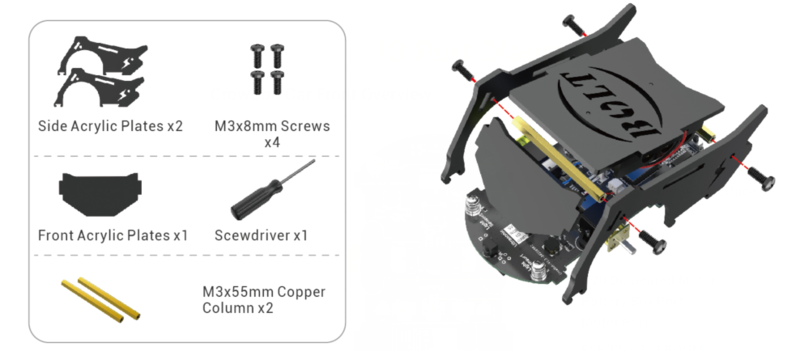
STEP 4: Mounting wheels
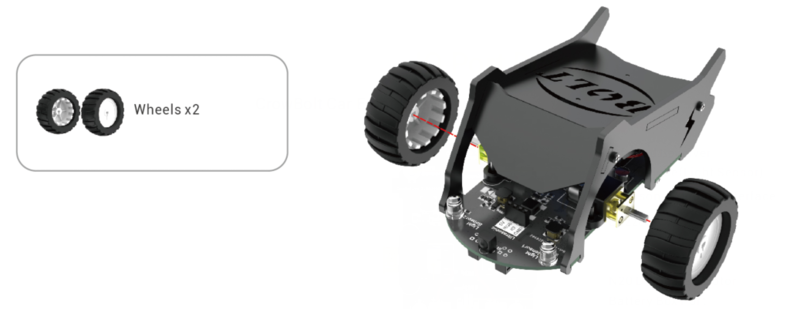
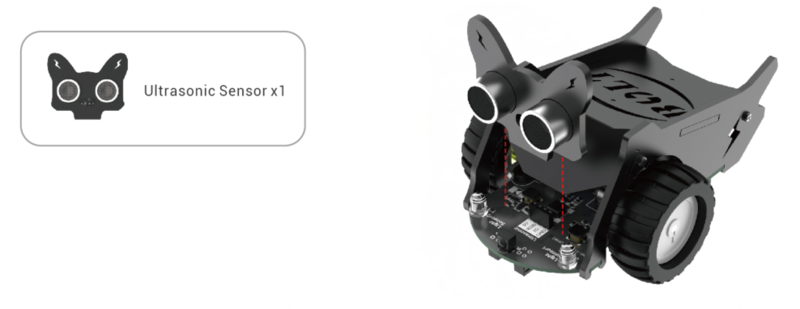
STEP 5: Connect ultrasonic sensor
Insert the 4pin ultrasonic sensor into ultrasonic module interface on the chassis.
STEP 6: Finish!
Factory Procedures
The factory default program has been loaded and you can play with CrowBot out of the box. But if you need to re-flash the program, please download Factory_source_code.zip to re-upload the factory default program. The folder contains a tutorial on how to set the Arduino for ESP32. 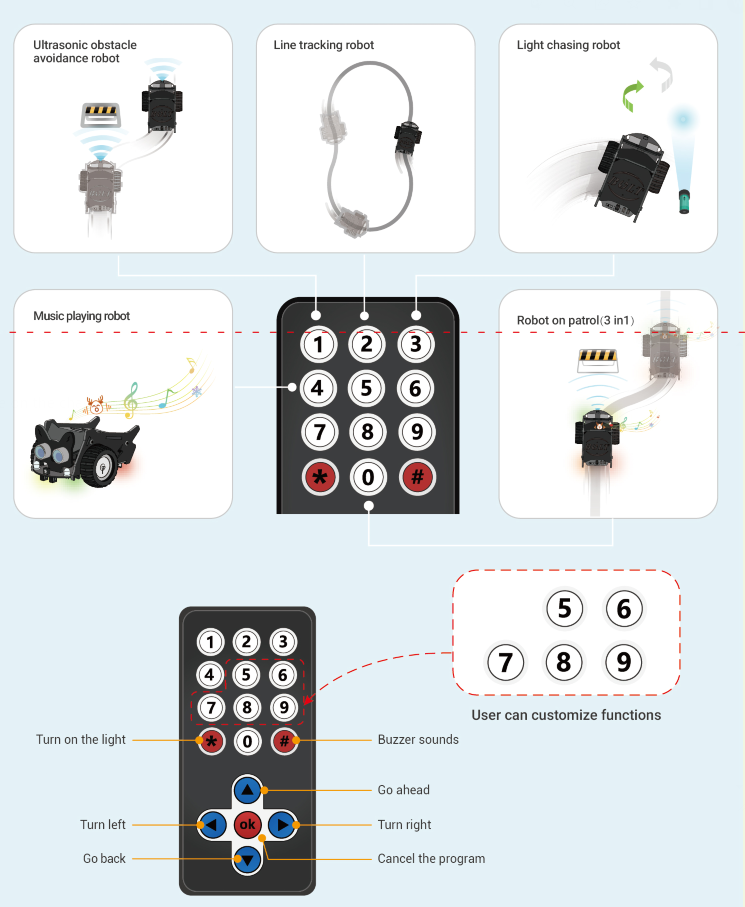
Programming
Play with Python
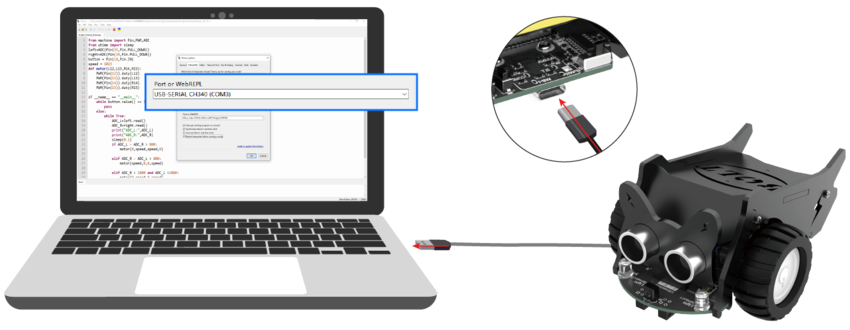
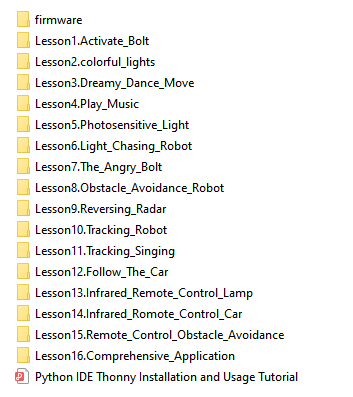
Please download Python_Lessons_Code.zip. The folder contains 16 Python Lessons code, firmware and tutorial.
Play with Arduino
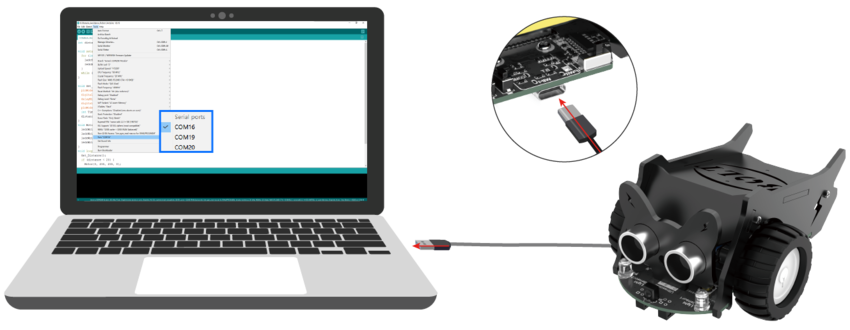
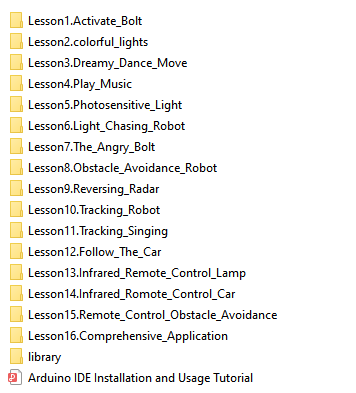
Please download Arduino_Lessons_Code.zip. The folder contains 16 Arduino Lessons code, library needed and tutorial.
Play with Letscode
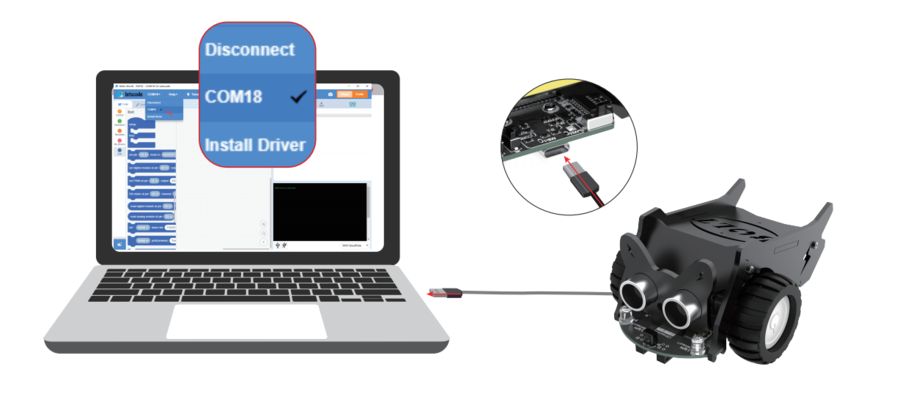
Please download Letscode_Lessons_Code.zip.
FAQS
-
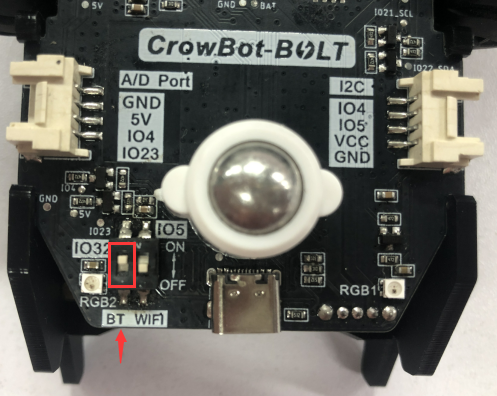
Bluetooth Connection Procedure (Follow these steps/order to connect Bluetooth):
A. First, turn off all switches;
B. Then turn on Bolt's Bluetooth switch;
C. Next, turn on Bolt's power switch;
D. Finally, turn on the joystick's power switch. E. Wait a moment to see if Bluetooth connection is successful.
-
Which board should be selected for program upload? (For Bolt, choose “ESP32-WROOM-DA Module”; for Joystick, select “ESP32C3 Dev Module”)
-
Course code and factory programs require installing esp32 version 2.0.14/2.0.15 to match the board.
Translated with DeepL.com (free version)
Q1: How to connect CrowBot with Joystick via Bluetooth?
A1: Turn on the Bluetooth switch on CrowBot board.
Q2: How to re-upload the factory default code to CrowBot and joystick?
A2: 1. The factory default program files are ino files. Please download Factory_source_code.zip to re-upload the factory default program. The folder contains a tutorial on how to set the Arduino for ESP32.
Q3: Is there any WiFi connection tutorial or code?
A3: We didn't write the code to realize WiFi control function, you can DIY a project to make it come true.
You can post your questions on our forum or contact with techsupport@elecrow.com for technology support.
Resources
Crowbot_BOLT_Beginner's_Guide.pdf
Python_Lessons_Code.zip
Arduino_Lessons_Code.zip
Letscode_Lessons_Code.zip
Factory_Source_Code.zip
CrowBot-BOLT_Schematic.pdf
CrowBot-BOLT_Eagle file_SCH&PCB
Joystick_for_Crowbot_Eagle file_SCH&PCB
CrowBot-BOLT_Structural_3D_Model_stp.zip

