2.8'' TFT Touch Shield
Introduction
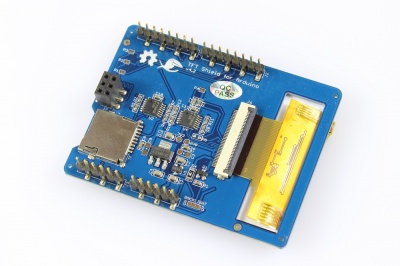
This TFT Touch Shield is Arduino/Crowduino/Arduino Mega compatible, it integrated a 2.8” TFT Display and a resistive touch panel, to make this shield suitable for handheld devices.
This TFT Touch Shield has 240x320 pixels with individual pixel control, it uses the ILI9341 driver and SPI interface to communicate with controllers such as Arduino, saving you much Arduino pins for other usages in your projects. Besides, A SD card socket is also added to help you develop applications that data storage is needed such as digital picture album.
Model: AMS320240TFT

Features
- LCD Driver: ILI9341
- Backlight controllable
- 65535 rich colors
- SPI Communication
- Voltage:4.8~5.5 V
- Max Current: 200 mA
- Resolution:320x 240
- LCD Panel Size: 2.8”
- Touch Mode: Resistance
- Dimensions(mm):72.0(L)x14.5(W)x55.0(H)
Cautions
- Please Be careful to deposit the fragile scree,pressing too hard on the screen might cause display damage.
Pins usage on Arduino
| Function | Pin Name | Arduino pin | Description |
|---|---|---|---|
| TFT Screen Control | TF_CS | D4 | SD card select input |
| TFT_CS | D5 | TFT chip select input | |
| TFT_D/C | D6 | TFT Data/Command control | |
| BACKLIGHT | D7 | TFT backlight control pin | |
| TFT SPI Interface | SPI_MOSI | D11 | SPI data pin MOSI |
| SPI_MISO | D12 | SPI data pin MISO | |
| SPI_SCK | D13 | SPI Clock Pin SCK | |
| Touch Interface | ADC0 | A0 | Touch Screen Y- input |
| ADC1 | A1 | Touch Screen X- input | |
| ADC2 | A2 | Touch Screen Y+ input | |
| ADC3 | A3 | Touch Screen X+ input |
Usage
Hardware connection
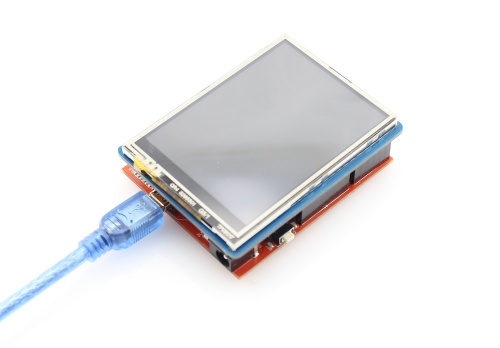
Plug 2.8 TFT Touch Shileld into Arduino or Crowduino.
Connect Arduino to PC via a USB cable.

Program
1.Please download 2.8'TFT Program Files.zip
2.Install the library to the Arduino IDE library to ...\Arduino\libraries, but please note that if you downloaded the library in .zip file, you should delete the "-master" in the library name when you unzip it, as the "-" can not be recognized in the Arduino Library.
Draw Circle
1.Open the code directly by the path:File -> Examples ->TFT_Touch_Shield_v2->drawCircle.
#include <stdint.h>
#include <TFTv2.h>
#include <SPI.h>

void setup()
{
    TFT_BL_ON;                                          //turn on the background light

    Tft.TFTinit();                                      //init TFT library

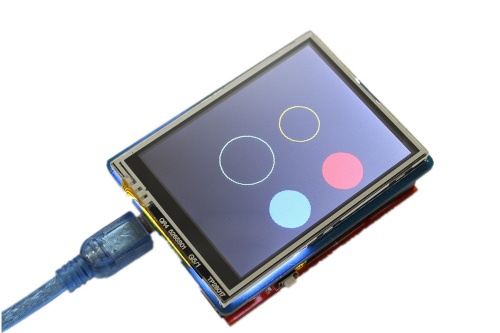
    Tft.drawCircle(100, 100, 30,YELLOW);                //center: (100, 100), r = 30 ,color : YELLOW

    Tft.drawCircle(100, 200, 40,CYAN);                  //center: (100, 200), r = 10 ,color : CYAN

    Tft.fillCircle(200, 100, 30,RED);                   //center: (200, 100), r = 30 ,color : RED

    Tft.fillCircle(200, 200, 30,BLUE);                  //center: (200, 200), r = 30 ,color : BLUE
}

void loop()
{

}
2.Upload the code,you will see that. 
Touch Screen
1.Open the code directly by the path:File -> Examples ->Touch_Screen_Driver->touchScreen.
#include <stdint.h>
#include <SeeedTouchScreen.h>

#if defined(__AVR_ATmega1280__) || defined(__AVR_ATmega2560__) // mega
#define YP A2   // must be an analog pin, use "An" notation!
#define XM A1   // must be an analog pin, use "An" notation!
#define YM 54   // can be a digital pin, this is A0
#define XP 57   // can be a digital pin, this is A3

#elif defined(__AVR_ATmega32U4__) // leonardo
#define YP A2   // must be an analog pin, use "An" notation!
#define XM A1   // must be an analog pin, use "An" notation!
#define YM 18   // can be a digital pin, this is A0
#define XP 21   // can be a digital pin, this is A3

#else //168, 328, something else
#define YP A2   // must be an analog pin, use "An" notation!
#define XM A1   // must be an analog pin, use "An" notation!
#define YM 14   // can be a digital pin, this is A0
#define XP 17   // can be a digital pin, this is A3

#endif

//Measured ADC values for (0,0) and (210-1,320-1)
//TS_MINX corresponds to ADC value when X = 0
//TS_MINY corresponds to ADC value when Y = 0
//TS_MAXX corresponds to ADC value when X = 240 -1
//TS_MAXY corresponds to ADC value when Y = 320 -1

#define TS_MINX 116*2
#define TS_MAXX 890*2
#define TS_MINY 83*2
#define TS_MAXY 913*2


// For better pressure precision, we need to know the resistance
// between X+ and X- Use any multimeter to read it
// The 2.8" TFT Touch shield has 300 ohms across the X plate
TouchScreen ts = TouchScreen(XP, YP, XM, YM);

void setup(void) {
  Serial.begin(9600);
}

void loop(void) {
  // a point object holds x y and z coordinates
  Point p = ts.getPoint();

  if (p.z > __PRESURE) {
     Serial.print("Raw X = "); Serial.print(p.x);
     Serial.print("\tRaw Y = "); Serial.print(p.y);
     Serial.print("\tPressure = "); Serial.println(p.z);
  }


  p.x = map(p.x, TS_MINX, TS_MAXX, 0, 240);
  p.y = map(p.y, TS_MINY, TS_MAXY, 0, 320);

  // we have some minimum pressure we consider 'valid'
  // pressure of 0 means no pressing!
  if (p.z > __PRESURE) {
     Serial.print("X = "); Serial.print(p.x);
     Serial.print("\tY = "); Serial.print(p.y);
     Serial.print("\tPressure = "); Serial.println(p.z);
  }

  delay(100);
}
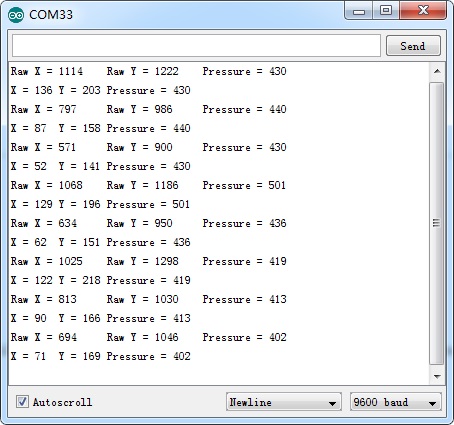
2.Upload the code,then open the serial monitor and touch the screen,you will see some information.

Resources
This TFT Shield uses the ILI9341 Driver IC, thanks to the Seeed TFT library, It works OK on this TFT Touch Shiled:
