Relay Shield
Introduction
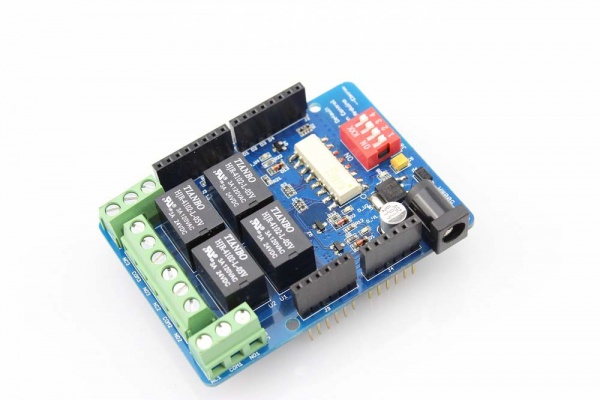
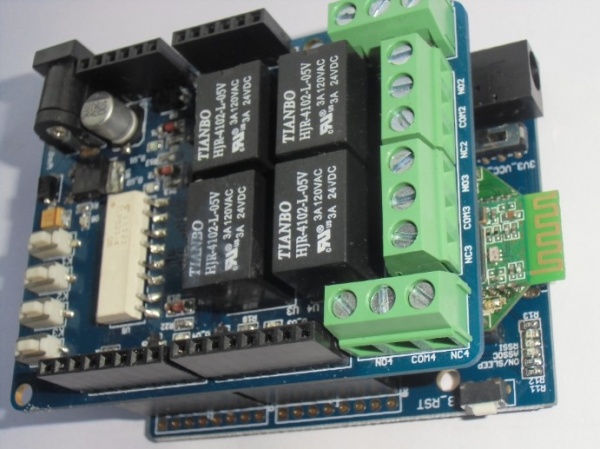
The Relay Shield is an Arduino compatible smart module with 4 mechanical relays providing an easy way to control high voltage. The max switching power is 35VDC 70W for each channel. It can be directly controlled by Arduino/Crowduino through digital IOs with an external 6.5~12V DC supply. With the onboard 4 control keys,you can also control the high voltage without programming.
Note: Take care the pins on the Shield should not touched the USB connector of Arduino UNO when they connected .
Model: MCS01584R
Features
- Arduino,Crowduino,Seeeduino,Arduino Mega compatible
- Automatic control and manual control
- 4 mechanical relays with photo-coupled circuit
- Equipped with screw holes for easy installation
- Light weight
- Small form factor
- Native Arduino/Seeeduino compatibility
- Extendible
Specification
| Item | Min | Typical | Max | Unit |
|---|---|---|---|---|
| Voltage | 7 | 9 | 12 | VDC |
| Current | 8 | / | 250 | mA |
| Switching Voltage | / | / | 35 | VDC |
| Switching Current | / | / | 2 | A |
| Frequency Response | -1 | / | 1 | dB |
| Switching Power | / | / | 70 | W |
| Relay Life | 100,000 | / | / | Cycle |
| ESD contact discharge | ±4 | KV | ||
| ESD air discharge | ±8 | / | ||
| Dimension | 75.0(L)x56.8(W)x23.5(H) | mm | ||
| Net Weight | g | |||
Cautions
- Place 2 layers of electrical tape on the top of the Arduino's usb connector. This will prevent the relay shield from making contact.
- Do not operate voltage more than 35V DC.
- Please be cautious while operating high voltage circuits! You may get hurt or hurt your appliances if used improperly.
Interface Function
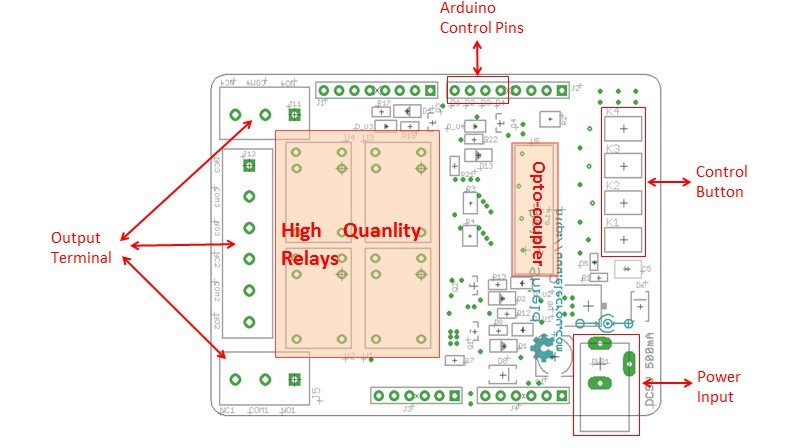
4 groups of channels for High voltage connection
Terminal 1:
COM1- Common pin
NC1- Normally Closed, in which case NC1 is connected with COM1 when D0 is set low and disconnected when D0 is high;
NO1- Normally Open, in which case NO1 is disconnected with COM1 when D0 is set low and connected when D0 is high.
Terminal 2-4 are similar to terminal 1, except that the control ports are D1-D3.
9V DC power supply connection
The function of the Terminal and the Jack is the same since they are internally connected, and you can choose either of them in needs.
IO controlling 4 on-board relays
C0-C3 4pins could be connected directly with Arduino pin number of 7-4, so that four relays could be easily controlled by the Arduino.
K1-K4 4keys could control the four relays without programming.
Usage
With Arduino/Crowduino
Relay Shield could be directly controlled by Arduino or Crowduino.
Step1. Plug Relay Shield onto Arduino Duemilanove (or compatible) board;
Step2. Supply 9v DC power to Arduino;
Step3. Download the example code and run in Arduino IDE.
If using Arduino via its USB connection for power, you must also provide 9v DC power to the Relay Shield or the relays won't switch.
Relays 1-4 can be activated by setting Arduino ports 4-7 to output, and doing a digitalWrite(portNumber,HIGH).
Use COMx and either NCx (normally closed) or NOx (normally opened) connections to switch power through to the controlled device.
example code
void setup()
{
pinMode(4,OUTPUT);
pinMode(5,OUTPUT);
pinMode(6,OUTPUT);
pinMode(7,OUTPUT);
}
void loop()
{
digitalWrite(4,HIGH);
digitalWrite(5,HIGH);
digitalWrite(6,HIGH);
digitalWrite(7,HIGH);
delay(1500);
digitalWrite(4,LOW);
digitalWrite(5,LOW);
digitalWrite(6,LOW);
digitalWrite(7,LOW);
delay(1500);
}
After downloanding the above code to your Arduino, the relays, with the relative LED on relay shield ,will be switch on and off with a period of 3 seconds. you will hear some noice "bang …bang..” when the relay works.
You can also control the relays with the on-board keys, just have a try...
Support
You can contact with techsupport@elecrow.com.
How to buy
You can click here to buy Relay Shield.


