Crowbits-IR Receiver
Description
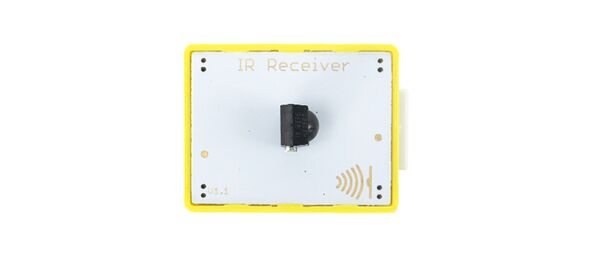
The Crowbits-IR Receiver module uses the HS0038B which is miniaturized receivers for infrared remote control system and it is the standard IR remote control receiver series, supporting all major transmission codes. The IR detector have a demodulator inside that looks for modulated IR at 38 KHz. We often use the two Crowbits-IR Receiver and the Crowbits-IR Emitter to work together.
Features
- Remote controller system
- Easy to use
Specification
- Operating Voltage: 3.3V DC
- Dimensions: 31.5(L)*24.5(W)*13(H)mm
Usage
The following sketch demonstrates a simple application of the module.
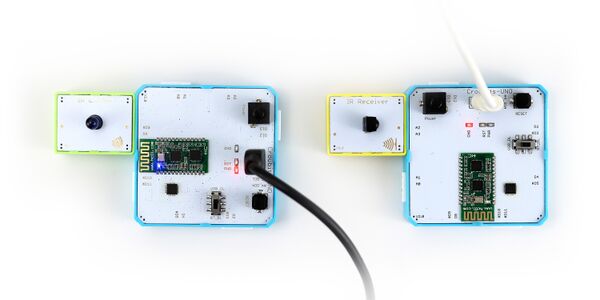
1. You need to prepare two Crowbits motherboards, such as Crowbits-UNO board. And a Crowbits-IR Emitter board.
2. Connect the Crowbits-IR Receiver board to the D2 interface of the Crowbits-UNO board. Connect the Crowbits-IR Emitter board to the D9 interface of another Crowbits-UNO board.
3. Download the library “IRSendRev”. Unzip and put it in the libraries file, for example: C:\Program Files (x86)\Arduino\libraries.
4.Open the code directly by the path:File -> Example ->IRSendRev->sendTest. Download this program to the motherboard connected to the Crowbits-IR Emitter module.
//**************
//IR sent demo v1.0
//Connect the IR sent pins to D3 for this demo
//******************************
#include <IRSendRev.h>

void setup()
{
    //enableIROut(38);
}
//unsigned char d[] = {9, 90, 91, 11, 31, 4, 1, 2, 3, 4};
unsigned char d[] = {15, 70, 70, 20, 60, 10, 1, 2, 3, 4,5,6,7,8,9,10};
//Very Important:
//the first parameter(15): the data that needs to be sent;
//the next 2 parameter(70,70): the logic high and low duration of "Start";
//the next 2 parameter(20,60): the logic "short" and "long"duration in the communication
//                             that to say:  if "0", the high duration is 20ms and  low is 20 ms; while logic "1",
//                              the high duration is 20 ms and low is 60 ms;
//the next 2 parameter(10): number of data you will sent;
//the next parameter(1, 2, 3, 4,5,6,7,8,9,10): data you will sent ;
void loop()
{
    IR.Send(d, 38);//sent the data via 38Kz IR
    delay(1000);
}
5. Open the code directly by the path:File -> Example ->IRSendRev->revTest. Download this program to the motherboard connected to the Crowbits-IR Receiver module.
//**************
//IR receive demo v1.0
//Connect the IR sent pins to D2 for this demo
//******************************
#include <IRSendRev.h>
//#include <IRSendRevInt.h>

void setup()
{
    Serial.begin(9600);
    IR.Init(2);
    Serial.println("init over");
}

unsigned char dta[20];

void loop()
{
    if(IR.IsDta())
    {
       // IR.Recv(dta);
        int length= IR.Recv(dta);
        for (int i =0;i<length;i++)
        {
          Serial.print(dta[i]);
          Serial.print("\t");
        }
        Serial.println();
// Very Important:
// the received data is comprised of the trsmission parameters , please refer to
// the sendTest.ino in the library ;
    }


}
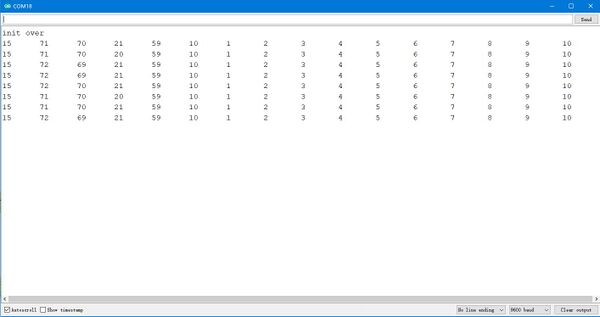
6. After downloading the two programs, open the serial port of the motherboard connected to the Crowbits of the Crowbits-IR Receiver module, the baud rate is set to 9600, and then you will receive the information sent by the transmitter module, as shown in the figure:


