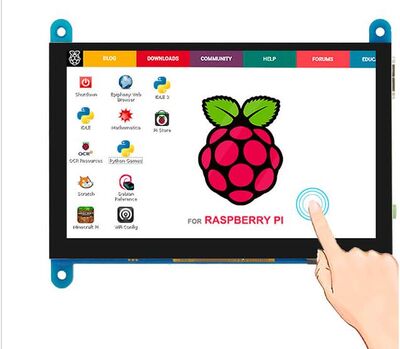
RC050 5 inch HDMI 800 x 480 Capacitive Touch LCD Display for Raspberry Pi/ PC/ SONY PS4
Description
This product is a universal HDMI display, 800×480 super clear resolution, support raspberry PI and a variety of mini PC, can also be used as a computer monitor.
Model:RC050
Features
- USB capacitive touch control.
- Support HDMI audio output.
- CE, RoHS certification.
- Free drive.
- Ultra low power consumption backlight.
Specifications
- Size: 5.0 (inch)
- Resolution: 800 × 480 (dots)
- Touch: 5 point capacitive touch
- Audio output: support
- Dimensions: 121.11*95.24 (mm)
- Package Size: 153*135*51 (mm)
- Rough Weight(Package containing): 259 (g)
- Power Dissipation: 0.30A*5V
Usage
1: Connect Raspberry Pi to use
Raspbian / Ubuntu / Kali / Retropie and WIN10 IoT systems for Raspberry Pi.When LCD works on raspberry PI systems, the resolution must be set manually, otherwise, it will be recognized as the system default resolution.
- Step 1: Please download the image of the latest version from Raspberry Pi's website.
https://www.raspberrypi.org/downloads/raspbian/
- Step 2:Download the compressed file to your PC and unpack it to get the .Img file.
- Step 3:The TF card is connected to the PC and formatted using the SDFormatter software.
- Step 41:Open the Win32DiskImager software, select the system image prepared in step 1, and click write to burn the system image.
- Step 5:After the programming is completed, open the config.txt file in the root directory of the TF card, and add the following code at the end of “config.txt” to save and safely eject the TF card.
added by elecrow-pitft-setup
hdmi_force_hotplug=1
max_usb_current=1
hdmi_drive=1
hdmi_group=2
hdmi_mode=1
hdmi_mode=87
hdmi_cvt 800 480 60 6 0 0 0
dtoverlay=ads7846,cs=1,penirq=25,penirq_pull=2,speed=50000,keep_vref_on=0,swapxy=0, pmax=255,xohms=150,xmin=200,xmax=3900,ymin=200,ymax=3900 display_rotate=0
end elecrow-pitft-setup
- Step 6:Save and insert the TF card into the Raspberry Pi.
- Step 7:Connect the touch interface of the 5-inch screen to the USB interface of the Raspberry Pi.
- Step 8:Connect the HDMI interface of the 5-inch screen to the HDMI interface of the Raspberry Pi, power on the Raspberry Pi, and wait for a few seconds to display normally.
2: Use as PC monitor
- Step 1:Connect the computer HDMI output signal to the LCD HDMI interface by using the HDMI cable
- Step 2:Connect the LCD's USB Touch interface (Either of the two Micro USB) to the USB port of the device
- Step 3:If there are several monitors, please unplug other monitor connectors first, and use LCD as the only monitor for testing.

