Building a Matter Protocol Smart Light Bulb Using the ESP32-C6
1.Hardware Composition:
The ESP32-C6 is a low-power, cost-effective wireless chip developed by Espressif Systems that supports Wi-Fi 6, Bluetooth 5 (LE), Zigbee, and Thread protocols. It is currently a popular choice for developing Matter devices.
In this article, we’ll use the Elecrow ESP32-C6 module as the core hardware to walk you through the process of building a smart light bulb and seamlessly integrating it into a Matter network.

2.Environment Composition:
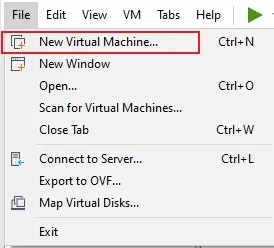
Step 1: First, install the VMware virtual machine.
It is recommended to download it from the official website. Here is the official website link.
https://www.vmware.com/products/desktop-hypervisor/workstation-and-fusion
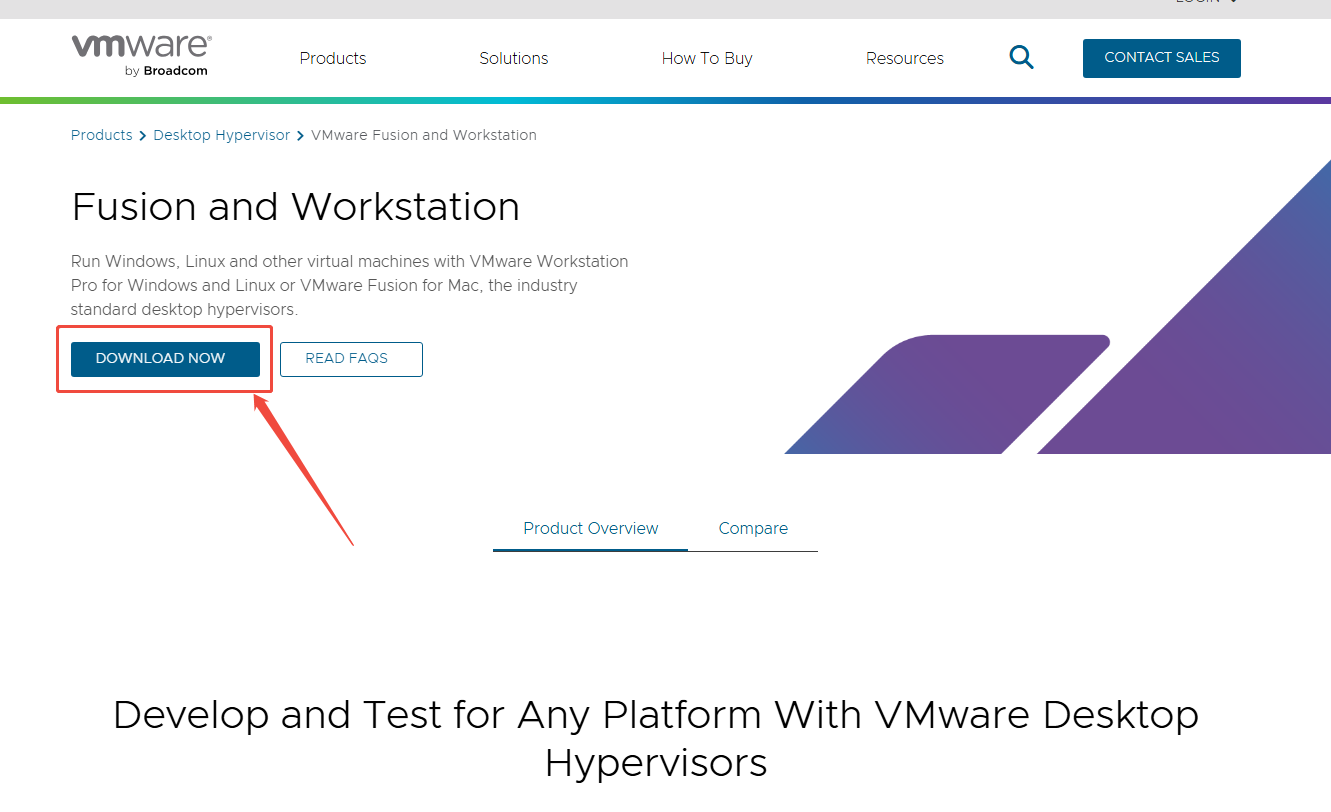
Note that you need to fill in the activation key in the last step of the installation. If you don't fill it in, you can only use it for a 30-day trial period.
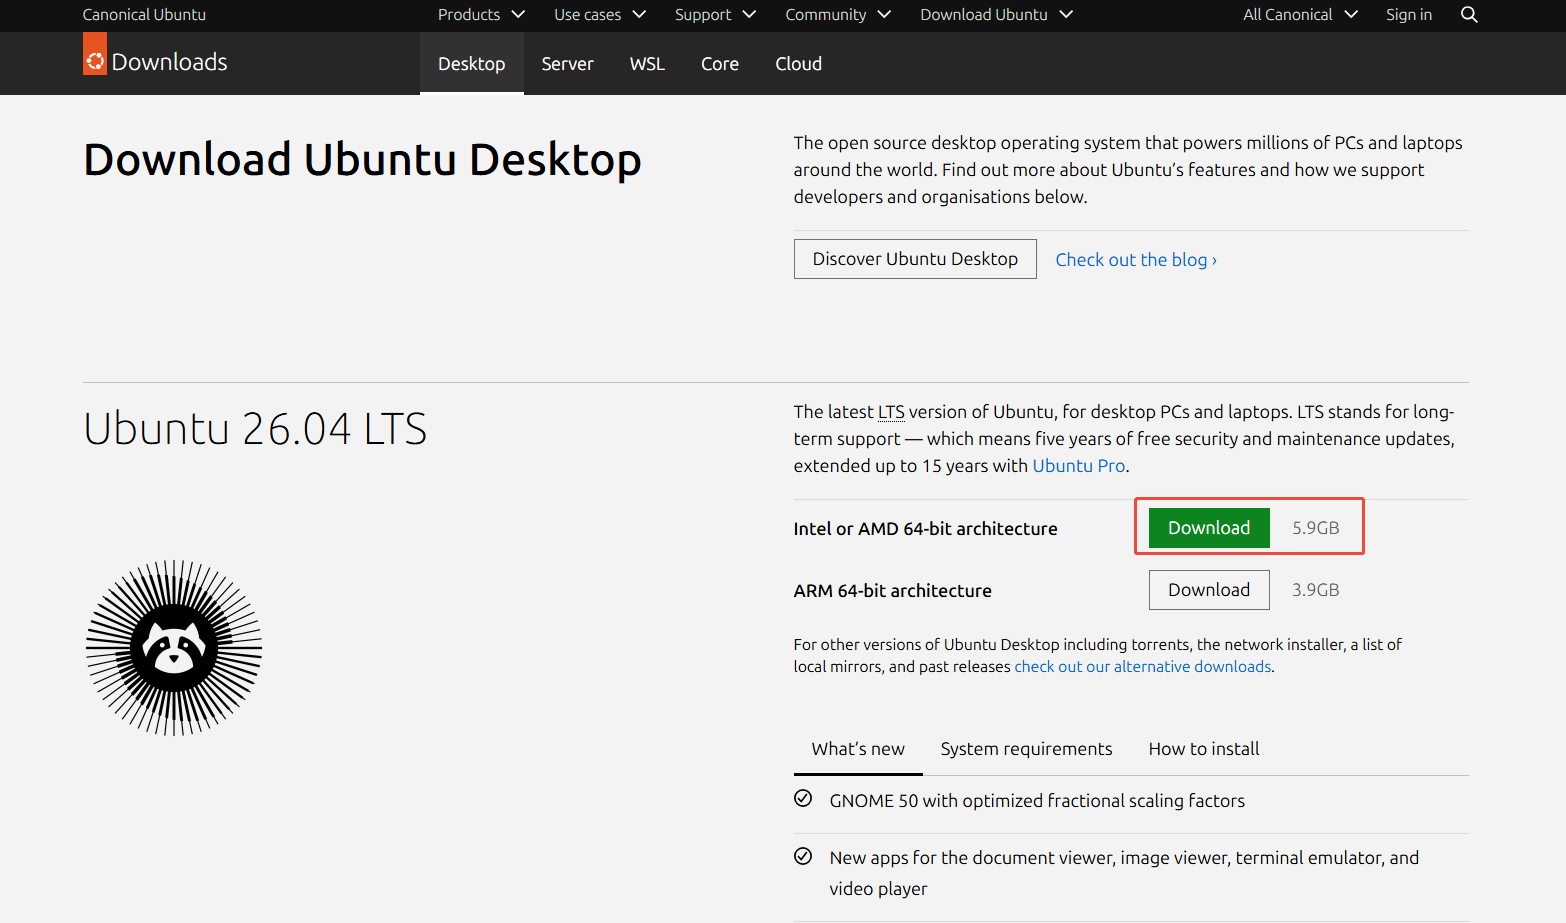
Step 2: Download the Ubuntu image.
It is not recommended to save it in the C drive.
The link is as follows:
https://ubuntu.com/download/desktop
We recommend developing this project on Ubuntu 20.04 or 22.04. You can download the required environment images or installation packages using the links below:
https://drive.google.com/drive/folders/1yC0z7l5RC8DSNBYCvedAiGTN2OoIGGaP?usp=sharing
Step3:Binding an Ubuntu Image to a Virtual Machine
Open the VMware that has just been installed, click "Create a New Virtual Machine", and start configuring the virtual machine environment.
Step4:Install the Python 3 environment.
Open the terminal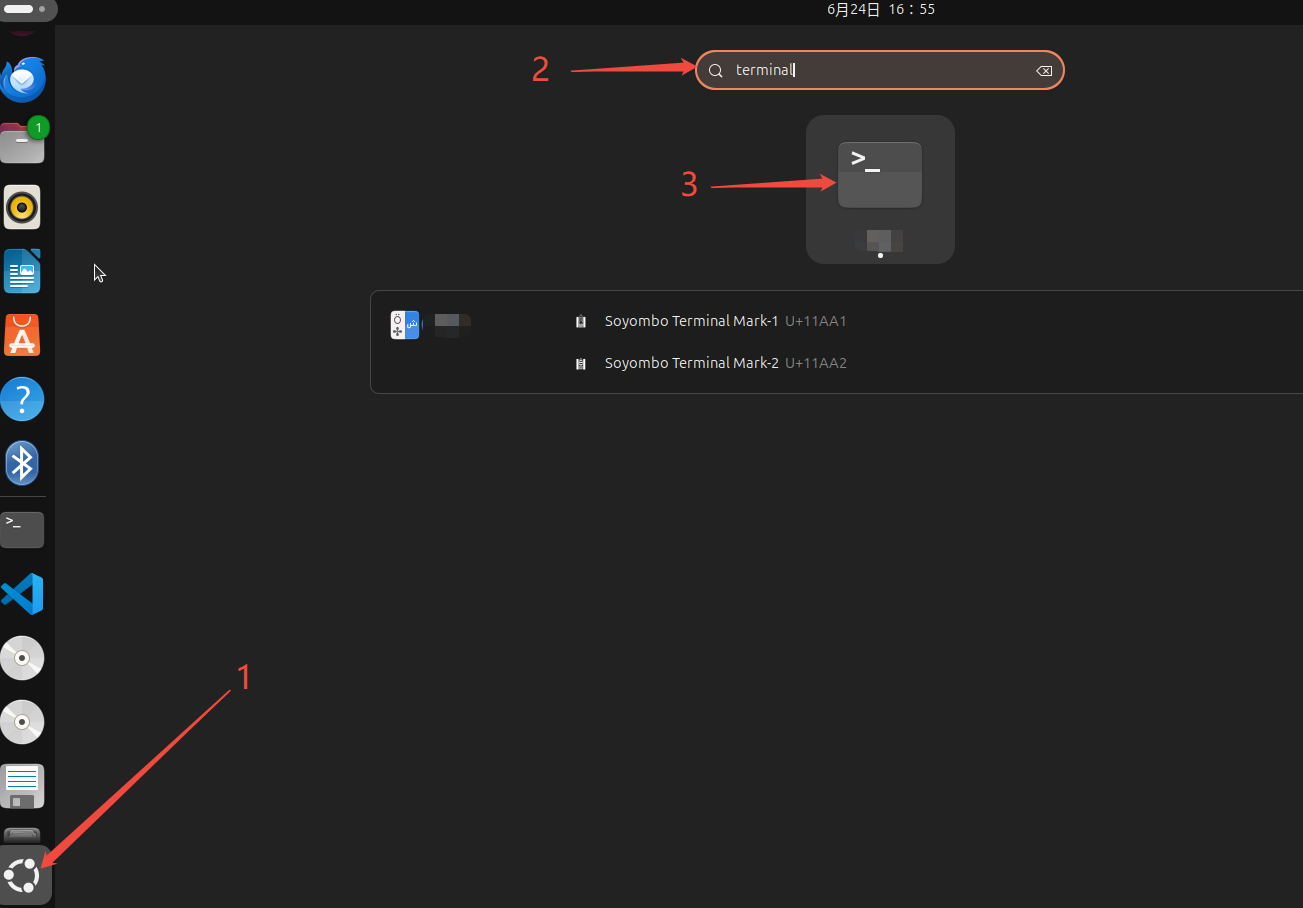
Enter the command line at the terminal
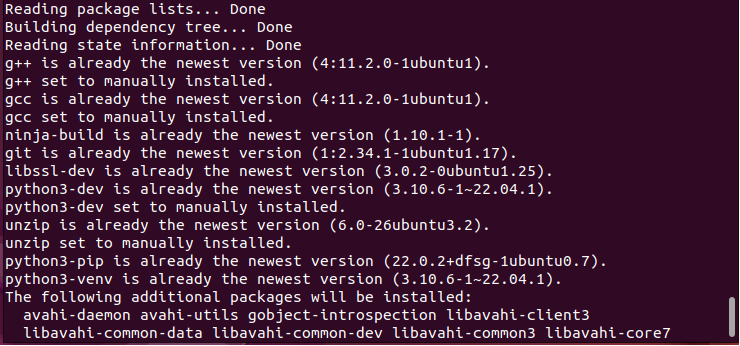
sudo apt-get install git wget flex bison gperf python3 python3-pip python3-venv cmake ninja-build ccache libffi-dev libssl-dev dfu-util libusb-1.0-0

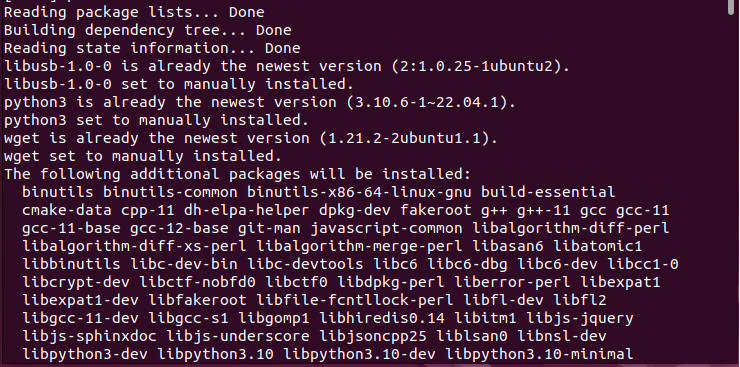
This command is used to install, with a single click, all the underlying dependencies required to set up the ESP-IDF and Matter development environment on Ubuntu. It includes code hosting and download tools (git, wget), cross-platform high-performance compilation and build systems (cmake, ninja, ccache), the Python3 virtual environment required for running ESP-IDF scripts and ensuring environment isolation, as well as the low-level development libraries (libssl-dev, libusb, etc.) needed for the Matter protocol’s core security encryption and hardware USB flashing and communication. This command serves as the foundation for ensuring that subsequent firmware compilation and device debugging proceed smoothly.
Step5:Pull ESP-IDF version 5.2.1
Enter the following commands in order:
Create an “esp” folder; you can name it whatever you like.

Navigate to the newly created esp working directory, create a new folder named esp-idf within that directory, and then clone the official ESP-IDF v5.2.1 source code and related dependencies into that folder via the network.

Navigate to the esp-idf folder and begin cloning the source code for version 5.2.1 and the related submodules. Note: Since this version includes all underlying dependencies, the download size is large, and the cloning process may take a long time. Please be patient.
This process will take some time, so please be patient.

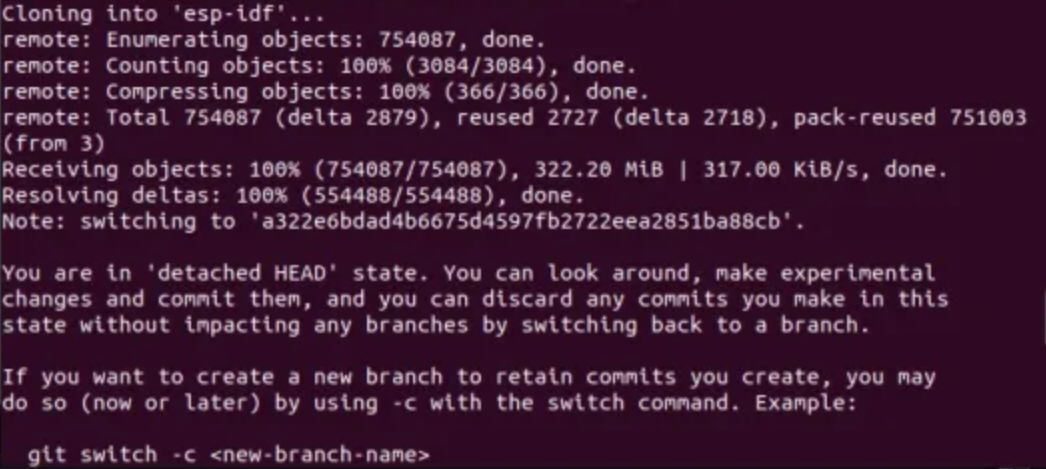
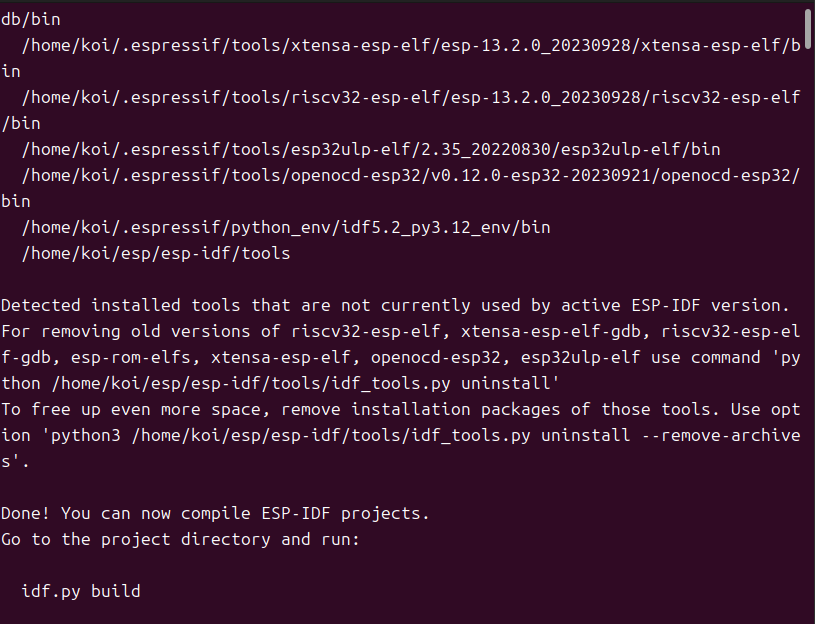
This command fetches the ESP-IDF source code for version v5.2.1 and downloads all submodules. It provides a stable firmware development framework for ESP32 Matter development on Ubuntu, including chip drivers, compilation scripts, and low-level Matter support components. The --recursive option ensures that all required dependencies are downloaded completely, preventing errors caused by missing files during subsequent compilation.
3.install esp-matter
Step 1: Install the essential components for esp-matter
First, go back to the parent directory to reach the esp folder.

Next, run the following command
sudo apt-get install git gcc g++ pkg-config libssl-dev libdbus-1-dev \
   libglib2.0-dev libavahi-client-dev ninja-build python3-venv python3-dev \
   python3-pip unzip libgirepository1.0-dev libcairo2-dev libreadline-dev

This command is used to install, with a single click, the dedicated core dependencies required to build and run the Matter (Project CHIP) SDK on Ubuntu. It focuses on providing the standard C++ compilers (gcc/g++) needed to compile the Matter source code, the key communication libraries required for Matter devices to discover each other and establish local connections within a local area network (avahi-client, dbus, glib), and the advanced Python 3 development bindings (python3-dev, etc.) on which Matter debugging tools and automated test scripts heavily rely. This is a critical step to ensure the successful compilation of Matter core components (such as the chip-tool controller) and the establishment of end-to-end secure communication on the device.
Step2:Clone the esp-matter repository
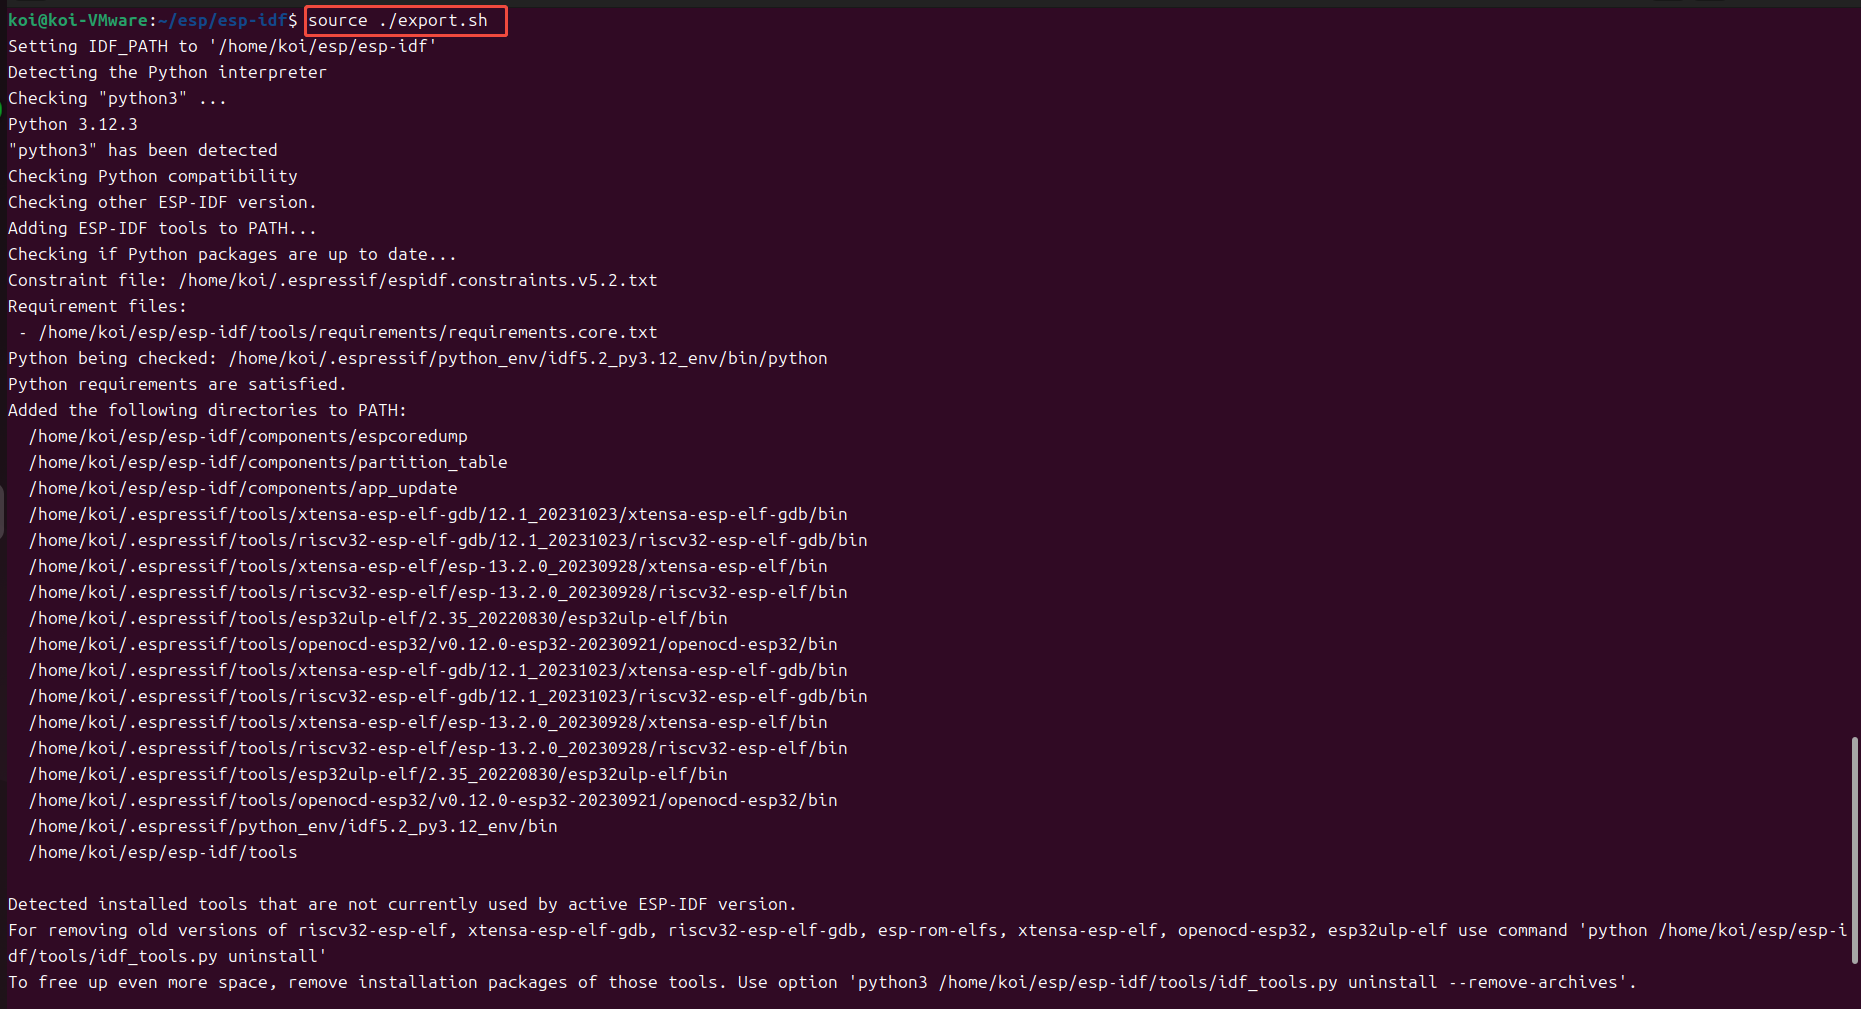
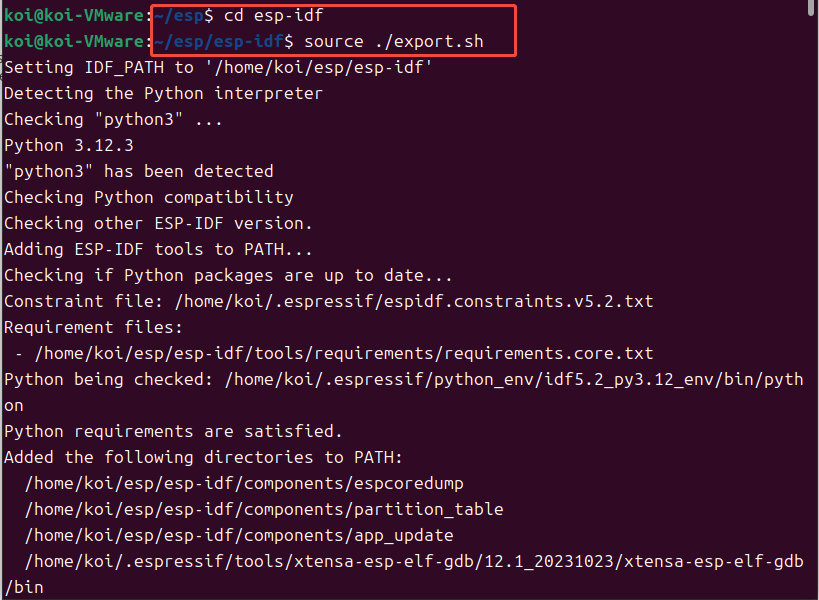
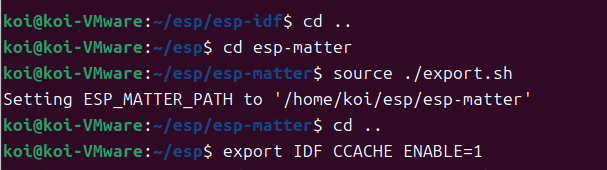
This set of commands is used to activate the ESP-IDF development environment in the current terminal session. By navigating to the esp-idf directory and running the environment configuration script (export.sh) with the source command, the system will automatically register the paths to the cross-compilation toolchain required for the ESP32 chip, a dedicated Python isolated virtual environment, and the core project management tool idf.py in the current terminal’s environment variables.
This allows you to transform a standard Ubuntu terminal into a “dedicated development console” capable of compiling and flashing ESP32 firmware with a single command.

Here's how it's done: 
This set of commands is used to obtain the official Espressif Matter-specific development framework. Execute cd .. to return to the parent directory, then use Git to recursively clone (--recursive) the official esp-matter extension library. This framework is the result of Espressif’s in-depth integration and optimization of the open-source standard Matter SDK for the ESP32 series of chips. It integrates the standard application-layer APIs required for developing Matter devices (such as data models for light bulbs, switches, sensors, etc.) and serves as the core software foundation for writing and compiling the Matter business logic for smart light bulbs in the future.
This process may take a long time, so please be patient.

Navigate to the esp-matter directory and run the installation script. This will automatically configure the Python virtual environment for Matter, install the required Python dependencies, and fulfill the software dependencies needed to compile and run the ESP32 Matter protocol.
In short, the core task of the ./install.sh script is to customize and assemble a dedicated “toolkit” for Matter development. It automatically performs three tasks in the background: first, it downloads and configures the Zap property configuration tool used to build the Matter device data model; second, it thoroughly synchronizes and fully fetches the official Matter core SDK source code and third-party binary dependencies; and third, it integrates with the system libraries installed earlier to compile Matter-specific security certificate generators and auxiliary debugging scripts locally.
This process will take some time, so please be patient.

Go back to the previous directory

4.Change the development board configuration
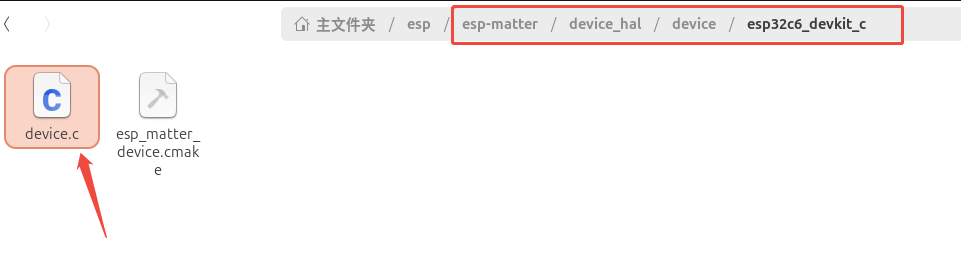
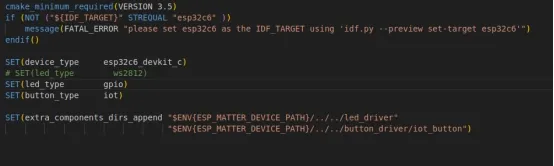
Step 1: Modify the relevant content in the esp-matter/device_hal/device/esp32c6_devkit_c/device.c file.
Once the modifications are complete, return to the root "esp" working directory you originally created in the terminal or file manager to proceed with compiling the Matter example.
Then, follow the path shown in the figure to locate the device.c file.
Since the Elecrow development board used in this tutorial employs standard GPIO to drive a regular LED, while the official sample code uses WS2812 (RGB LEDs) by default, you must make the following two modifications to ensure the program controls the LED properly:
Modify the pin number: Open the device.c file and modify the value of the LED_GPIO_PIN macro definition based on the actual I/O port to which the LED is connected on your development board.
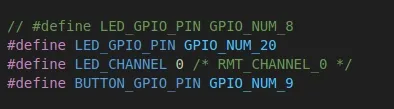
Change the driver type: Open the esp_matter_device.cmake file and change the driver type to standard GPIO mode:
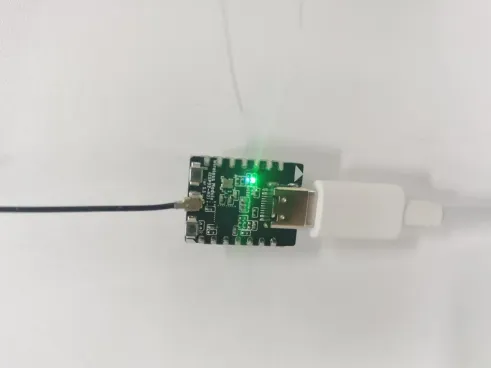
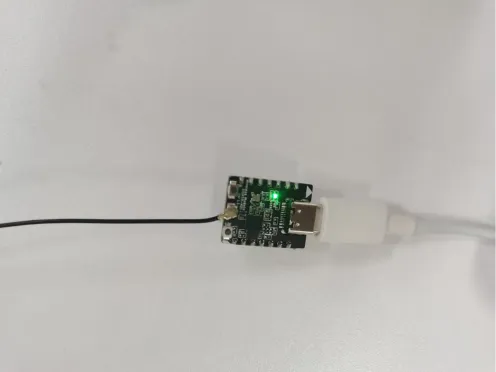
Step2:Connect the development board to the computer.
Step3:Configure the development board
The purpose of this step is to refresh and reactivate the entire development environment. Since we have just finished installing the esp-matter framework and modifying the hardware code, navigate back to the esp-idf directory and run source ./export.sh. The script will not only re-initialize the ESP-IDF base build toolchain but will also automatically detect and inject the newly installed Matter-specific extension tools (such as the data model configuration tool Zap) into the current terminal environment variables, thereby completing the final preparations for compiling the smart light bulb firmware.
Go back from the esp-idf directory to the parent esp folder.
Navigate to the directory containing the source code for the esp-matter protocol stack that you just downloaded.
Load the esp-matter environment script, temporarily configure the ESP_MATTER_PATH environment variable so that the system can recognize the Matter build tools and component paths, bind the ESP-IDF environment, and output the log message Setting ESP_MATTER_PATH, indicating that the environment has been successfully loaded.
Exit the esp-matter directory and return to the esp root directory to make it easier to create and compile projects later.
Enable the ESP-IDF compilation cache (ccache) to reuse cache files during subsequent compilations of the Matter firmware, significantly reducing the time required for repeated compilations.
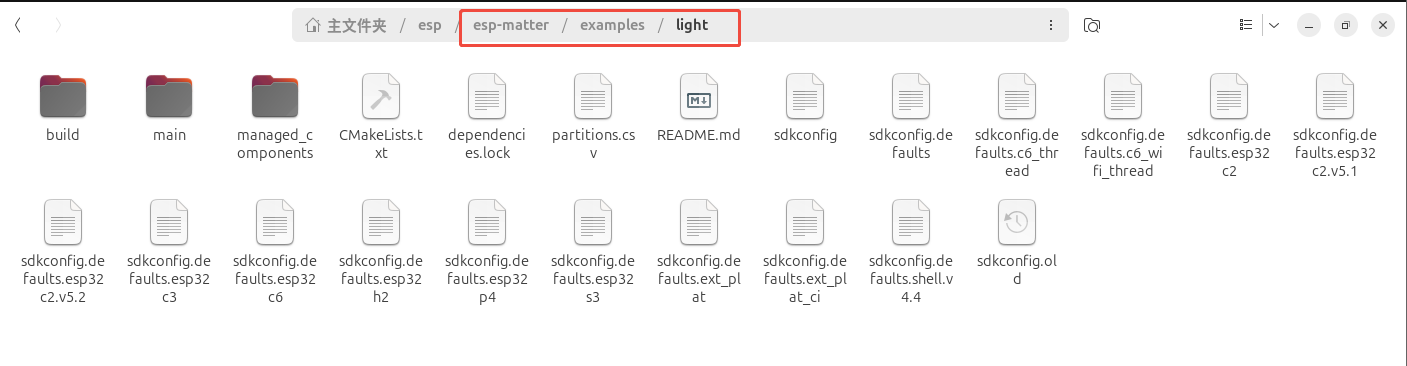
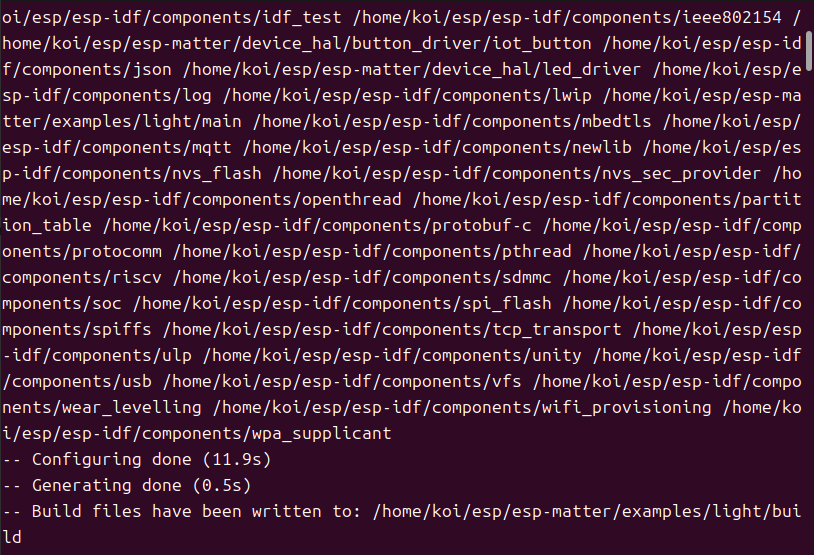
Navigate to the directory containing the official Matter lighting example project provided by esp-matter. This example serves as the standard starter project for developing ESP32 Matter devices and is used to compile and generate firmware for lighting devices that support the Matter protocol.

Below are the project files in the file system:
This command is used to lock the project’s hardware compilation target. Since Espressif’s example projects are typically compatible with multiple chips, before proceeding with the actual compilation, we must explicitly inform the compilation system that the current hardware core being used is the ESP32-C6 by executing the command idf.py set-target esp32c6. After execution, the system will automatically clear irrelevant chip configurations, seamlessly switch to the dedicated toolchain for the RISC-V architecture, and generate a low-level hardware configuration file (sdkconfig) specific to that chip, thereby completing the most critical step before compilation.
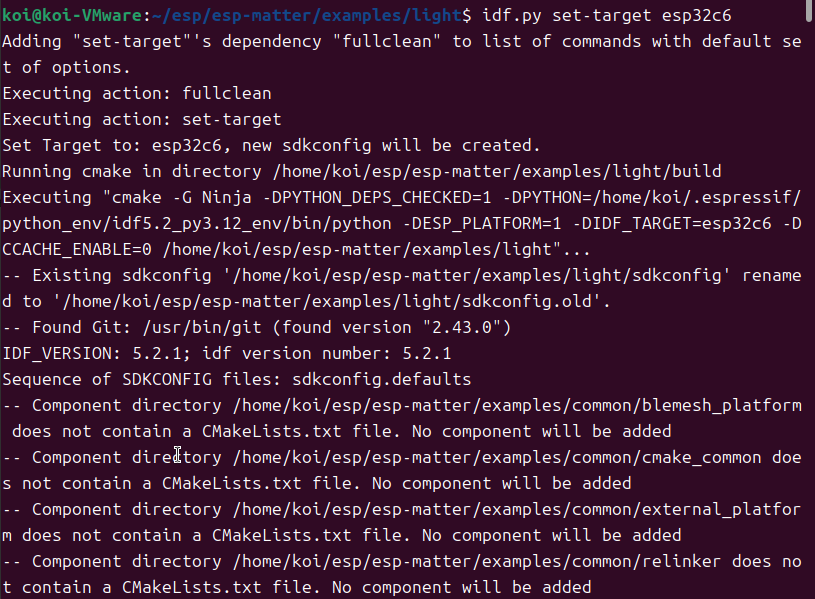
The chip settings are successful.
Run the command idf.py menuconfig to open the graphical configuration interface, which allows you to visually modify engineering parameters such as Matter network configuration, Wi-Fi, Bluetooth, power consumption, and peripheral pins.
Practical Tip: Navigate to Component config -> ESP System Settings and change the “Channel for console output” to the correct mode for the ESP32-C6 lighting development board. Refer to the image below for specific configuration details:
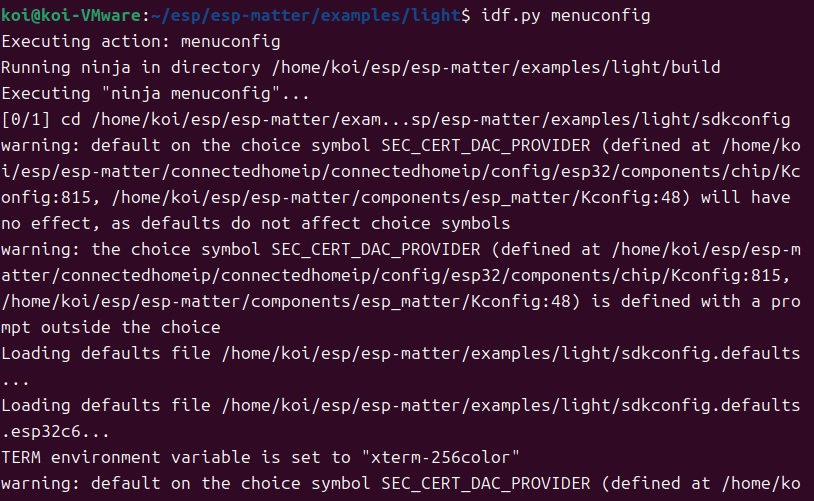
Once opened, follow the path shown at the very top of the image below.
Now, on the ESP System Settings → Channel for console output configuration page in idf.py menuconfig, the currently selected option is USB Serial/JTAG Controller. This is the ESP32-C6’s native serial programming and debugging peripheral, and it is the most commonly used option.

The ESP32-C6 comes with a built-in USB Serial/JTAG controller, so you can use this option directly to enable serial logging and firmware downloads without any additional hardware modifications:
- Press Enter to confirm selection of USB Serial/JTAG Controller
- Press ESC on the keyboard to exit the menu step by step; when the save prompt appears, select Yes to save the configuration
5. Compile and flash the code.
ESP32C6:
Note:use WiFi
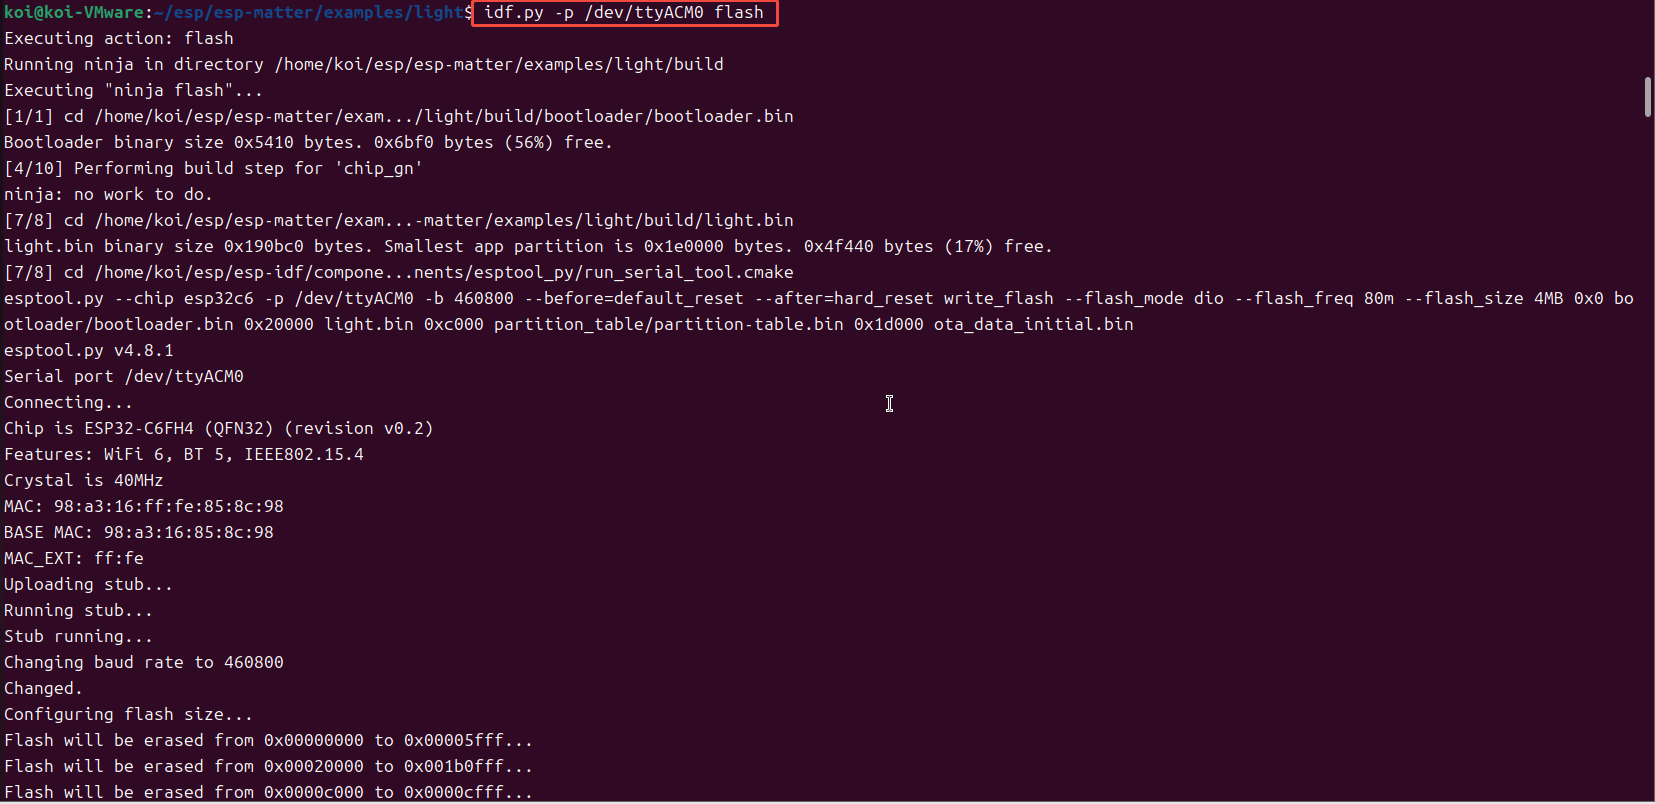
1、Connect COM
List all virtual serial devices in Ubuntu whose names begin with “ttyACM” to verify that your ESP32-C6 development board is successfully connected to your computer and to identify its specific serial port number.

2、compiled code
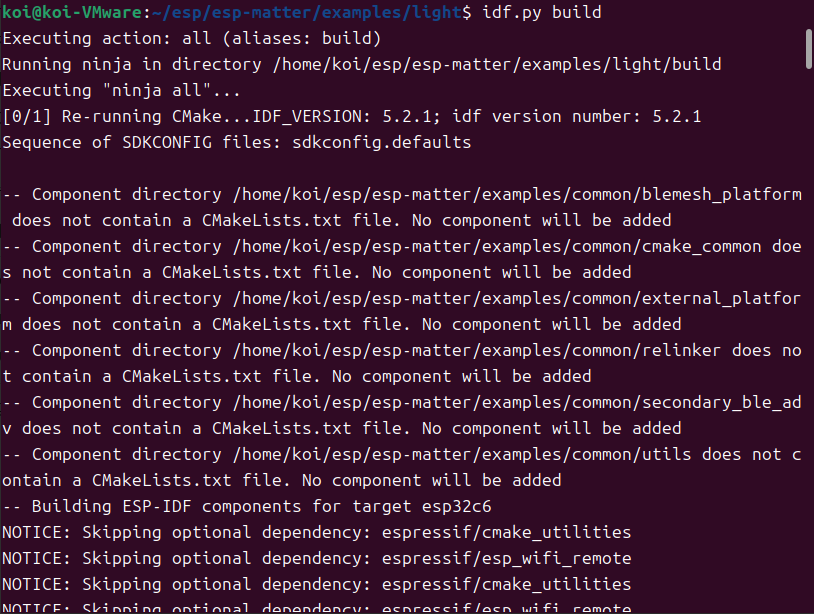
Run the project's build process to package and compile all C/C++ source code, the Matter protocol stack, and the underlying configuration into a binary firmware (binary image file) that can run directly on the ESP32-C6 chip.
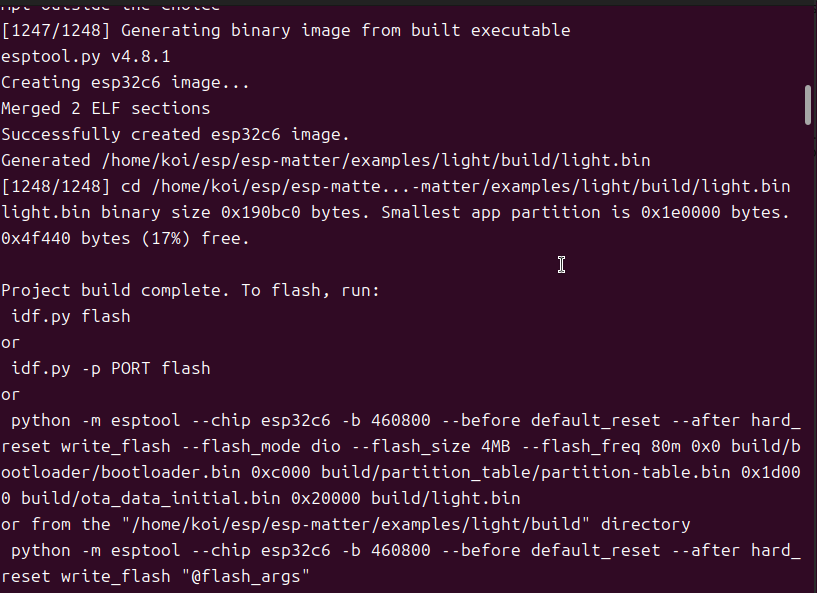
Compilation Complete:
3、Next, grant permissions to that serial port
Grant the current Linux user permanent or temporary read and write permissions for the /dev/ttyACM0 serial port to ensure that the subsequent firmware flashing and serial log viewing commands do not fail with a “permission denied” error.

4、Flash the chip.
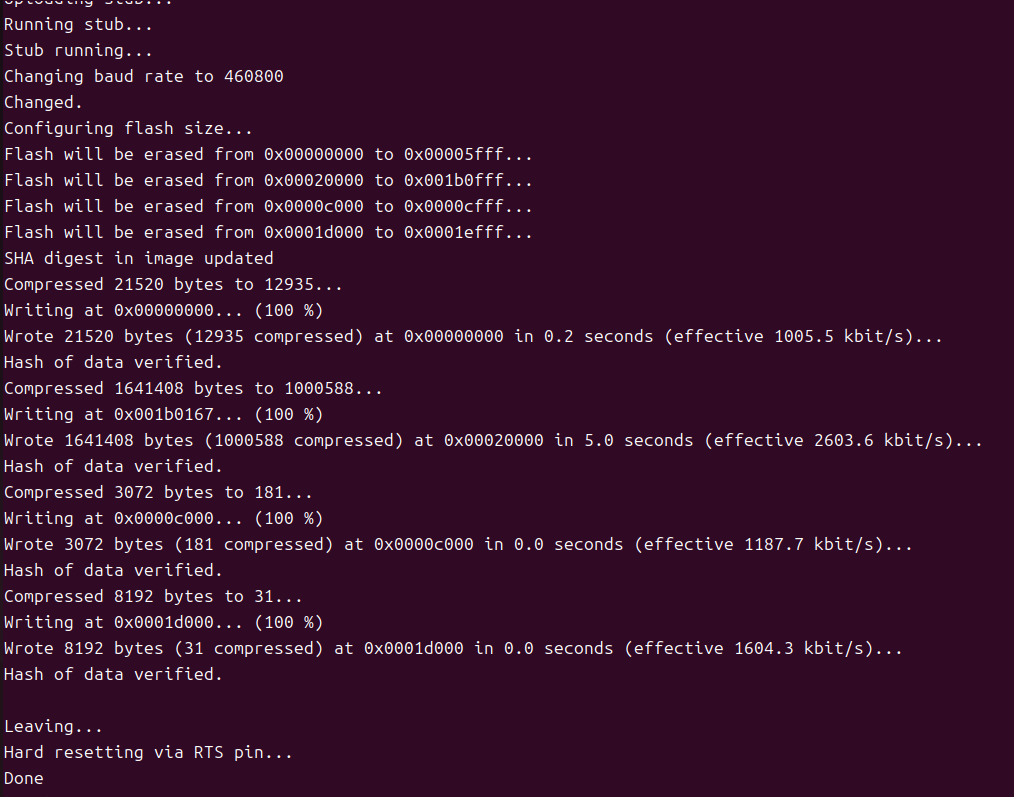
Use the specified serial port to officially burn (download) all the binary firmware compiled in the previous step—including the bootloader, partition table, and smart light bulb main program—into the ESP32-C6 chip’s Flash memory.
(note: ttyAcm0 is the automatically identified output COM port number)
Code Flashing Complete:
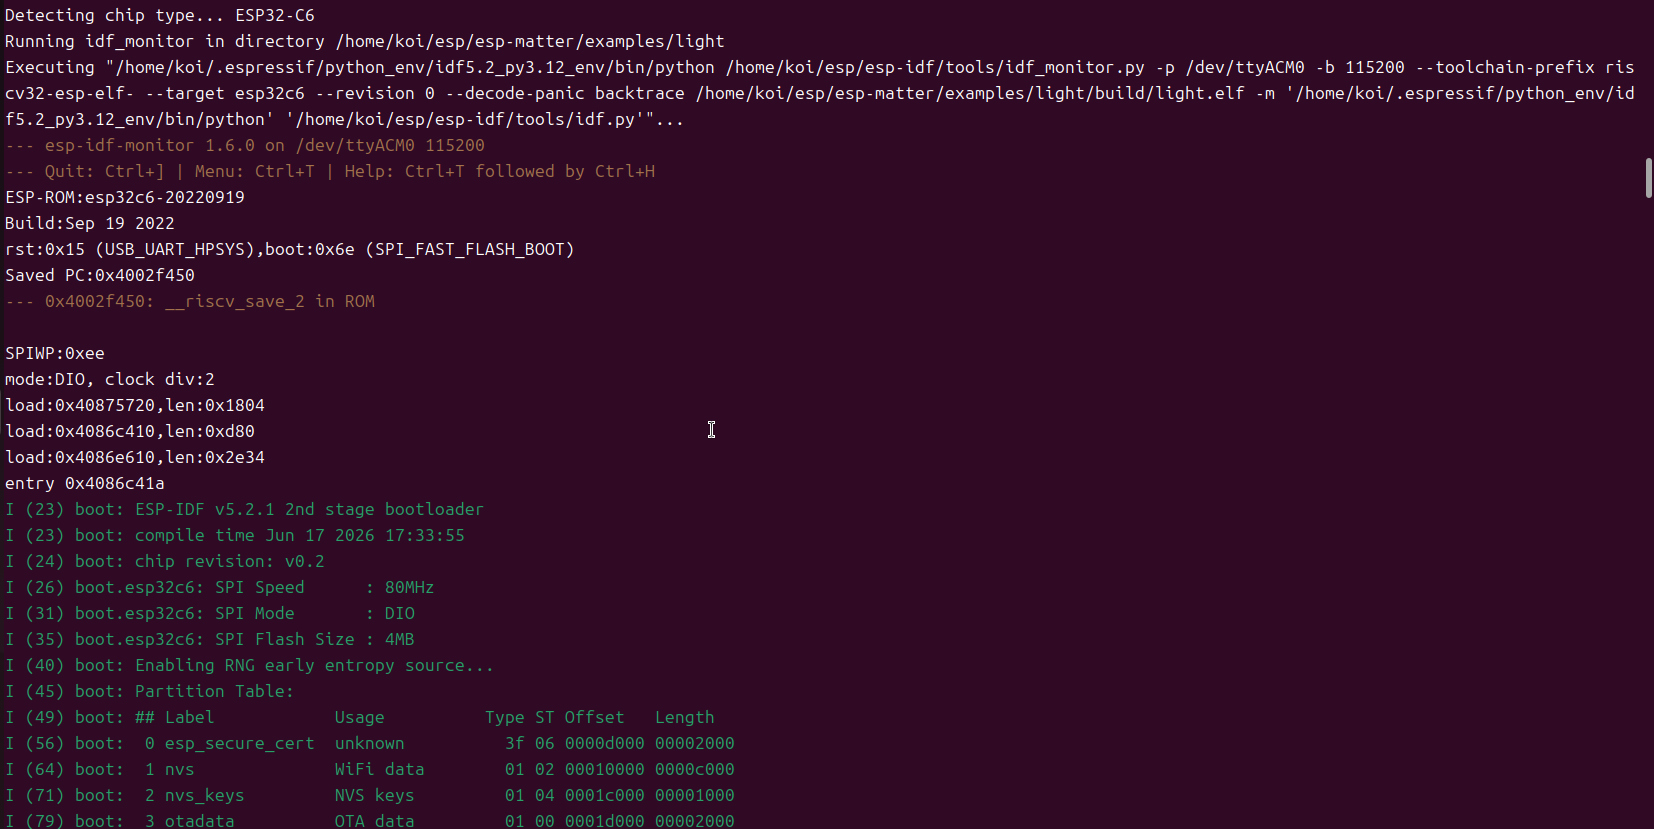
5、Open the serial monitor.
Launch the ESP-IDF’s built-in Serial Monitor to view the debug logs printed by the ESP32-C6 development board in real time in the terminal, and interact with the device using the keyboard.

6、Set Up a Wi-Fi Network
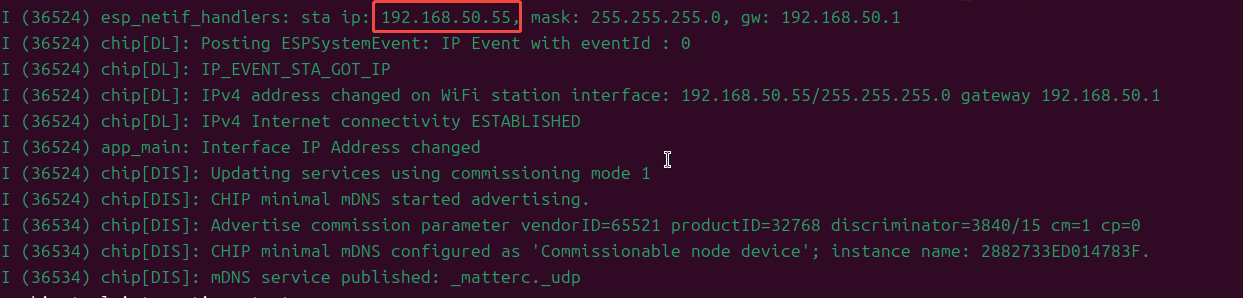
This command is used to manually configure the development board’s Wi-Fi network via the command line. During the testing phase, to avoid the complex process of configuring the network using a mobile app, you can directly enter matter esp wifi connect <ssid> <password> in the monitor debug terminal (replace the latter two with the actual Wi-Fi name and password). Once executed, the ESP32-C6 will immediately connect to the local area network and obtain an IP address, then activate the underlying Matter network service and broadcast device information to the network. This is a convenient way to quickly verify the network communication capabilities of a Matter device.
Ensure that the Linux environment and the ESP32-C6 are on the same local area network.
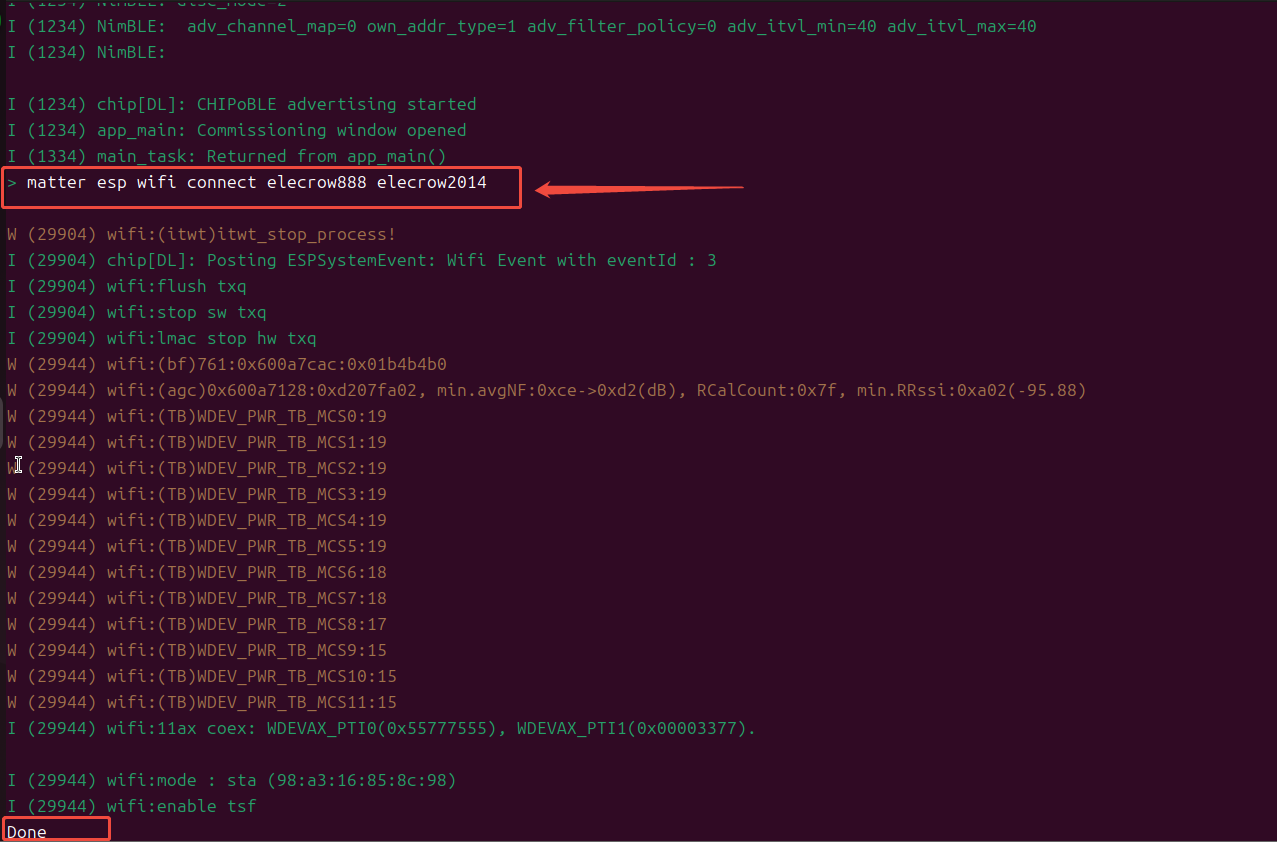
Once the connection is established, the IP address of the Wi-Fi network you are currently connected to and related information will be displayed.
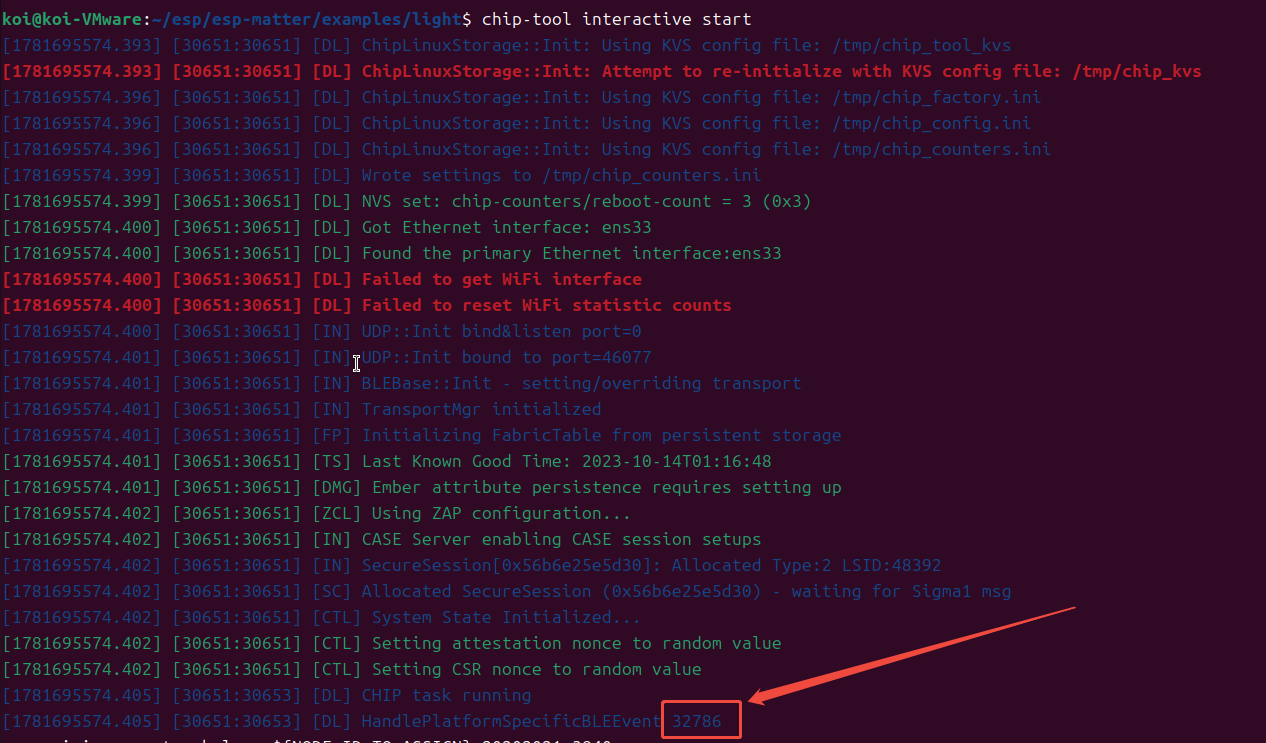
7、Launch the official Matter kernel debugging tool, chip-tool
This command is used to launch the interactive terminal for the official Matter core controller debugging tool (chip-tool). In the Matter ecosystem, chip-tool serves as the “smart gateway/ecosystem controller” (such as the Apple HomePod or Mi Home Gateway). By executing chip-tool interactive start, the terminal enters a dedicated Matter command console (the prompt changes to chip-tool>). In this mode, developers can directly and efficiently send Matter standard cluster commands—such as network binding, on/off control, and property reading—to ESP32-C6 lighting devices on the local area network without having to repeatedly enter the lengthy tool path prefix each time.

8、Pairing
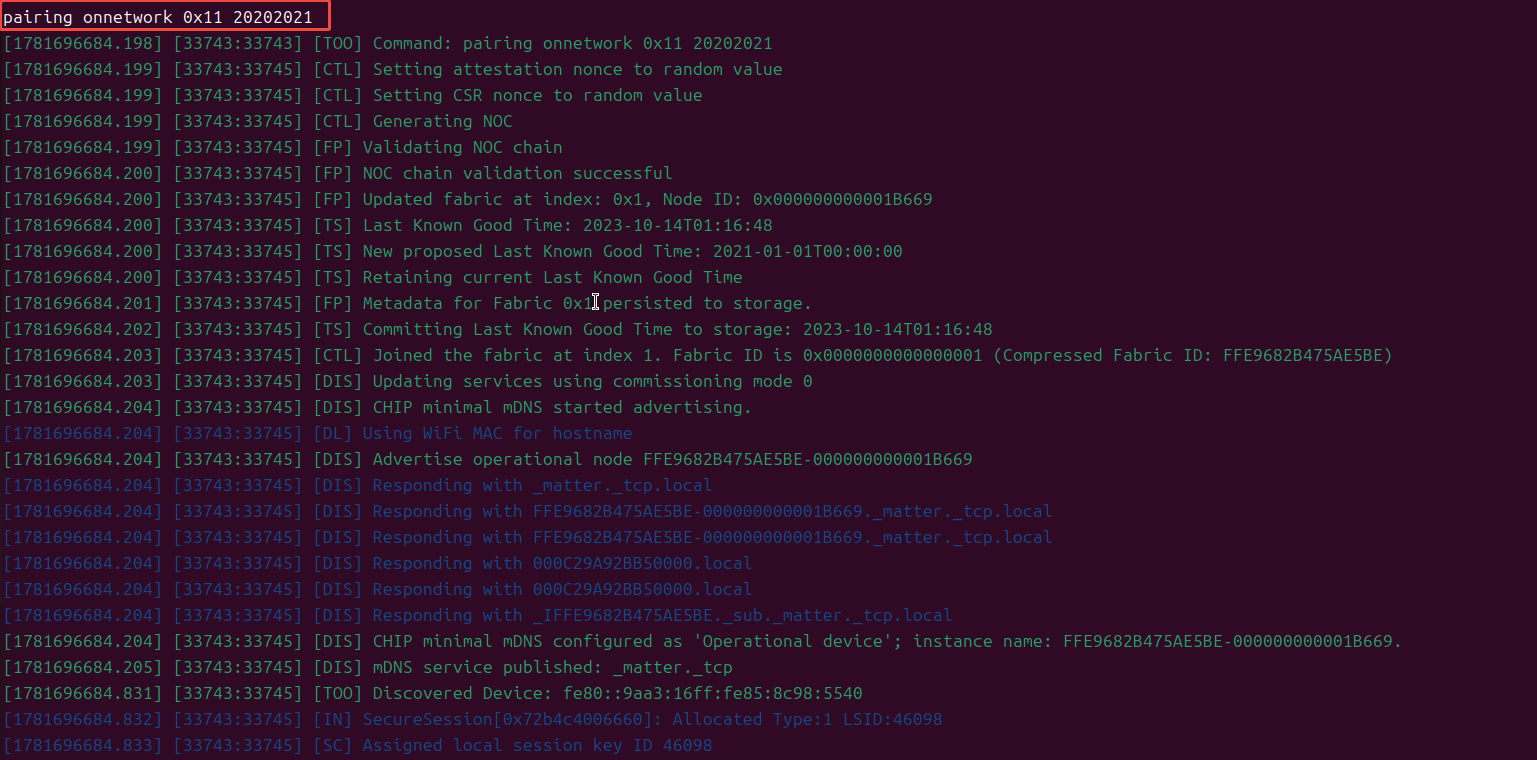
This command is used to perform LAN binding and secure network commissioning for Matter devices. By executing pairing onnetwork 0x11 20202021 in the interactive console, the master control tool chip-tool will scan the local network for connected ESP32-C6 devices, authenticate them using the Matter default security key 20202021, and assign them a unique virtual node ID 0x11 (hexadecimal). Once pairing is complete, the master device will send an encryption operation certificate to the development board, formally incorporating the lighting device into the control ecosystem and establishing a secure communication channel for subsequent remote control commands.
- pairing onnetwork: A type of network pairing mode. It means, “The device is already connected to Wi-Fi; please search for and pair it directly within the local area network.” (Since we executed “wifi connect” in the previous step, the board and the computer are already connected to the same router.)
- 0x11: This is the Node ID (hexadecimal) you assigned to this light. It’s like giving this light an “ID number” or “student ID” within your smart home network. From now on, whenever you want to control this light, simply send commands to 0x11.
- 20202021: This is the Matter device’s Setup PIN Code. The default built-in secure setup key in the Espressif example project is 20202021. It acts as a “setup password” to prevent strangers from casually binding your light to their network.
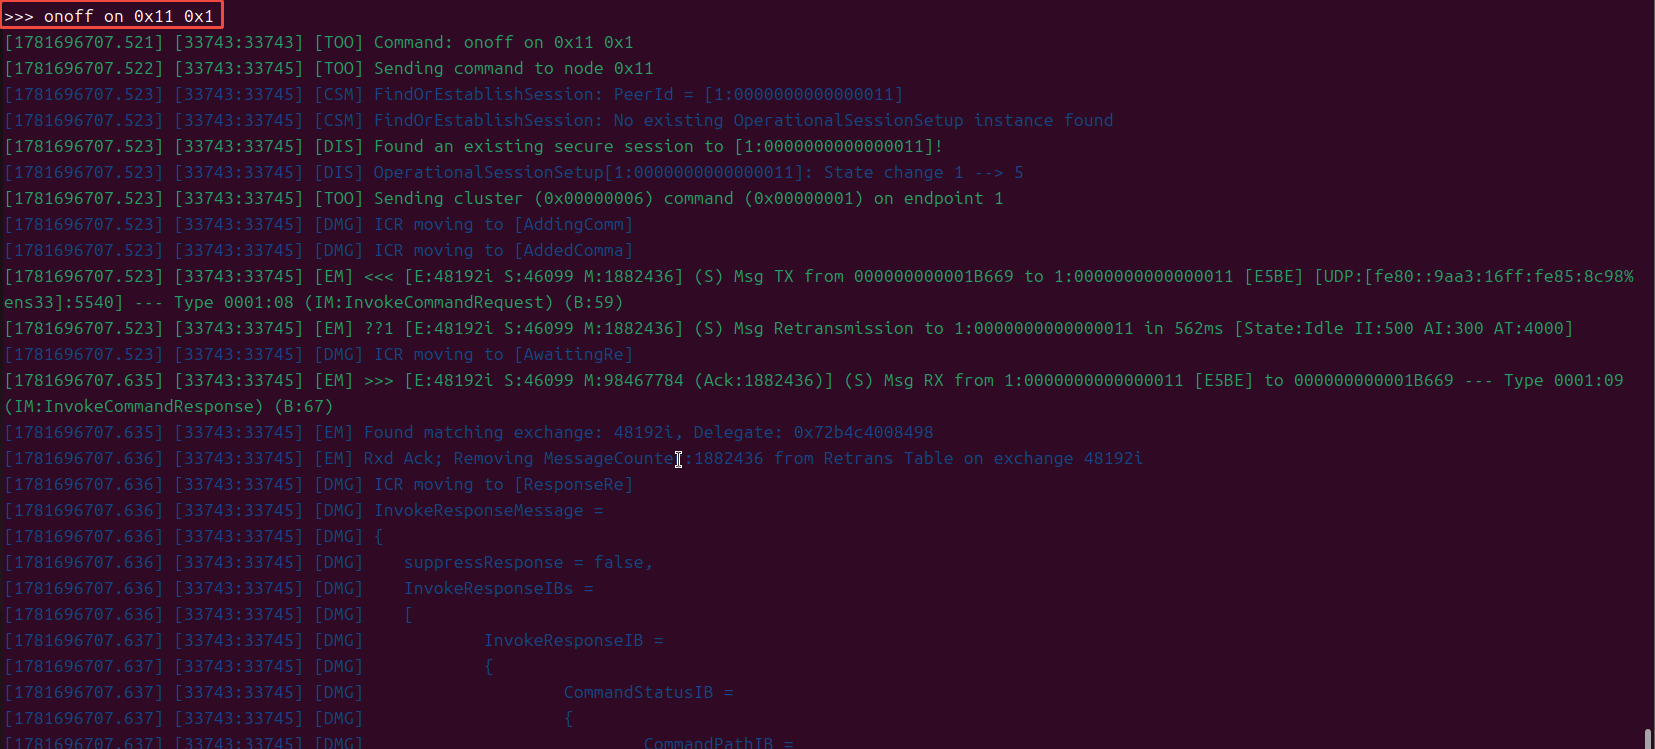
9、Turn off the LED
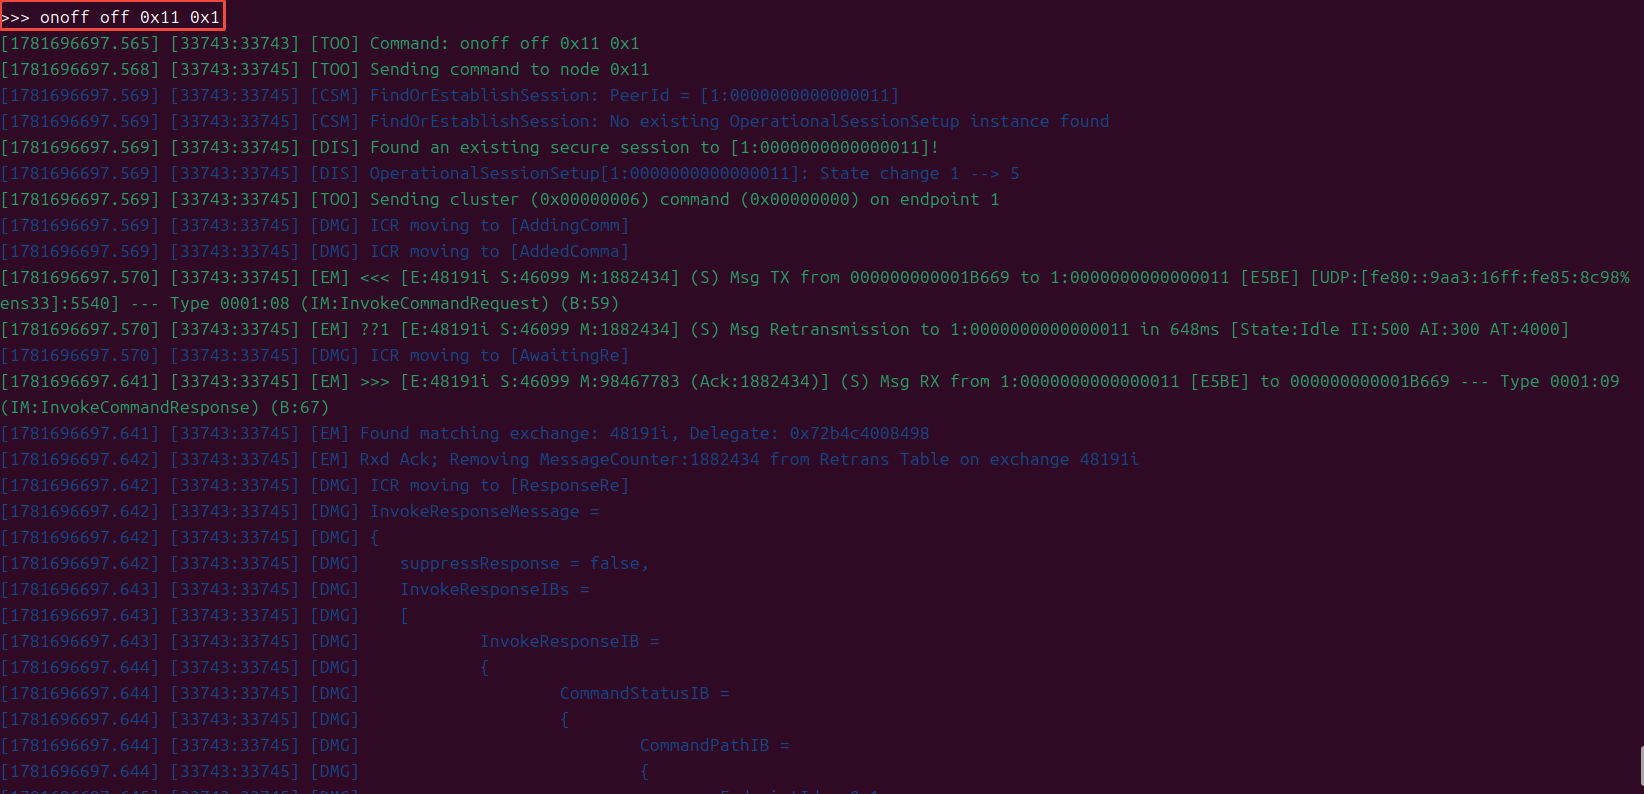
This command is used to send a Matter-standard control command to the development board to turn off the LED.
When the command onoff off 0x11 0x1 is executed, the host invokes the standard OnOff switch cluster in the Matter protocol, precisely identifies the ESP32-C6 device with node ID 0x11 on the network, and sends a turn-off command to its Endpoint 1 (0x1). Once the hardware receives this command, the underlying driver immediately changes the voltage level of the control pin, thereby remotely turning off the physical LED. The successful execution of this command marks the completion of the full Matter development cycle—from source code modification, compilation, and flashing to network control—for the smart light bulb.
- onoff: Calls the OnOff Cluster within the Matter standard application layer. In the Matter protocol, all devices with “switch” attributes (such as lights, outlets, and fans) must adhere to this standard interface.
- off: Executes the specific command under this cluster, i.e., the “turn off” action. (To turn on a light, the corresponding command is “on”; to toggle the state, it is “toggle”).
- 0x11: Target Node ID. This tells the master: “This ‘turn off the light’ command should be sent to the ESP32-C6 device that was just assigned the Node ID 0x11.”
- 0x1: Endpoint ID. A single piece of physical hardware may contain multiple independent control units (such as a four-way switch or a ceiling light with a built-in exhaust fan). Endpoint 1 (0x1) typically corresponds to the first and most central functional unit on the device—in our example, it represents the main light.

10、Turn on the LED