ESPHome User Guide
This tutorial will show you how to add theCrowpanel ESP32 Miner HMI Displayto ESPHome。
This class mainly collects temperature and humidity by using the DHT20 temperature and humidity sensor and LED lights on the Crowpanel ESP32 Miner HMI Display, and can also remotely control the on and off of the bulb.
When the control switch on the ESPHome platform is clicked, the bulb can be controlled to turn on and off, and the current status of the bulb can also be displayed on the screen.

And you can also view the historical collected data of temperature and humidity in the ESPHome backend.
First, we need to prepare:
- a Raspberry Pi;
- a 64GB SD card;
- a Crowpanel ESP32 Miner HMI Display;
- a four-wire interface light bulb;
- a DHT20 Temperature and Humidity Sensor;
- DuPont wires.
Hardware Preparation
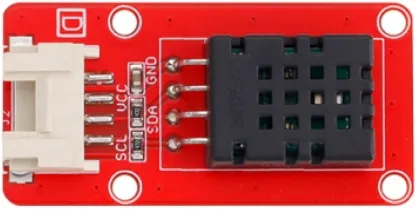
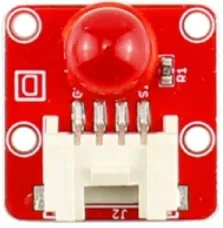
| CrowPanel ESP32 2.8'' HMI | Crowtail-DHT20 | Crowtail-LED |
|---|---|---|
 |  |  |
 | | |
Download HomeAssitant
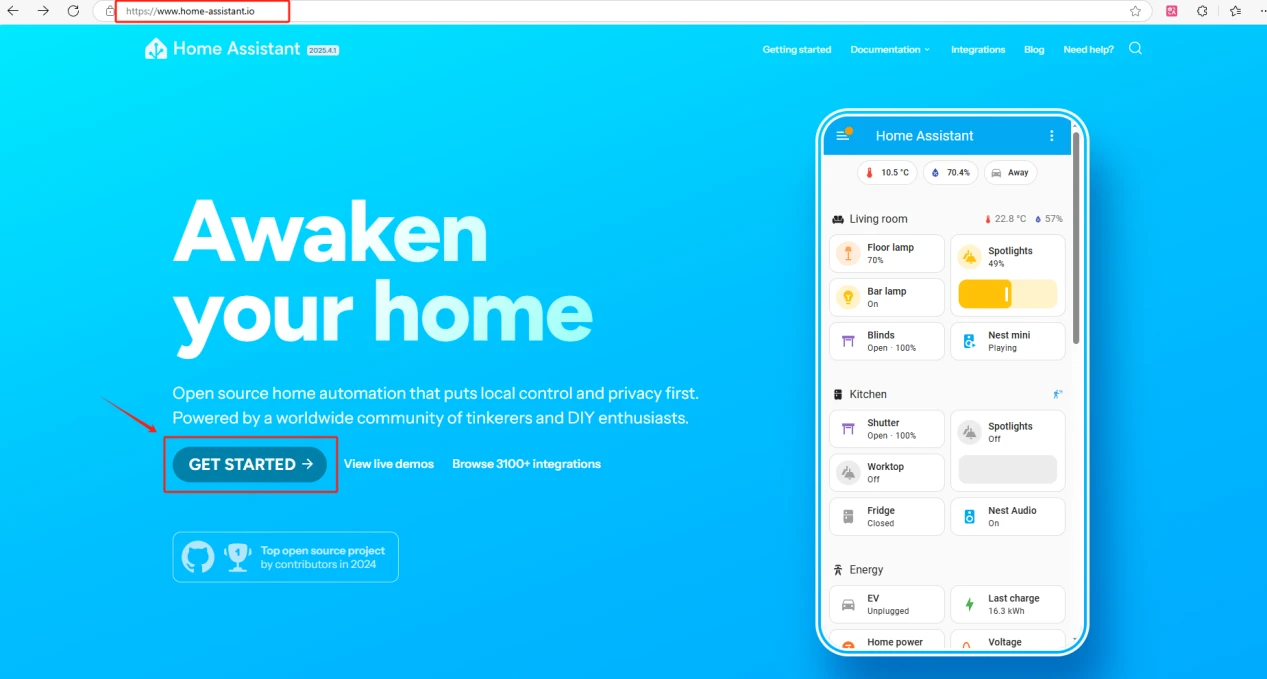
Open the official website of HomeAssitant:https://www.home-assistant.io/
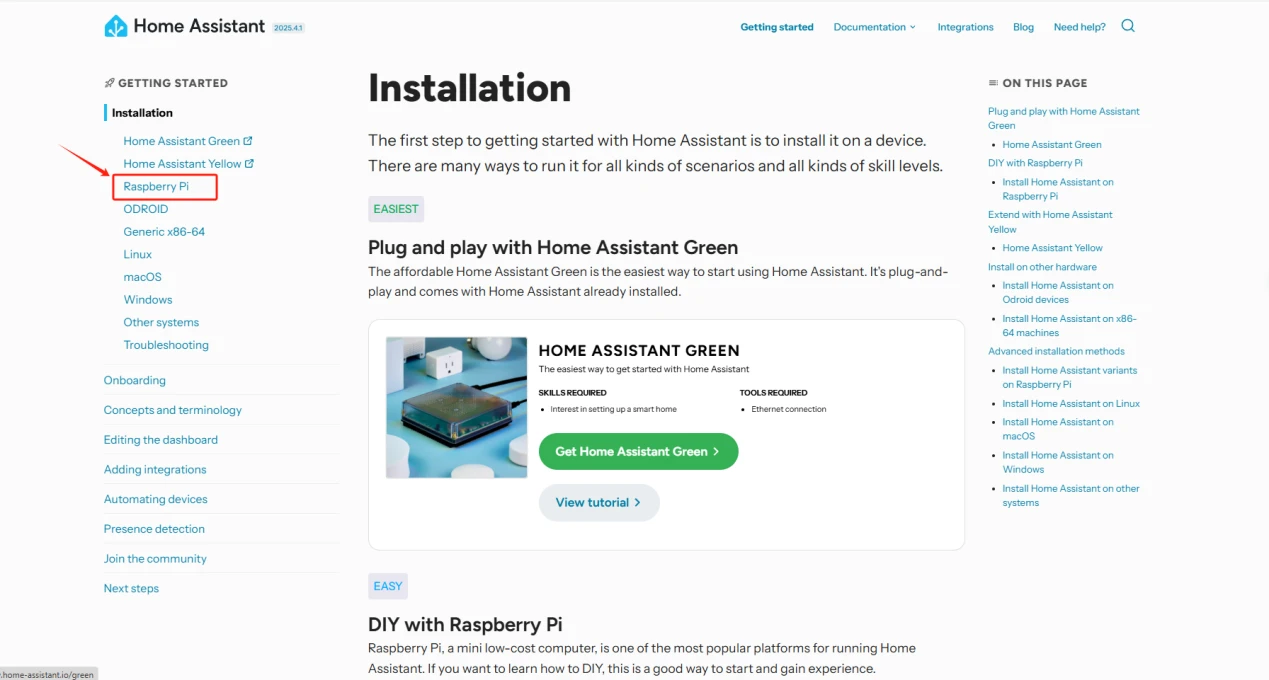
Select a Raspberry Pi and install the Home Assistant system according to this installation guide.
After the installation is complete, insert the SD card with the Home Assistant system into the Raspberry Pi and connect the Ethernet cable.Note:Make sure that the Wi-Fi network your Crowpanel ESP32 Miner HMI Display will connect to is on the same local area network (LAN) as the Raspberry Pi.
The following devices need to be on the same LAN:
① Your computer
② Crowpanel ESP32 Miner HMI Display
③ Raspberry Pi with the Home Assistant system
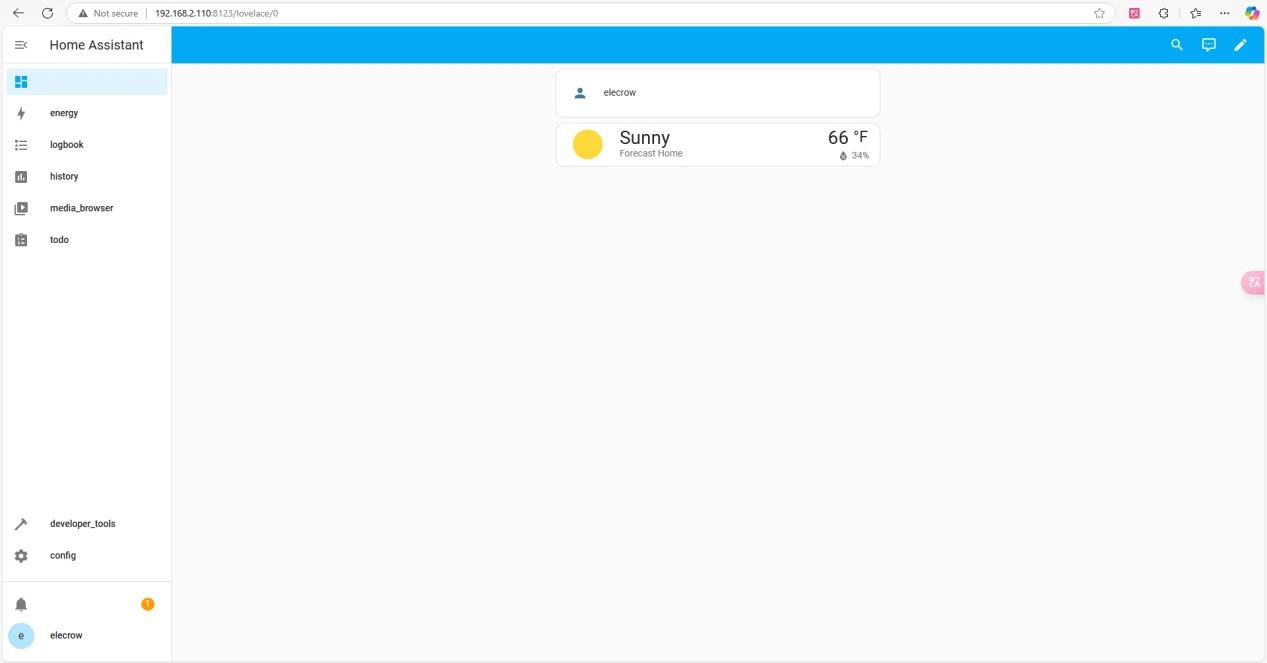
Note:The Raspberry Pi must be connected to a screen to view information. Once everything is ready, power on the Raspberry Pi and wait for it to load. The screen will display the following image.
(You need to connect a display screen to the Raspberry Pi in order to see these information.)
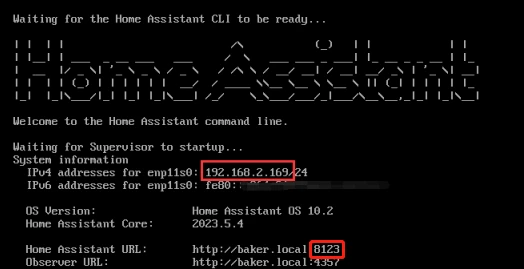
Remember the IP address and the Home Assistant URL.
In my case, the IP address is:192.168.50.11.
So I enter 192.168.50.11:8123 in the browser.
Next, start configuring the Home Assistant system.
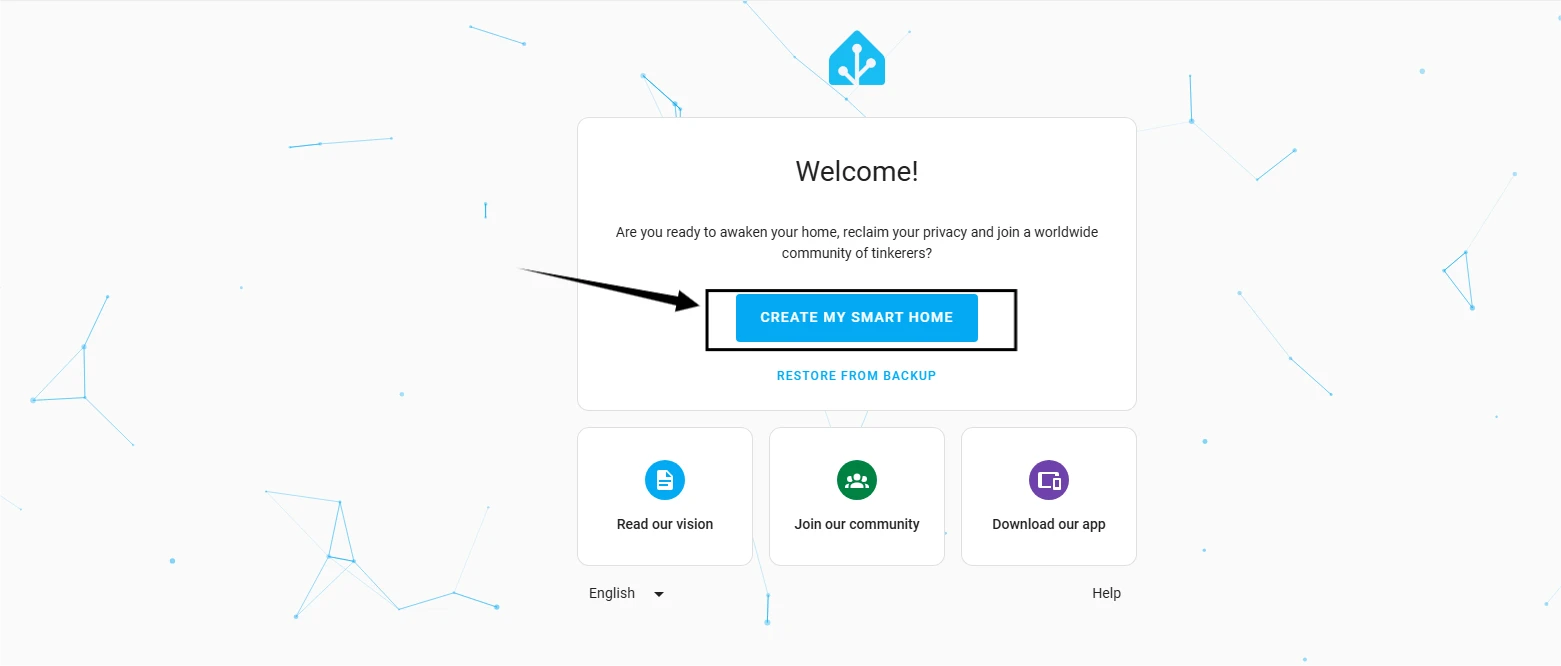
You can either manually set your location or allow it to be detected automatically.
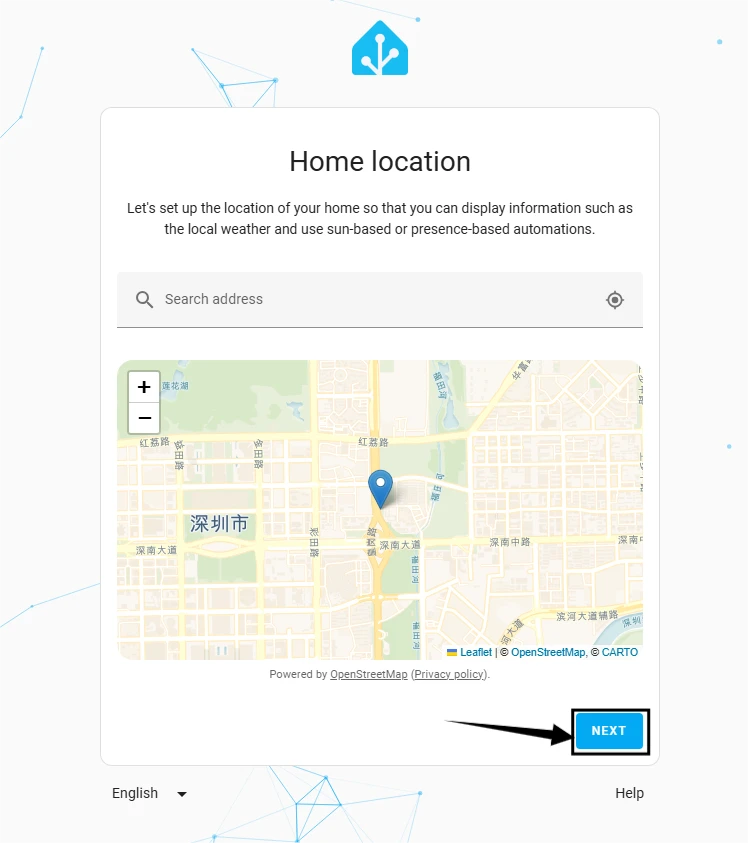
By default, click 'Next'.
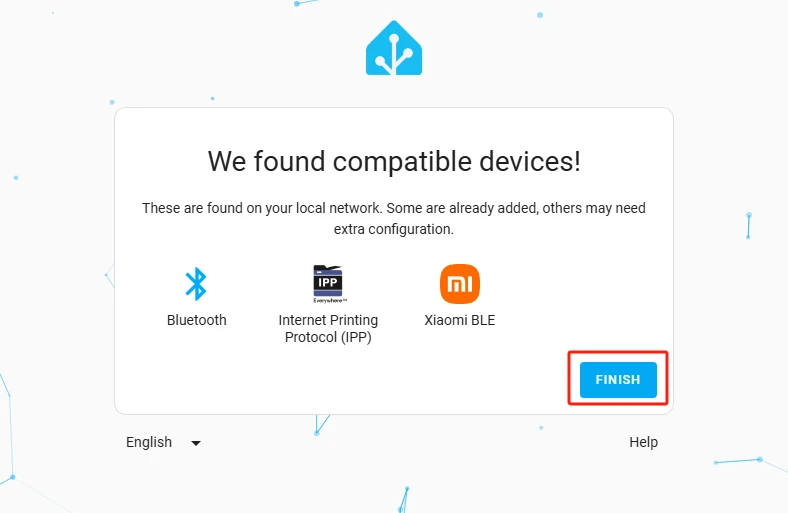
You can either add smart devices now or click Finish to add them later.
Here, we will add the devices later.
Add ESPHome
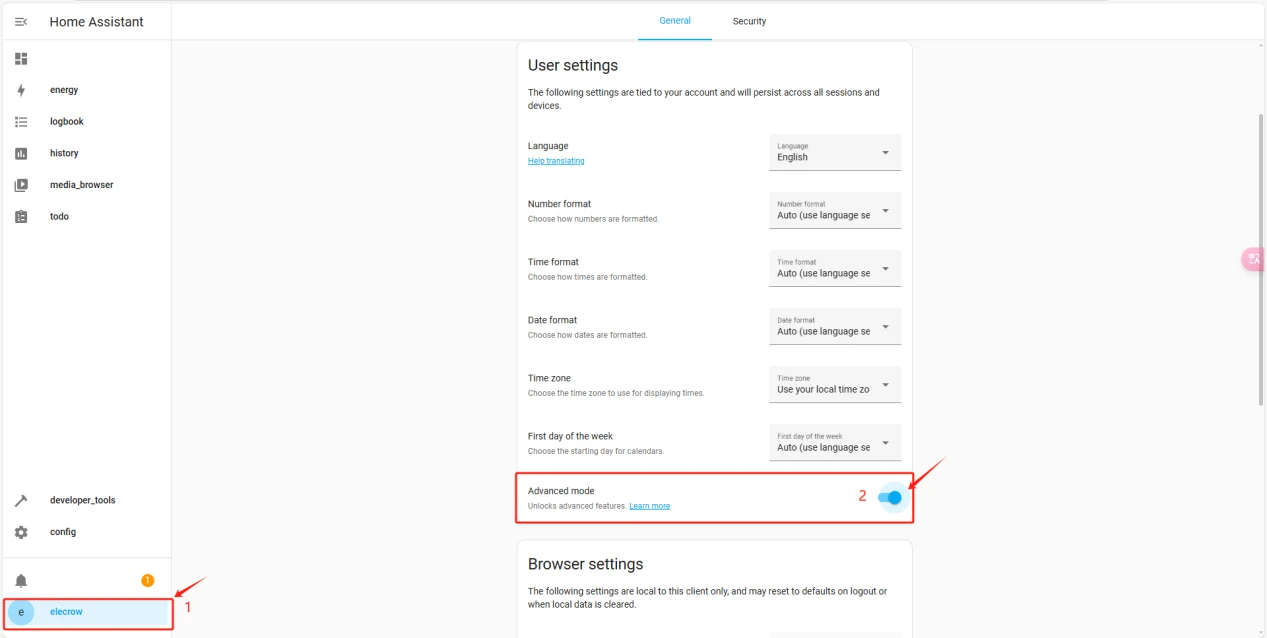
This will bring you to the main interface of Home Assistant.
Click on the username and enable "Advanced Mode."
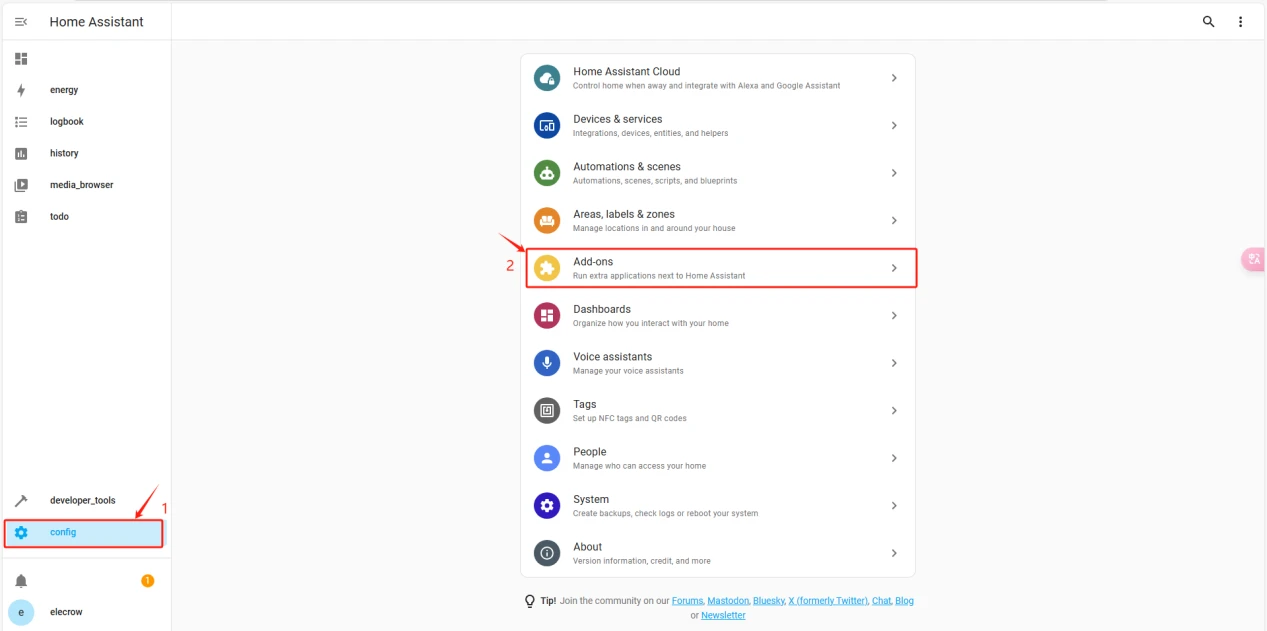
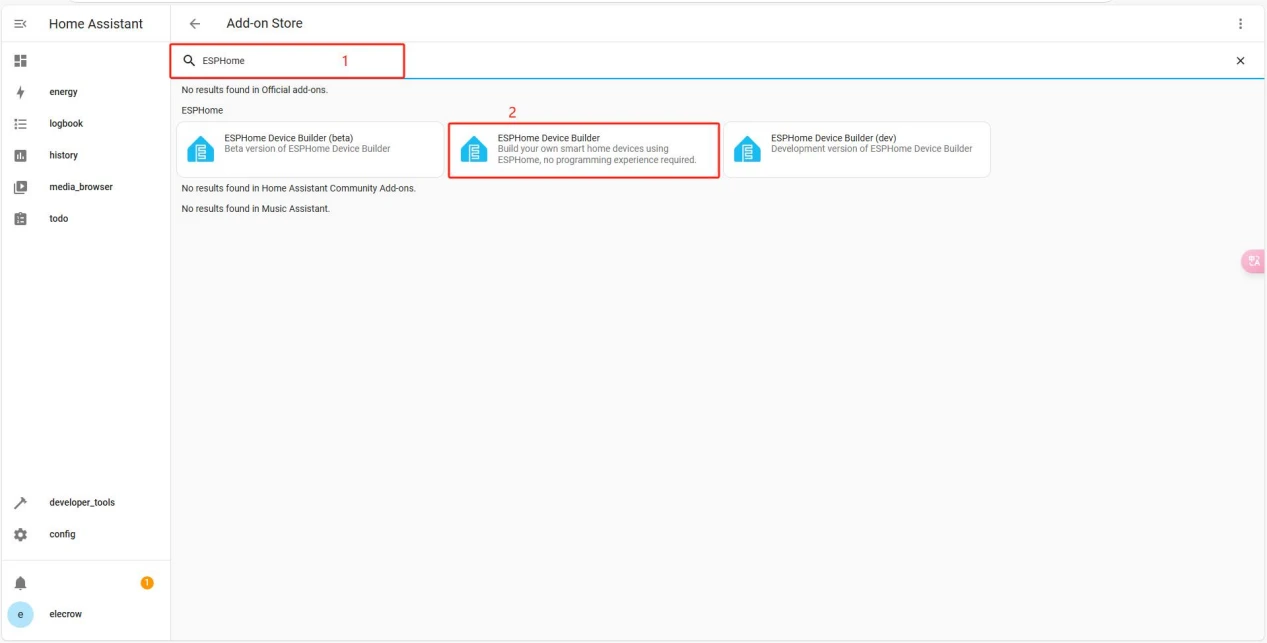
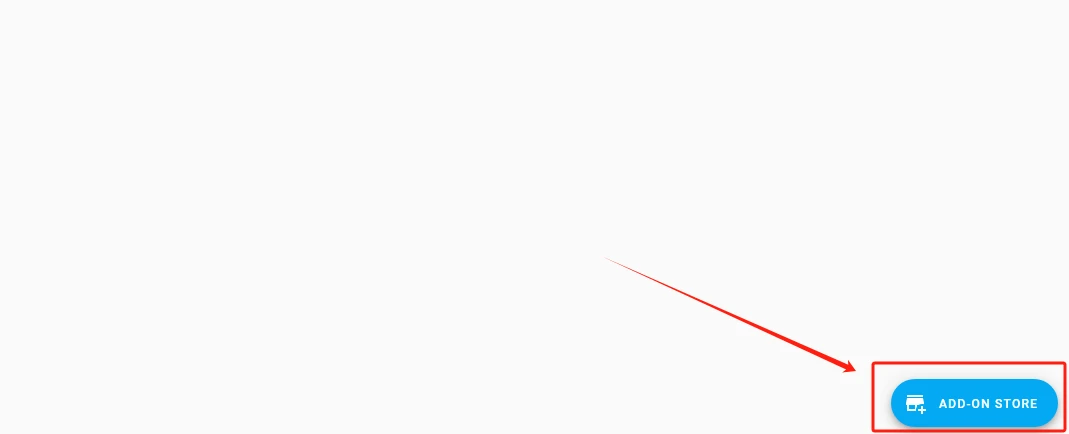
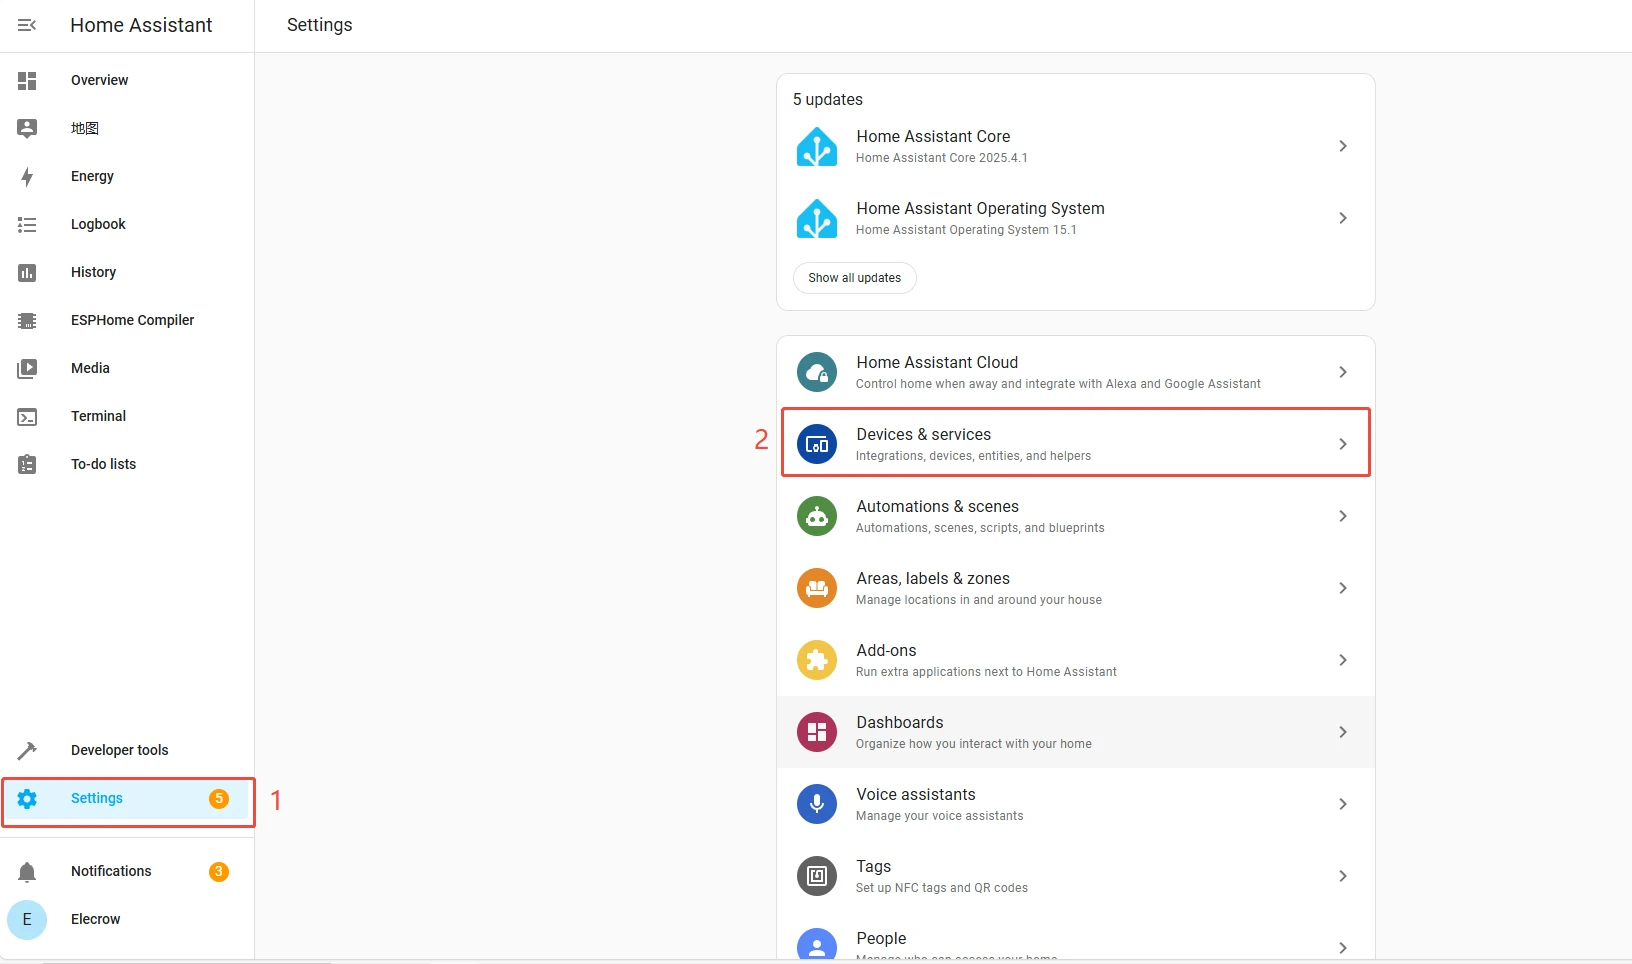
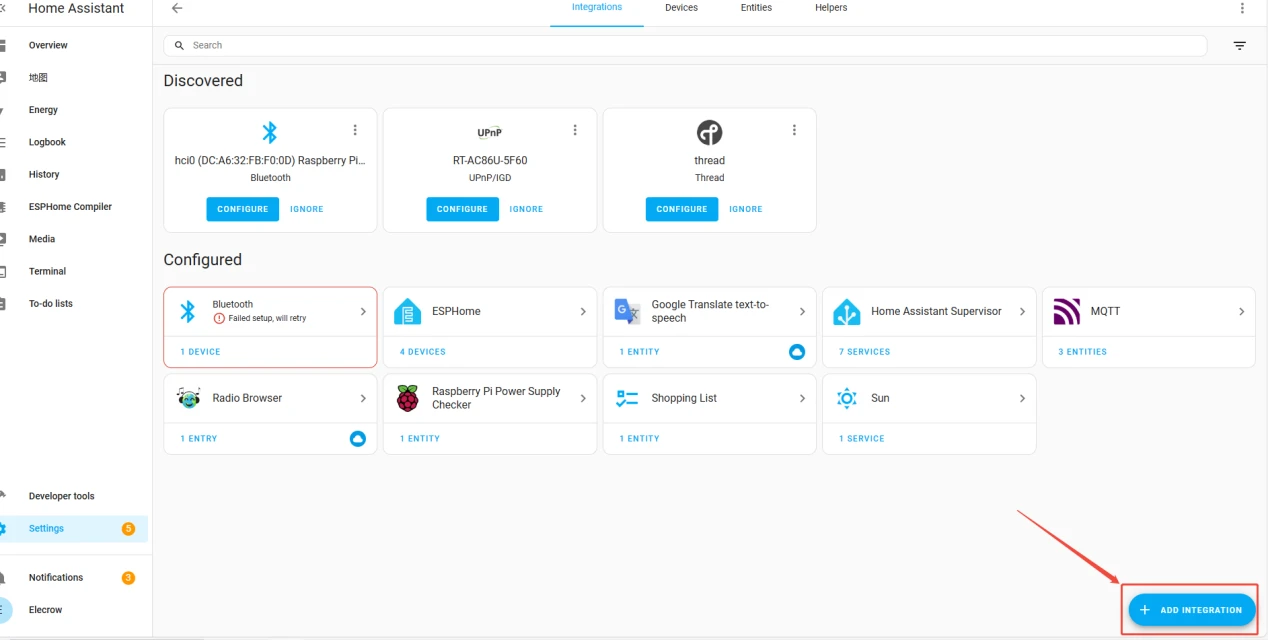
Click on "Settings" and then "Add-ons."
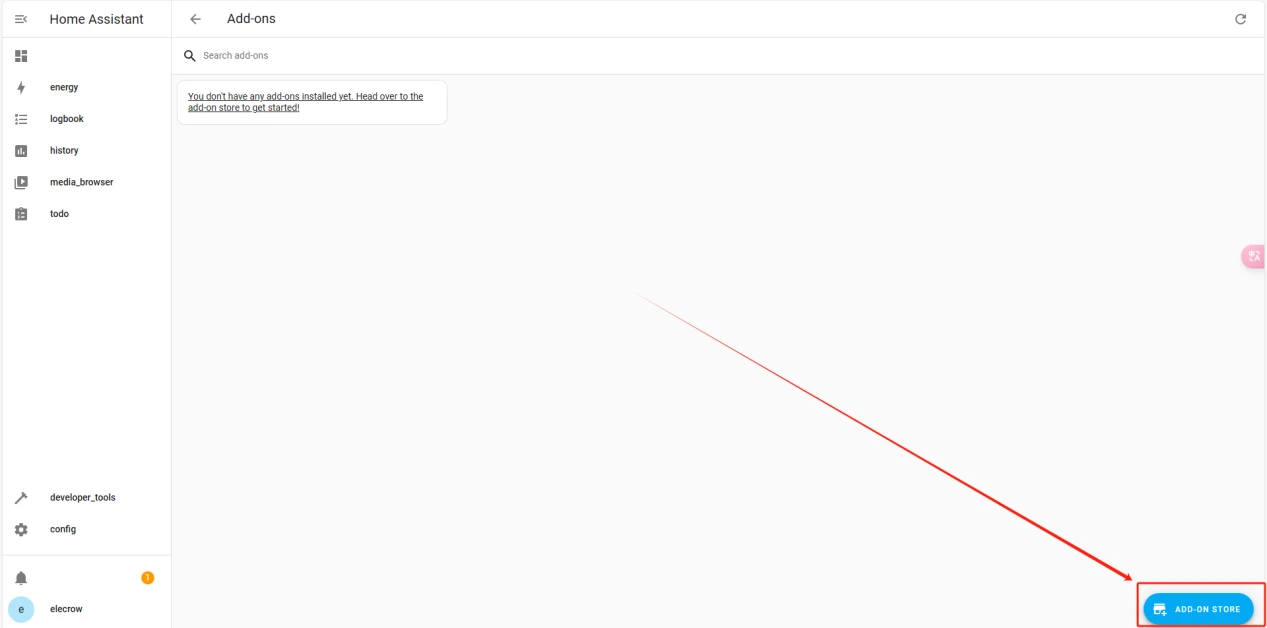
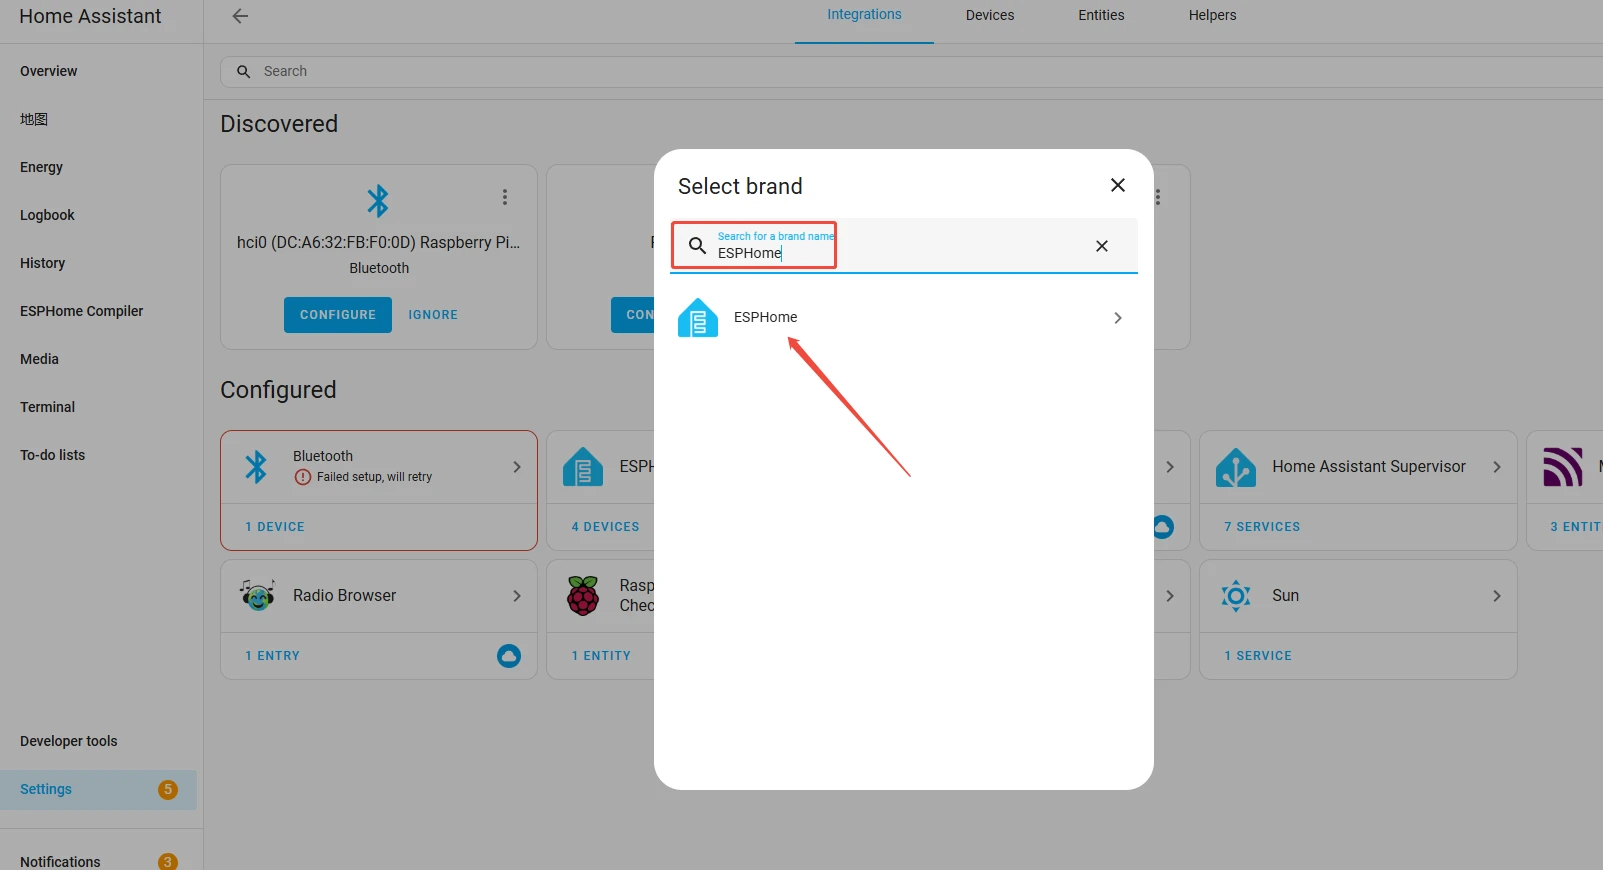
Click on "ADD-ON STORE" and type ESPHome to install it.
The installation is in progress, as shown in the image.

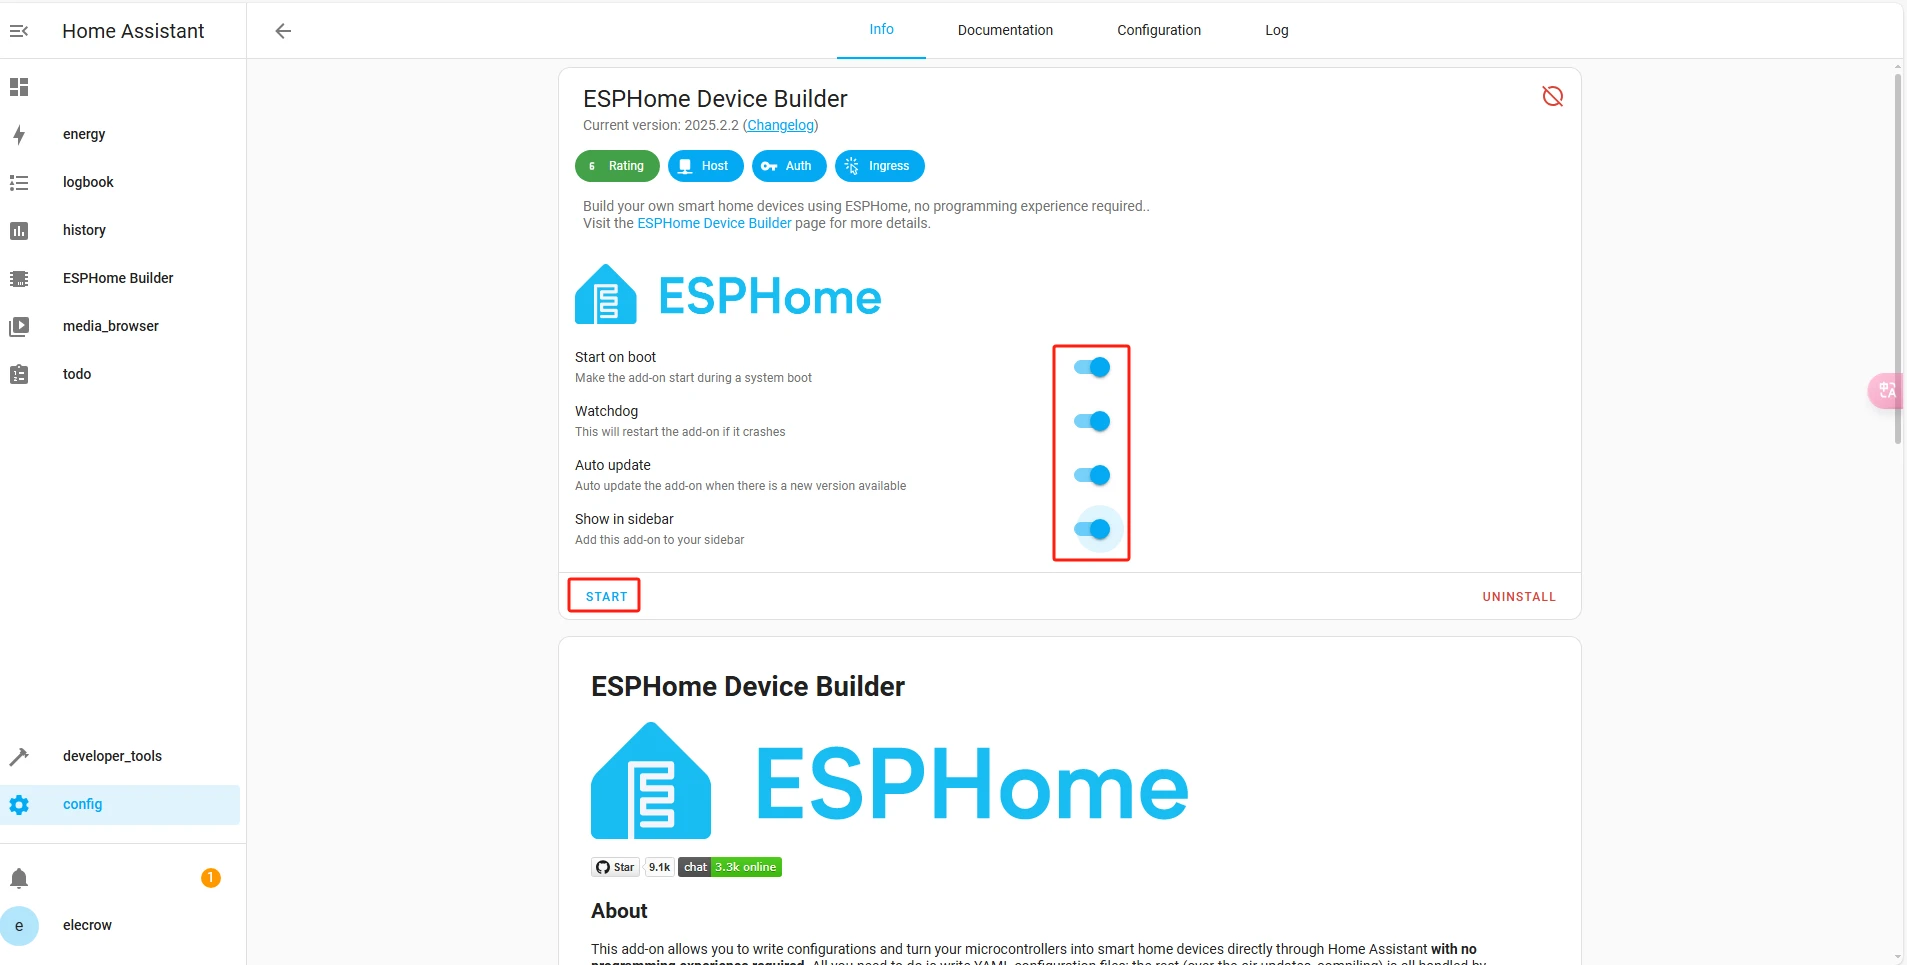
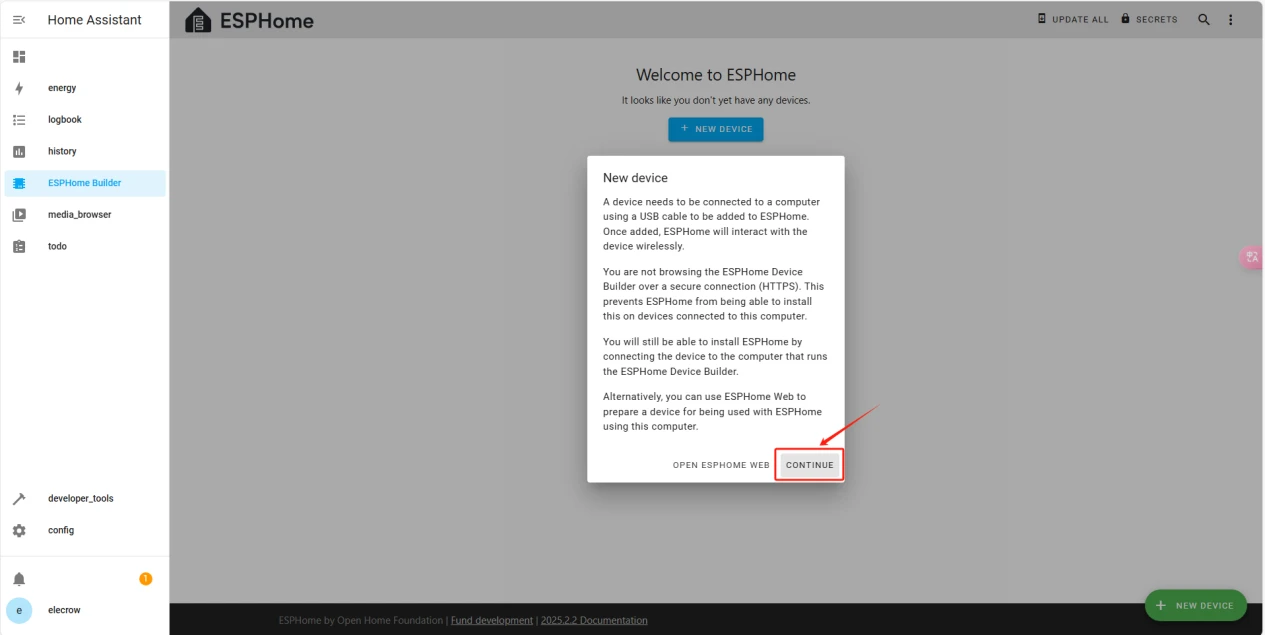
Once the installation is complete, we can start adding devices. Click on + New Device->Continue.
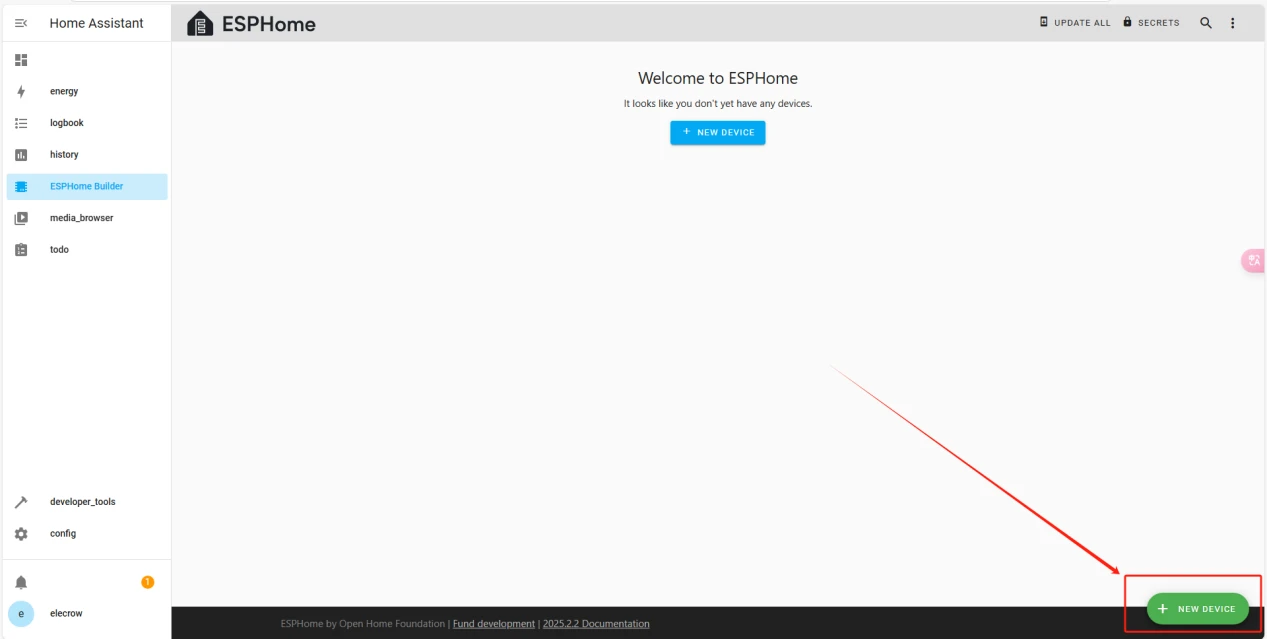
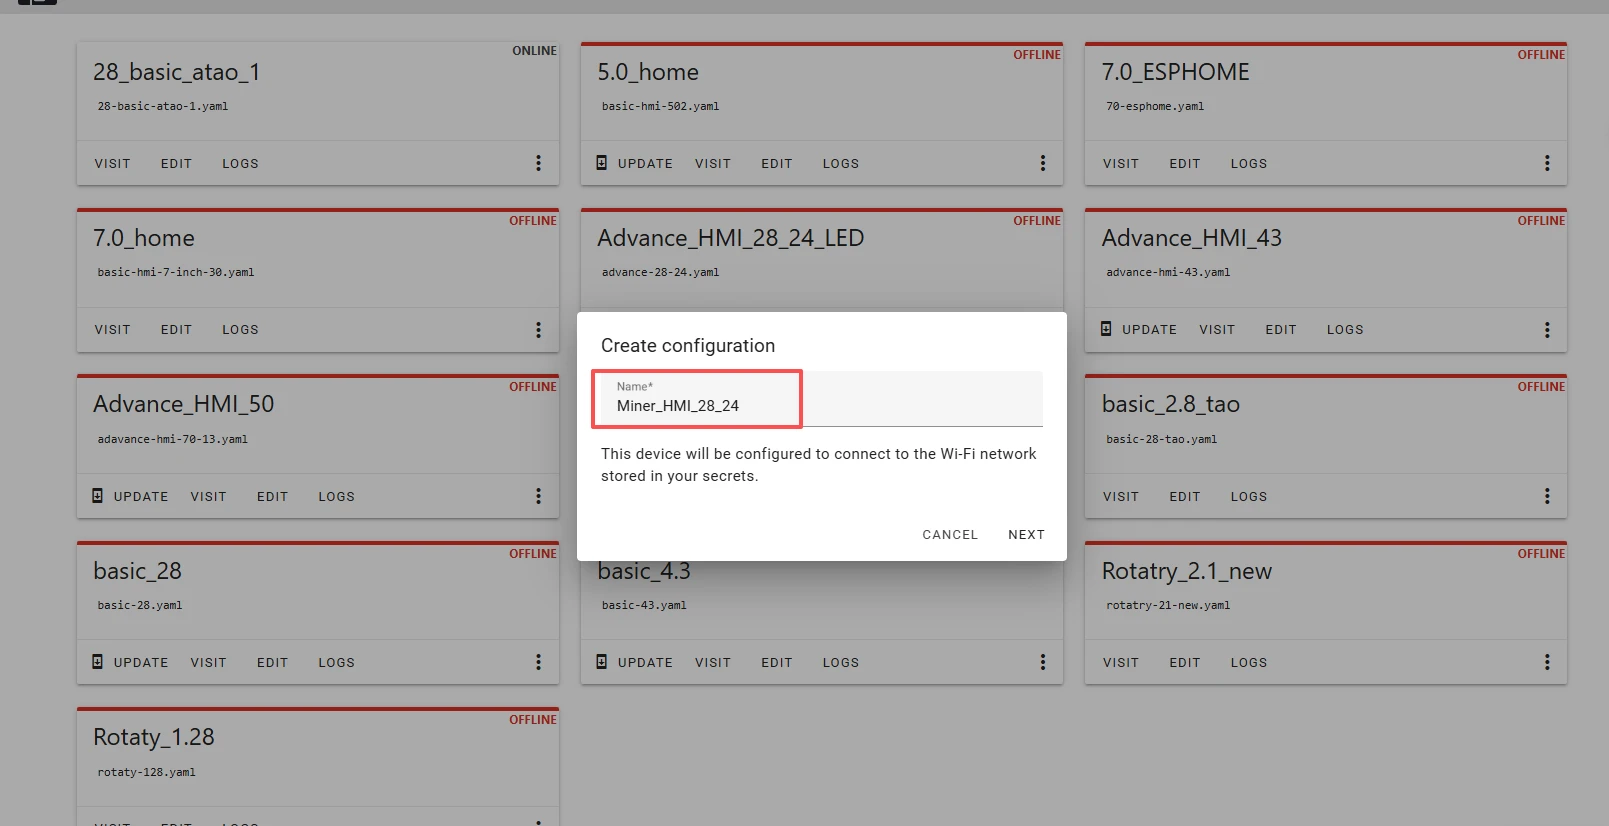
Enter a name and click Next.
(You can use any custom name. Do not include any strange symbols such as @, #, etc.)
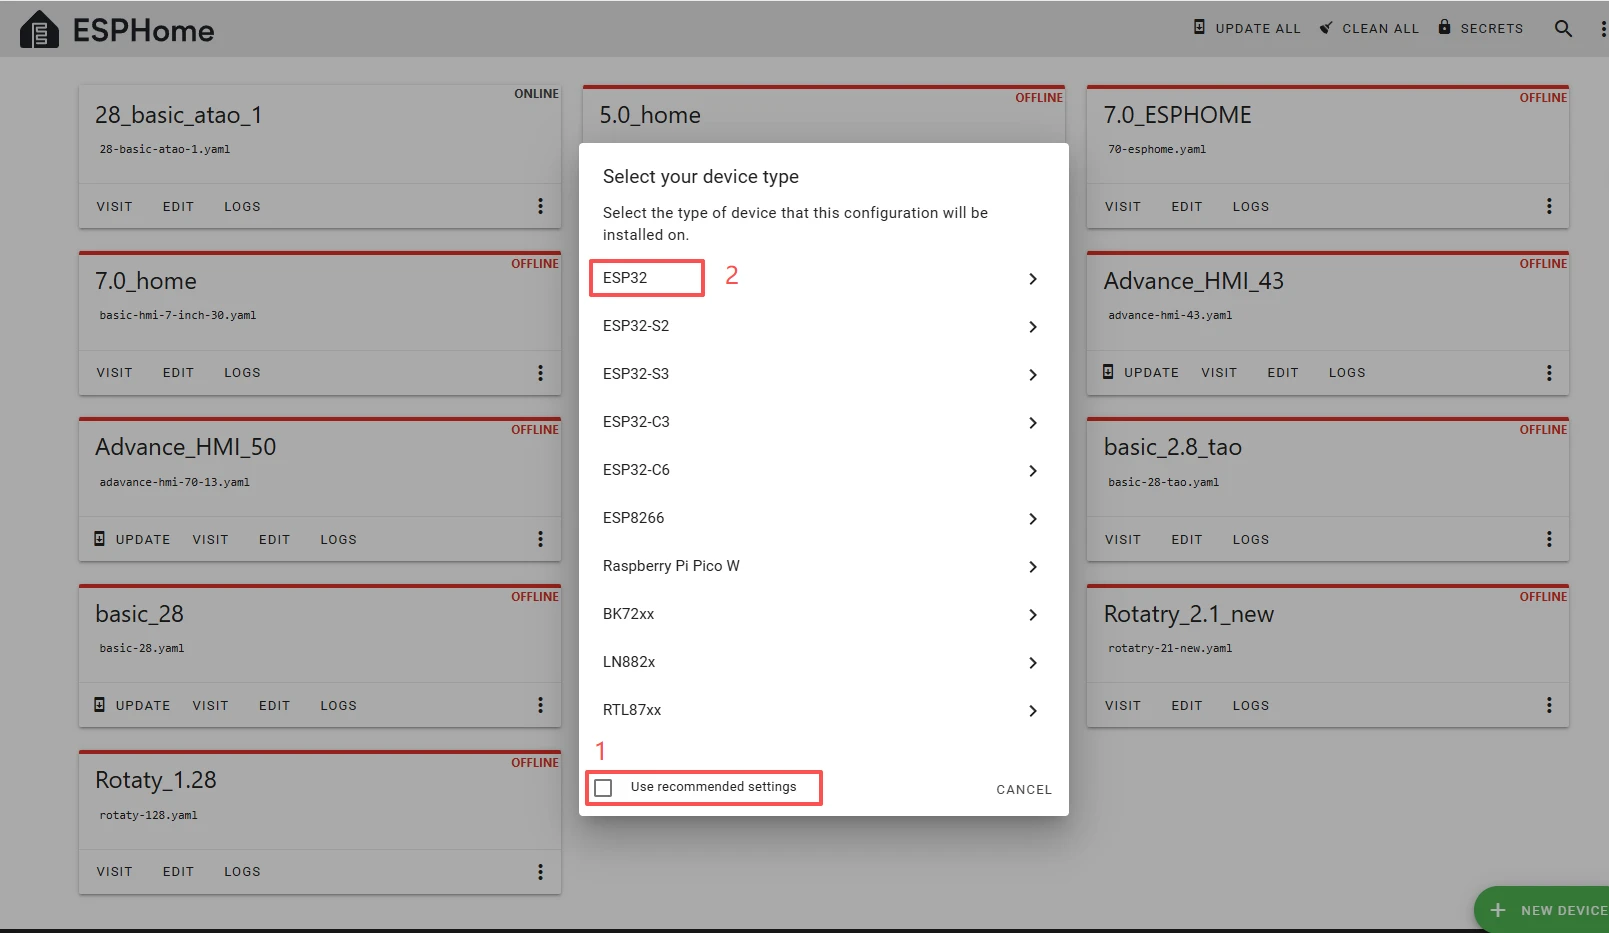
Here, do not check "Use recommended settings."Select the main chip of the Crowpanel ESP32 Miner HMI Display,ESP32.
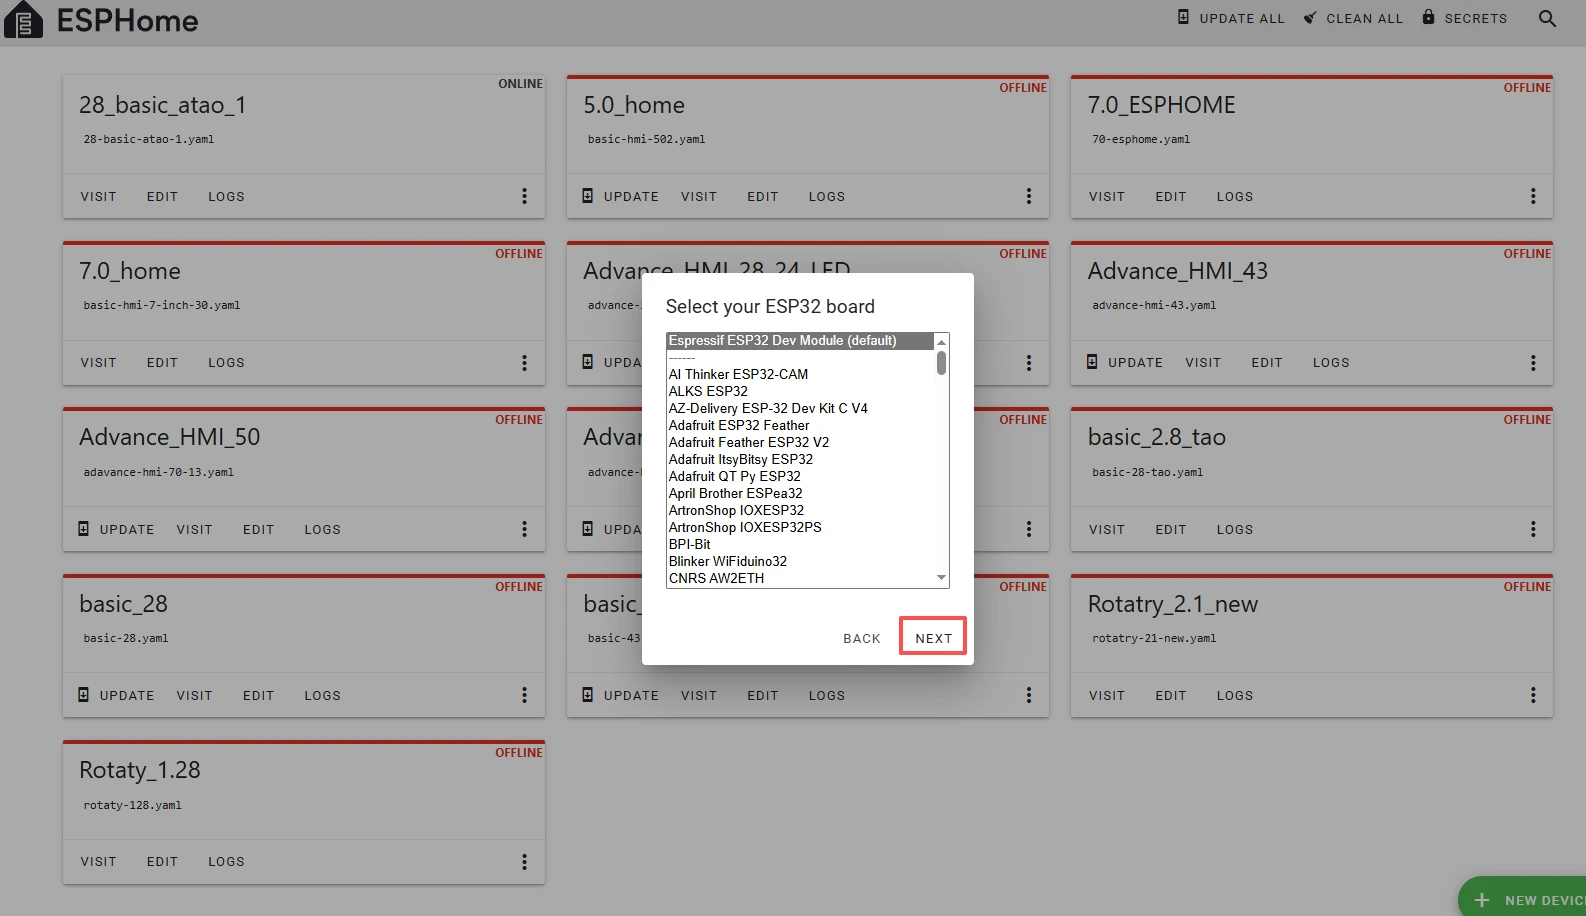
Next, choose any option (since we will replace it in the code later).
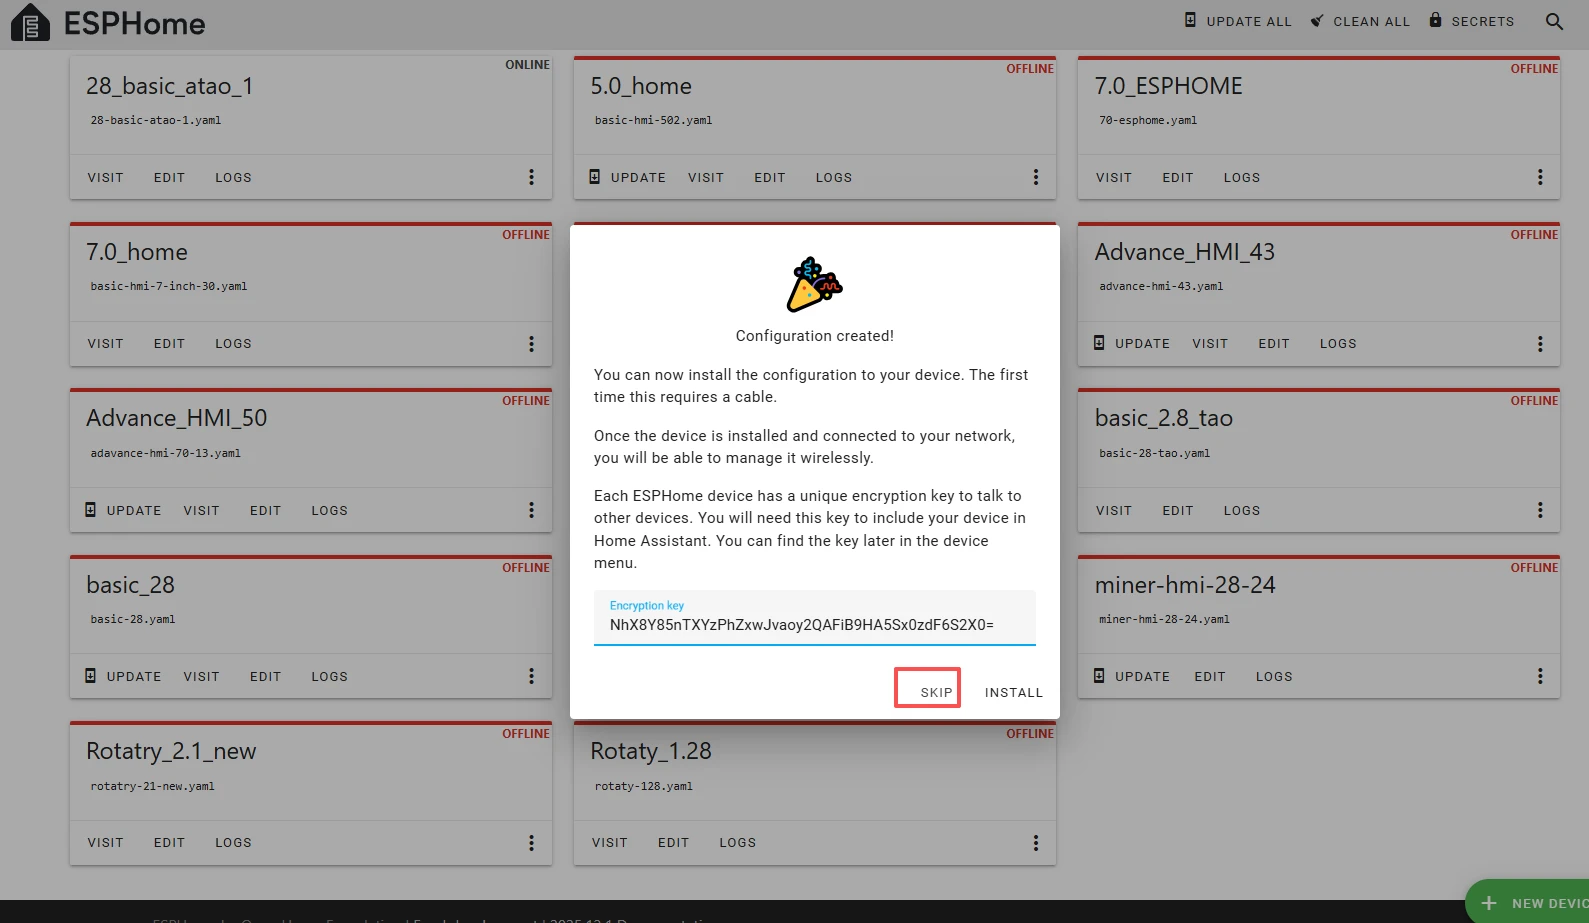
Here, click "SKIP".
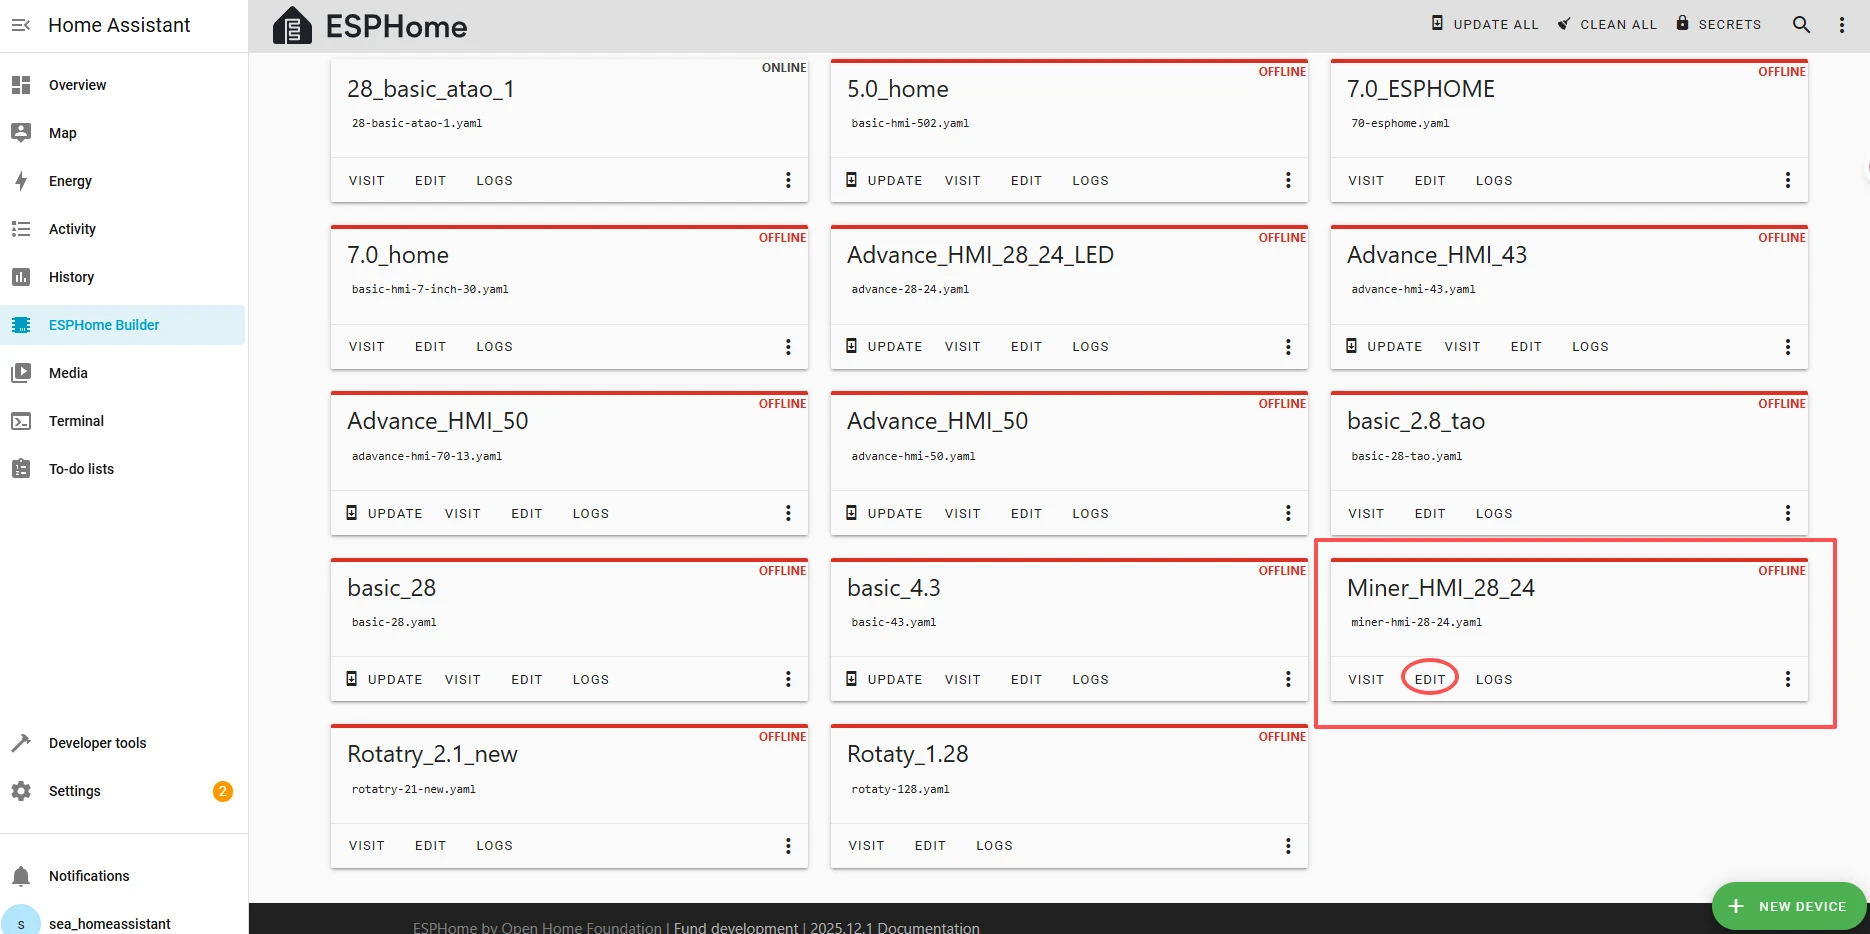
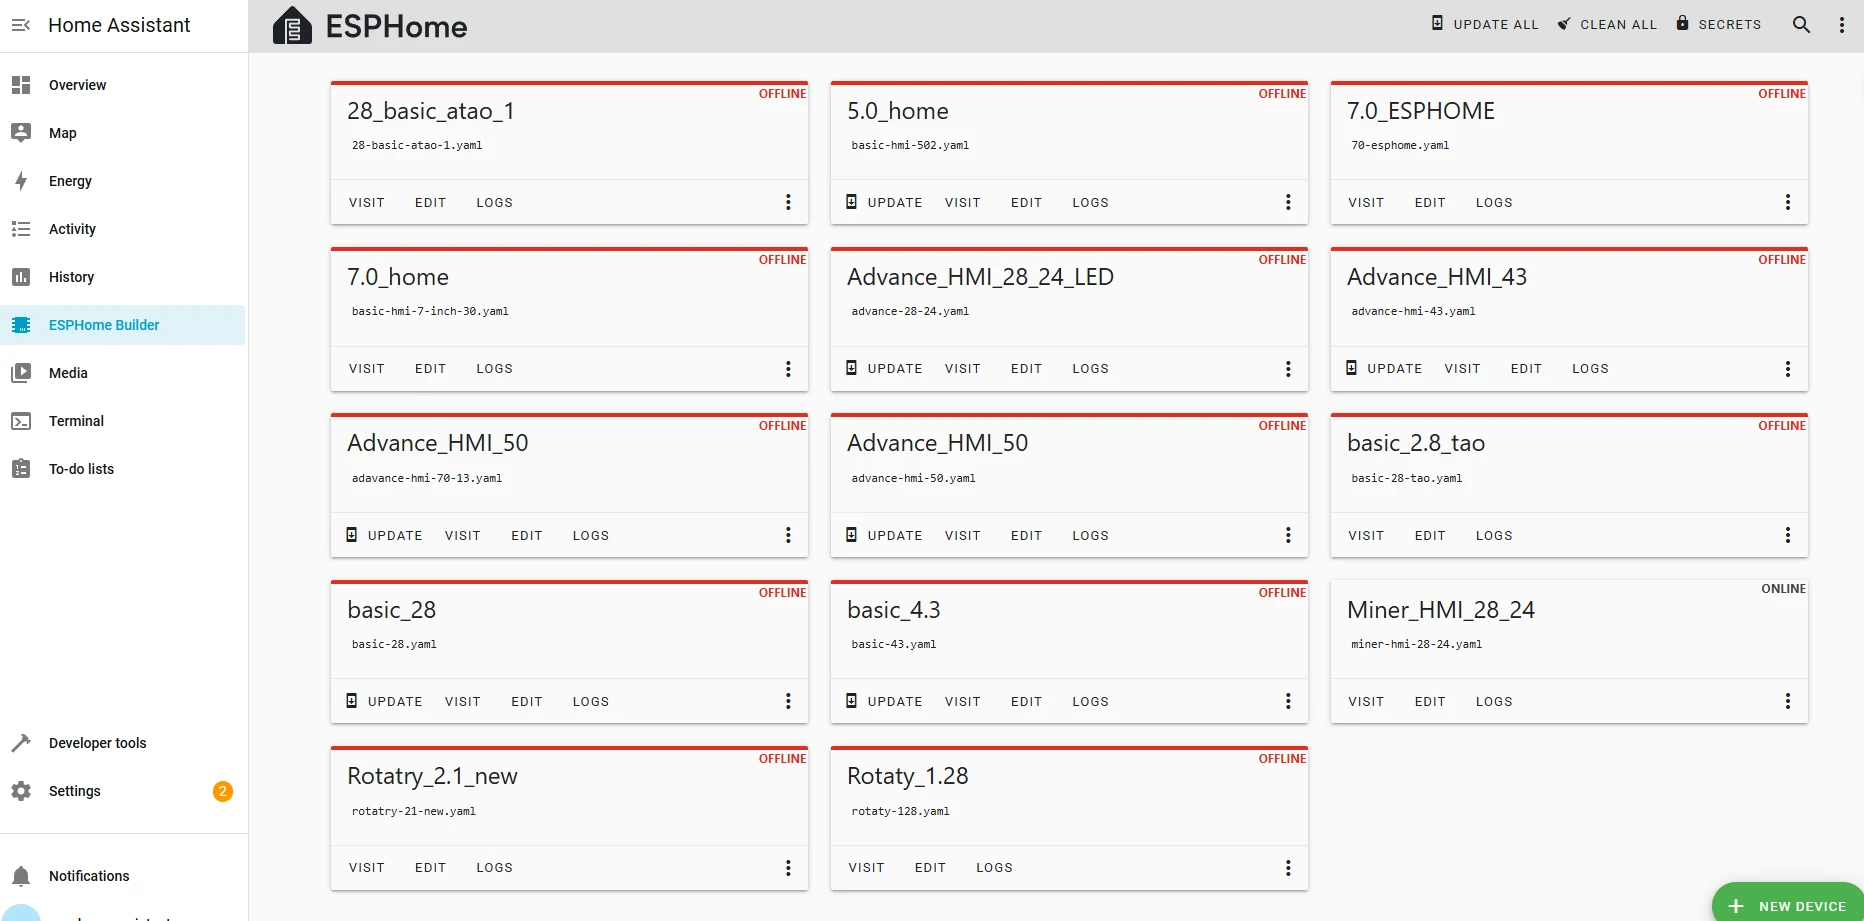
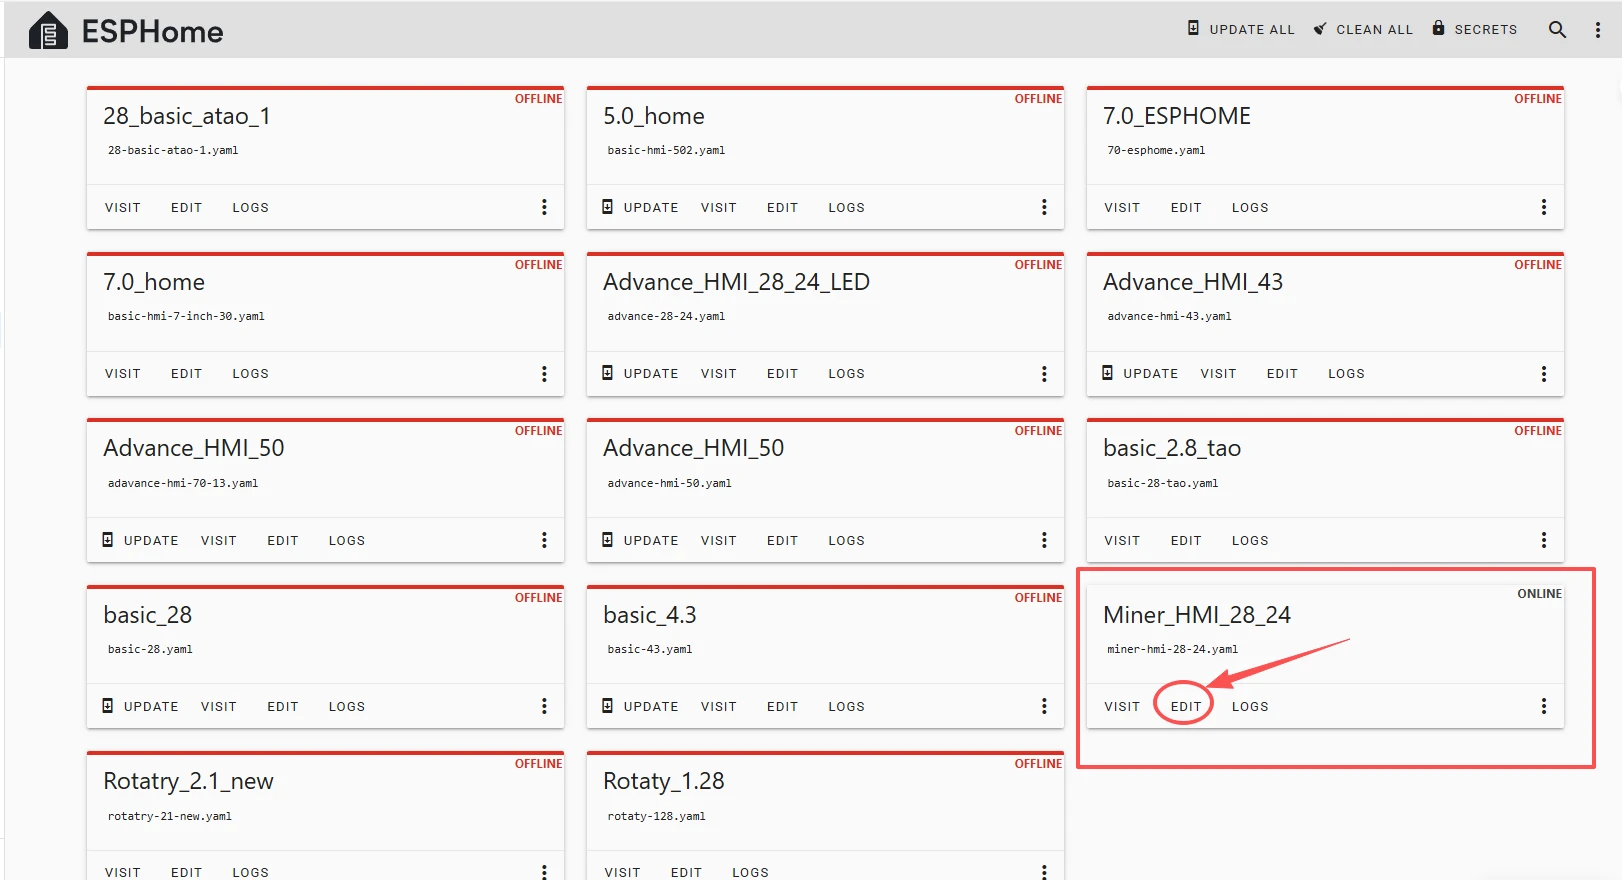
Then, return to the main interface, find the Miner_HMI_28_24 you just created, click "EDIT", and enter the code editor.
This code is automatically generated based on the previous steps.
Next, we will make replacements in it, which will help optimize the code for more efficient operation.
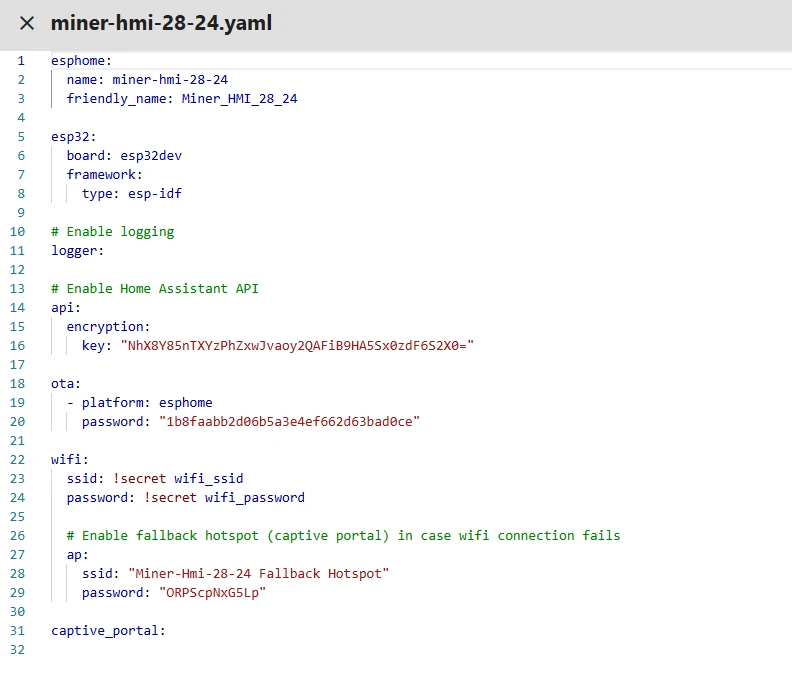
Next, you can replace the relevant content in esphome and ESP32 as needed.
You can click  to download the complete project we provided.
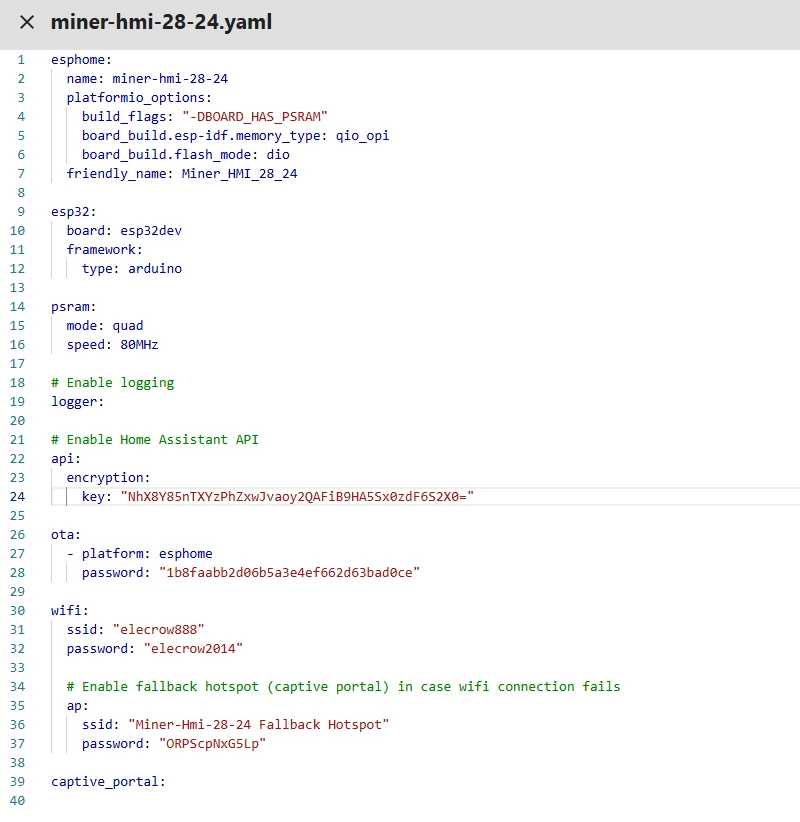
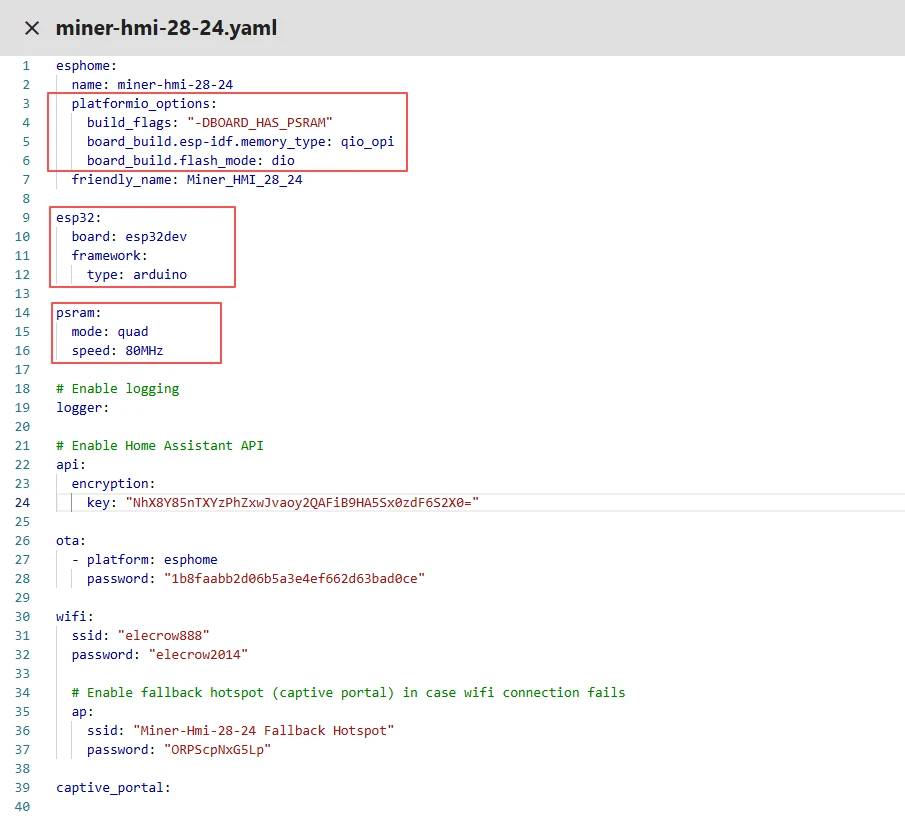
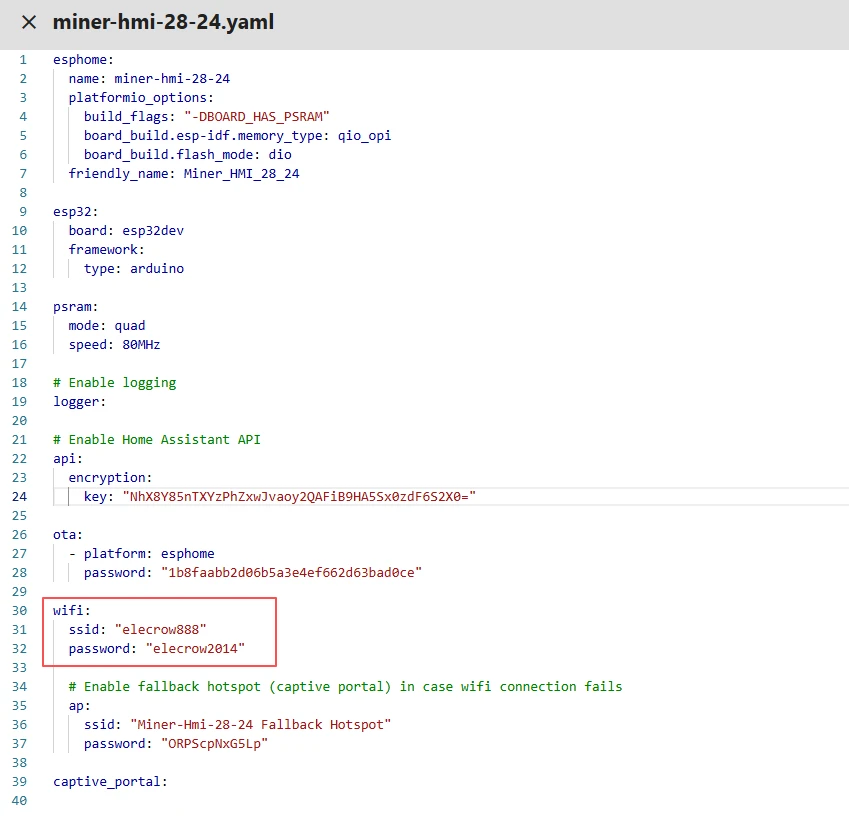
Then, based on your existing code, follow the format shown in the figure to add or replace these codes.
(Other configurations remain unchanged)
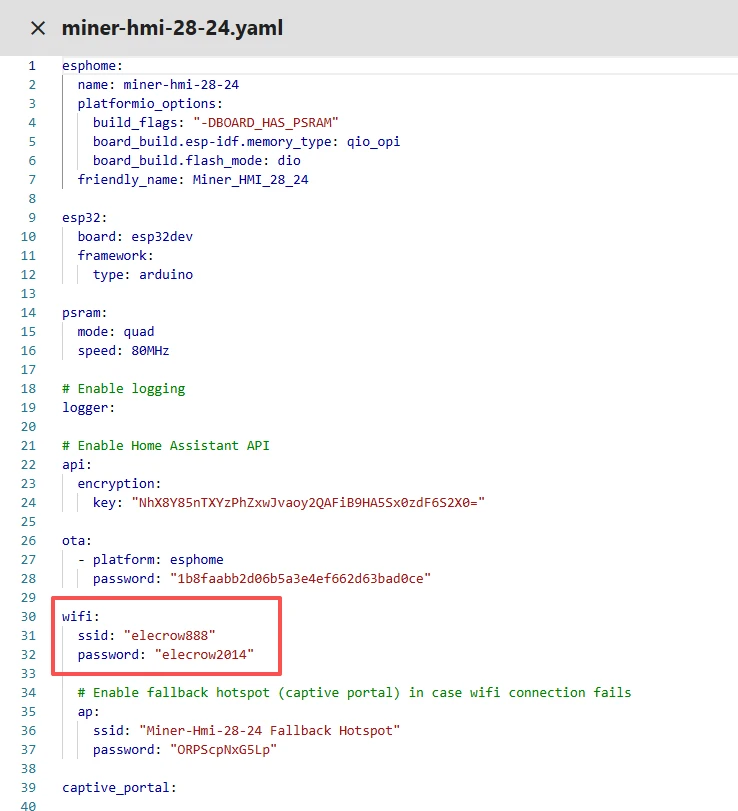
Remember to replace your own Wi-Fi name and password.
Note: This Wi-Fi connection must be in the same local network as your computer and Raspberry Pi!
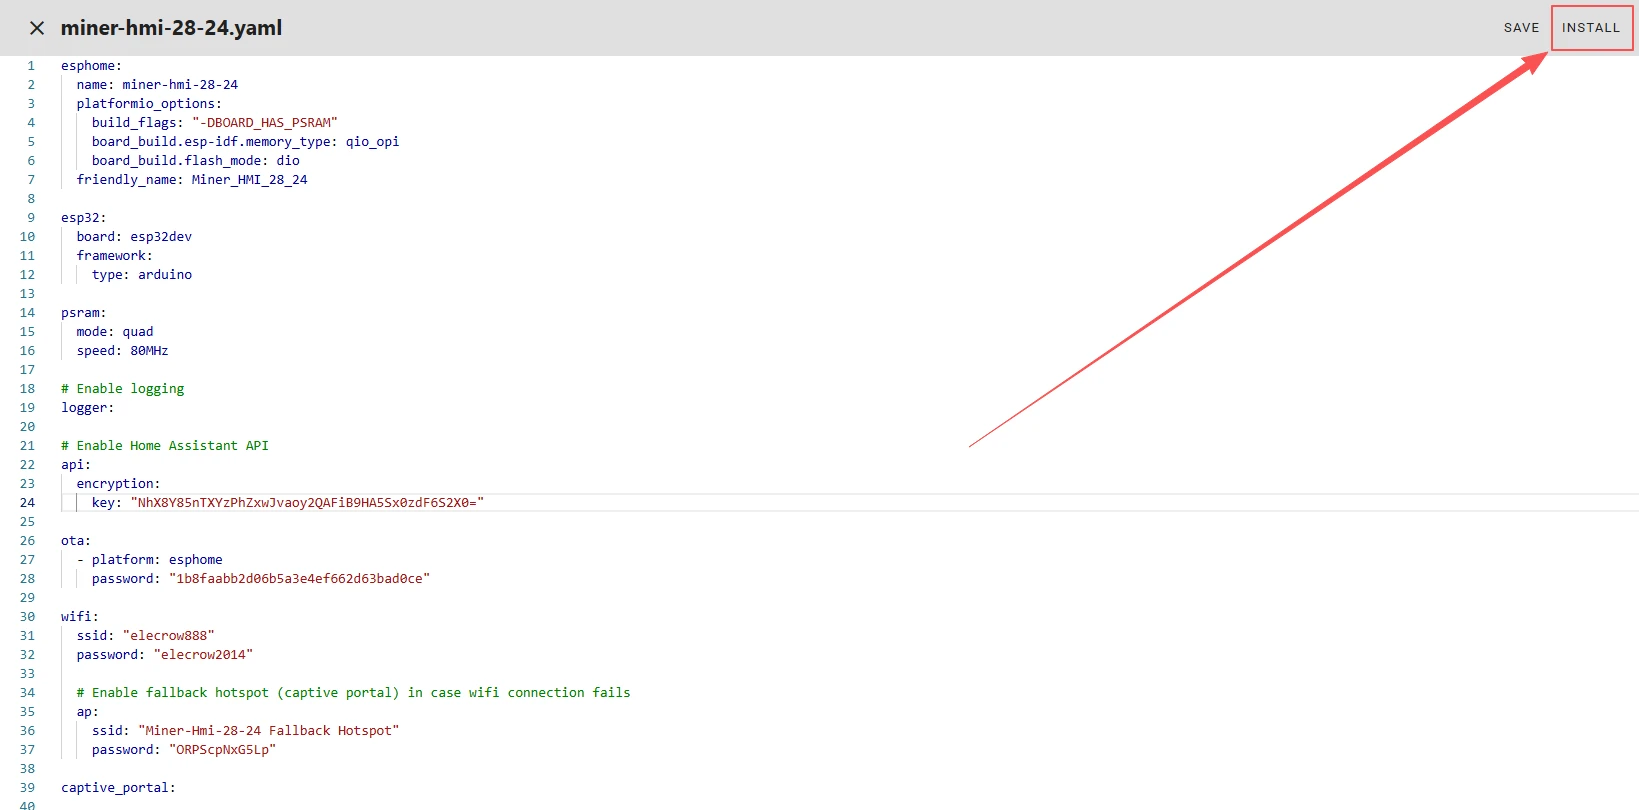
Once the code replacement is complete, click "INSTALL" in the top right corner.
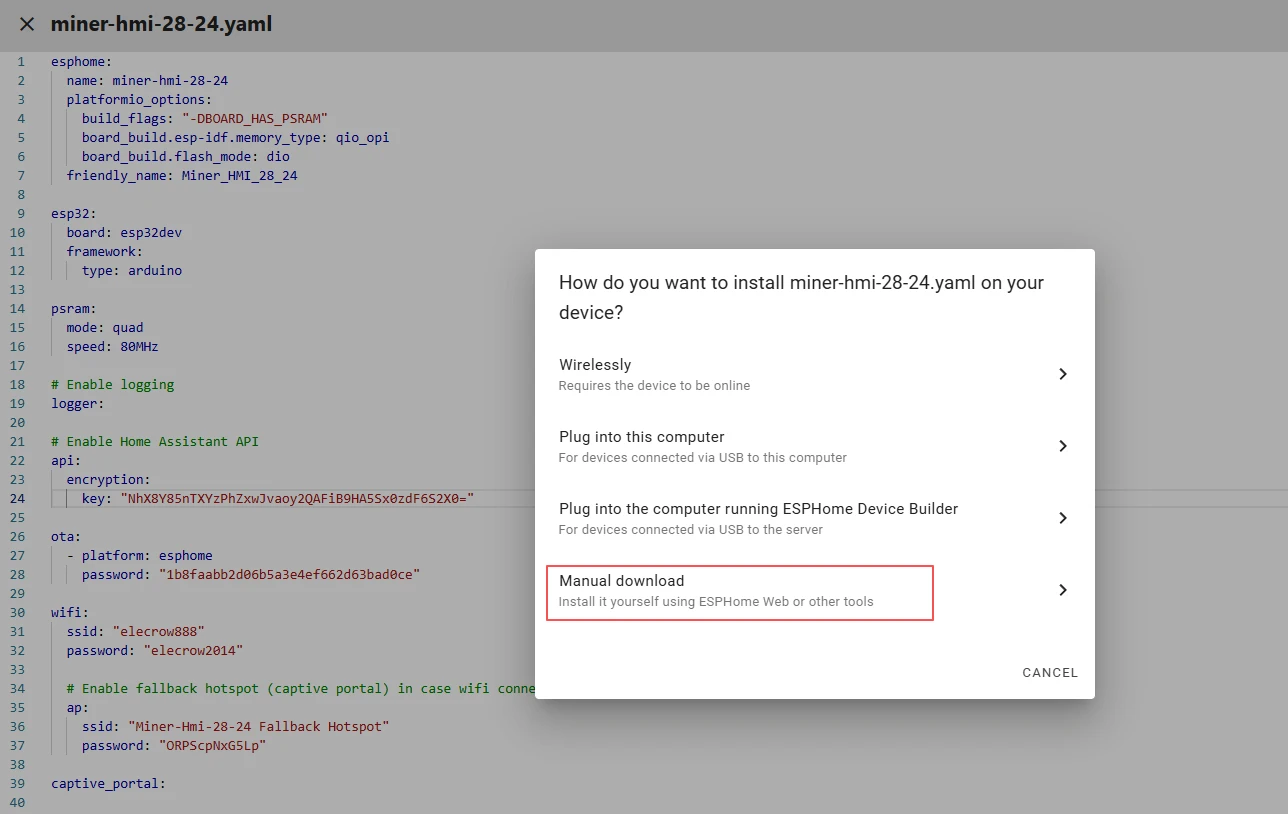
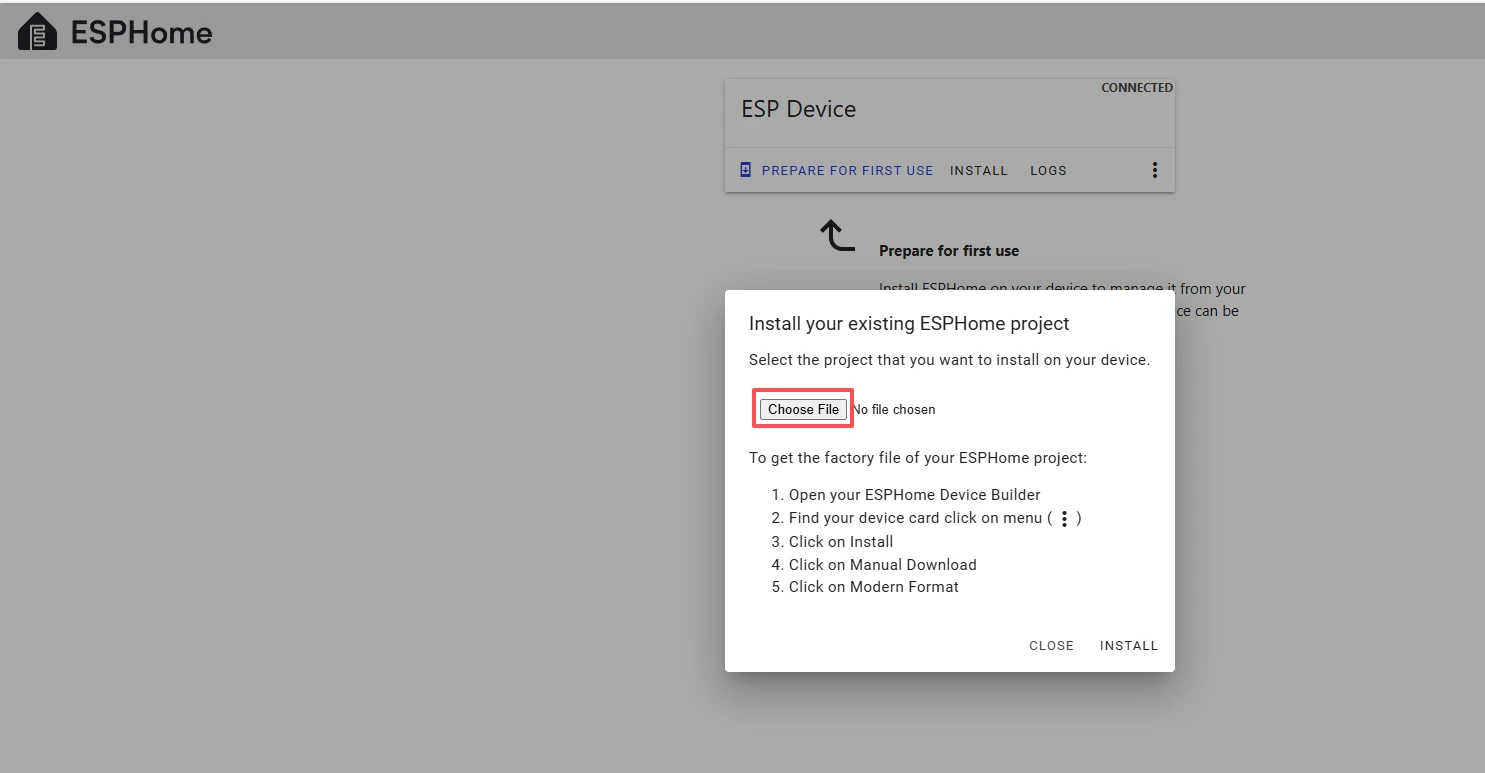
Select "Manual download".
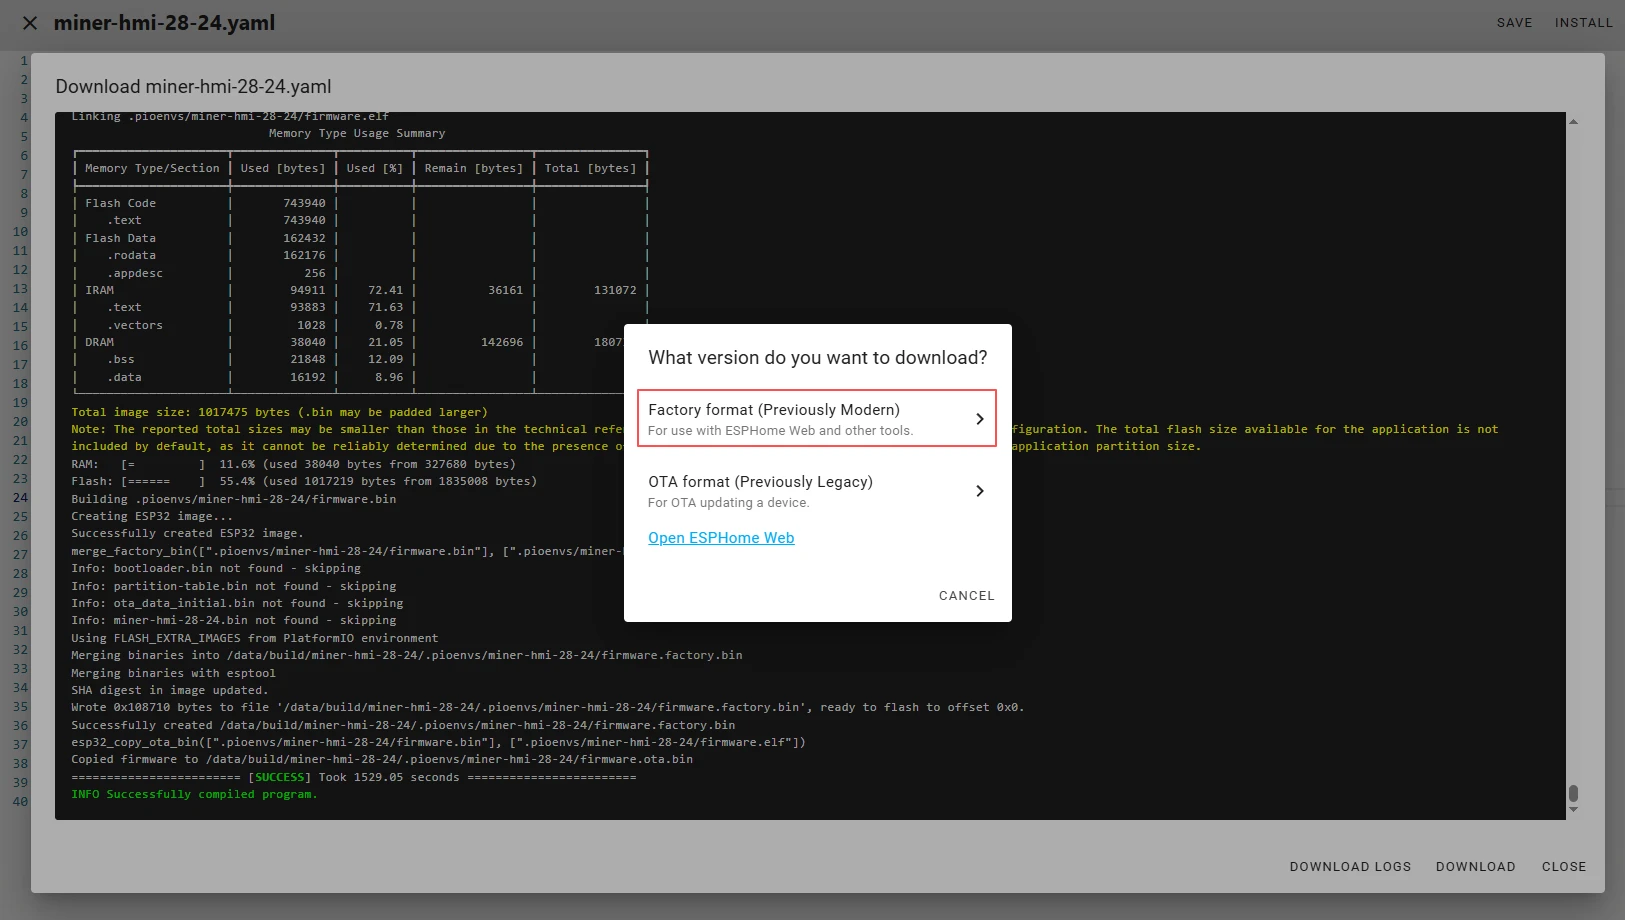
Wait for a few minutes until the installation is complete.
Then, select "Factory format".
Once the download is complete, you will see the .bin file.
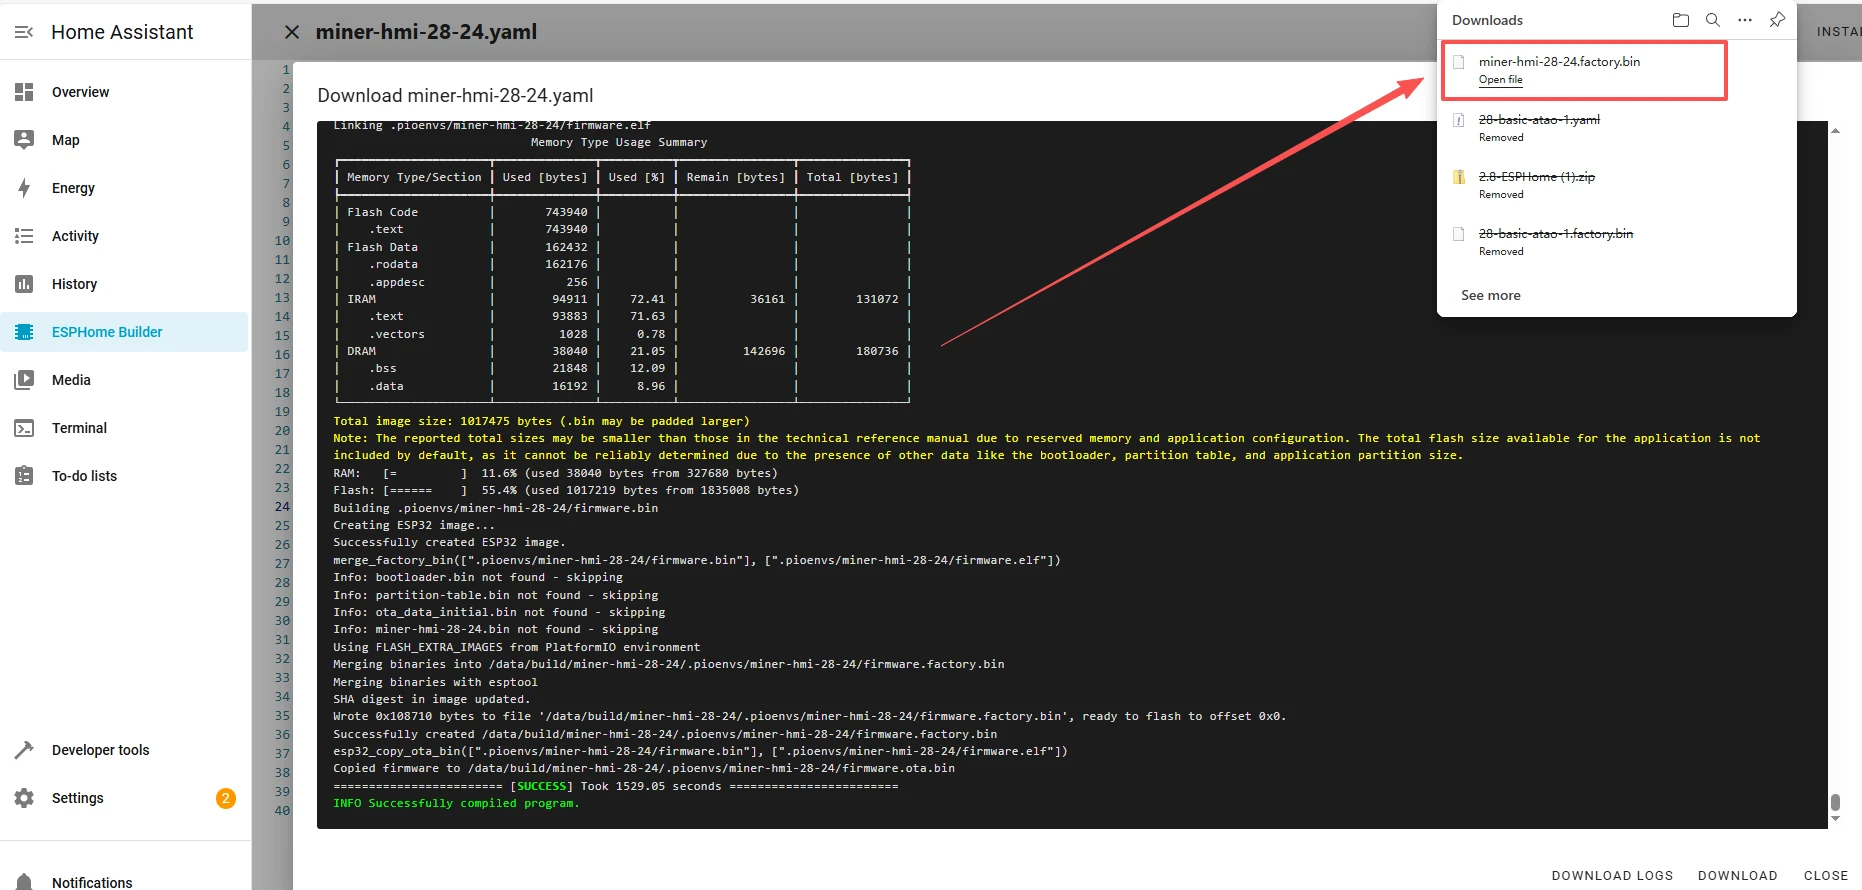
Remember the path of this .bin file.
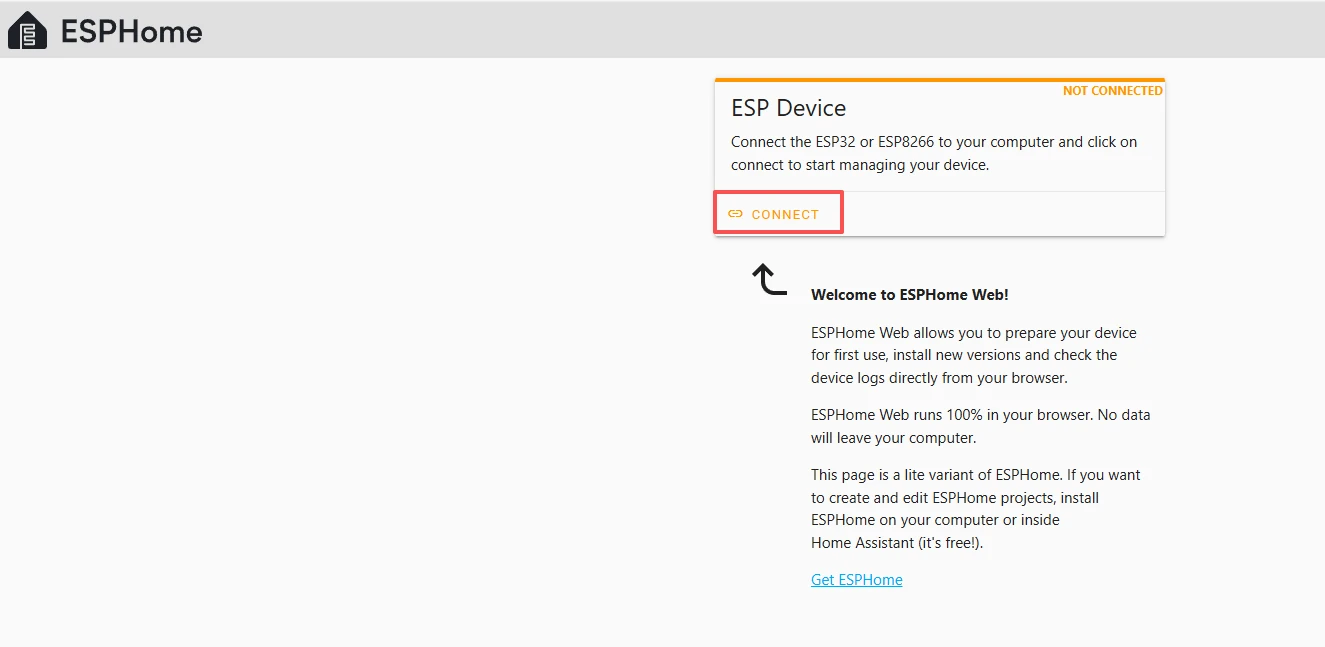
Open the following website:https://web.esphome.io/?dashboard_wizard
After opening this website, you will arrive at this interface:

Next, we will flash this .bin file into the Crowpanel ESP32 Miner HMI Display.
Connect the Crowpanel ESP32 Miner HMI Display to your computer.
Click "Connect".
select the COM port, and connect it.
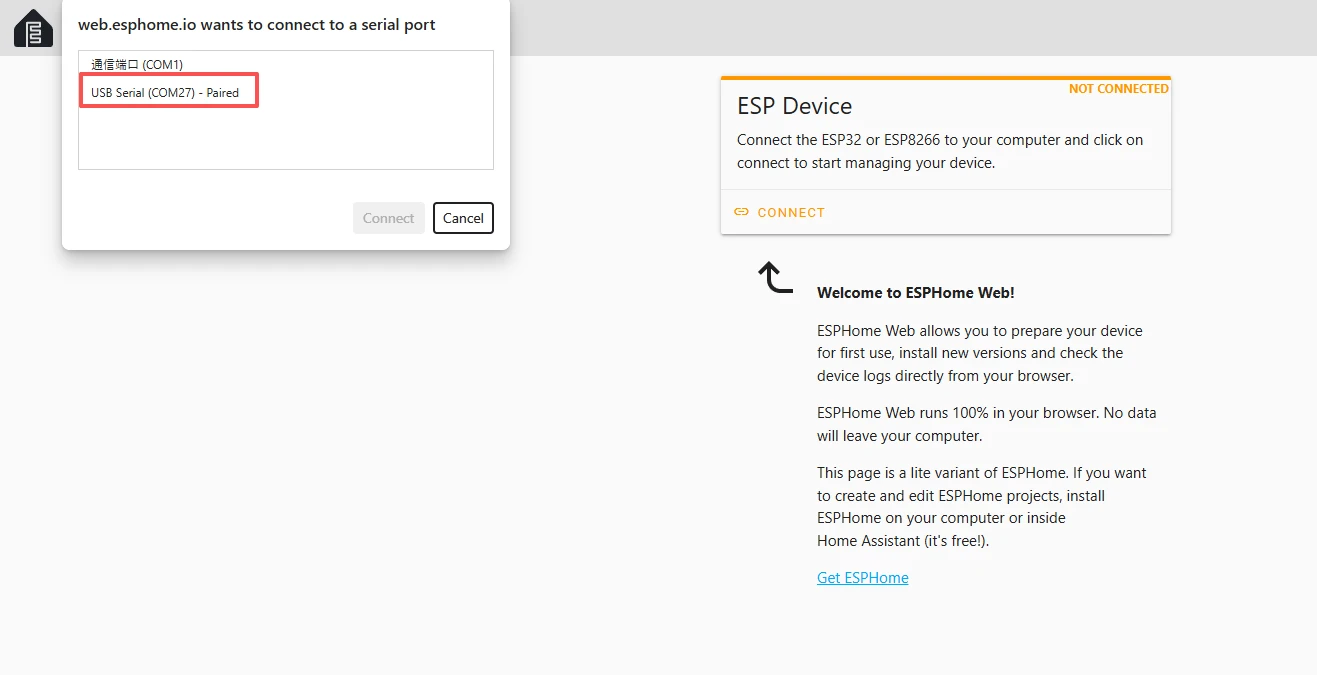
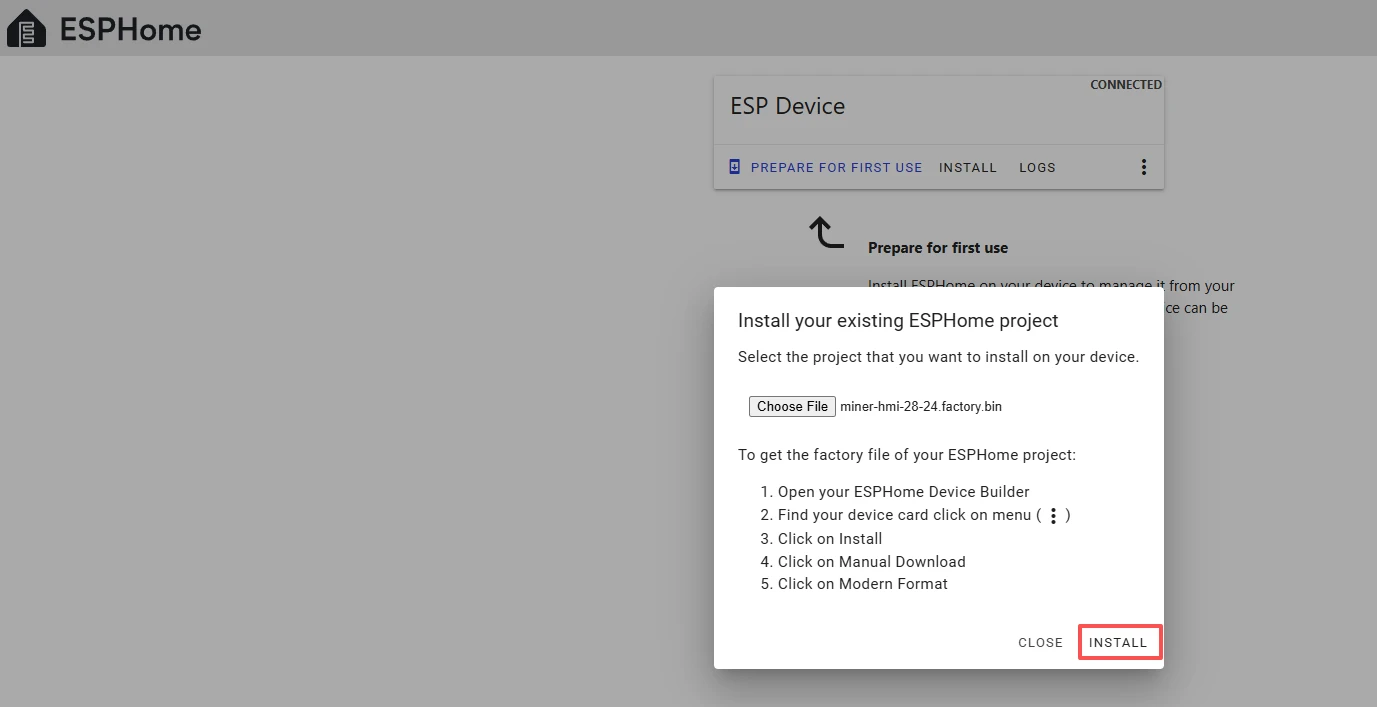
After connecting the Crowpanel ESP32 Miner HMI Display, click "Install".
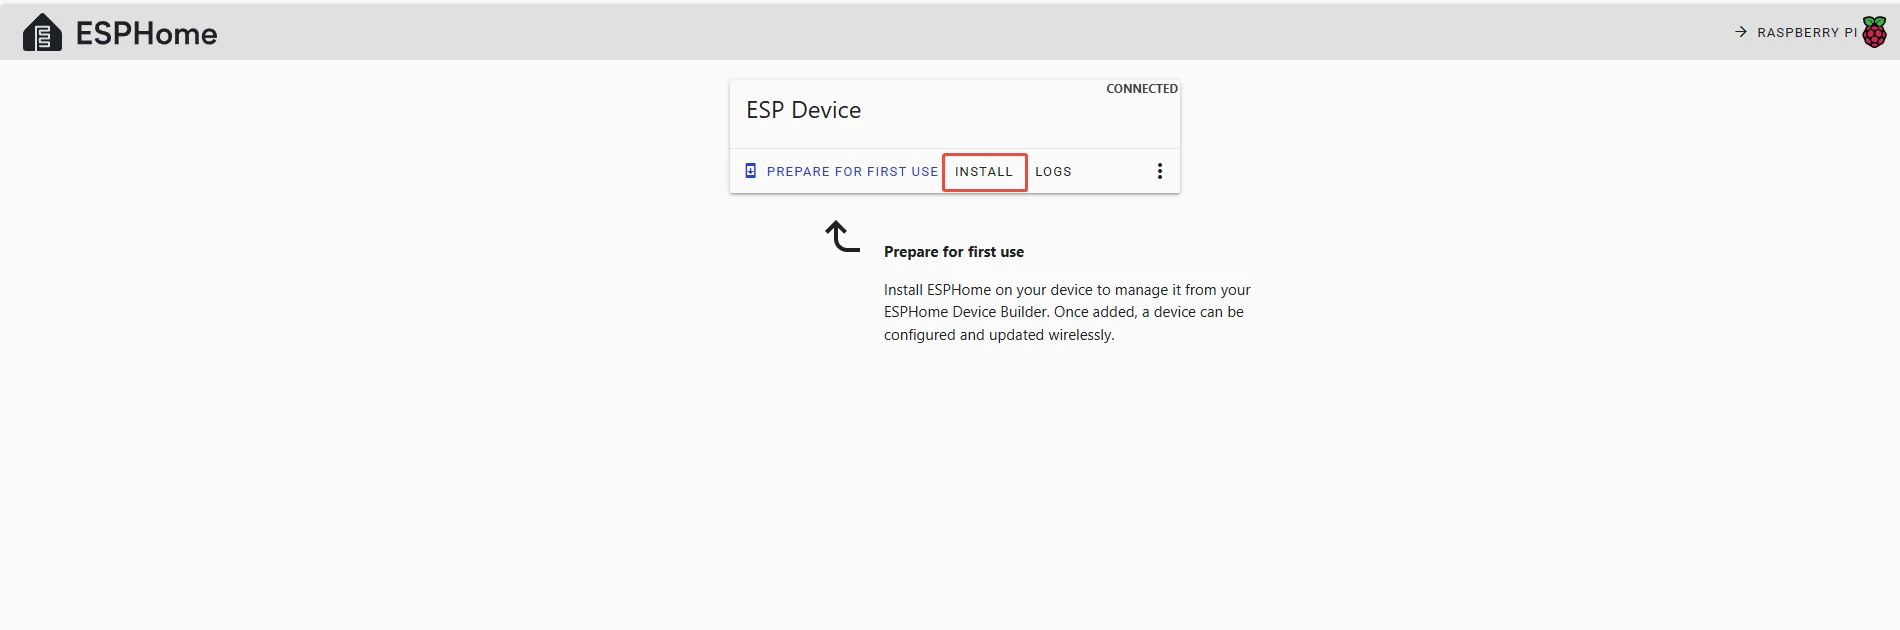
Add the .bin file you just downloaded, then click "Install".
Then select the bin file that you just downloaded.
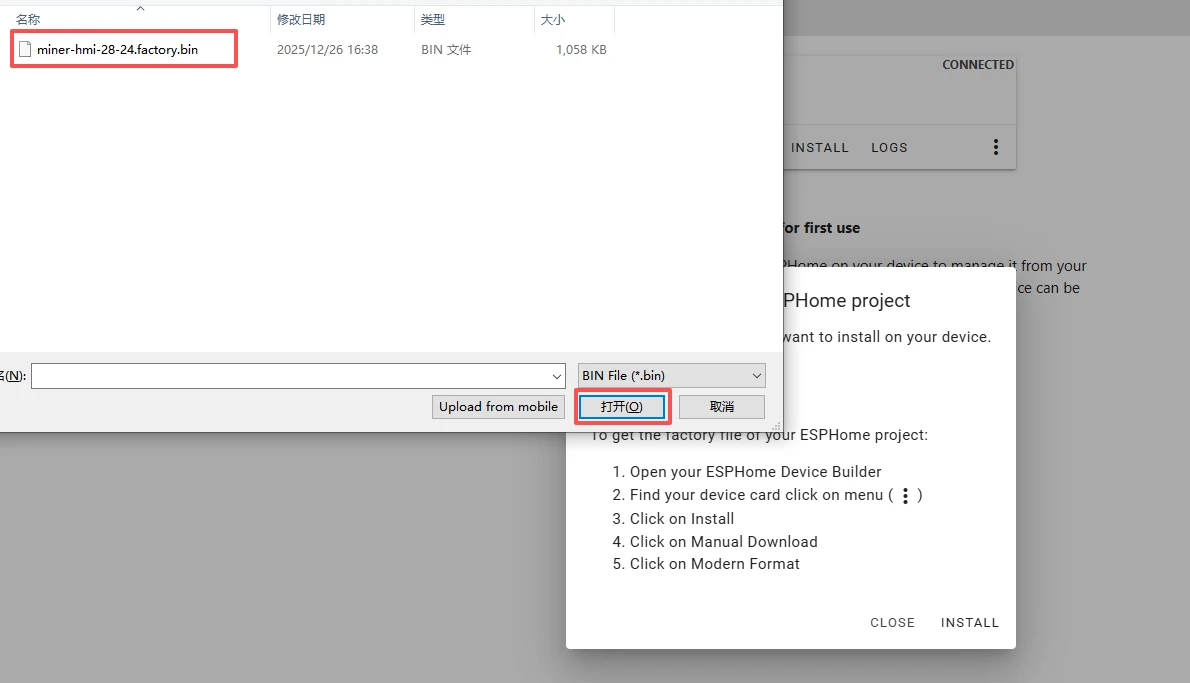
Click "INSTALL"
Wait for a few minutes.
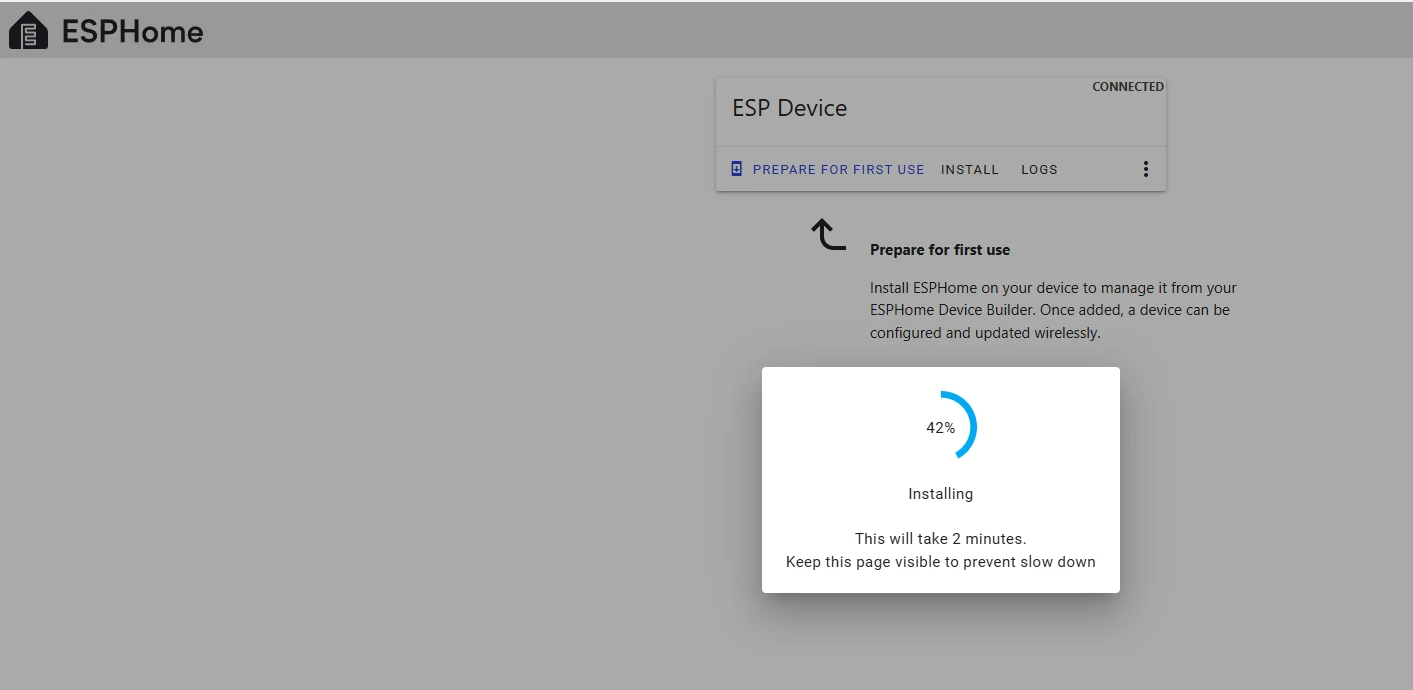
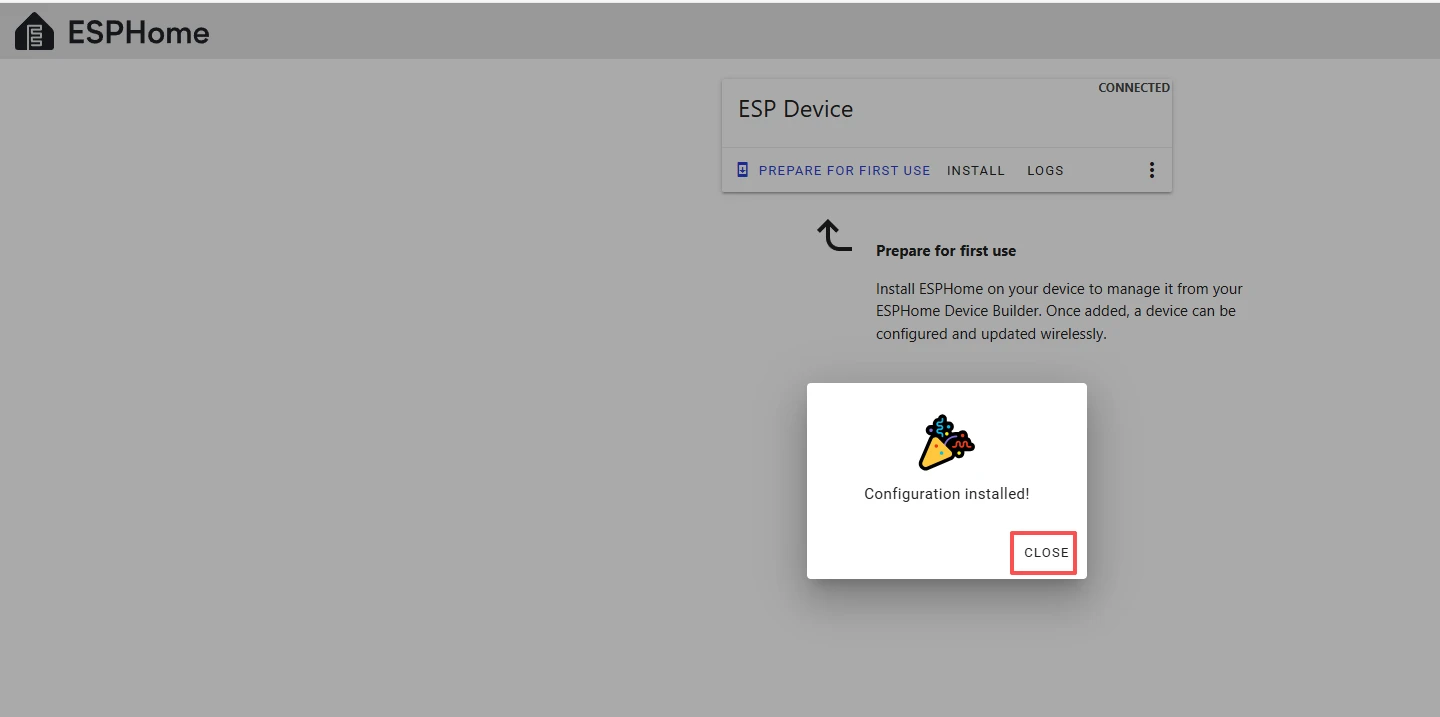
After the installation is complete, click "Close".
After successfully flashing the .bin file, return to the ESPHome page in Home Assistant.
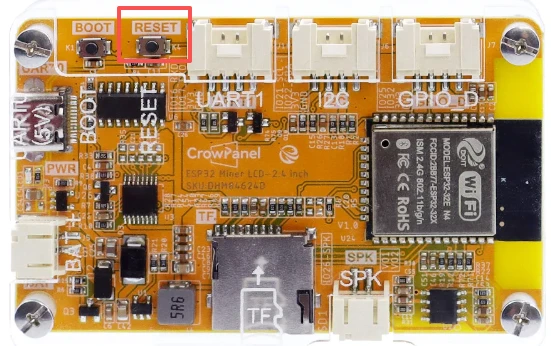
Press the RESET button on the CrowPanel ESP32 Miner HMI Display.
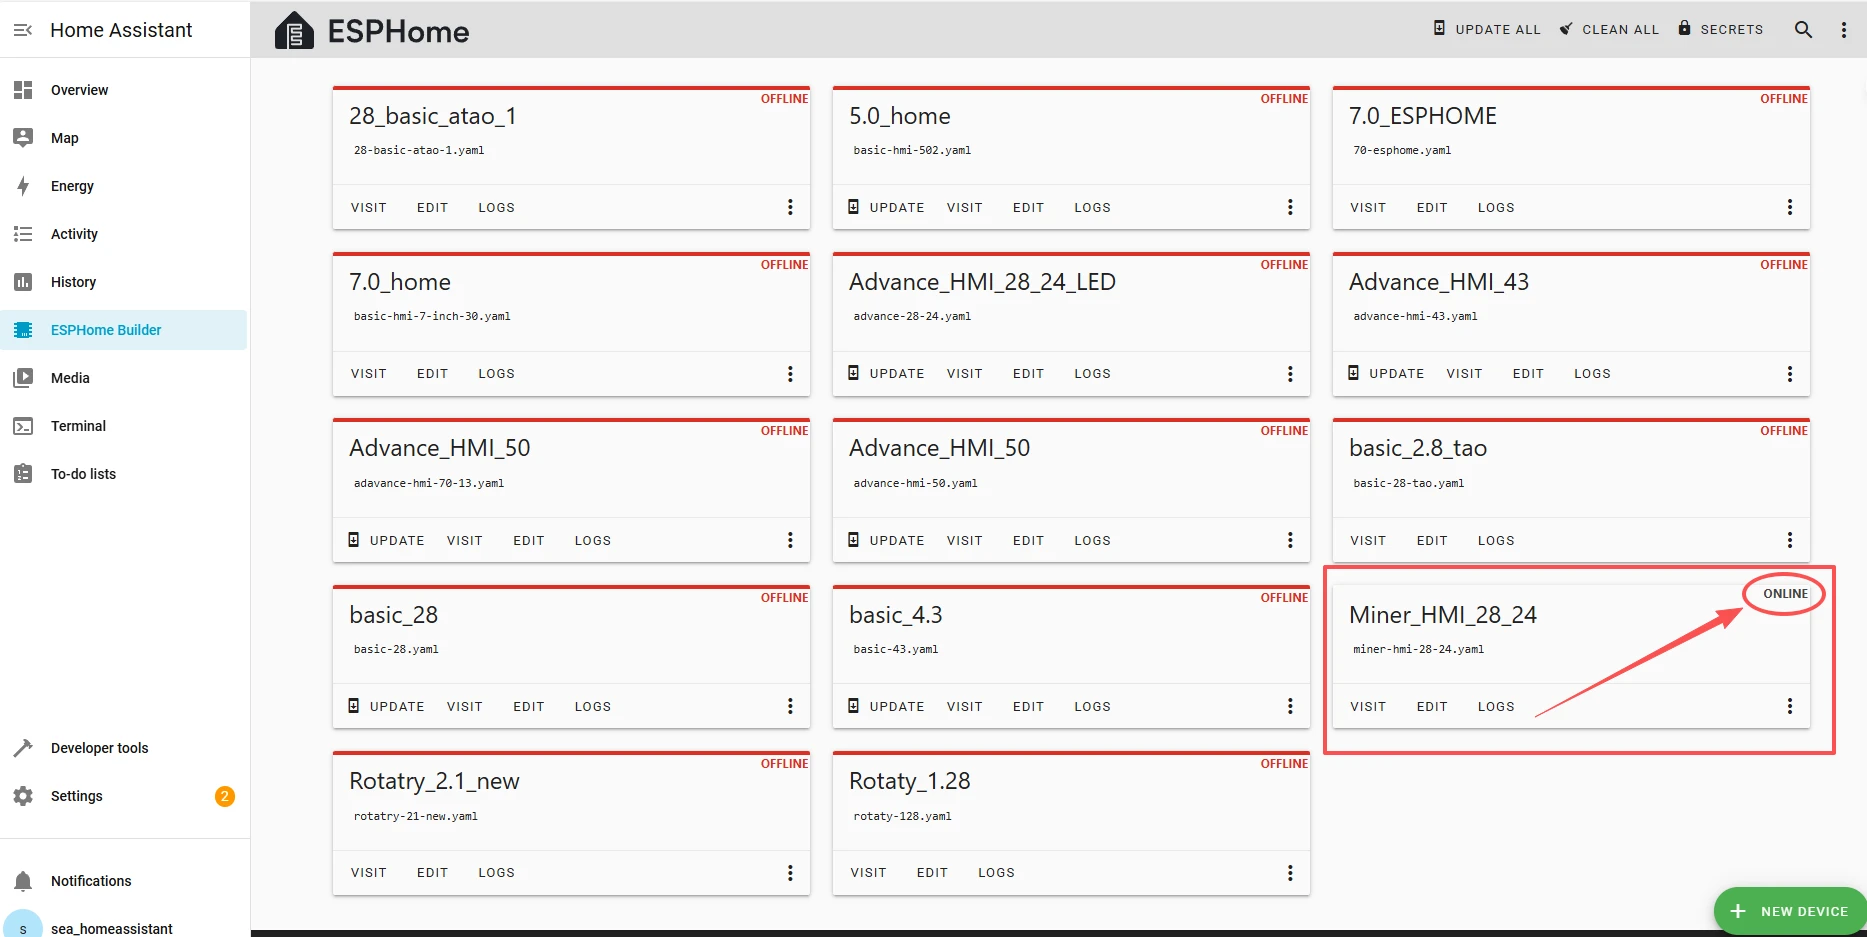
Restart the ESP32 display, and you should see the device you created earlier show as ONLINE in the top right corner.
After activating your device, you can now start writing code to implement your functions.
Firstly, this lesson mainly focuses on collecting temperature and humidity data, and you can also see the historical values of temperature and humidity in the ESPHome backend. Additionally, a function for remotely controlling the on/off of the light has been added.
We hope that the implementation of the functions in this lesson will enable you to gain a deeper understanding of the convenience of ESPHome in smart home applications.
Next, let's take a look together.
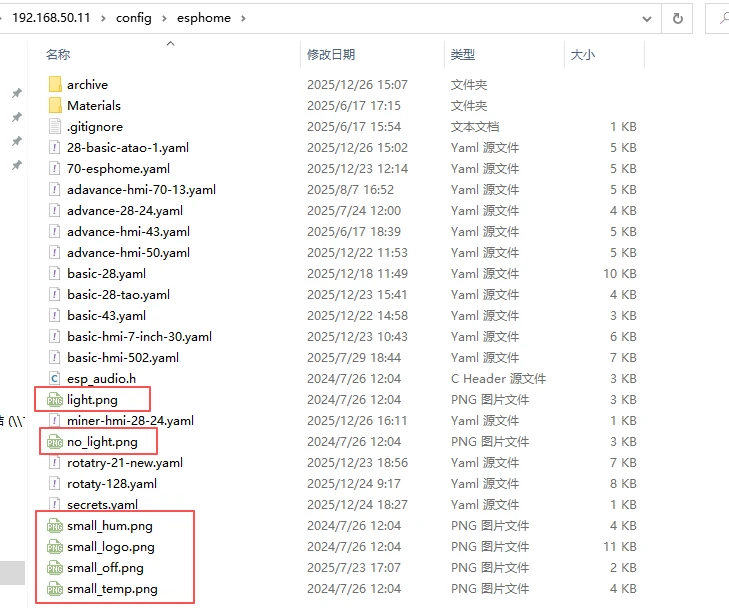
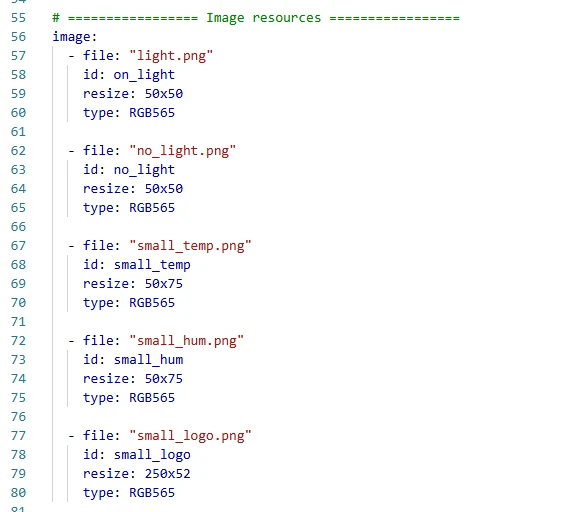
You can see these materials on the screen. We need to use them on the ESPHome platform, so we need to upload these materials to the ESPHome platform.
You can click to download the materials we provided.
After downloading the provided materials, you need to download a tool to upload these materials to the ESPHome platform for use.
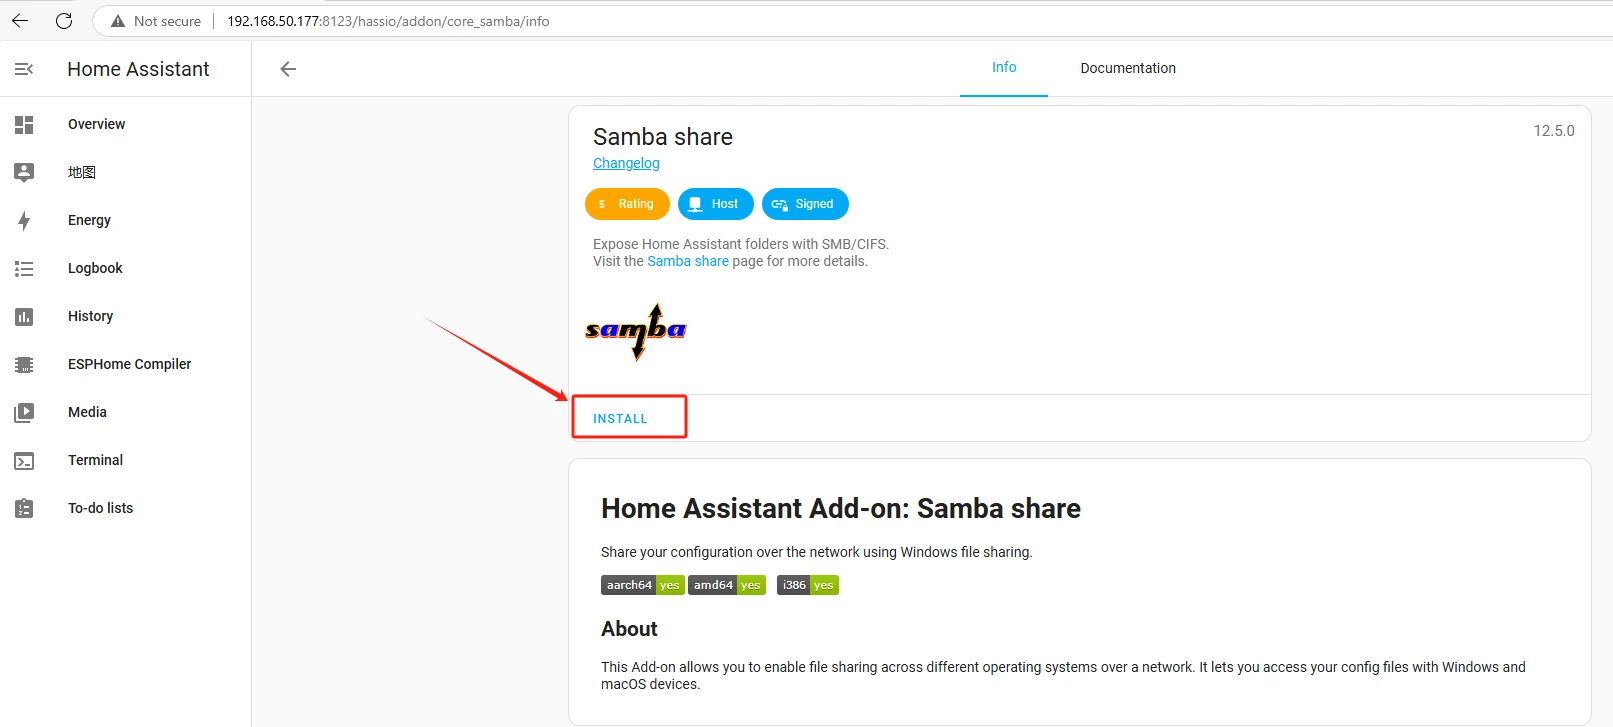
Click Settings, and select Add-ons.

After entering, click on the "ADD-ON-STORE" at the bottom right.
Search for Samba share above.

Click on "INSTALL" to start the installation process.
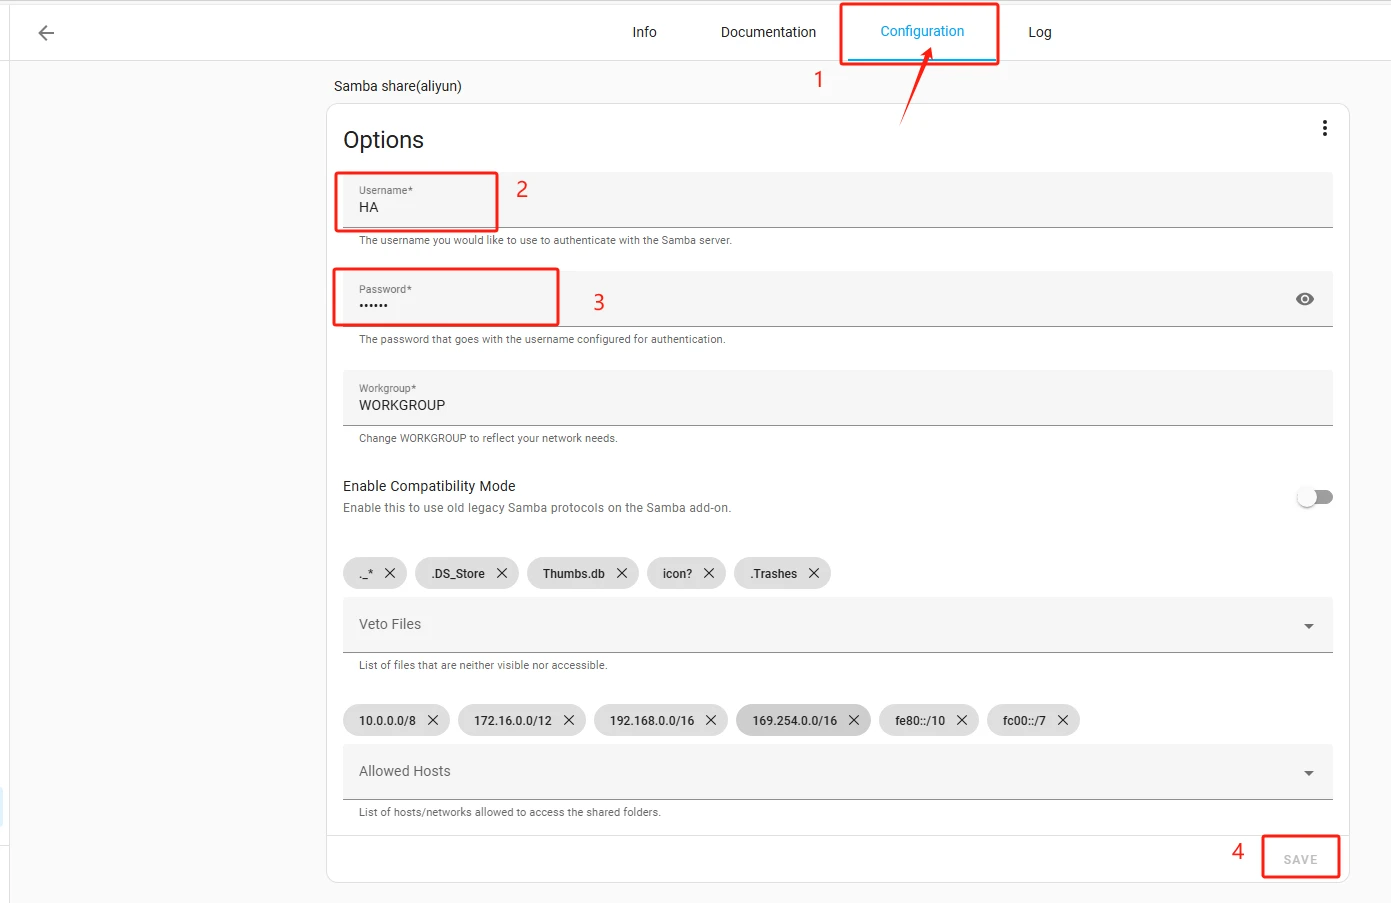
After the installation is complete, configure your own Samba share, set your username and password, and remember this!!
After saving, you will come to the File Explorer on your computer.

Enter \\ + your Home Assistant's IP address here.

For example: The input I made is \\192.168.50.11

Enter config

Then select esphome
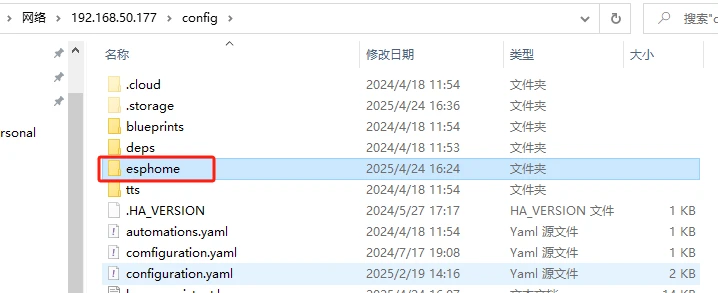
Put the materials you just downloaded into the "esphome" folder.
In this way, the mission of the Samba share is accomplished.
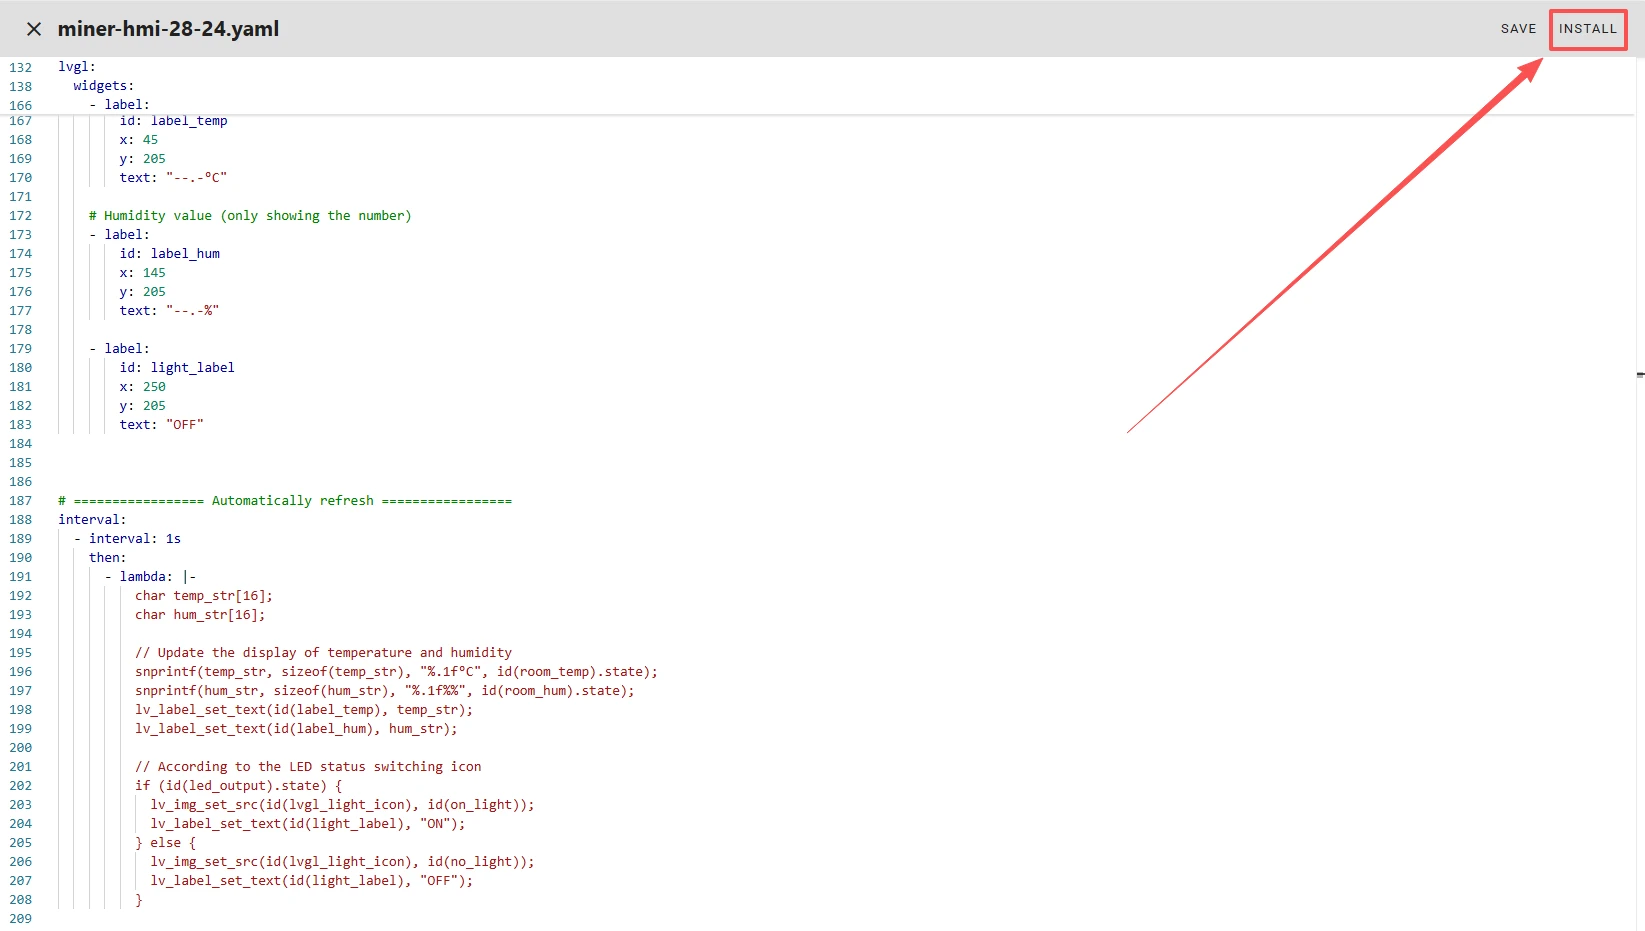
Next, you can edit your code to implement the simple functions of this smart home we mentioned.
Click "EDIT" to start writing the code.
You can click to download the complete project we provided.
This will help you implement the functions.
After downloading the code, you can simply copy our code into your project.
Next, we will talk about the points that everyone should pay attention to when using the code.
1.WiFi
The WiFi name and password here should be the same as the WiFi in the same local network as your computer.
2.LED pin
Regarding this pin used to control the LED
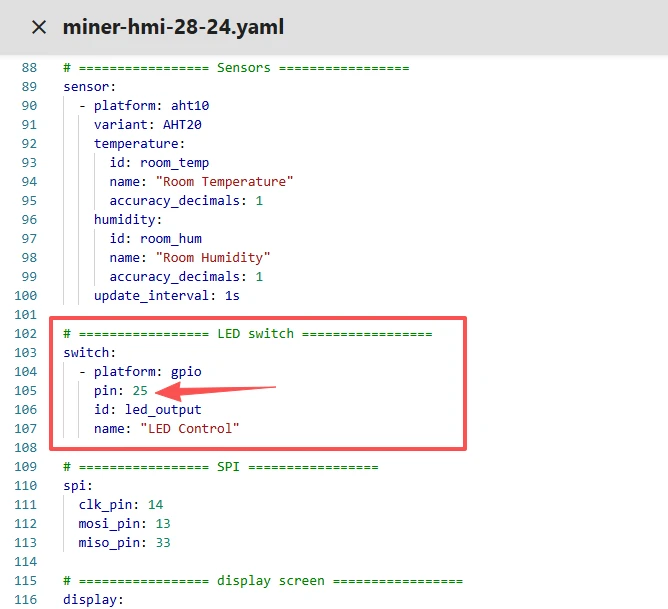
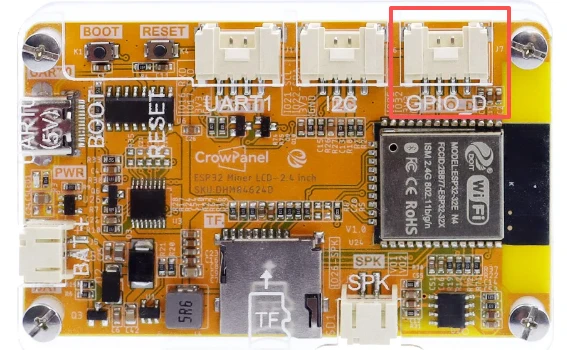
Here,pin:25 corresponds to the GPIO_D of the Crowpanel ESP32 Miner HMI Display that you have connected.
3.Materials
This is the material we just imported. You can set the size of these images here.
(Make sure it is consistent with the size of the images we provided)
4.DHT20 Temperature and Humidity Sensor
Here we initialize the pins 21 and 22 for the temperature and humidity sensor connection.
And we set up the initialization of the DHT20 temperature and humidity sensor.

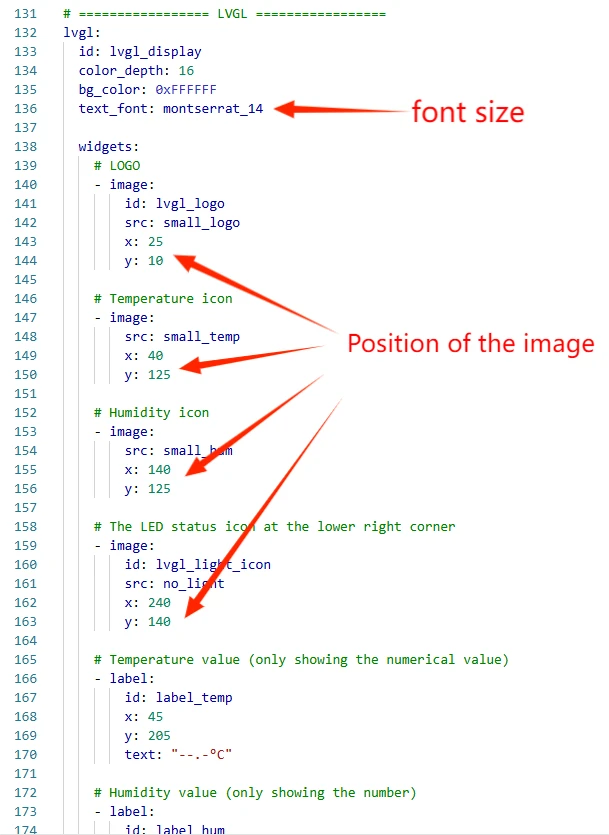
5 .Position of the materials
We can also customize the position of the materials and the font here.
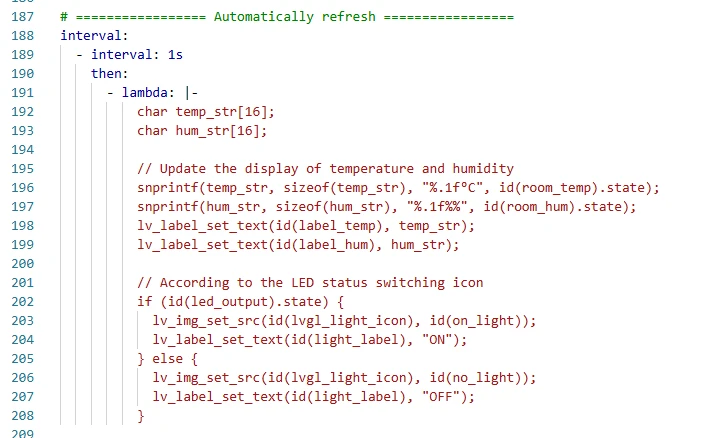
6. Value Update
And set the update time for the temperature and humidity values at the end. (Refresh every 1 second)
That's how the code works. That's all for this introduction.
Next, we will burn the code.
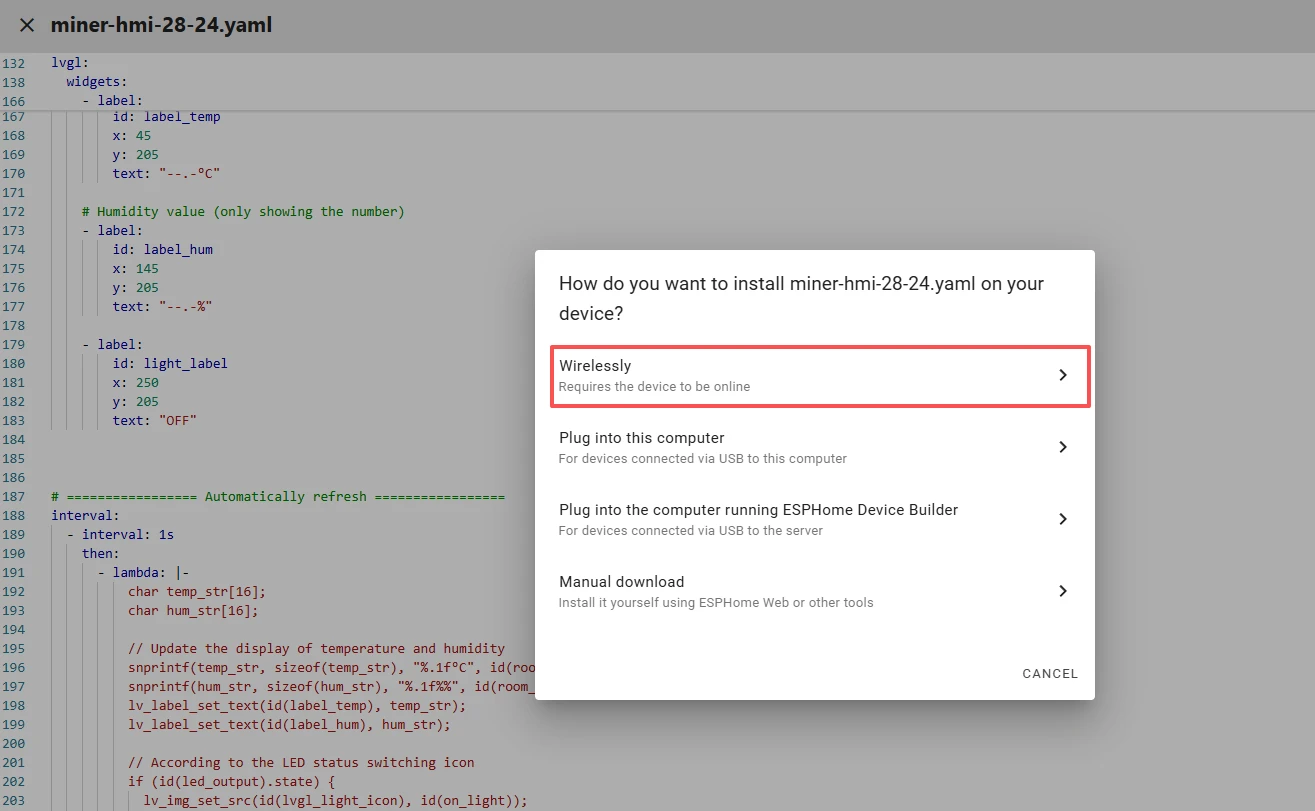
After editing the program, click "Install".
Then select "Wireless". This method is very convenient for us.
(Only by choosing "Wireless" can you remotely control the LED on the web page and view the corresponding temperature and humidity data.)
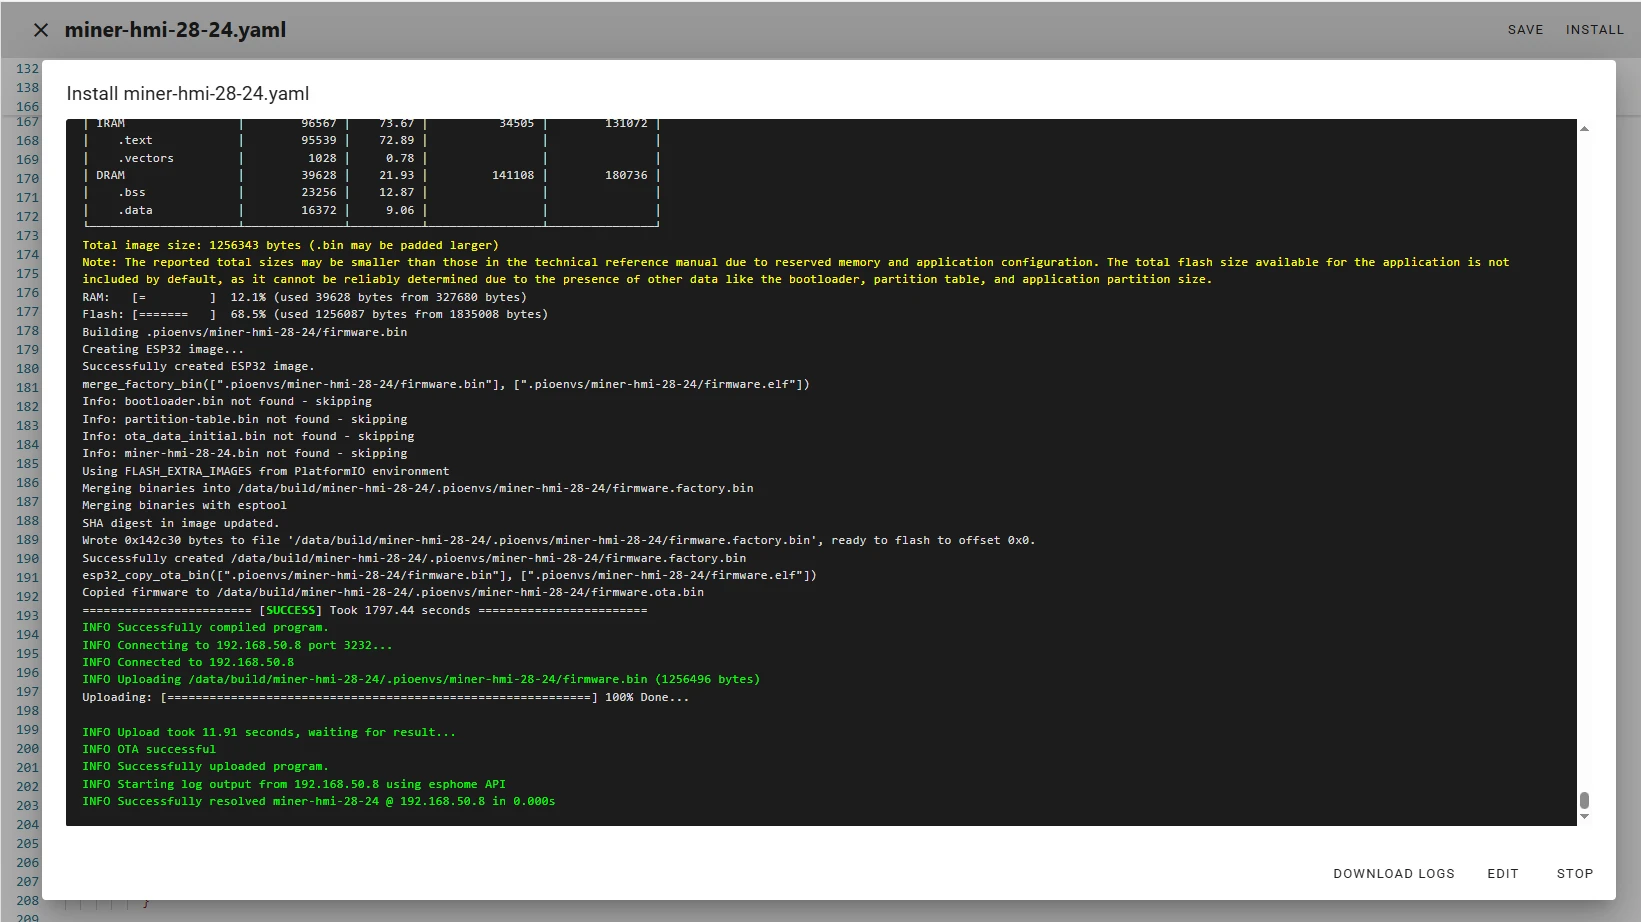
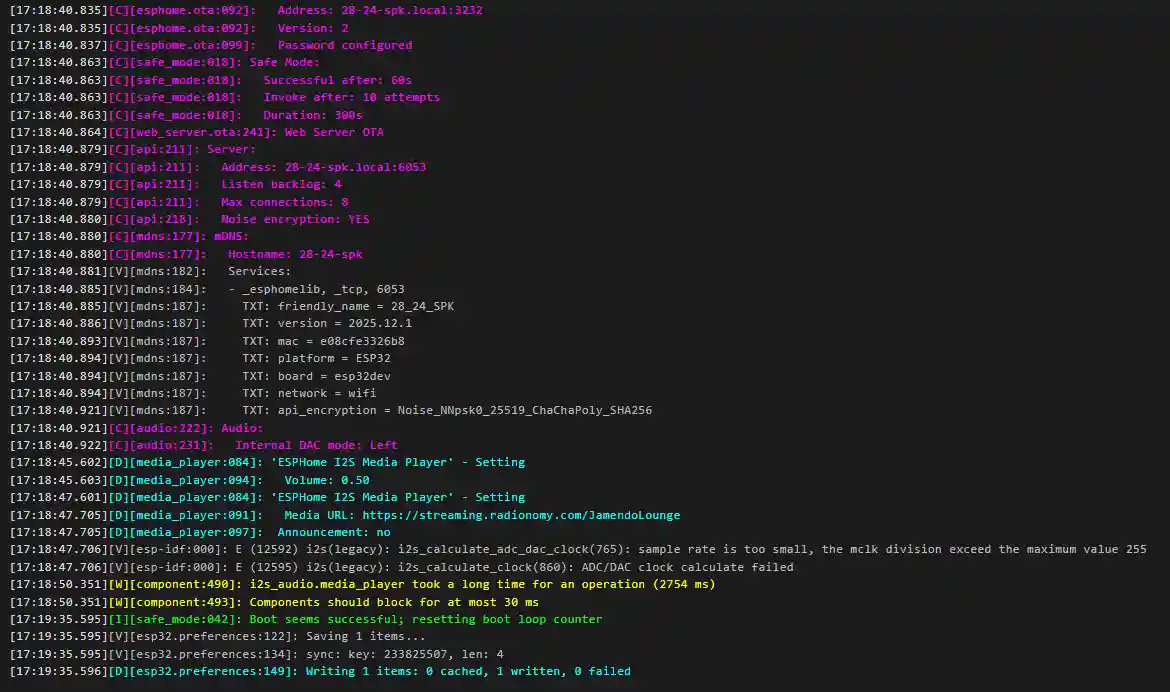
After a successful flash, the following interface will appear.
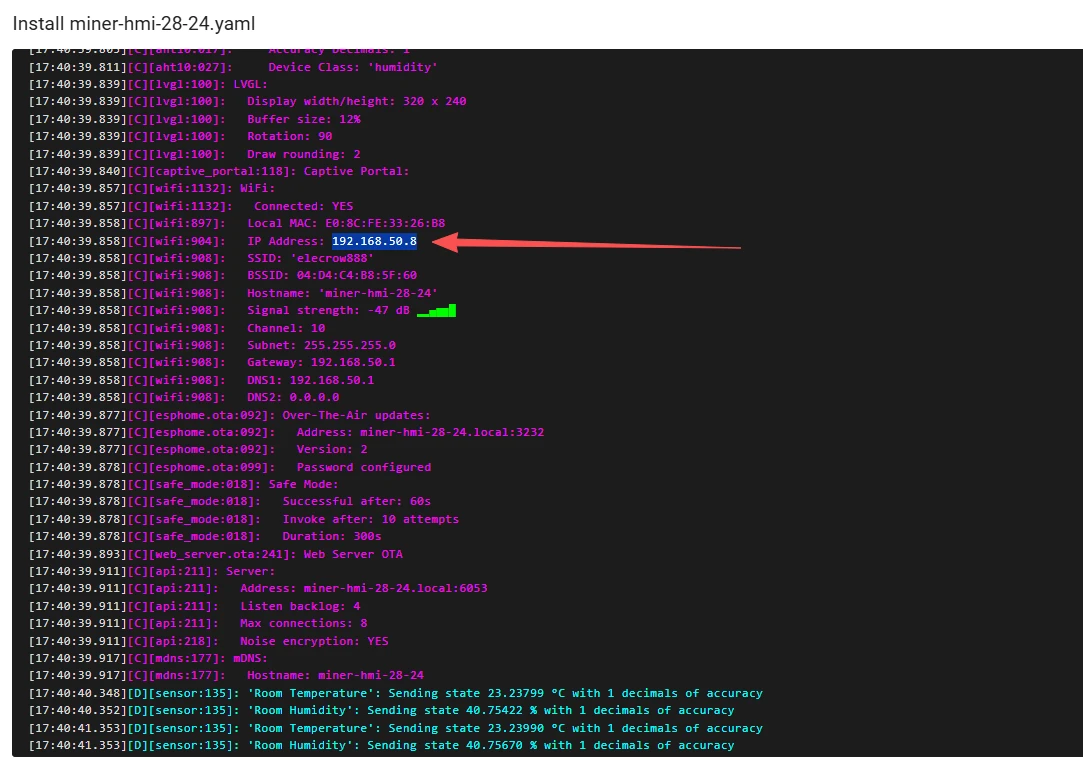
Scroll the mouse wheel to view the IP address of the Crowpanel ESP32 Miner HMI Display and make sure to remember it.
(This IP address is the IP address of the Crowpanel ESP32 Miner HMI Display after it has connected to Wi-Fi.)
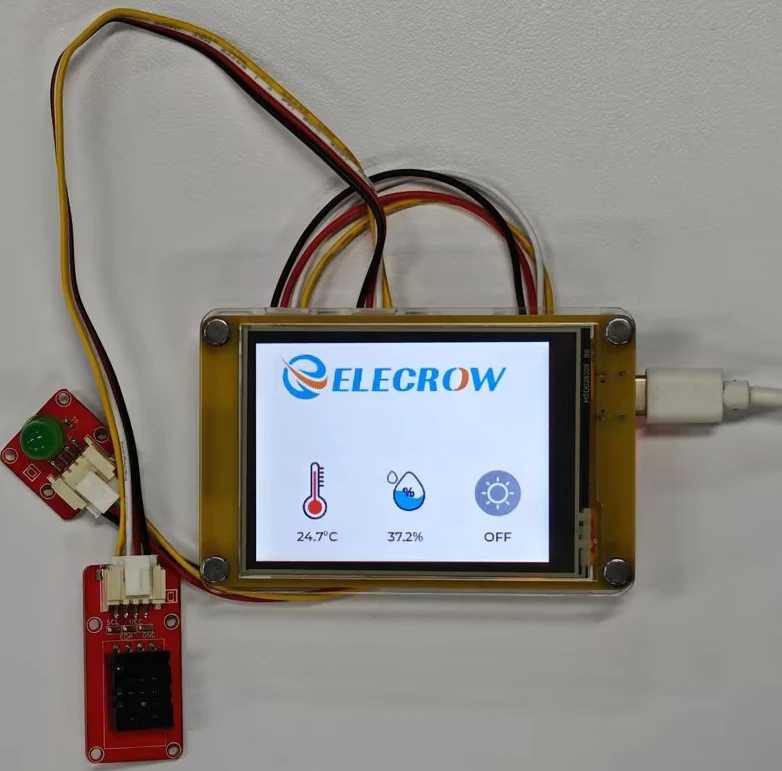
After the code is burned in, you will be able to see the same interface on your screen as ours.
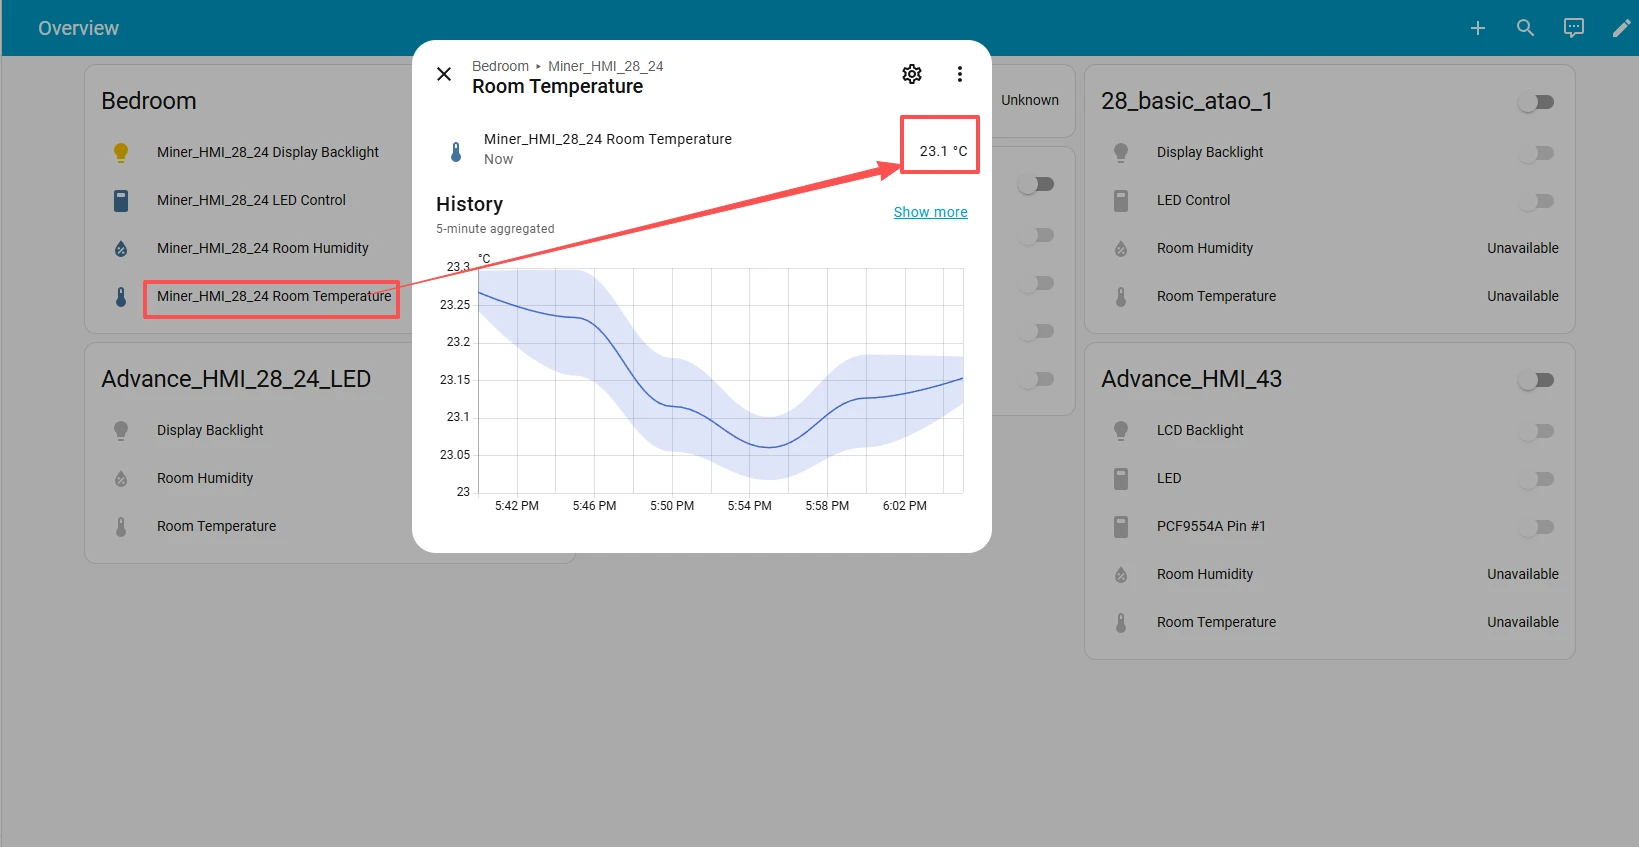
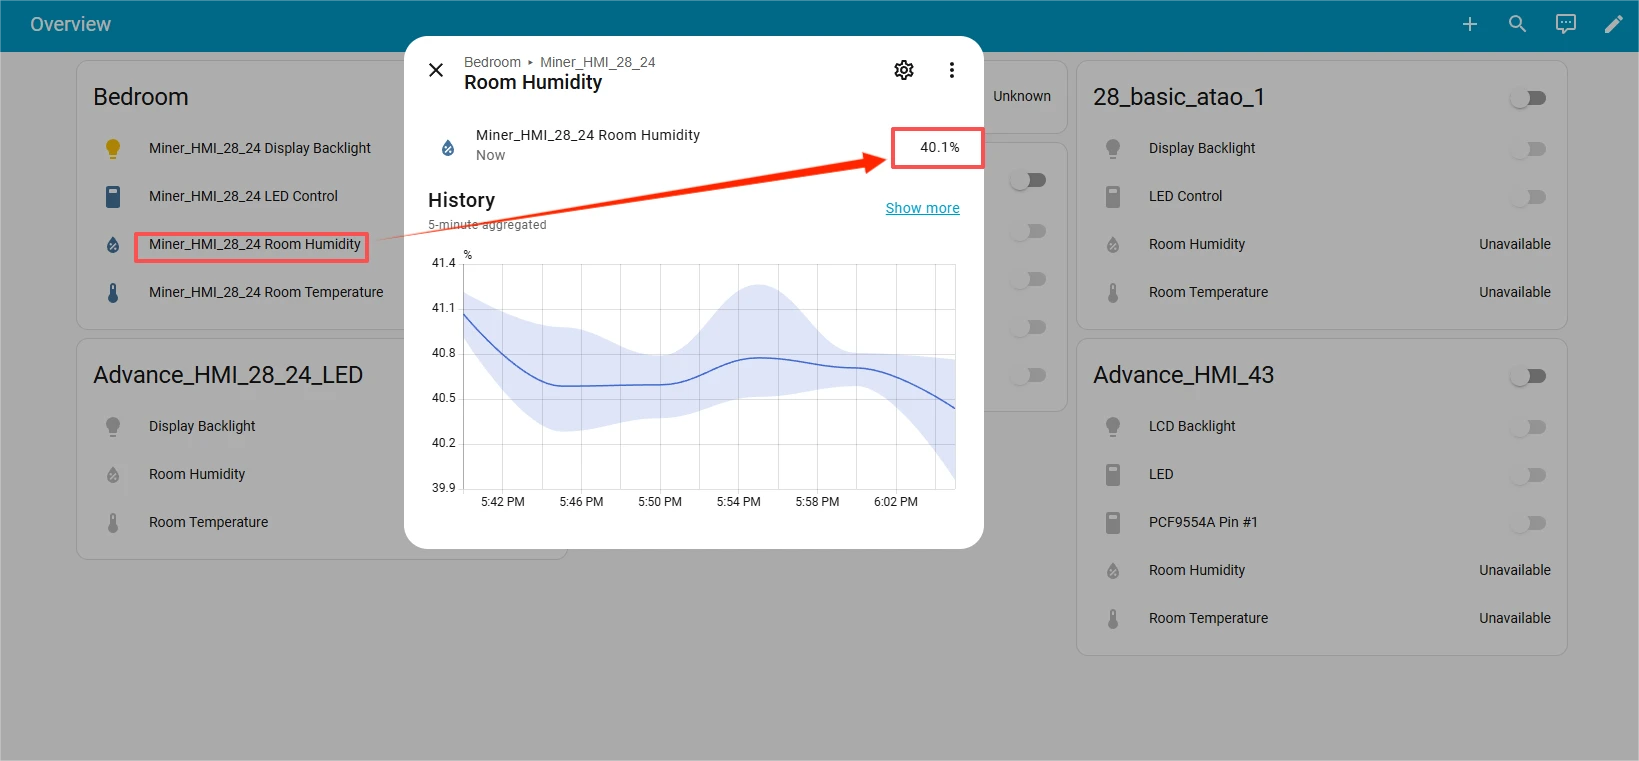
Next, let's take a look at the temperature and humidity data observed on ESPHome and the status control of the LED lights.
Add the device to ESPHome
Click Settings→Devices & Services→Add Integration, then enter 'ESPHome' and click on it.
After entering ESPHome, add the already updated devices.
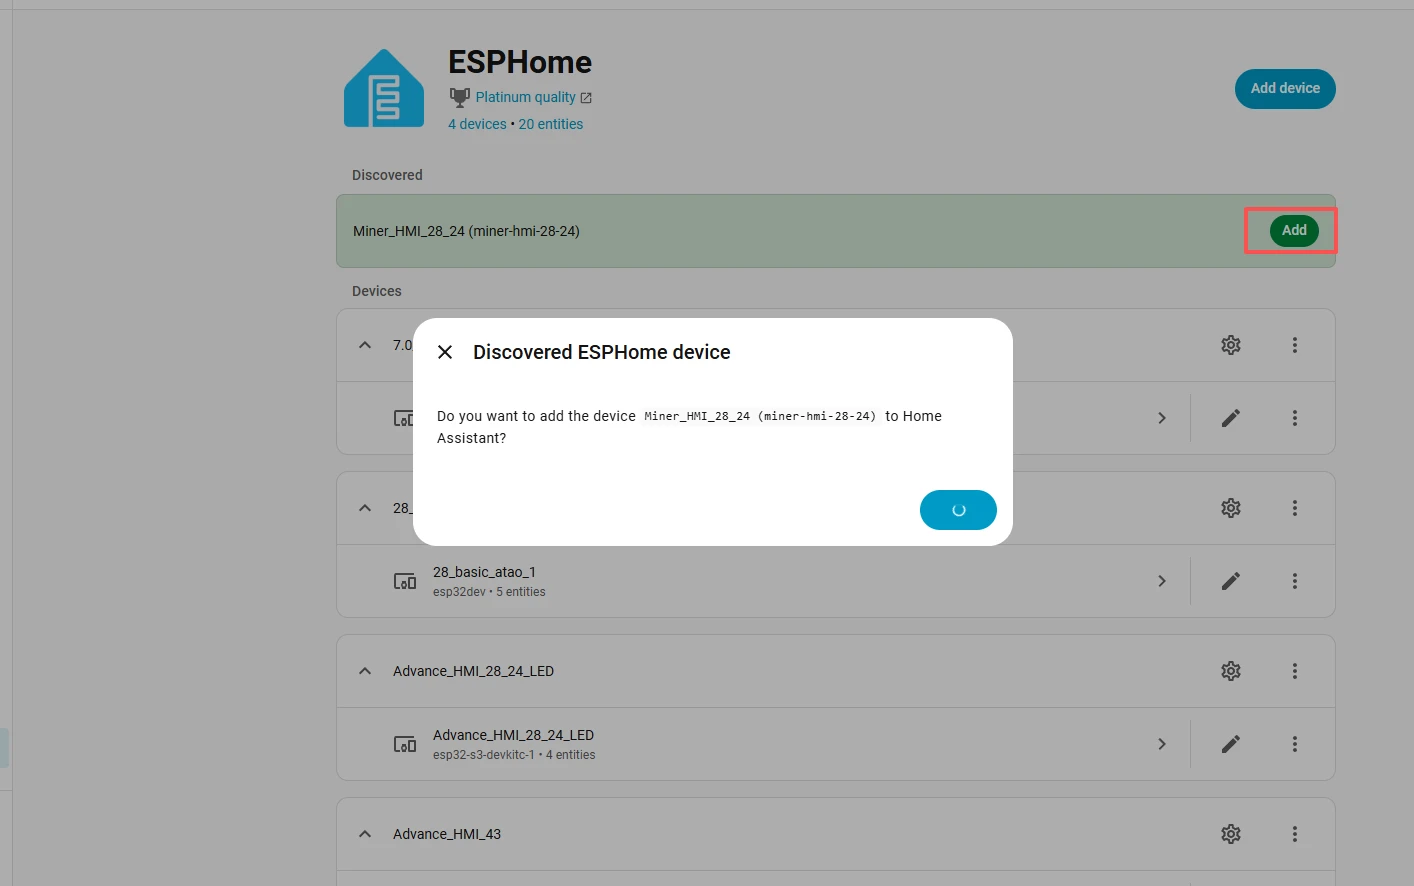
Then add this new device to the area you have designated.
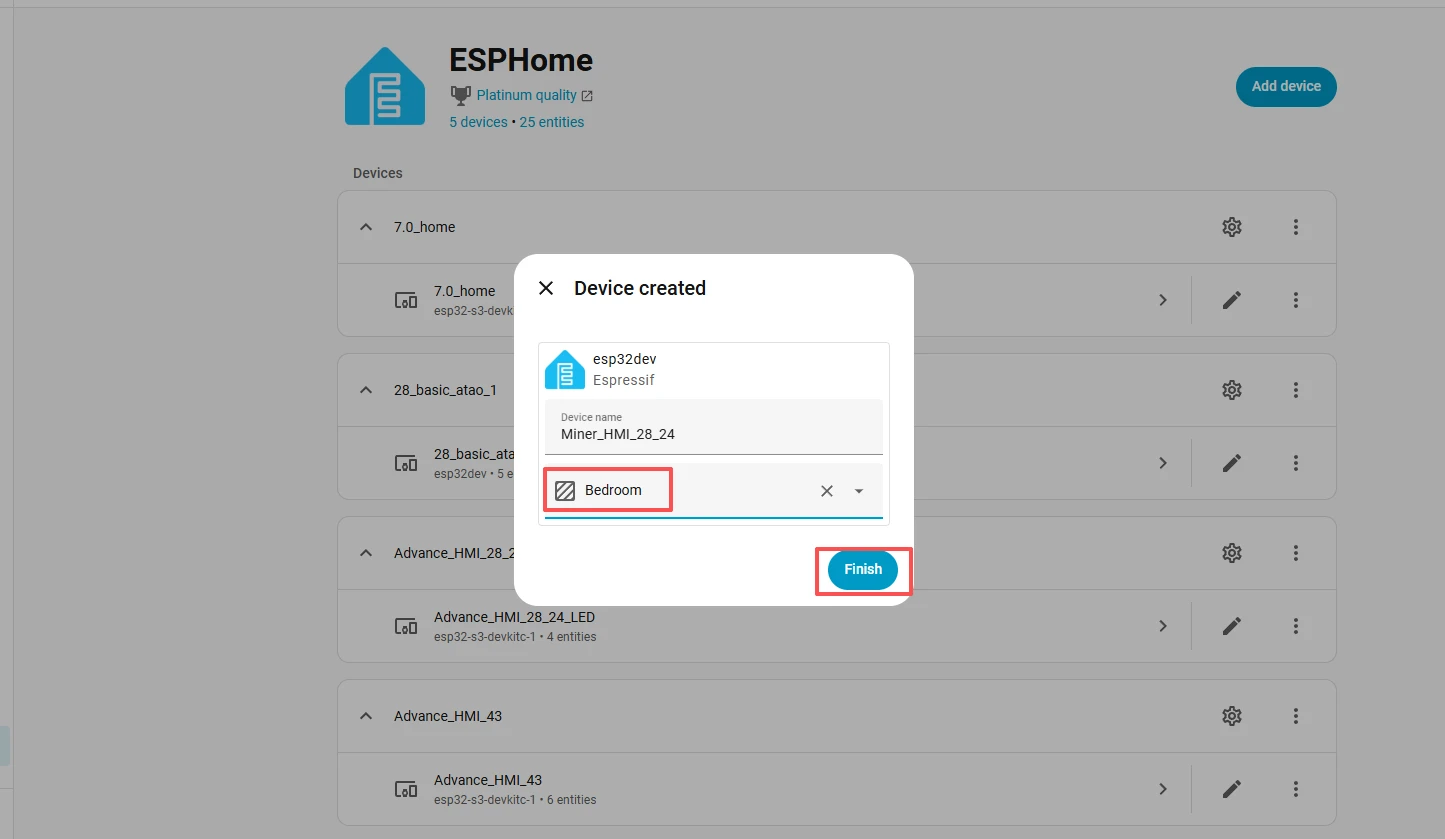
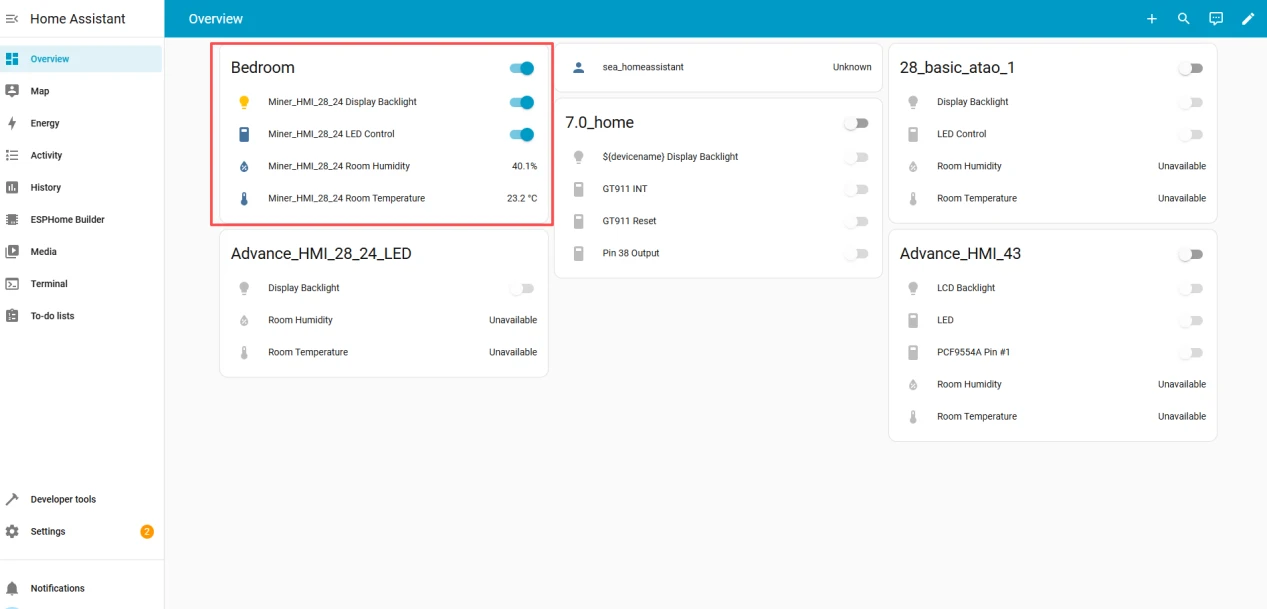
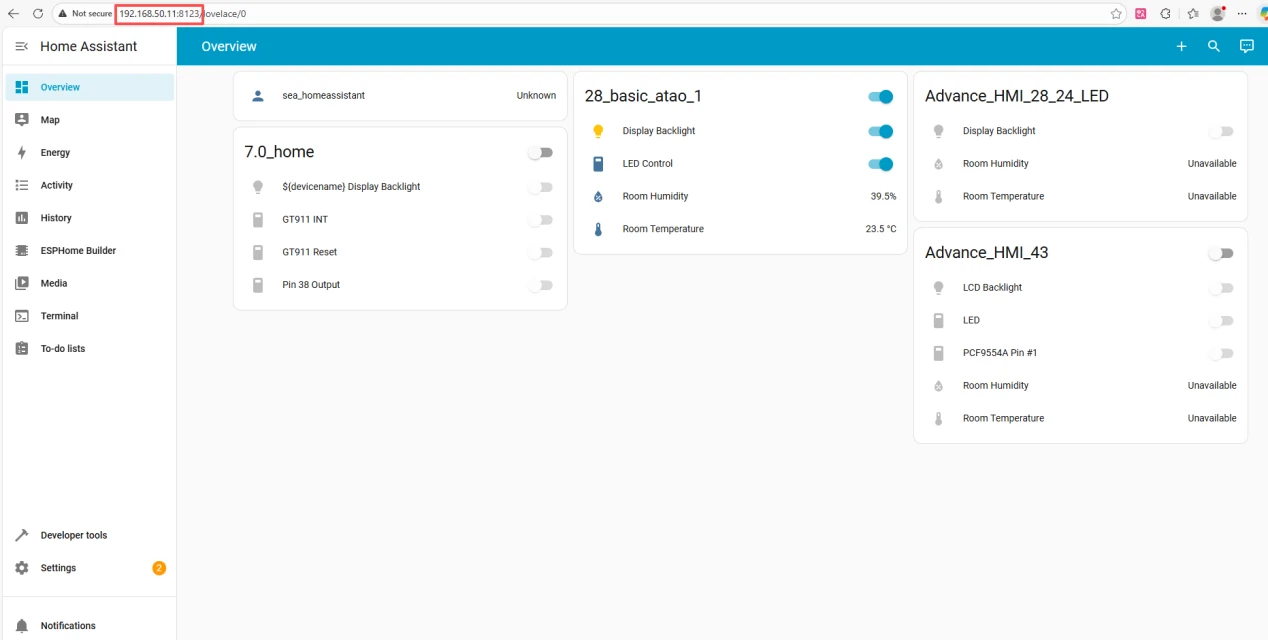
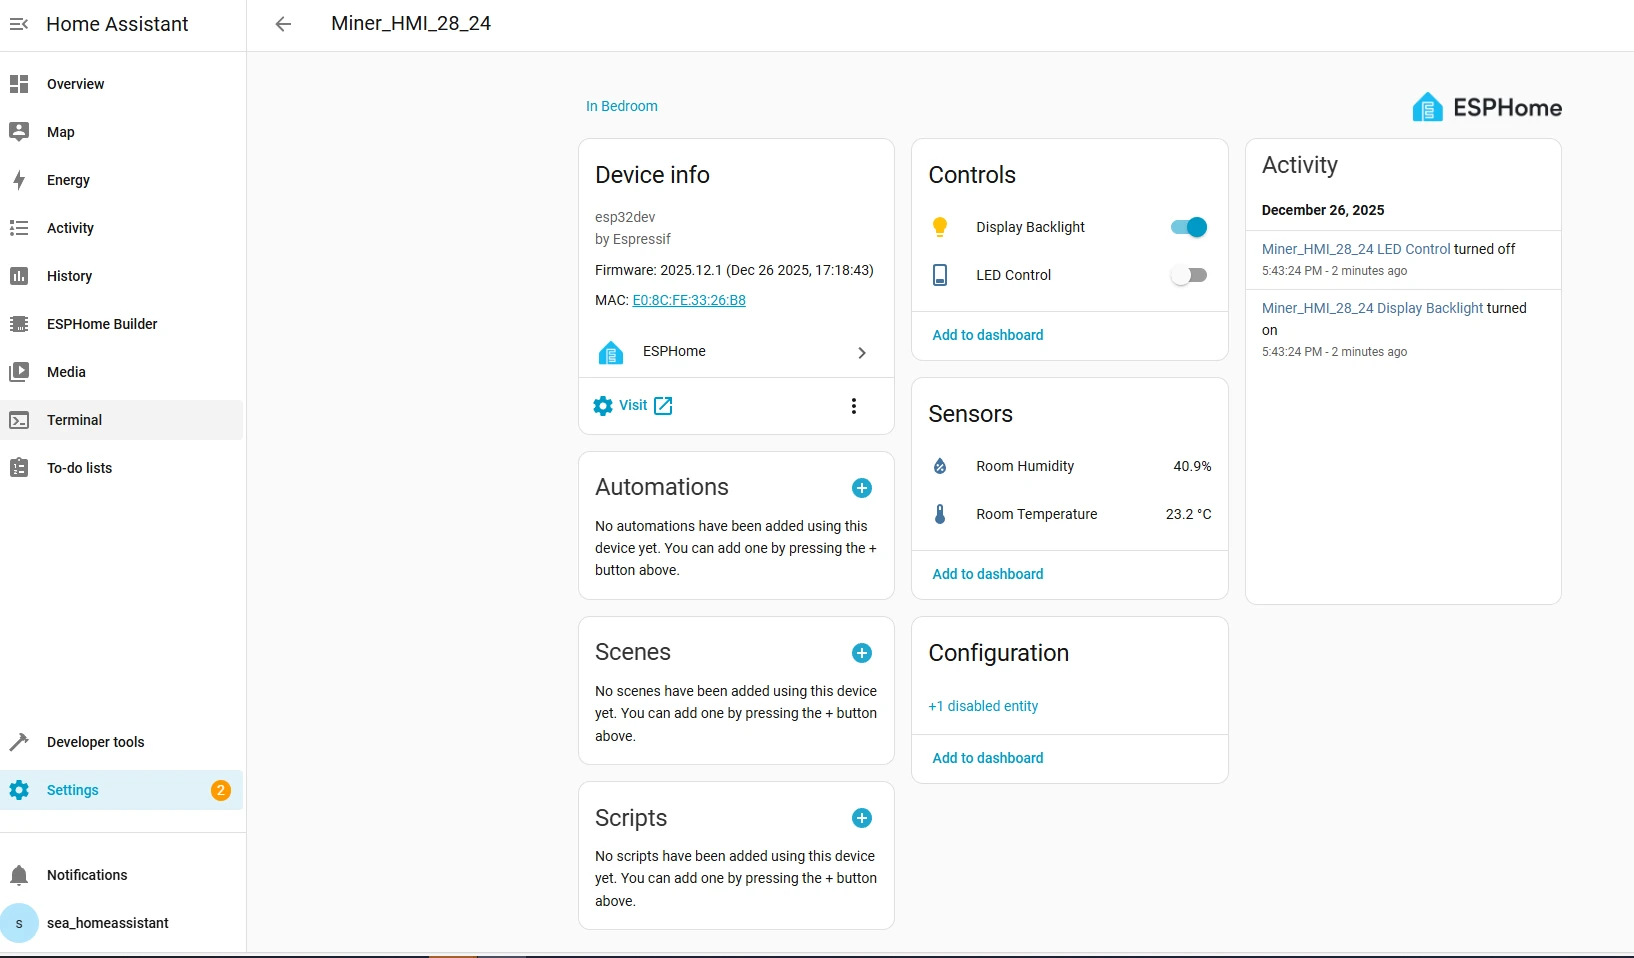
Then you will be able to view the relevant information of your device on this main page.
(All of these are set in your code.)
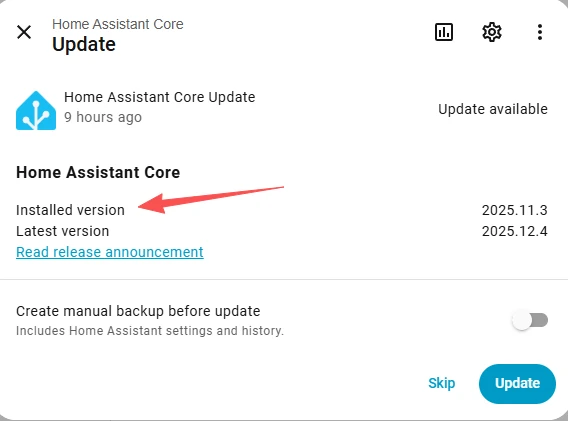
Reminder: The version of ESPHome we are using is 2025.11.3.
Please check at this location.
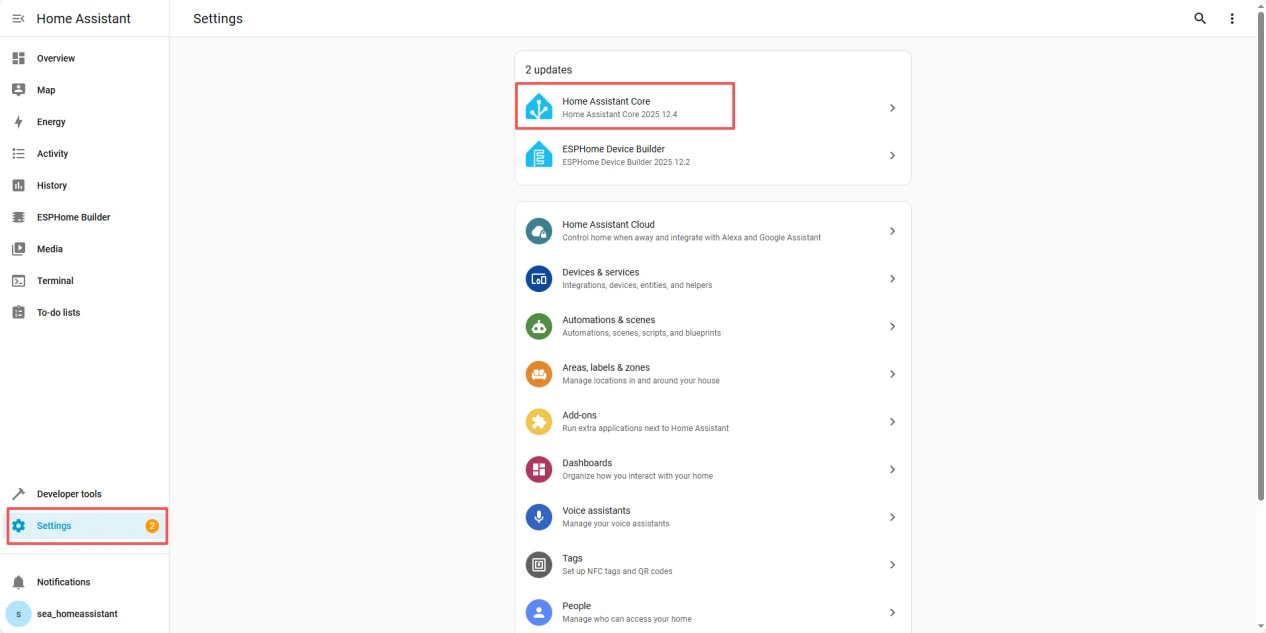
Back to our ESPHome interface.
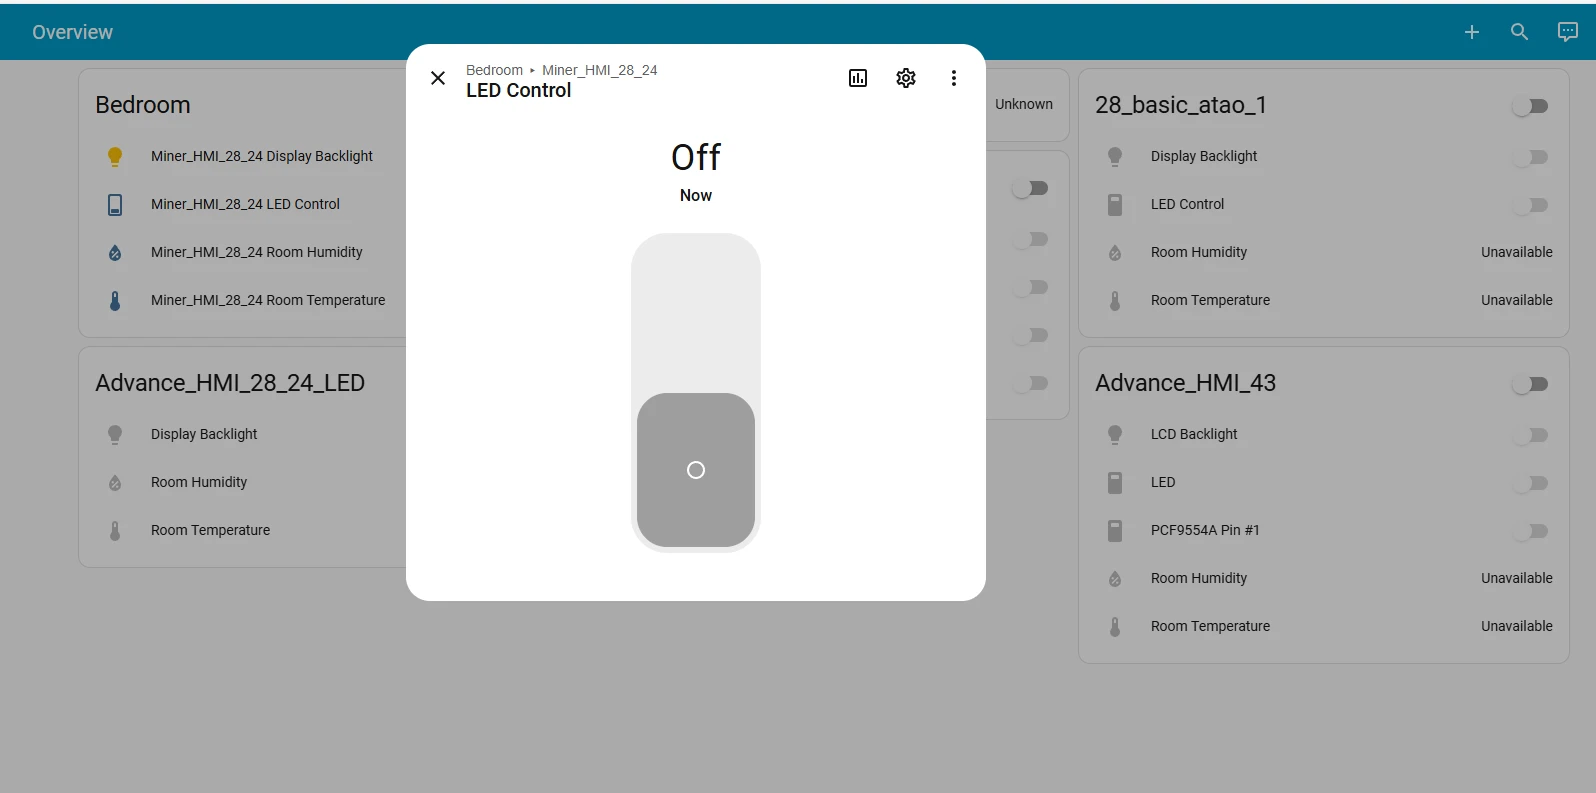
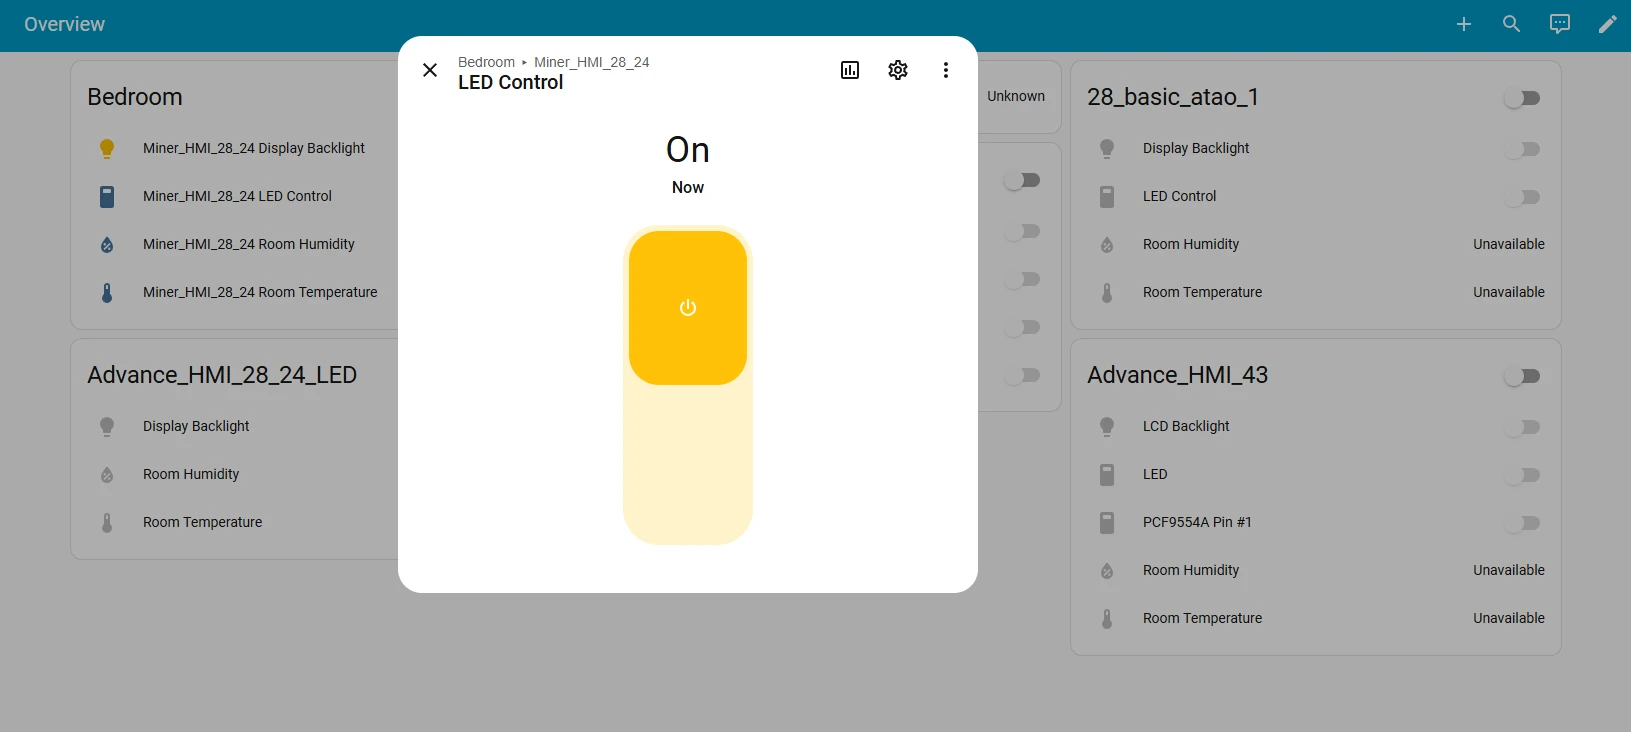
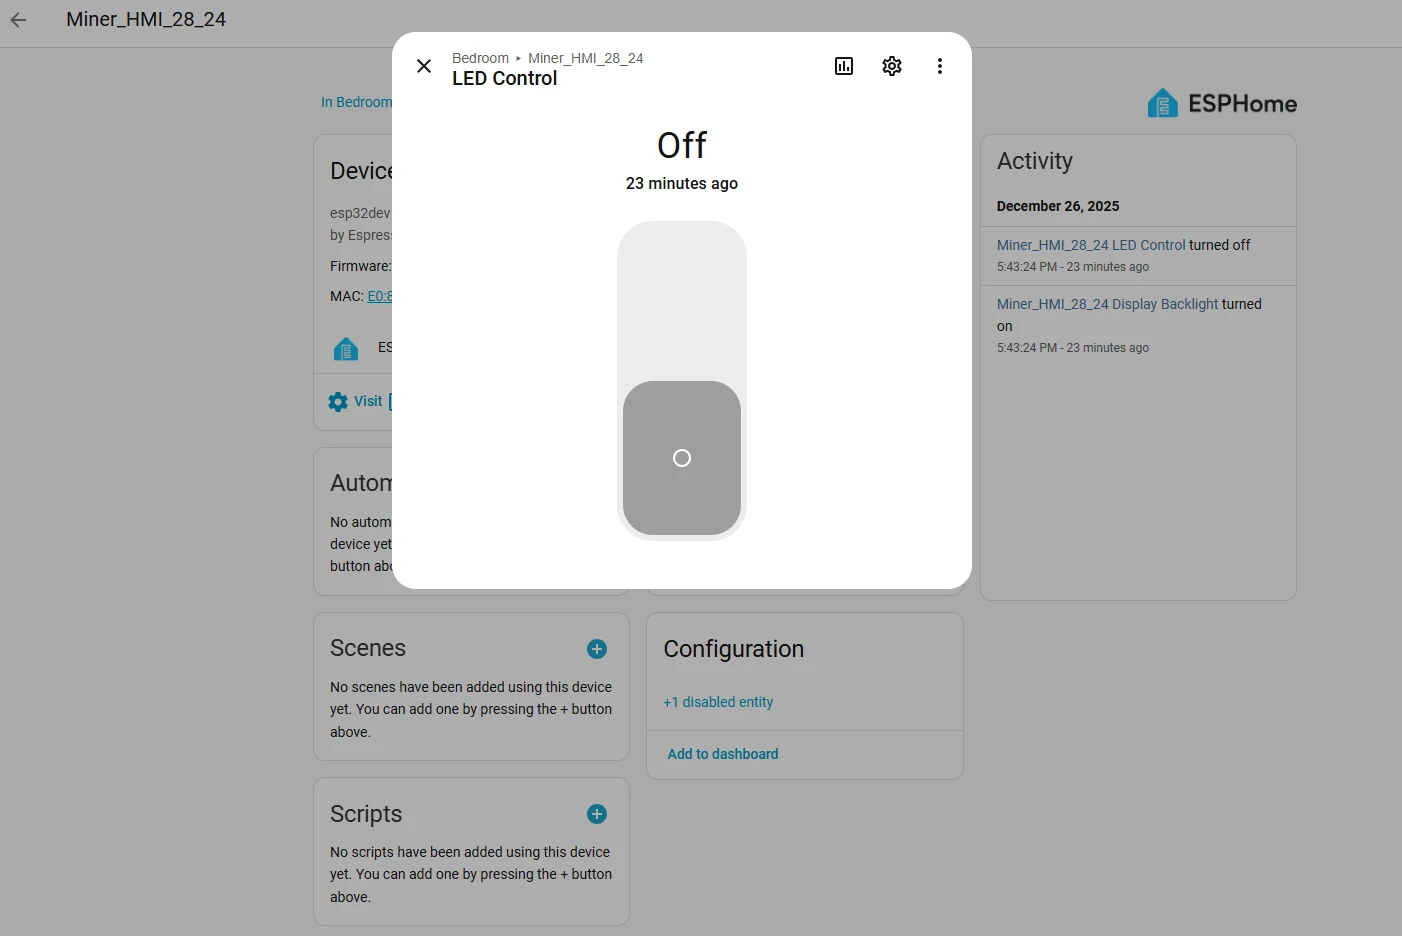
Click on it, and you'll be able to successfully control the light bulb connected to the Crowpanel ESP32 Miner HMI Display.
And the icons on the screen will also clearly indicate your current status.
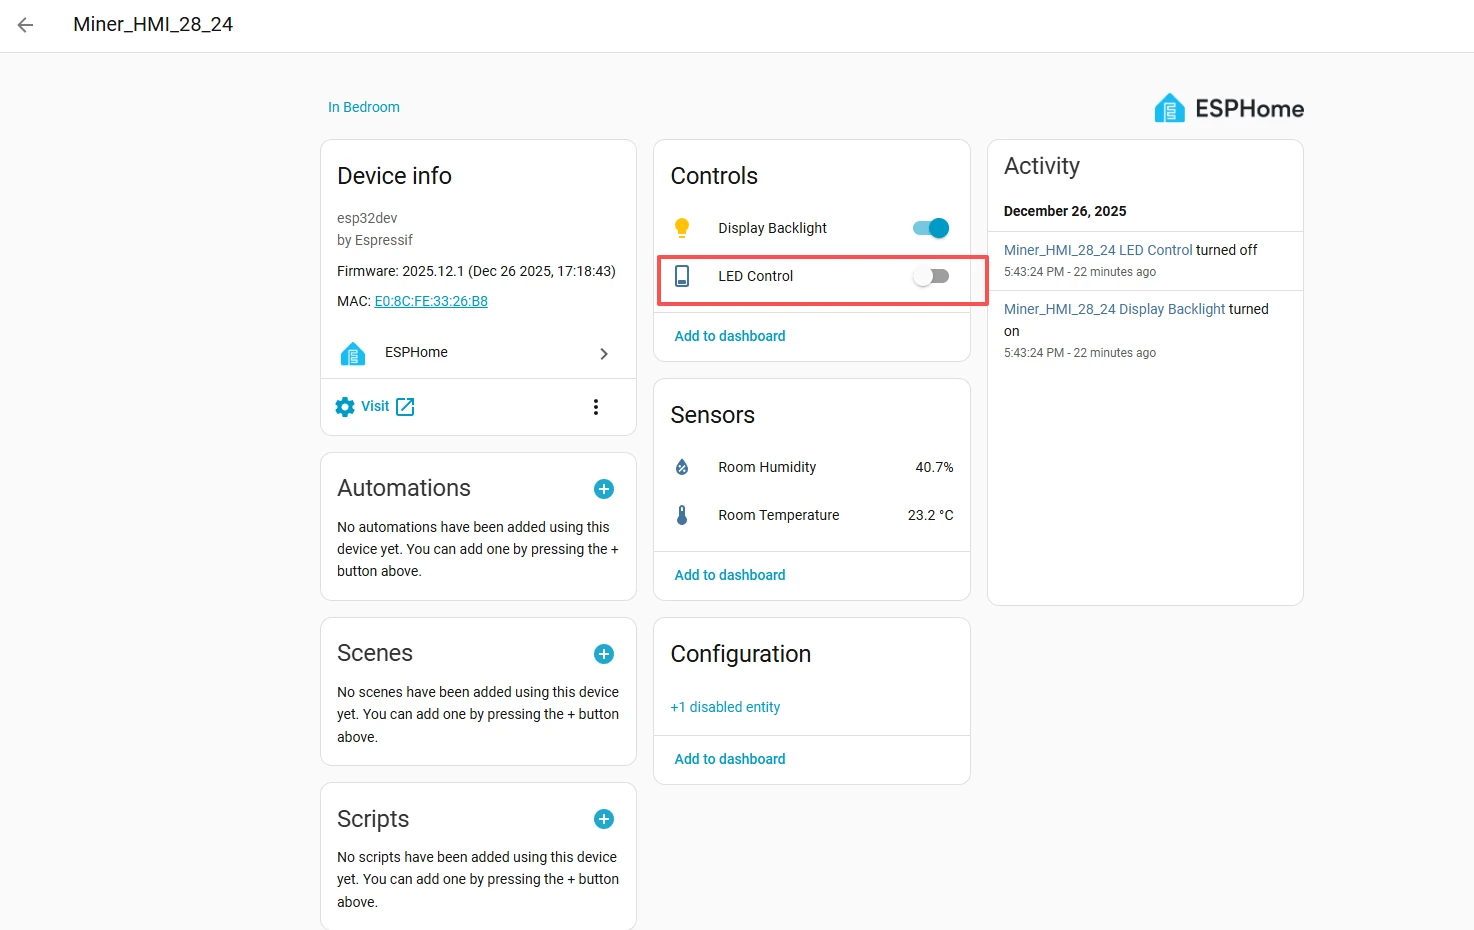

And you can also view the historical collection data of temperature and humidity in the background of ESPHome.


Examples
You can click to download the examples we provided.
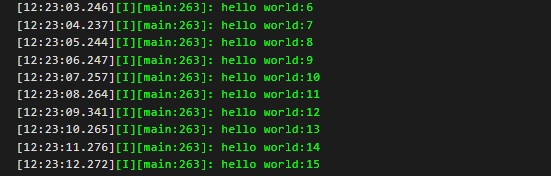
1.UART
Connect the Crowpanel Miner ESP32 HMI Display to the computer. After running this code, you will be able to see the following information in the log window:
2.SPK
Connect a speaker to the ESP32 Display SPK port. After a piece of music is played, you can view the printed information in LOG.
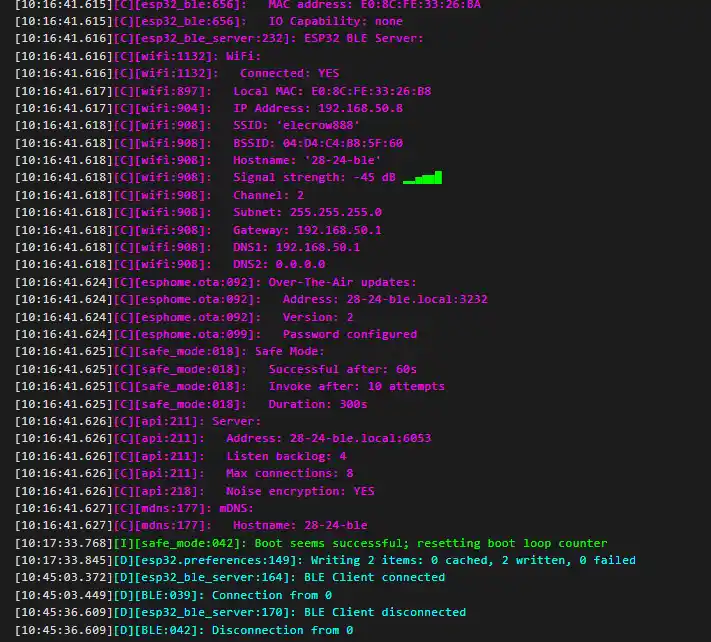
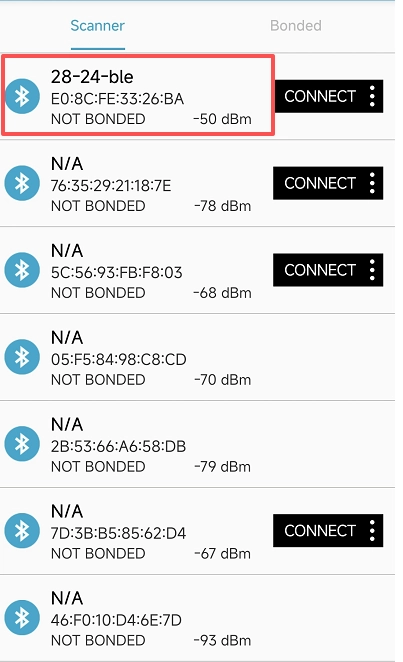
3.BLE
Connect your phone's Bluetooth to the Bluetooth of the ESP32 Display. You can check whether the connection is successful in LOG.
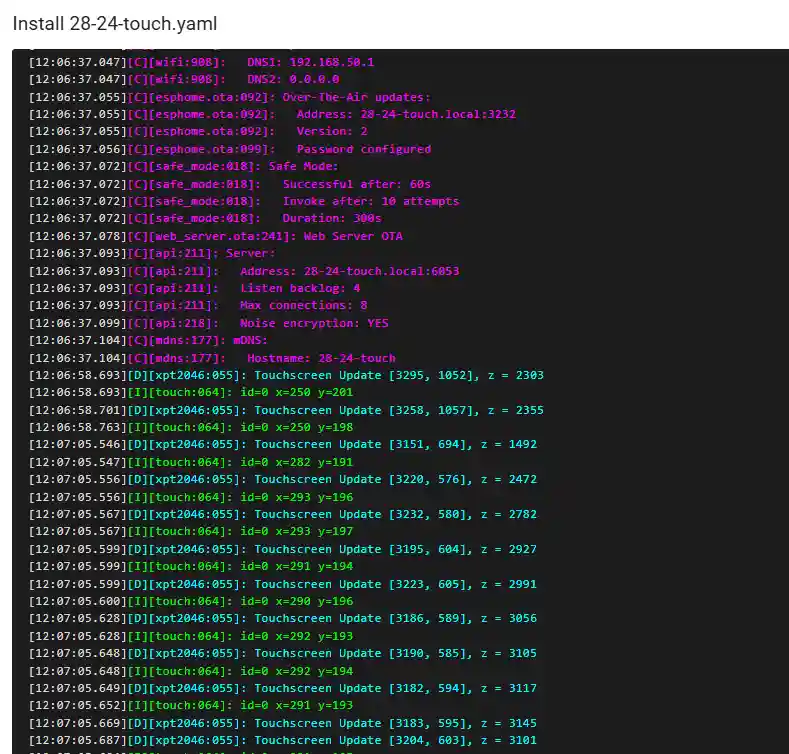
4.Touch
Read the position of the touch on the ESP32 Display by looking at the LOG.
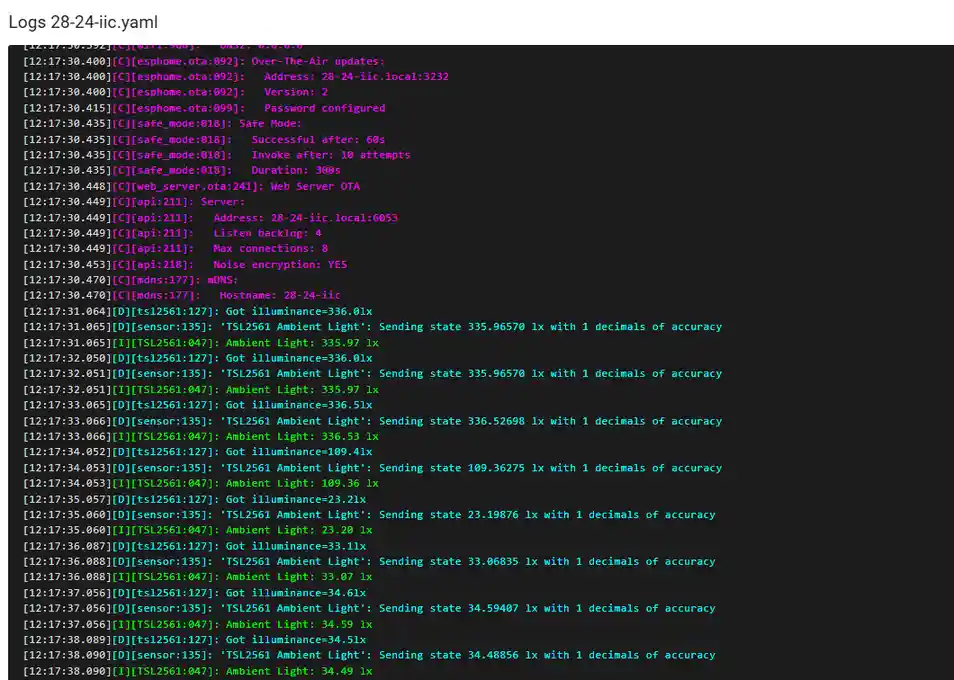
5.IIC
Connect the digital light sensor to the IIC port of the ESP32 Display. Check the brightness value in LOG.
6.GPIO
Connect the LED to GPIO_D-IO25 of the ESP32 Display.
