Case 4:Multi-Channel Application Routine for Raspberry Pi Gateways and Nodes
Equipment: LR1302(915) Gateway Module , LR1302 LoRaWAN Hat
Website:LR1302(915) Gateway Module , LR1302 LoRaWAN Hat
Raspberry Pi setup steps
Step 1. Installing the LR1302 LoRaWAN HAT onto the Raspberry Pi and installing the LR1302 Gateway Module
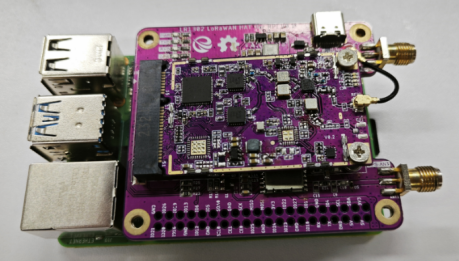
Easily install the Hat onto the Raspberry Pi 40-pin connector. Firstly power down the Raspberry Pi. Insert the LR1302 module into the Hat as shown below and tighten it
Step 2. Enabling Raspbian I2C and SPI Interfaces
The LR1302 module communicates with the Raspberry Pi via SPI and I2C. However, these two interfaces are not enabled by default in Raspbian, so developers need to enable them before using the LR1302. Here, we introduce a command line way to enable the SPI and I2C interfaces.
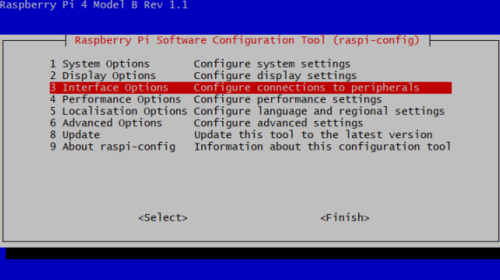
Firstly, log in to the Raspberry Pi via SSH or using a monitor (do not use the serial console as the GPS module on the Pi Hat will take over the Pi's hardware UART pins), and then enter the command line sudo raspi-config to open the Rasberry Pi Software Configuration Tool.
1.Select "Interface Options".
2.Select SPI, and then select Yes to enable it.
3.Select I2C and select Yes to enable it.
4.Select Serial Port, then select No "Do you want to log into the shell..." and select Yes "Do you want serial port hardware...".
5.Afterwards, please reboot the Raspberry Pi to make sure these settings are valid.
Step 3. Getting and compiling the SX1302 source
Now let's install git from github and download sx1302_hal (libraries and programs for the SX1302 LoRa gateway)
sudo apt update
sudo apt install -y git
cd ~
git clone https://github.com/Elecrow-RD/LR1302_loraWAN.git
Move to the sx1302_hal folder and compile everything
TTN configuration
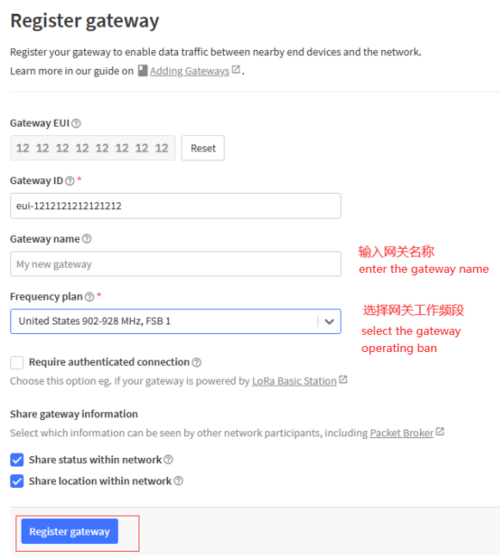
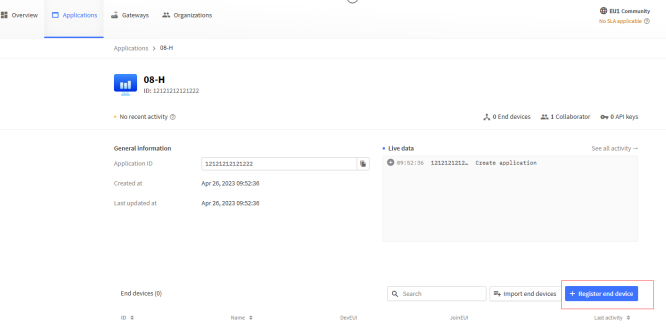
1. Add gateway (TTN address eu1.cloud.thethings.network, you need to register an account to access the console to add)
Enter the gateway ID, click Confirm, enter the gateway name, and select the operating band.
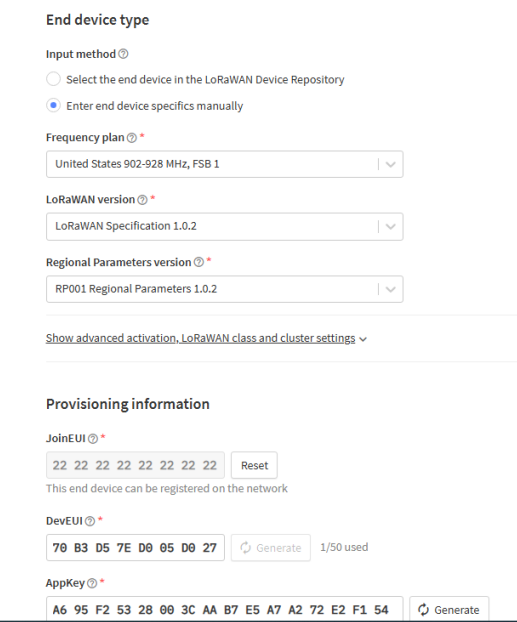
Note: Select the band "United States 902-928MHz FSB1" (select this band when testing LoRa nodes using the 915MHz band).
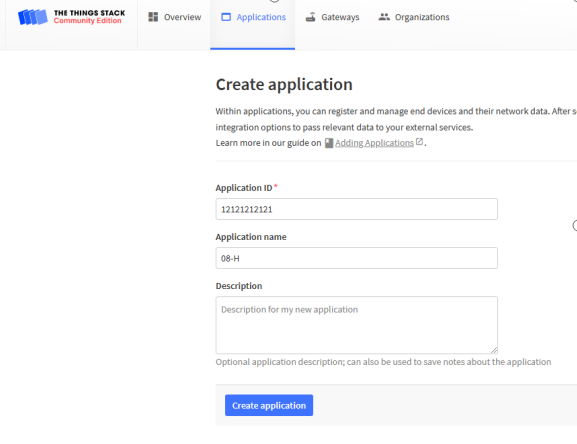
2. Add Node
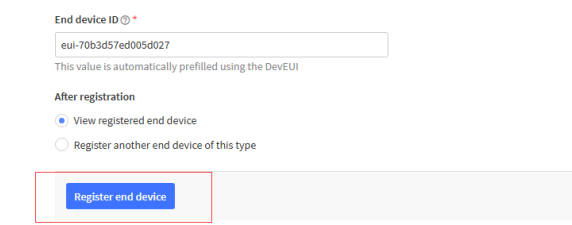
Enter the node ID, name, and description
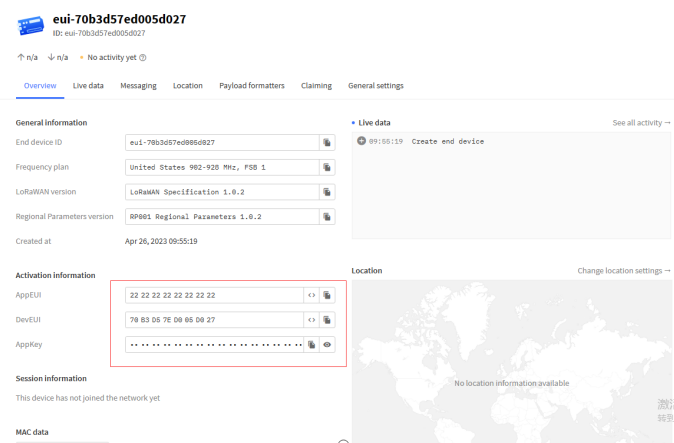
Configure the node parameters added by TTN to the node.
It must be confirmed that the LR1262 module has been burned with the factory firmware programme. Open the serial port tool and enter the network.
Functional debugging of loRa nodes with LR1262 terminal
Raspberry Pi LoraWan Gateway
1. Connect to the network (wifi or wired)
2. Run the programme
1). Open Raspberry Pi shell
2). Run the command
Note: Please make sure there is reset_lgw.sh file under current path when running lora_pkt_fwd. 915SPI mode:
Sudo /home/pi/sx1302_hal/packet_forwarder/lora_pkt_fwd -c
/home/pi/sx1302_hal/packet_forwarder/global_conf.json.sx1250.US915.USB
3). Check if you are connected to the TTN server and receiving heartbeat packets.
LR1262 connects to PC serial port
1. OTAA distribution network
You need to modify DEVEUI according to the relevant data displayed by the TTN, APPEUI and APPKEY. (The setting of the TTN node is taken as an example in Case 1, and users need to set it according to their own TTN node, and also configure different frequency parameters according to different modes.)
2. LR1262 node
1). Open the serial port tool, serial port settings
- Baud rate: 9600
- Tick the serial port carriage return line feed
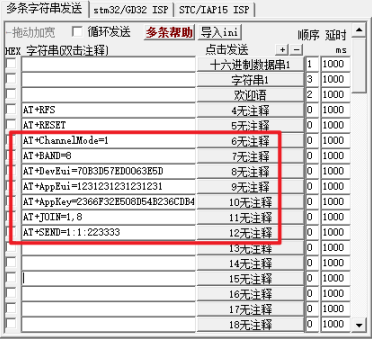
2). Node access single channel gateway configuration steps (send AT command)
- Select the node for single channel/multi-channel mode mode: AT+ChannelMode=1 (1 for multi-channel)
- Set the node into the network frequency band: AT + BAND = 8 (8 for 915 band)
3). Set the node entry triad (OTAA):
- Set node DevEui: AT+DevEui=70B3D57ED005B7FF
- Set node AppEui: AT+AppEui=000000000000000003
- Set node AppKey: AT+AppKey=A8D7E5959F7746D902BF52BA2F899E3E
4). Setting the node to start netting: AT+JOIN=1,8 (parameter description: the first parameter is to select the netting mode, 0 is ABP mode, 1 is OTAA mode, the second parameter is the number of times of cyclic request for netting in OTAA mode (1-8), no cycle is needed in ABP mode)
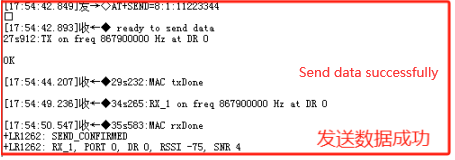
5). Start sending data: AT+SEND=1:1:223333 (parameter description: the last parameter is the data to be sent, and only an even number of data can be sent)
