Arduino Environment configuration
1.1 Open the official Arduino website
https://www.arduino.cc/en/software
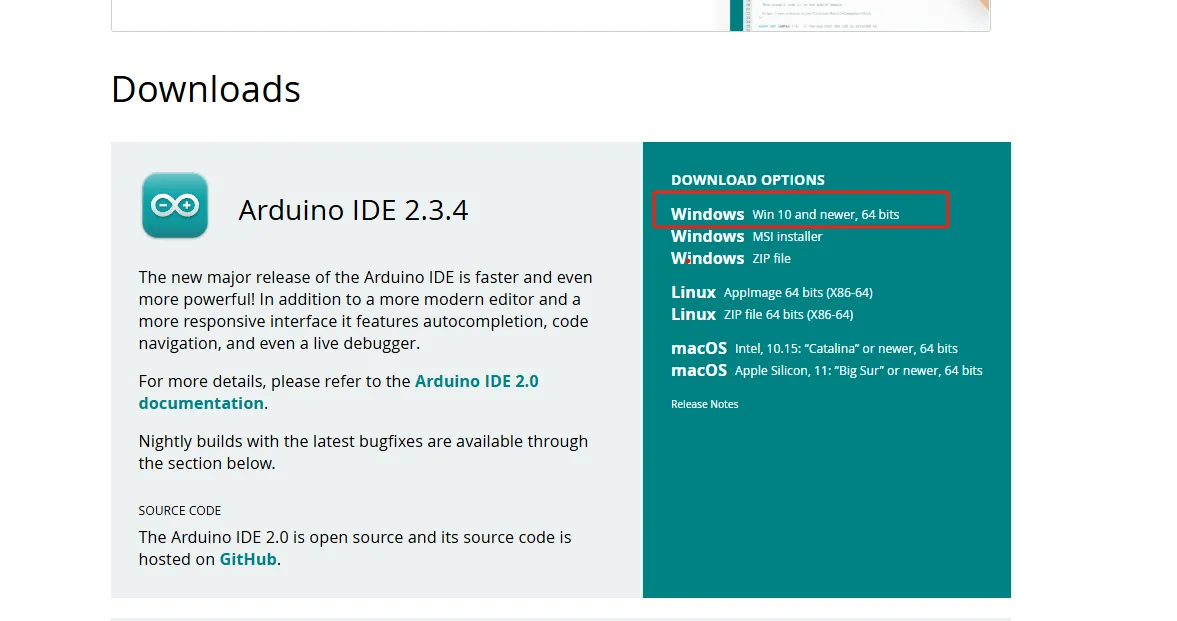
1.2 Choose the appropriate system for installation based on your system
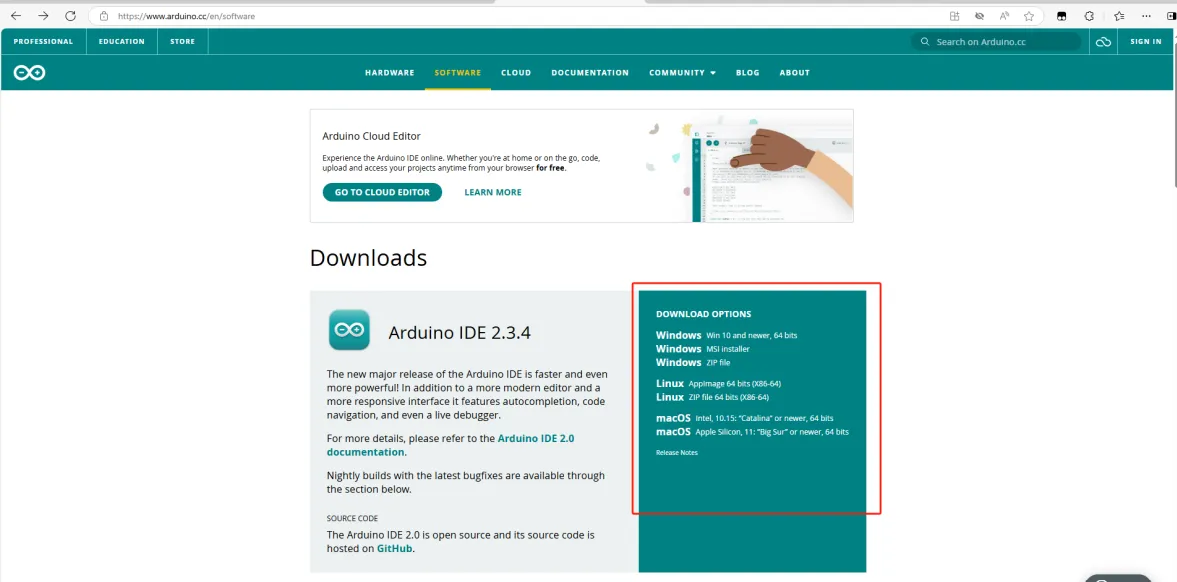
1.2.1 I have chosen the first one here
1.2.2 Choose to download only
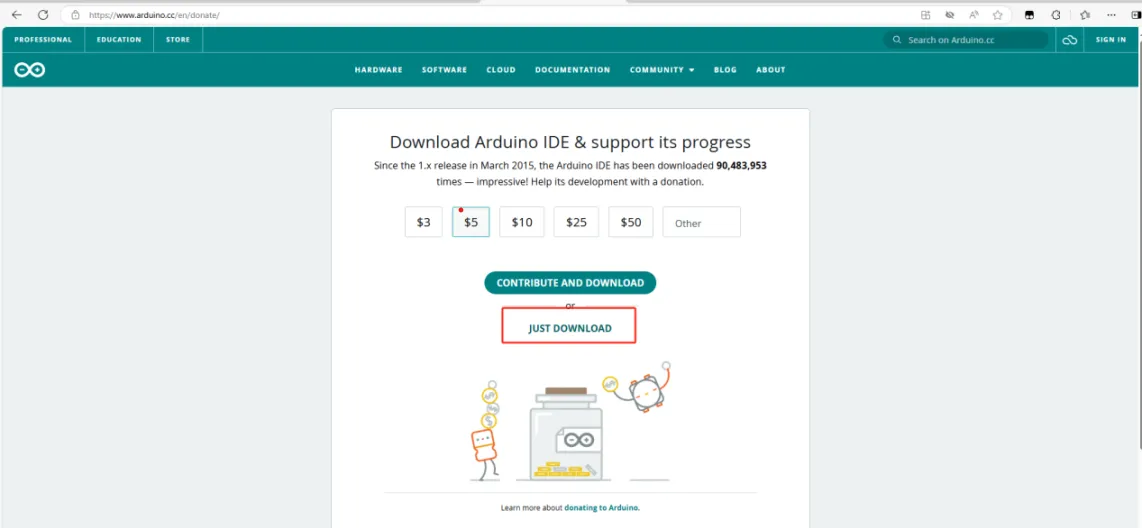
1.2.3 ditto
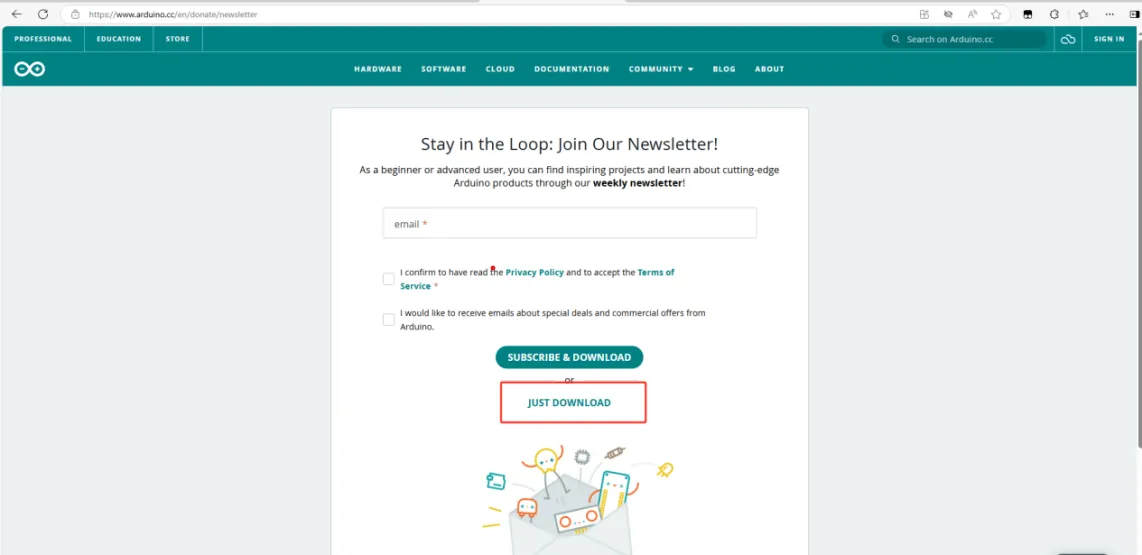
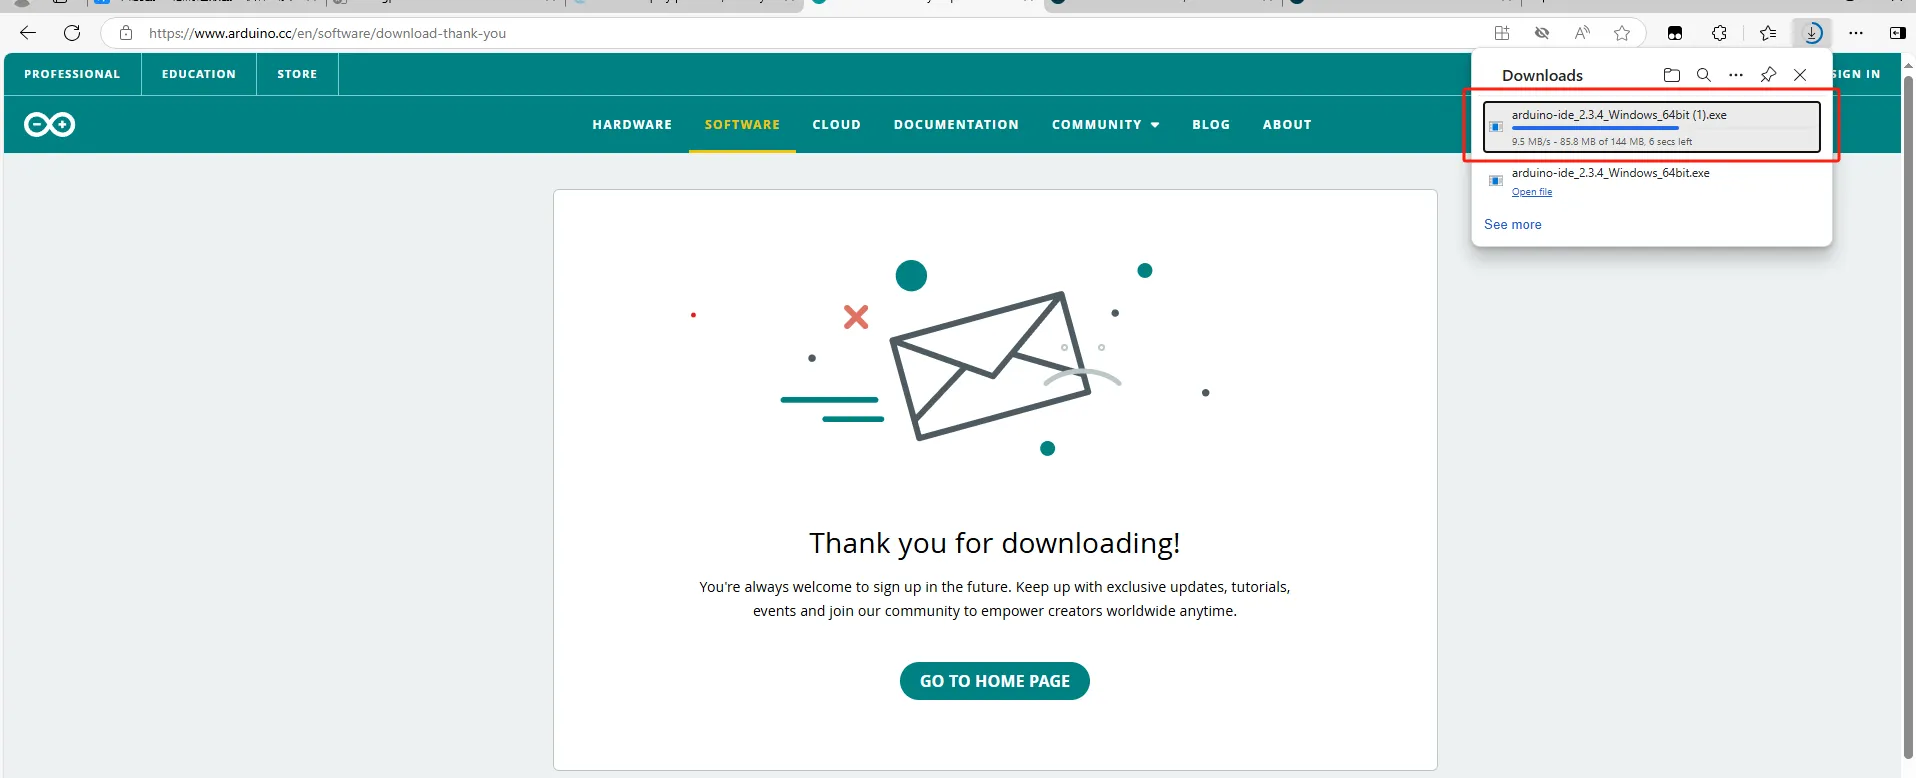
1.2.4 Waiting for download to complete¶¶
1.3 Confirm the download process
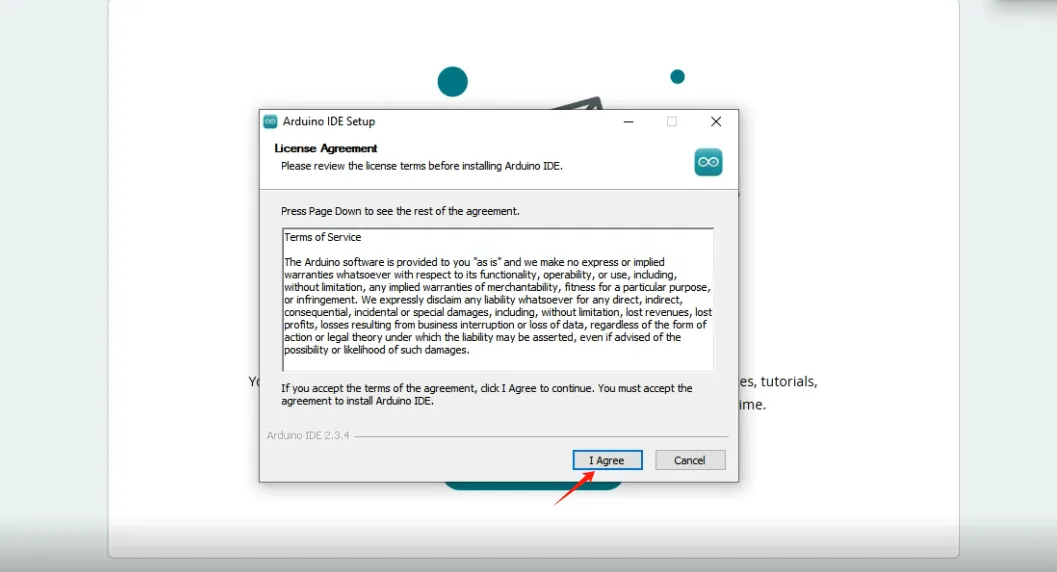
1.3.1 Agree option
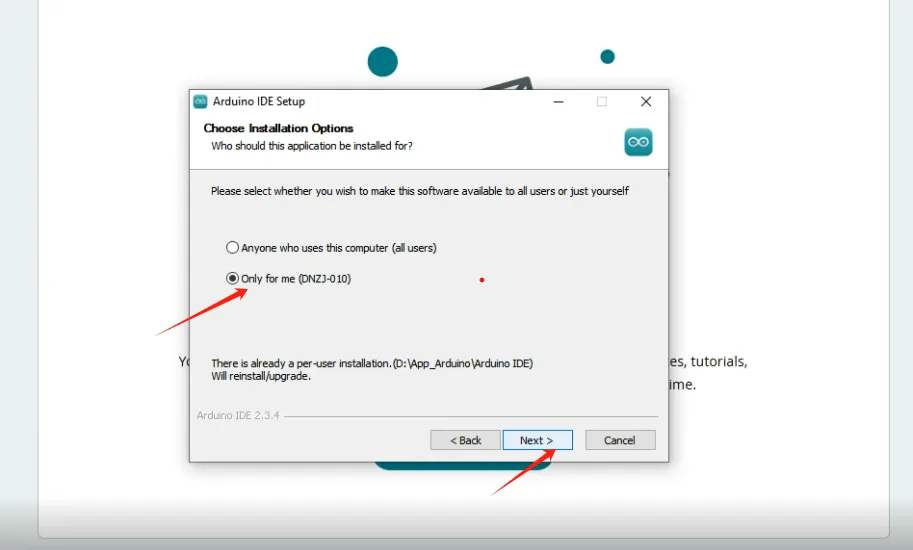
1.3.2 As shown in the figure, confirm
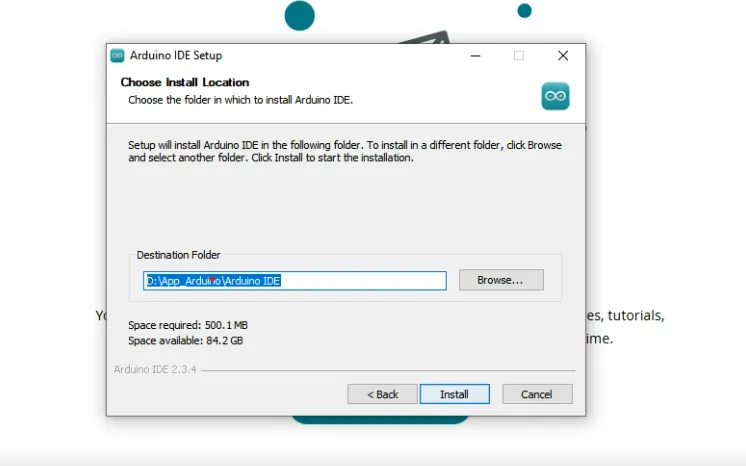
1.3.3 Customize your path and click install
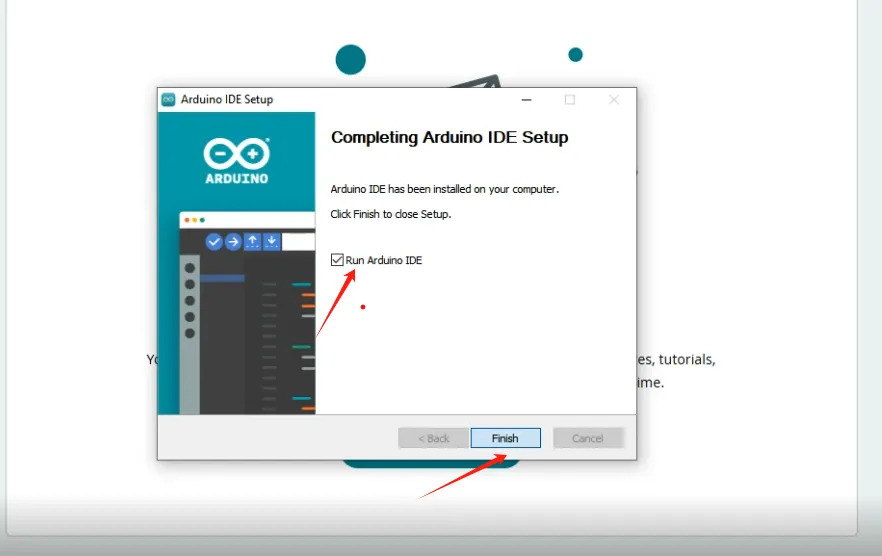
1.3.4 After installation, you can run the Arduino IDE
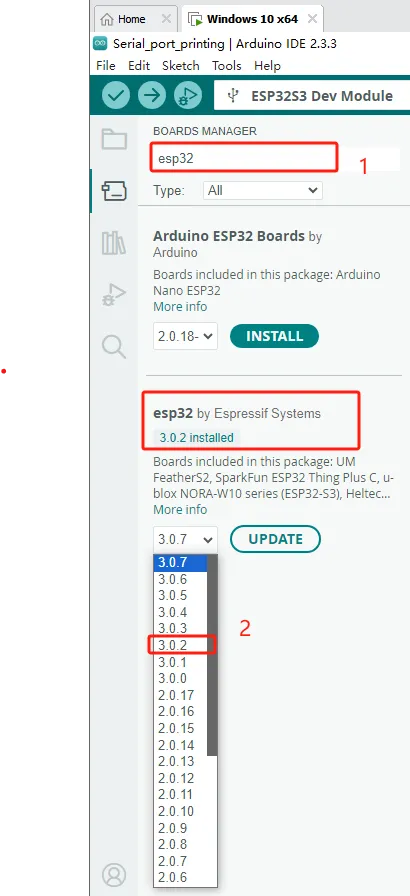
2 Install ESP32 development board version 3.0.2
2.1 Open Development Board Management
Path: Tools ->Board ->Board Manager or press Ctrl+Shift+B directly

2.2 Search for ESP32 and download it (the version we were using for development at the time was 3.0.2)
2.3 After completing the Esp32 download, replace the files in that directory
2.3.1 Open the "ESP32S3_120M" file we provided, copy a copy of the file from that folder to the following path in ESP32, and replace it
Path reference:
C:\ESP32_Code\CrowPanel_Advanced_HMI\ESP32S3_120M(1)\ESP32S3_120M
C:\Users\14175\AppData\Local\Arduino15\packages\esp32\tools\esp32-arduino-libs\idf-release_v5.1-bd2b9390ef
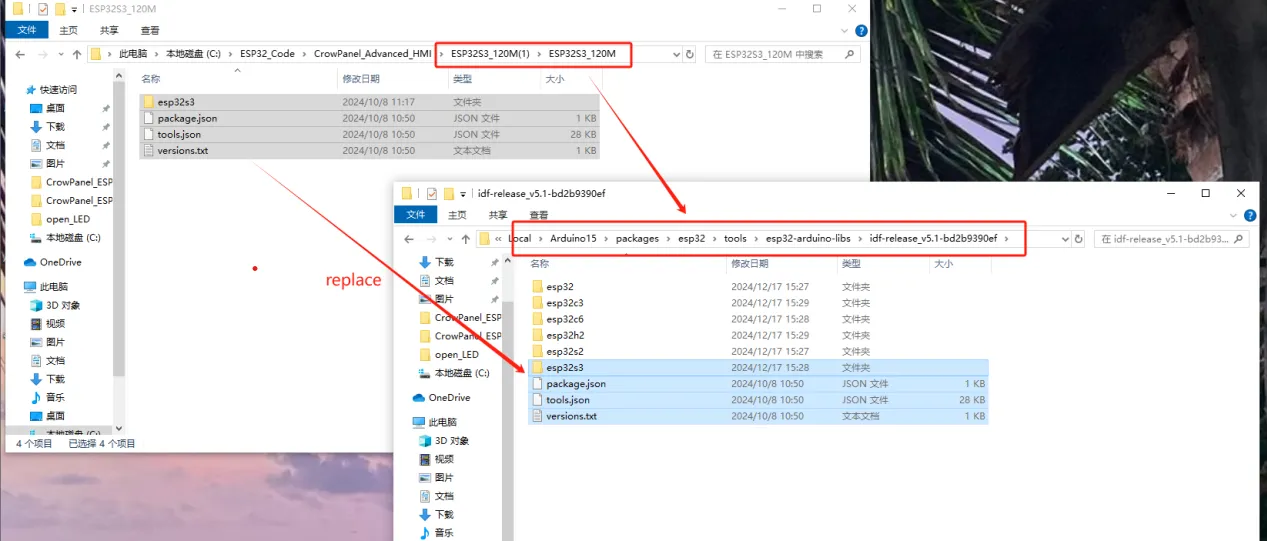
Note: "ESP32S3_120M" is a recompiled official file that has enabled PSRAM high-speed communication mode, and the improved refresh rate is just one of its optimizations. If not replaced, the maximum can only reach 80M, and after replacement, the maximum is 120M.