CrowPanel advance ESP32 AI display with PlatformIO
Overview
The example tutorial is a PlatformIO project, which demonstrates how to create a new project using PlatformIO, display UI graphics with LVGL, and control the on and off of a small light bulb connected to the UART port of the Advance development board according to the touch input on the screen.
In this tutorial, the version of the SquareLine Studio software used for designing the UI interface is 1.4.2, the version of LVGL is 8.3.11, and the version of the PlatformIO plugin is 3.3.4.
1. Introduce platfromIO
PlatformIO is a powerful open-source embedded development platform that provides developers with a one-stop solution. It has excellent cross-platform compatibility and can run seamlessly on various operating systems such as Windows, Mac OS, and Linux. This platform supports integration with mainstream IDEs like Visual Studio Code and Eclipse, enabling developers to work efficiently in a familiar environment.
PlatformIO boasts a wealth of library and sample code resources, which significantly reduces repetitive development work and accelerates the project development process. It standardizes the development processes for different hardware platforms and encompasses functions such as project management, code editing, compilation, uploading, and debugging. Whether it is for the development of Internet of Things (IoT) devices, embedded system development, or teaching practices in the field of education, PlatformIO can play an important role and is an ideal choice for embedded developers.
2. Install Visual Studio Code
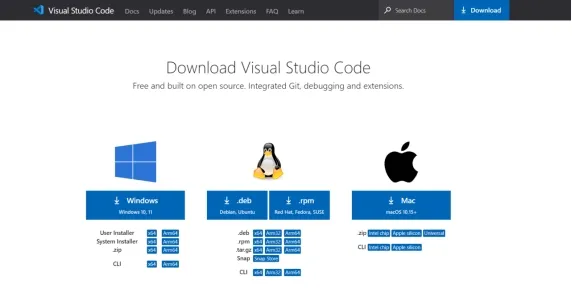
Search for Visual Studio Code download on Google or enter the https://code.visualstudio.com/download, select the version compatible with your computer system and download Visual Studio Code installer. In this instructions we are selecting Windows.
Double-click the VSCodeUserSetup file to install the Visual Studio Code.

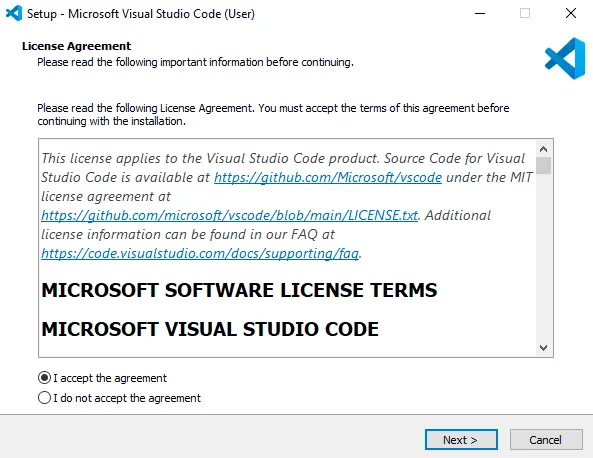
Accept the license agreement and go next.
Accept the default location or click 'Browse...' to change the installation location.

Accept the resting default option and click 'Next >...'
Click install and waiting for the installation ...

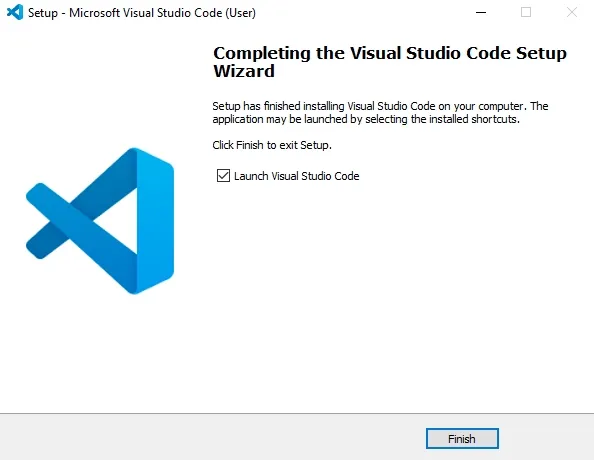
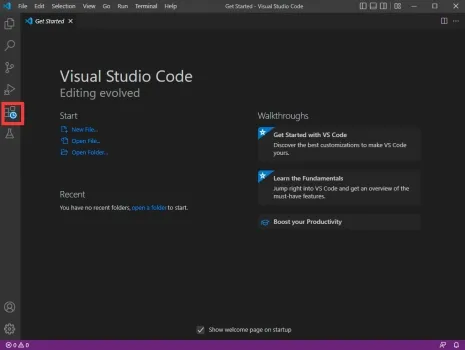
Click 'Finish' to exit the installation and (by default) launch Visual Studio Code:
Open Visual Studio Code and open Extension Manager.
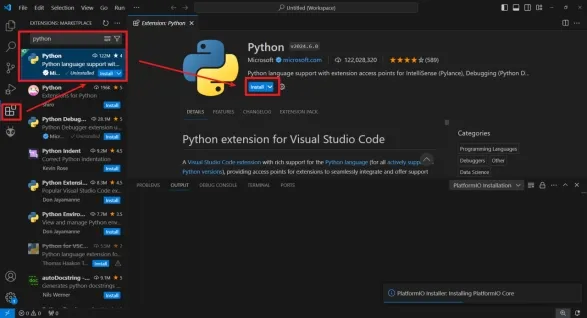
Install Python
Search for 'Python' and install.
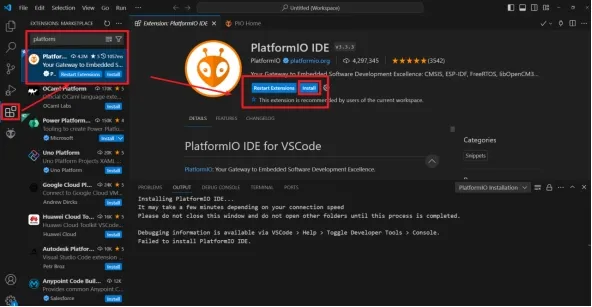
Install PlatformIO
Search for 'PlatformIO' and install.
Install Driver(Optional)
If you have not installed the USB driver, you need to install it:
https://www.silabs.com/developers/usb-to-uart-bridge-vcp-drivers
3. Introduce LVGL
LVGL (LittlevGL) is an open-source, lightweight, high-performance embedded graphics library designed specifically for devices with limited resources. It supports multi platform porting, provides rich controls, animations, touch support, and highly customizable styles, suitable for fields such as smart homes, industrial equipment, medical instruments, etc. LVGL is centered around modular design and can run on bare metal or operating systems, accelerating GUI development through powerful community support and tools such as SquareLine Studio.
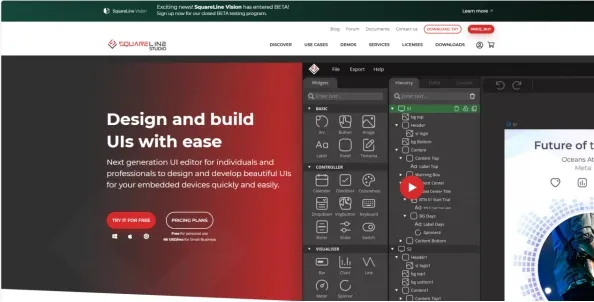
SquareLine Studio is a next-generation user interface (UI) solution for individuals and professionals, allowing users to quickly and easily design and develop aesthetically pleasing UI for embedded devices. This software provides integrated design, prototyping, and development capabilities, supporting the export of platform independent C or MicroPython code for LVGL (Lightweight Graphics Library), which can be compiled and run on any vendor's device.
4. Install SquareLine Studio
4.1 Installation Guide
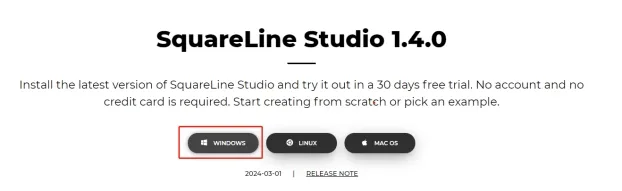
Enter the https://squareline.io/ to download the SquareLine installation file.
Download the version 1.4.0
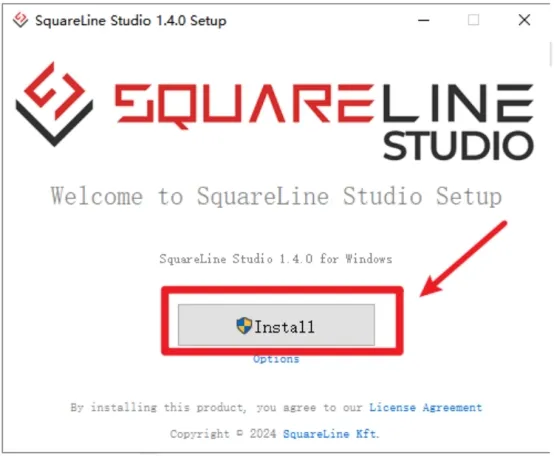
Double-click the setup.exe file.

Click install.
Wait for installation.

Installation finish.
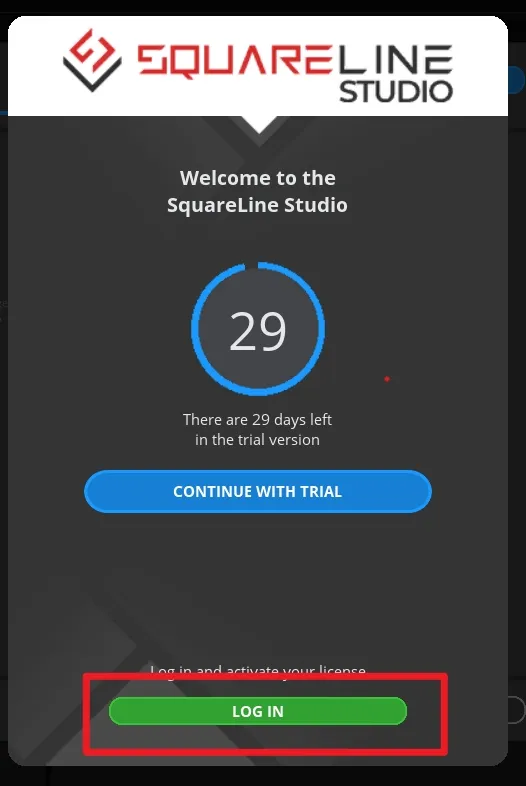
There is a 30-day trial period for the first time you use it. Please follow the prompts to register an account. You will continue to use it when you log in to your account next time.
4.2 Software Function Introduction
Open the software
The historical project page: open the project built earlier.
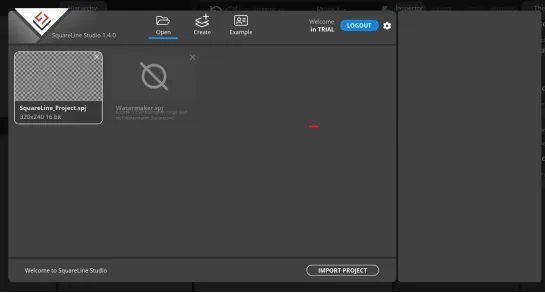
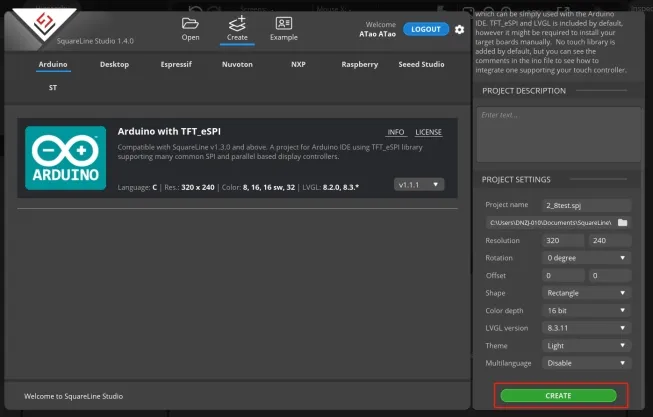
Create a project page: choose different platforms according to different hardware of the project.

When select the Arduino framwork, there's only one option "Arduino with TFT_eSPI". By choosing this, the squareline studio will generate a template code suitable for the TFT_eSPI library. However, squareline studio not only supports the TFT_eSPI library, it supports a variety of libraries to suit different hardware and application needs. For example, Adafruit_GFX library, LovyanGFX etc.
After using SLS to generate UI code, we then use different graphics libraries according to different hardware and modify the corresponding code to display the content you design.
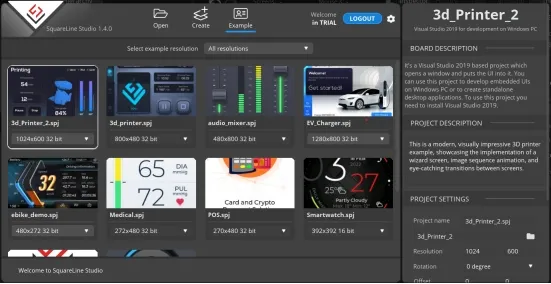
Example page. This page has several official examples for reference.
The project settings bar is used to make basic settings for the project, including property settings such as project name, screen size, display angle, etc.
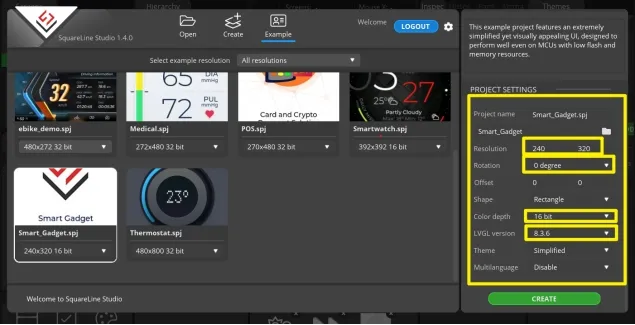
Note:Please select the corresponding resolution and color depth according to the screen specifications.
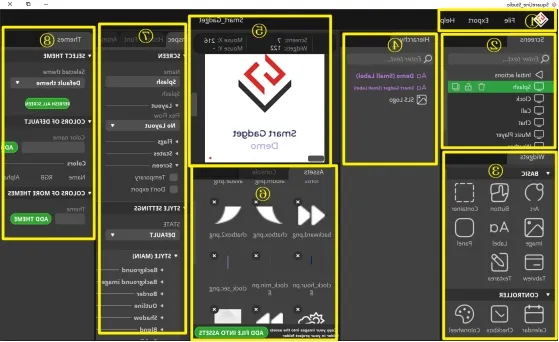
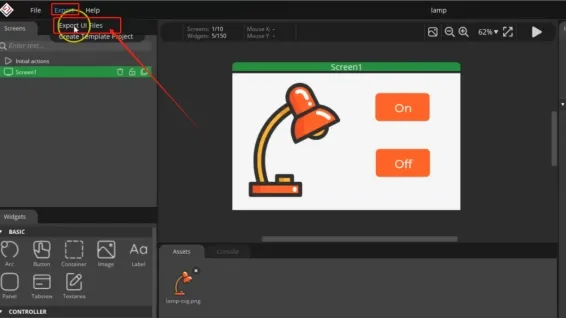
①Toolbar, including File, Export, and Help. Basic file operation bar, create or open files, export UI files and other operations. Click help and there are related introductory documents.
②Screen bar, the project screen will be listed here.
③Widget area, all widgets are here and can be selected and used according to project needs.
④Hierarchy area, it will show every widget used in each screen.
⑤This area shows the actual display effect, you can adjust the widgets or screen here.
⑥Material column, the added materials are displayed here.
⑦Setting bar, where you can make basic settings for each part, including the basic attributes and trigger operations of the part.
⑧Theme bar, different themes can be set.
5. Use SquareLine Studio to create UI control interfaces
5.1 Create a new SquareLine Studio project.
Firstly, open the SquareLine Studio software and create a case study

Choose the correct resolution based on the different sizes you are using
Here, I take a 2.8-inch screen as an example. After determining the resolution, I fill it in

After selecting the parameters, click Create
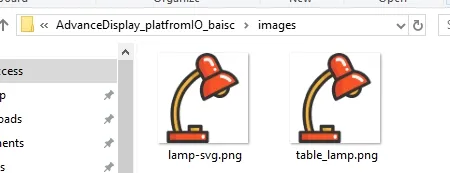
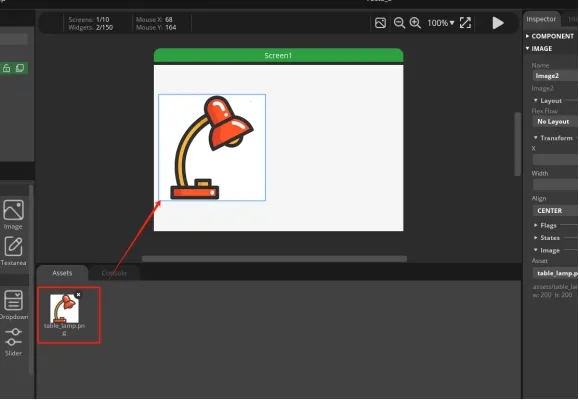
Open the photo of the desk lamp we provided and add it in. (Of course, you can also choose the image you want to use)
The file download address is https://drive.google.com/drive/folders/1Qw7hdW862upBigarI11btgl4cQkr0vpe?usp=sharing

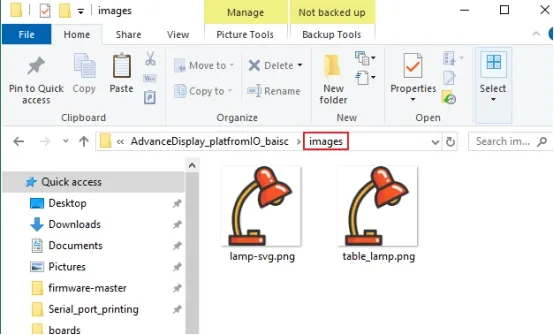
The lamp_28 image size is available for both 2.4-inch and 2.8-inch screens.
Table_1amp image sizes are available for 3.5-inch, 4.3-inch, 5.0-inch, and 7-inch screens.
After adding it, drag and drop the image in.
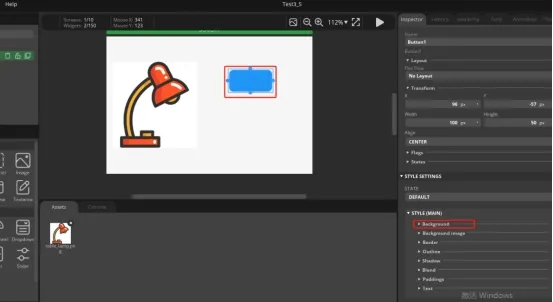
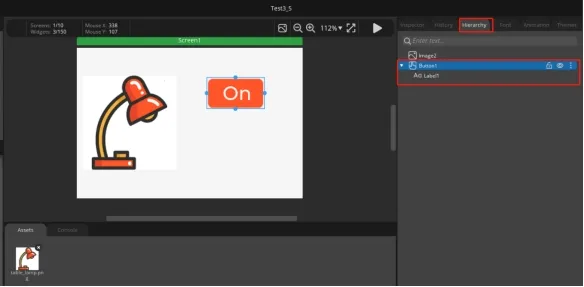
The task we need to complete is to turn on and off the lights by clicking on the buttons on the graphical interface. So we need to design two buttons
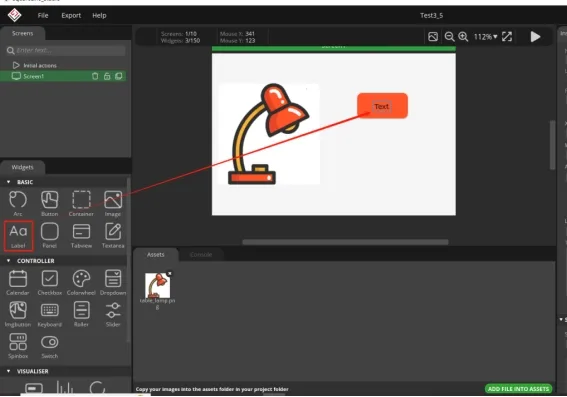
From the left sidebar, select Button and drag it into the interface.

You can adjust the border of the button with the mouse, which can adjust the size of the button, and you can also drag and drop the button to adjust its position.
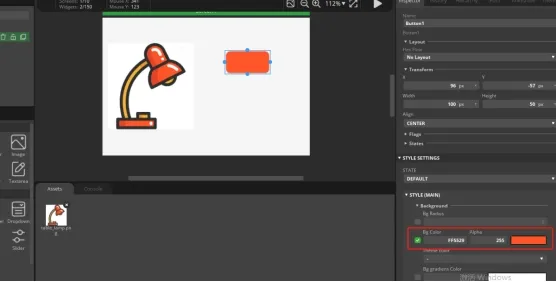
Then, by selecting Background, choose the background color of the Button.
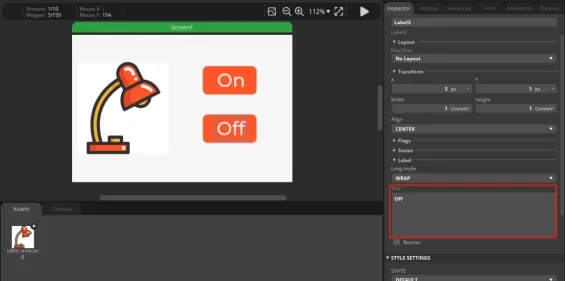
We have made the button patterns, and now we need to add labels to the button patterns in order to distinguish their functions.
Drag and drop from the left sidebar, select Label, and drag into the interface.
Modify the text content of the label
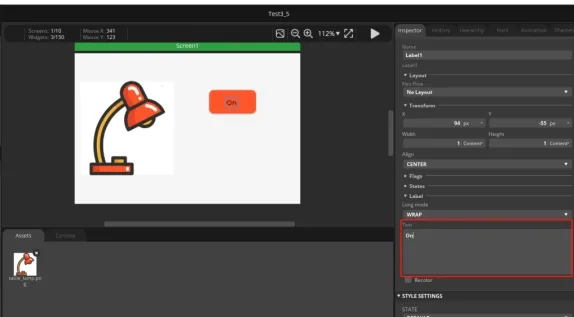
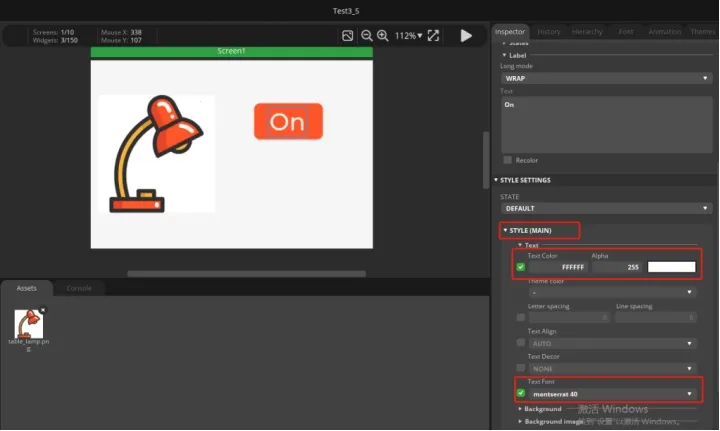
And modify the font size and text color of the text
The Button and Label have been designed. Click on the Hierarchy in the right-hand column and drag the Label onto the Button line to merge them into one.
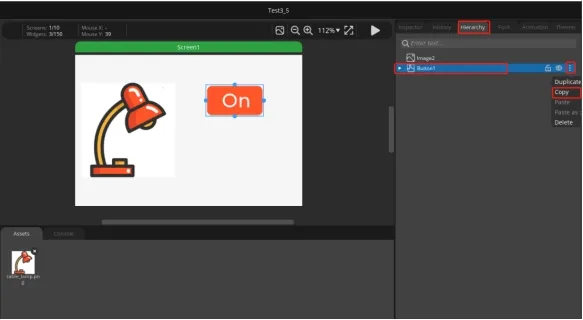
At this point, if you drag the buttons again, you will find that they are dragged together
Next, we will copy a completed button, right-click, and paste it in.
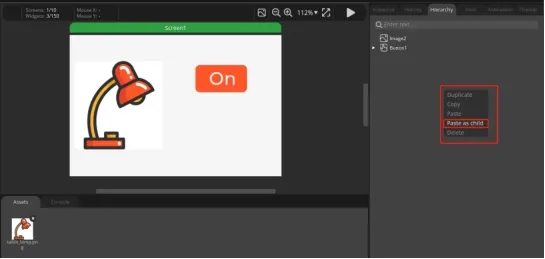
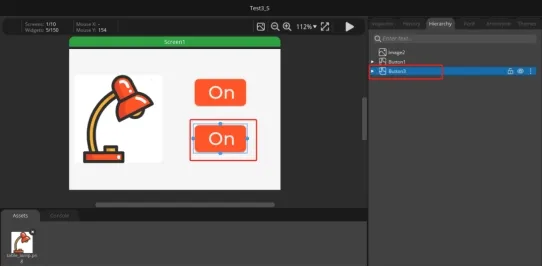
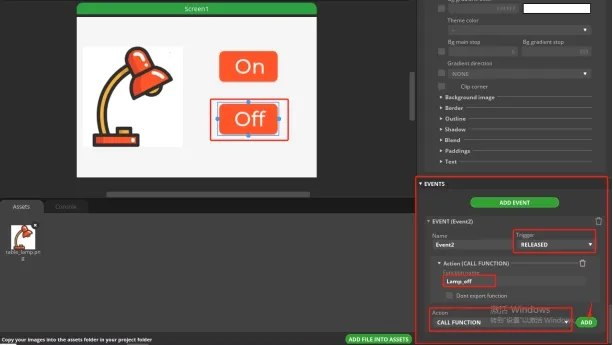
Click the second button ON to change the text content to Off. Used to achieve the effect of turning off lights.
5.2 Add functions to the buttons to enable them to turn on and off lights
Select 'event' to add in the right sidebar.
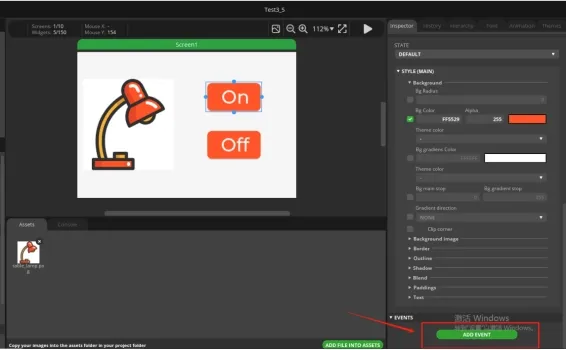
Select 'released' as the triggering condition and 'Call function' as the action.
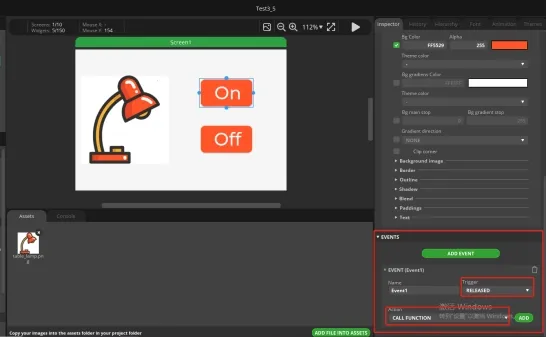
After selecting, click ADD.
And add a function name to the CALL Function. (Customization is sufficient)

Similarly, add an event to the Off button. The operation process is the same as above.
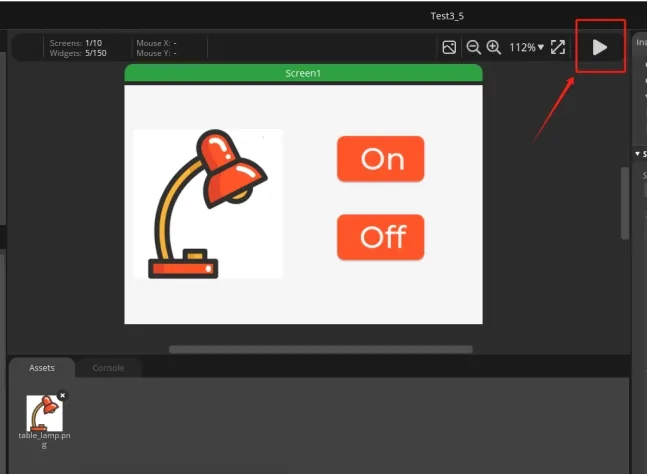
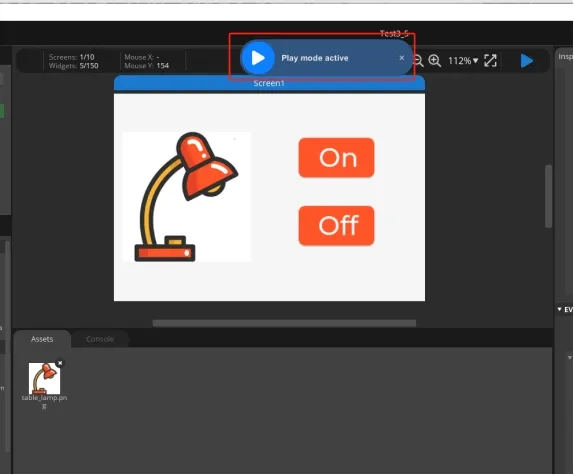
After adding, run
5.3 UI interface design completed, exporting UI files for easy use in subsequent code
Click on Project Setting

Set export path.
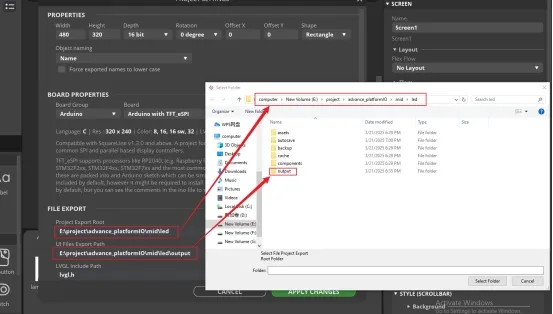
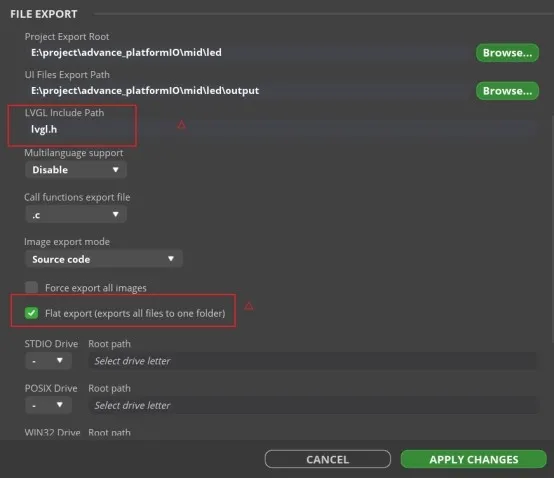
Complete the setup and export file.
6. Create and run the PlatformIO project of this lesson
6.1 Create a new PlatformIO project
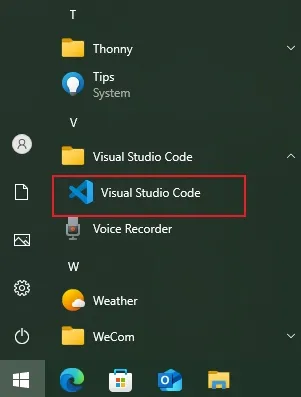
Double-click to open Visual Studio Code.
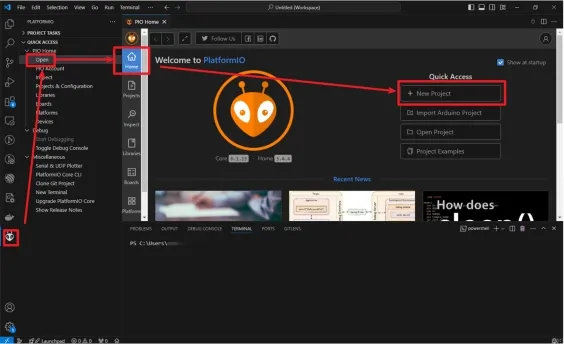
Click the PlatformIO icon, click QUIK ACCESS 'Open', then click '+New Project'.
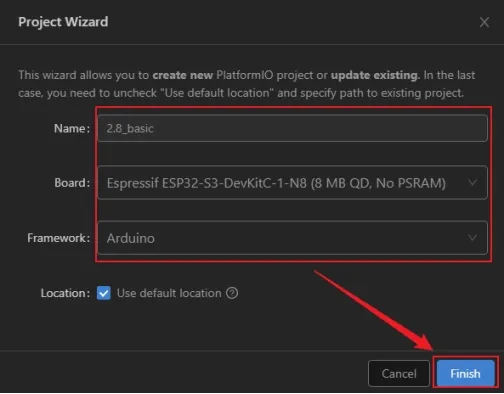
Add a project name. Select "Espressif ESP32-S3-DevKitC-1-N8" for the board and Arduino for the framework.(In this lesson, the 2.8-inch development board is taken as an example.)
6.2 Add the necessary libraries to the PlatformIO project.
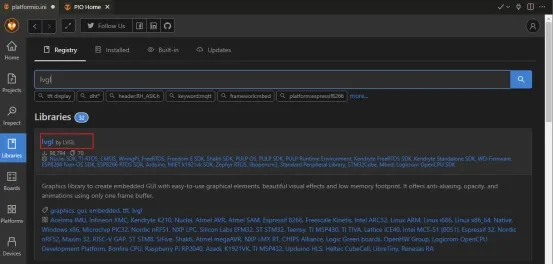
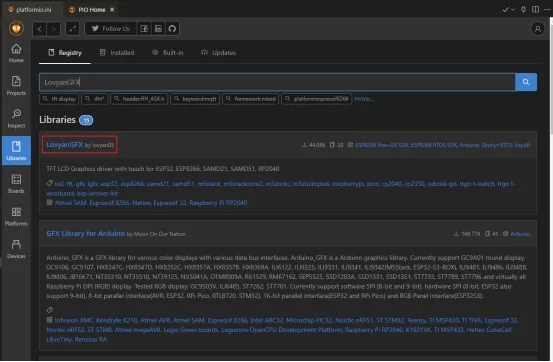
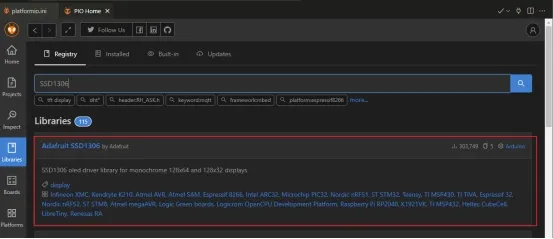
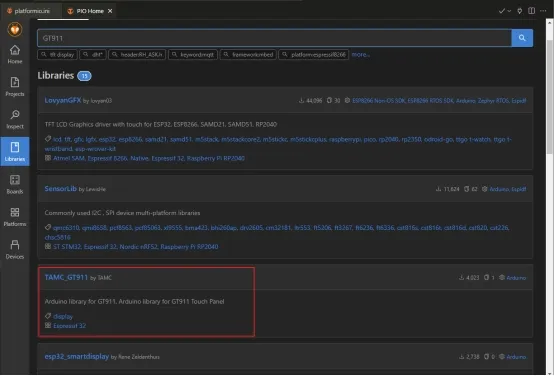
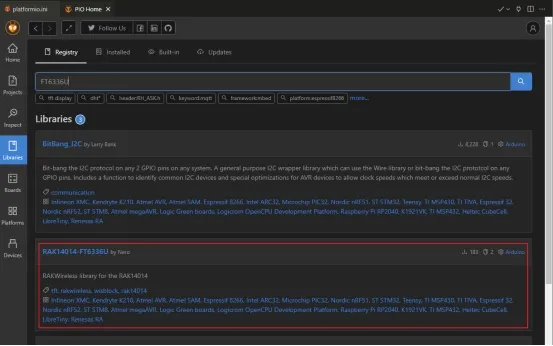
Click the PlatformIO icon, click ‘Libraries’, then search for the following libraries.
① Lvgl
② LovyanGFX
③ Adafruit SSD1306
④ TAMC_GT911
⑤ FT6336U
Click on the LVGL library.
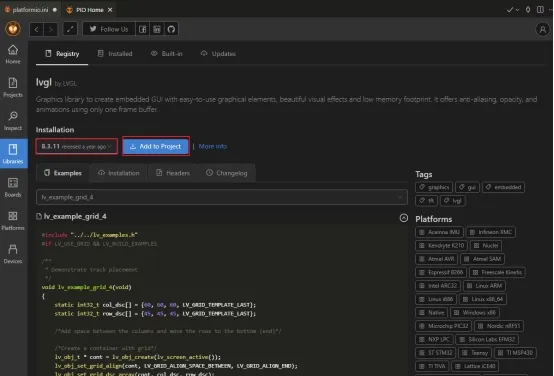
Select version 8.3.11 (which needs to correspond to the version selected when creating the project in SquareLine Studio), and click "Add to Project".
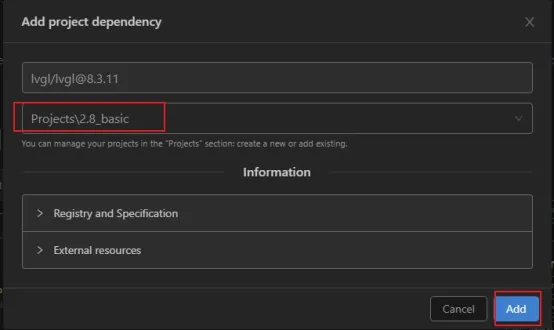
Select the corresponding project name and click "Add".
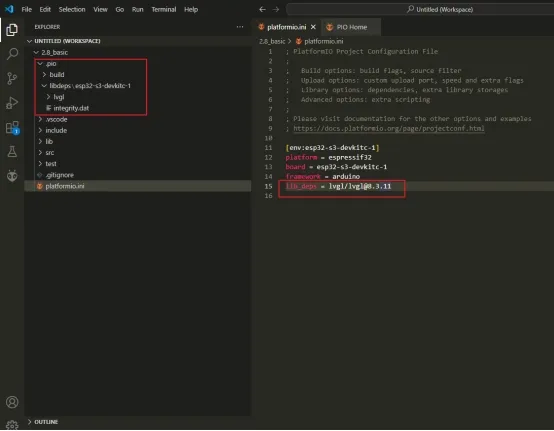
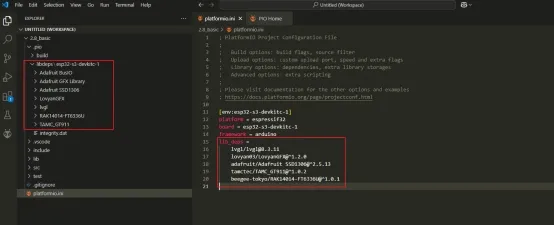
If the library is successfully added to the project, the interface will automatically jump to the PlatformIO.ini file and automatically generate the project dependencies.
Note: If the platformio.ini file remains unchanged, but the library that has just been added is present in the pio->libdeps->esp32-s3-devkitc-1 folder, then click on "Compile". The PlatformIO plugin will pop up a window prompting you to change the library dependency link in the platformio.ini file.

Repeat the above steps and add the remaining libraries one by one (just select the latest version by default for the library versions).
After all the required libraries have been added, the PlatformIO project will be as shown in the following figure.
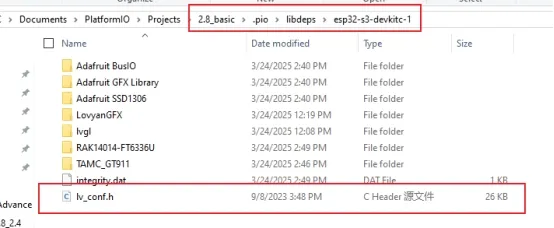
Place the lv_conf.h we provide to the path: .pio\libdeps\esp32-s3-devkitc-1-myboard in the project folder.
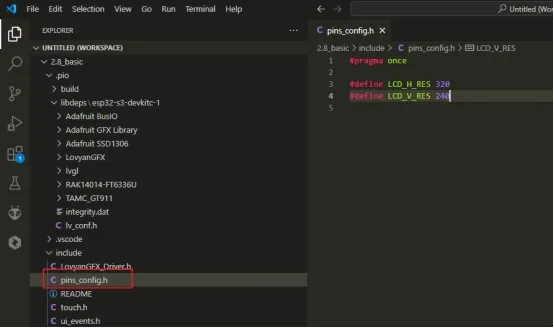
6.3 Add the chip configuration to the PlatformIO project
Open the platformio.ini file. This file is the configuration file of the PlatformIO project, which is used to define information such as the project's build environment, upload options, and library dependencies. Copy the following development board configuration into this file.
monitor_speed = 115200
board_build.arduino.partitions = default_8MB.csv
board_build.arduino.memory_type = qio_opi
build_flags =
-DBOARD_HAS_PSRAM
-mfix-esp32-psram-cache-issue
-DCONFIG_SPIRAM_SUPPORT=1
-DCONFIG_SPIRAM_TYPE=1
-DPSRAM_SIZE=2
-DPSRAM_CLK=120000000
board_upload.flash_size = 8MB

6.4 Add the necessary source files and header files to the PlatformIO project
Find the UI source files and header files generated by SquareLine Studio.
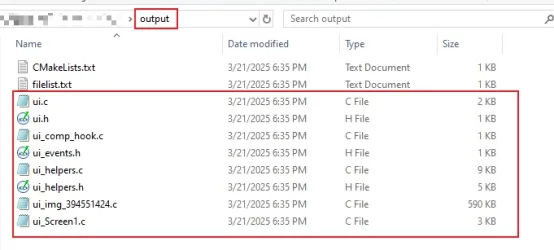
Copy the.c file in the UI file to the src folder of the PlatformIO project.
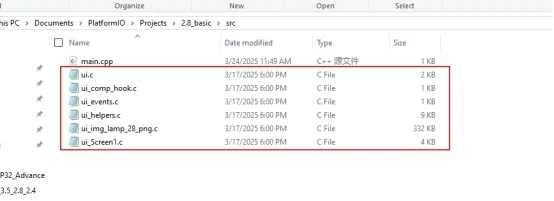
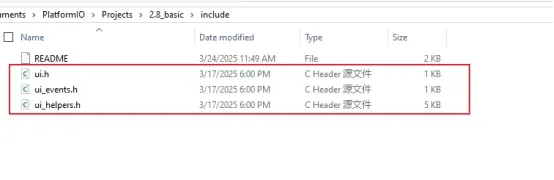
Copy the.h file in the UI file to the include folder of the PlatformIO project.
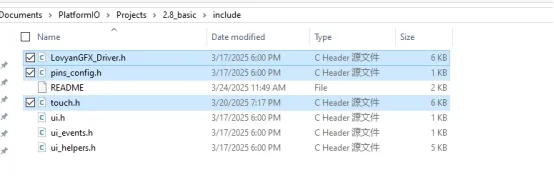
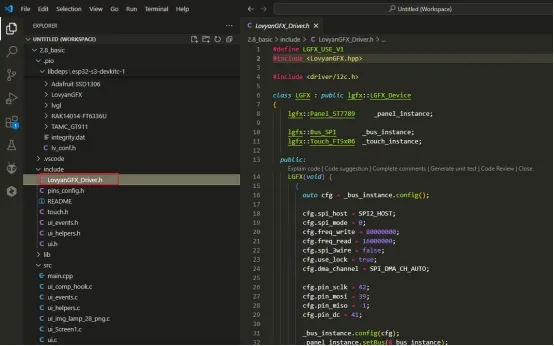
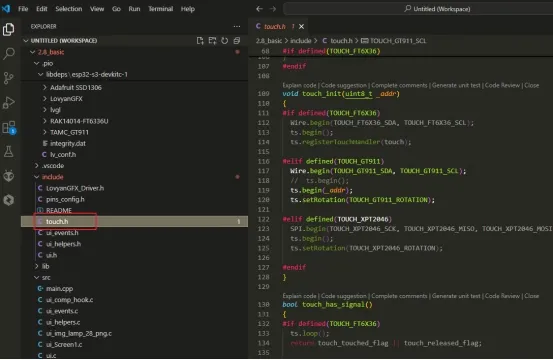
Similarly, add the display driver and pin definition header files to the include folder.
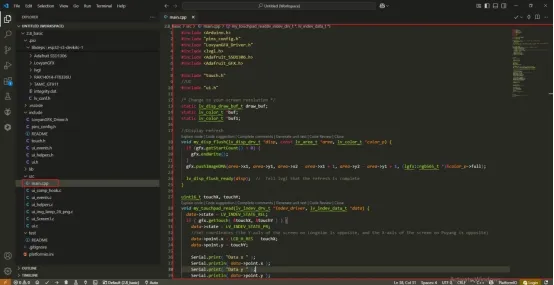
6.5 Write the main program in main.cpp
In PlatformIO, the.cpp file is an extremely crucial C++ source file. It serves as the core carrier for implementing program logic. It can define various functional functions to complete specific tasks, and it can also implement classes and objects, organizing the code with the object-oriented programming concept.
In terms of interacting with hardware, the.cpp file enables the writing of driver code to initialize, read from, and write to hardware devices such as sensors and actuators. Additionally, it allows for the writing of interrupt service routines to respond to hardware interrupts.
Moreover, the.cpp file supports modular development. Different functional codes can be encapsulated within it, which facilitates code reuse. In a multi-person team development scenario, different team members can be assigned to write different.cpp files, thereby improving development efficiency and the maintainability of the project.
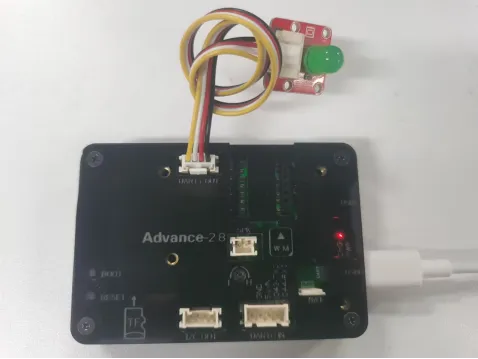
6.6 Burn the well-written PlatformIO project into the CrowPanel Advance ESP32 AI display
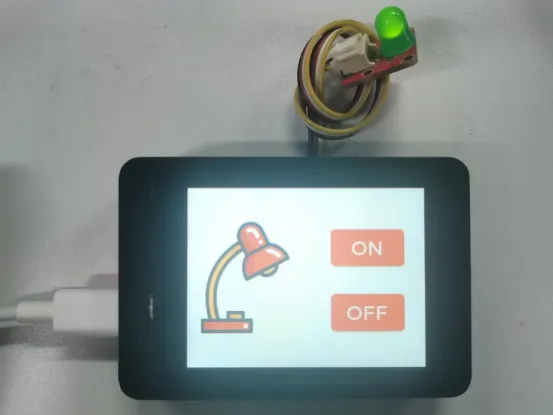
Connect the light bulb at the UART1 interface
Select the corresponding serial port.
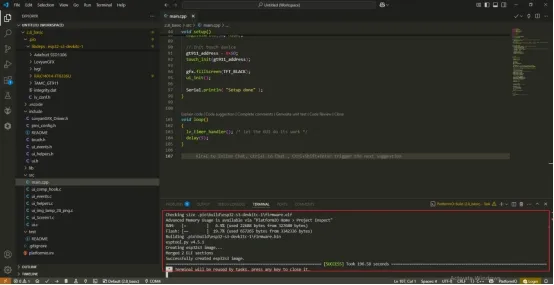
Click this button to build.

Wait for the compilation to be completed.
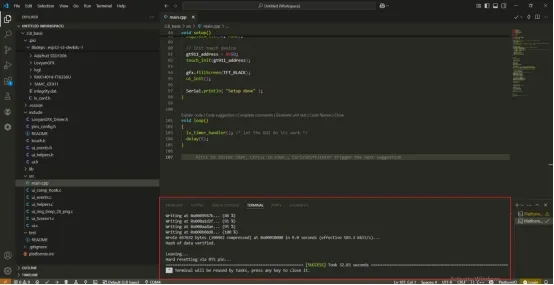
Click to burn.

Wait for the burning process to be completed.
So you can see the UI interface you just designed.
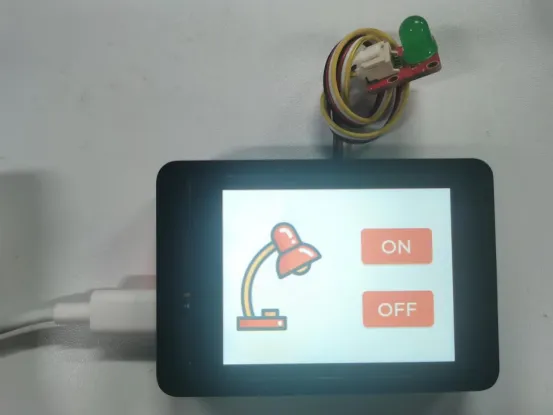
You can click the On and Off buttons to control the on/off of the lights