

Story
Ever wondered how to combine functionality and style in your workspace? Meet the ultimate IoT Weather Clock with an e-paper display—a sleek, minimalist device that keeps you informed and blends seamlessly into any setup.
This compact gadget isn’t just a weather clock—it’s powered by IoT, fetching real-time weather updates and displaying them on an ultra-low-power e-ink screen. Think of it as your personal weather assistant, right on your desk.
With its always-on e-paper display, this clock provides a crisp, paper-like look that's easy on the eyes and power-efficient. Whether you're working, studying, or simply want a clean accessory, this is the perfect addition to your workspace.
In this video, I’ll show you how to build your own IoT Weather Clock step-by-step, using the CrowPanel 4.2-inch E-Paper Display!
Let’s create the perfect blend of technology and simplicity for your desk. Let’s get started!
Required Components:
Here’s the best part—our components list is ridiculously short:
-
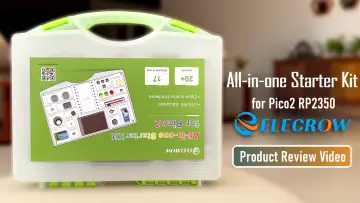
The CrowPanel 4.2-inch E-Paper Display!
And that’s it!
Wait, that’s all? How does it connect to the internet? How does the display even run without anything else?
You’re absolutely right! Those are all valid questions. For this project, we need something that connects to the internet, fetches real-time weather data, gets the current time, processes everything, and displays it on the screen.
And guess what? The CrowPanel 4.2-inch E-Paper Display does all of that in one package!
I just received this from Elecrow.com. Let’s unbox it and answer all your questions.
Inside, we’ve got:
-
A USB Type-C cable for programming and power.
-
And The display module itself.
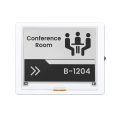
The display comes housed in a sleek white acrylic case and includes several interface buttons for interacting with the display.
The screen is 4.2 inches with a resolution of 400x300 pixels, offering sharp and clear visuals.
Let’s unscrew the display and take a closer look at the interfaces and buttons.
It’s powered by an onboard ESP32-S3 microcontroller, a popular choice with built-in Wi-Fi and Bluetooth capabilities. This means no external components are needed for internet connectivity or processing—this microcontroller handles it all!
There’s a battery connector here for standalone use and a USB Type-C port for programming the ESP32 and powering the system when a battery isn’t connected.
The board also has:
-
Two buttons for the ESP32 - boot and Reset
-
A 20-pin GPIO interface to connect external peripherals like sensors or actuators.
-
Two additional buttons—one for the menu and one for exit.
-
A rotary switch for easy navigation.
-
An SD card slot for additional storage.
This is where tools like Altium Designer and Altium 365 come into play if you’re designing something similar from scratch.
Altium 365 is a cloud-based platform that connects everyone involved in electronic product development. It lets you collaborate seamlessly with your team, view, edit, and discuss projects in real-time—no matter where your team is.
With Altium 365, you can:
-
Review design files directly in a web browser and leave comments for the team.
-
Share advanced object details with software engineers, who get notified instantly. They can access datasheets and other information right away.
-
Transition your design to production effortlessly by sending the complete design package directly to your manufacturer—just by adding their email.
And if all this sounds a bit overwhelming for beginners, don’t worry! Altium offers a free course called “Learn Printed Circuit Board Design” through their Student Lab program. This course covers everything—from schematic creation to PCB layout, routing, and even manufacturing.
I’ve created a separate video to guide you through the signup process, how to get your Altium Designer license, and how to get started with Altium 365. Be sure to check that out if you’re curious!
Now, let’s power up the display and see what it offers.
When the display boots up, it first shows the specifications.
Then, we’re greeted with a menu featuring three options to demonstrate its capabilities:
-
A product description.
-
A gallery of stock images, which I can scroll through.
-
A simulated lamp control program, showing how the display can work in real-life scenarios.
The versatility of this display makes it a great choice for so many different applications.
What makes e-paper displays special is their low power consumption and excellent readability, even in bright sunlight.
One thing I love about e-paper displays is that they’re bi-stable. That means the display only consumes power when updating—perfect for low-power projects like the weather clock we’re building now.
Now that we’ve explored the hardware, let’s set up and program the display. Since the ESP32-S3 is onboard, we can program it directly without needing an external microcontroller.
I’ve connected the display to my computer using the provided USB cable. This allows us to program the ESP32-S3 directly. For the code, we’ll use the Arduino IDE, which is compatible with the ESP32-S3. You’ll also need libraries for the e-paper display and for fetching weather data from an API. I’ll link all the required code, libraries, and instructions in the description below.
Before uploading the code, there are a few changes you’ll need to make in the source file to personalize it:
Wi-Fi Network Credentials: Update the code with your Wi-Fi network name (SSID) and password. Remember, the ESP32-S3 only supports 2.4GHz networks.
OpenWeatherMap API Key: Replace the placeholder API key with your own from OpenWeatherMap. If you don’t already have an API key, you can create a free account on the OpenWeatherMap website to get one as shown here.
City Name and City Code Information : Update the city name and country code to match your location:
Replace "Bengaluru" with your city name. For the CityCode, you can find your city’s unique ID on the OpenWeatherMap website's URL as shown here.
Time Zone Configuration: Set your time zone by editing the following lines in the code:
Replace 5.5 * 3600 with the appropriate offset for your time zone. For instance, 5.5 * 3600 is for India Standard Time (IST), which is UTC+5:30.
Next Make sure the uploading configurations are as followed.
1. Flash Size : 8MB
Partition Scheme : Huze App
P S RAM
O P I
P S RAM
Uploading Speed : 115200
Board : ESP32S3 Dev Module
And select the right port.
Once you’ve made these updates, you’re ready to upload the code to the ESP32-S3.
Let’s do that now!"
After uploading, the ESP32-S3 connects to your Wi-Fi, fetches the current time from NTP pool and weather information via the OpenWeatherMap API, and displays it on the e-paper screen.
And there we go!
The CrowPanel is now showing real-time weather and time information. Look how crisp and clear the display is — and it’s barely using any power.
This setup is perfect for building low-power, always-on IoT projects like this weather clock.
So, what do I think about the CrowPanel ESP32 4.2-inch e-paper HMI display?
It’s compact, versatile, and perfect for low-power IoT projects. The onboard ESP32-S3 makes development straightforward, and the display’s readability in various lighting conditions is impressive.
For students working on their final-year projects, this could be the perfect centerpiece for something innovative.
That’s it for today’s video! stay tuned Electronics Innovation for the interesting DIY Projects.
See you in the next episode!
bubyee…!