Story
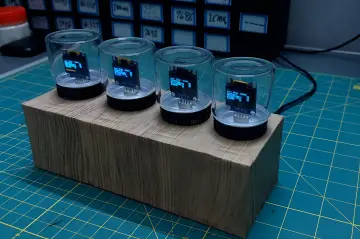
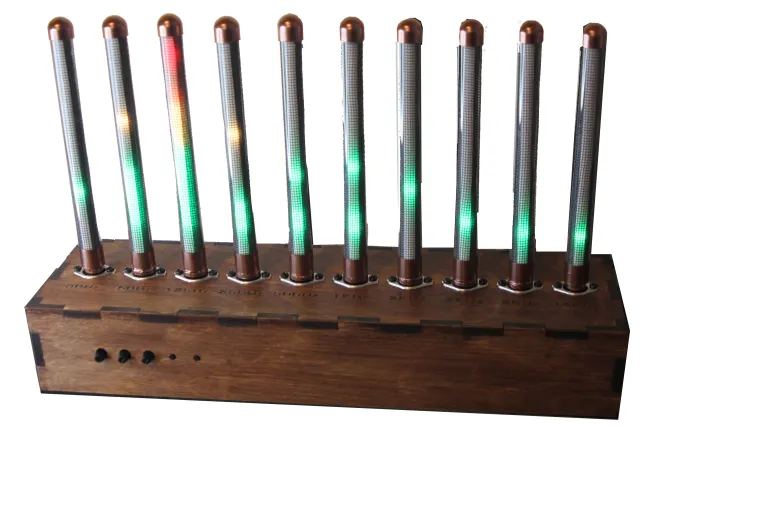
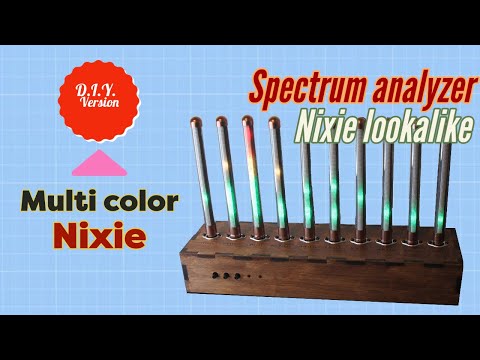
This is my version of a NIXIE tube lookalike Spectrum Analyzer
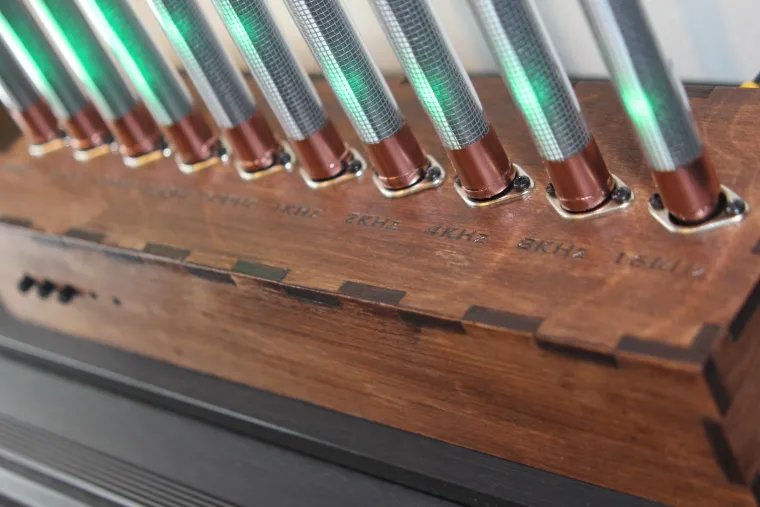
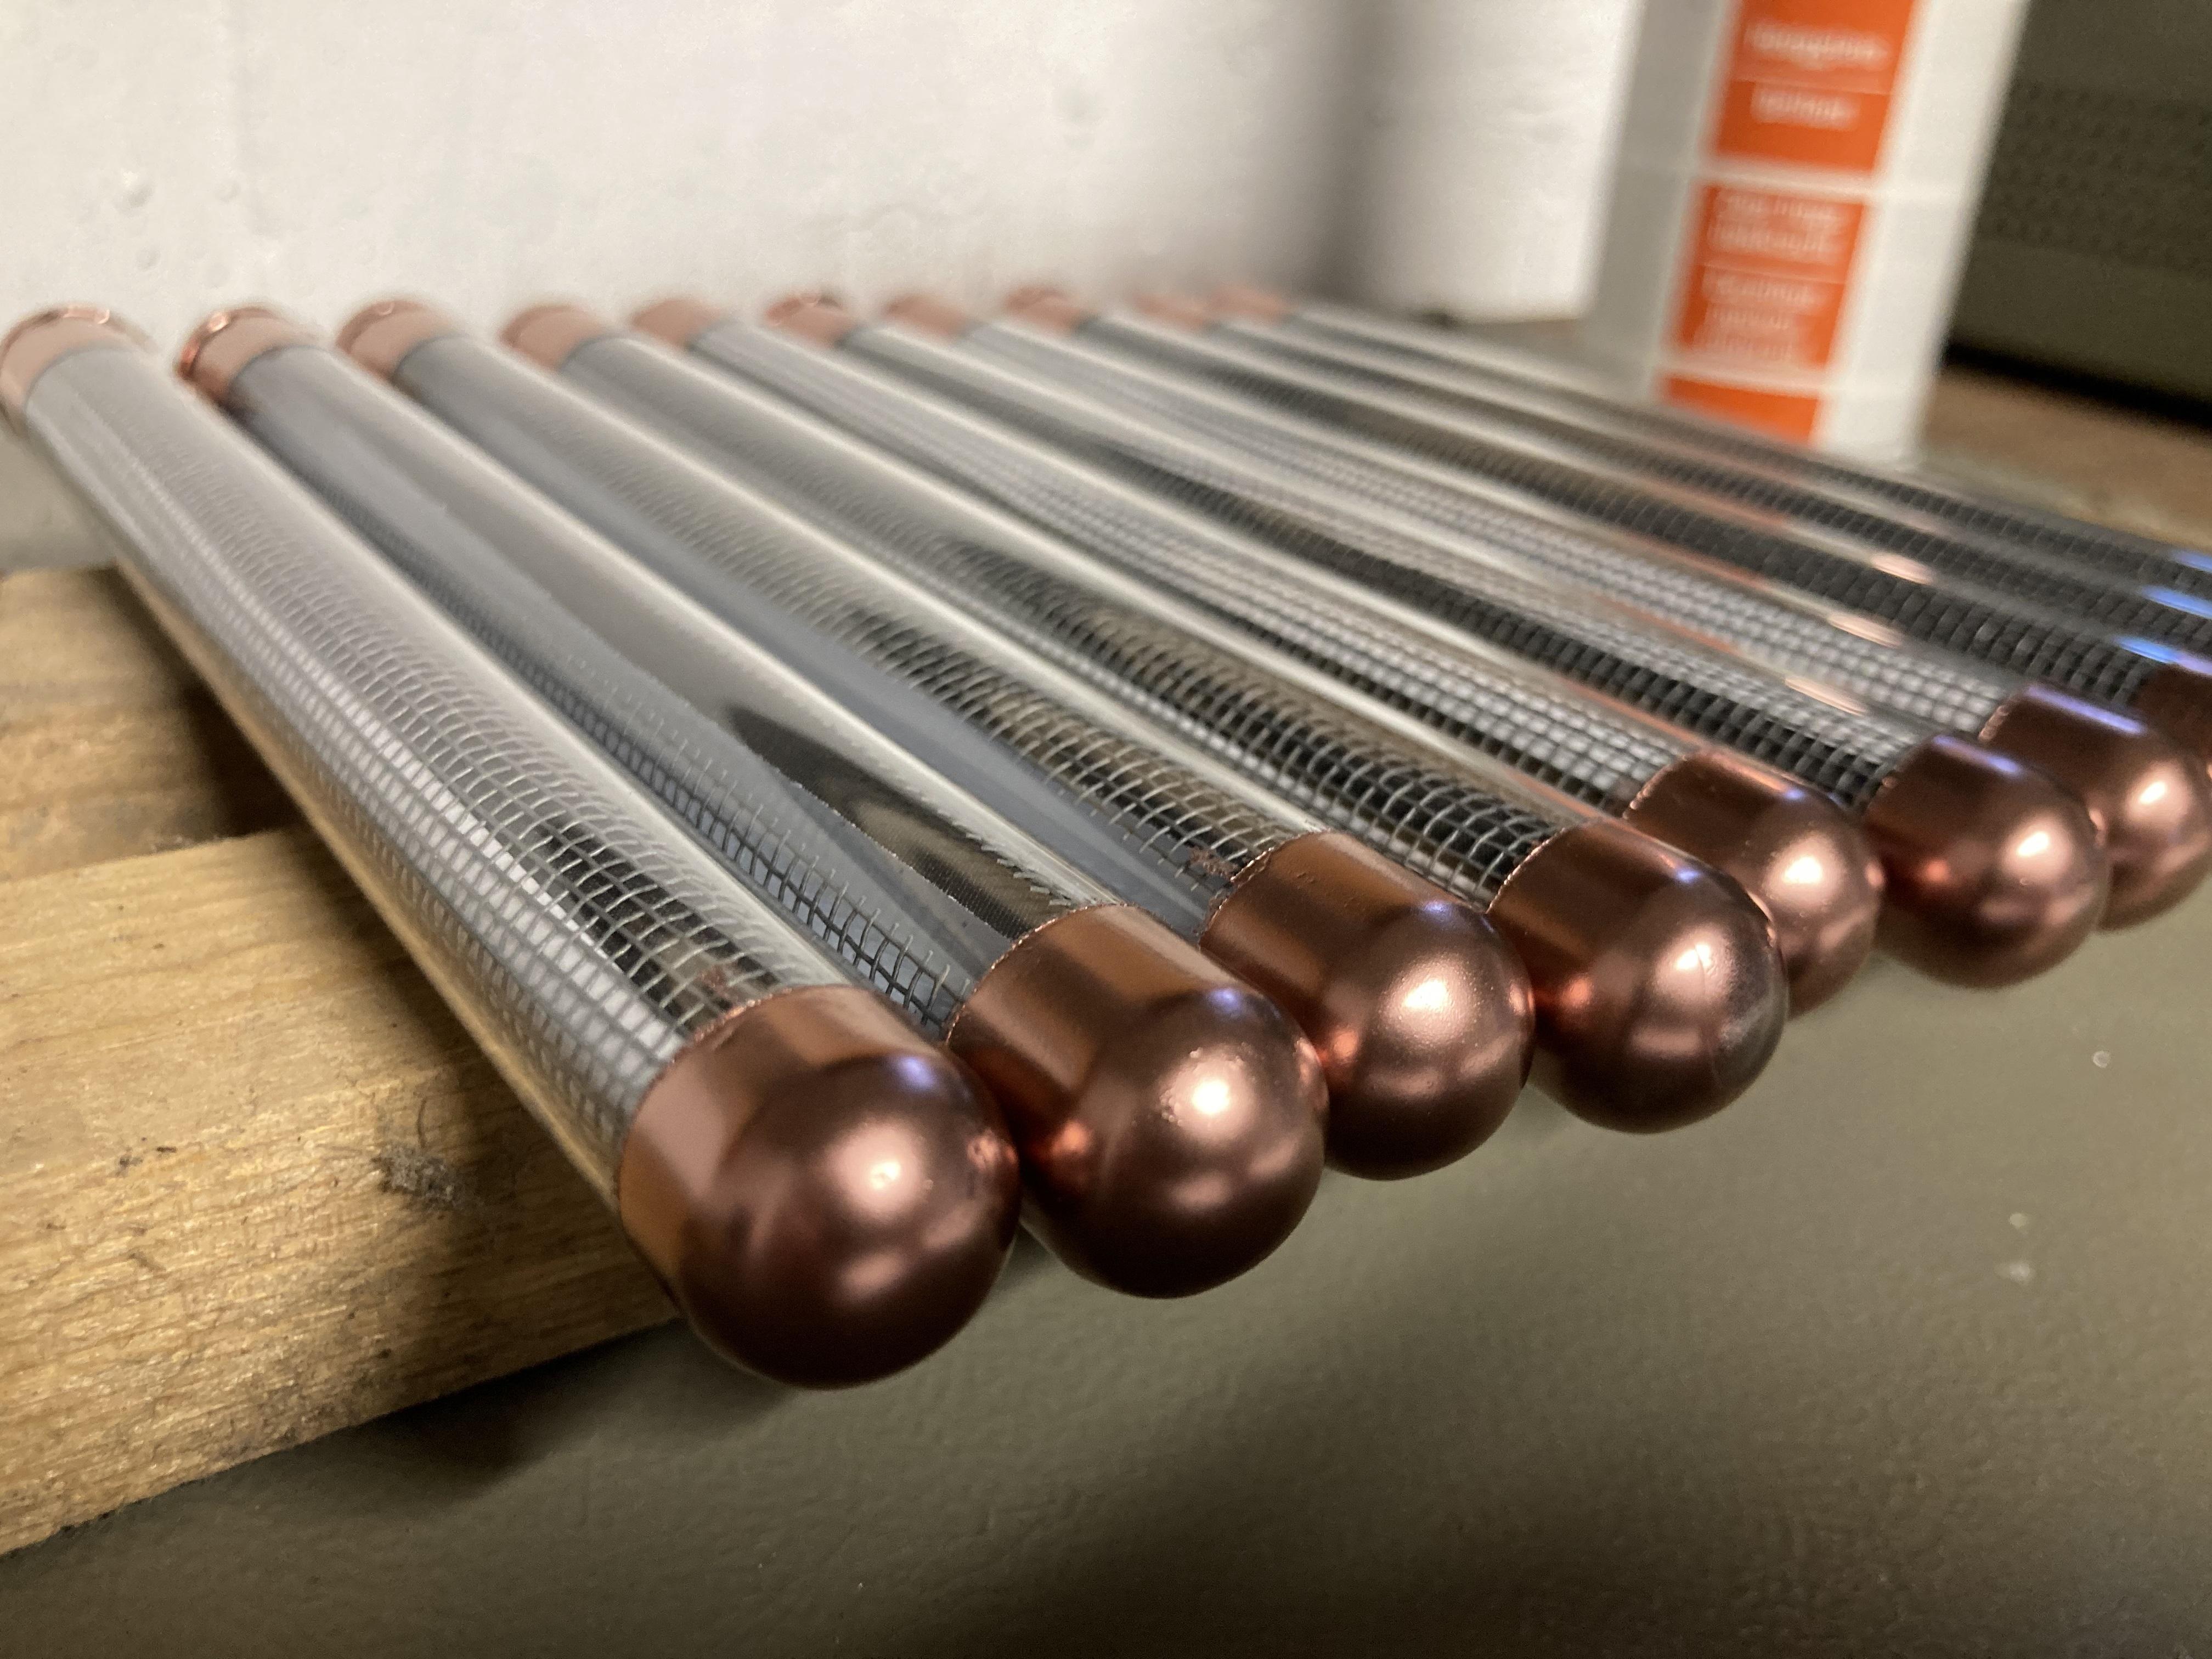
I created my own tubes using testtubes, fly screen fabric and PixelLeds like WS2812b
After making the tubes, I use a lasercutter to create wooden panels for a housing to place the tubes on.
The end result is a 10 channel spectrum analyzer with a antique look that can easily be modified to fit a steampunk theme.
Although the tubes I created look like Nixie Tube's (IN-9/IN-13), they are larger in size and they can display multi colors. How cool is that!
The Pixelleds are controlled by an ESP32. I know this board is way to smart and has processor power beyond what is needed for this project. Therefore, I also included a IoT webserver to display the result of the analyzer. Furthermore, programming the ESP32 can be done with the well known Arduino IDE.
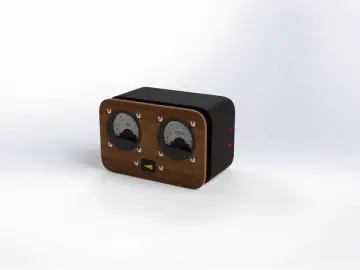
I also did a Stereo VU meter in the same style for the Element 14 community.

- ESP32, I used DOIT devkit 1.0 but most ESP32 board will do the job.
- Pixelled strips of 144 leds per meter. We only need enough to fill 10 tubes..
- Alternatively, you can use a pcb and solder on the pixelleds yourself.( Preferable option! )
- You can buy it he: https://www.tindie.com/products/markdonners/pcb-tubebar-set/
- 3 linear potentiometers that was a resistance between 1K and 20K
- 2 tactile switches to access all the available functions
- 2 Tulp/cinch connectors for the audio input
- 1 power switch
- 1 Power entry connector
- Alternatively, you can feed all without switch and power entry by using the usb input on the ESP32
- Housing ( buy or, like me, create your own)
- Some wires
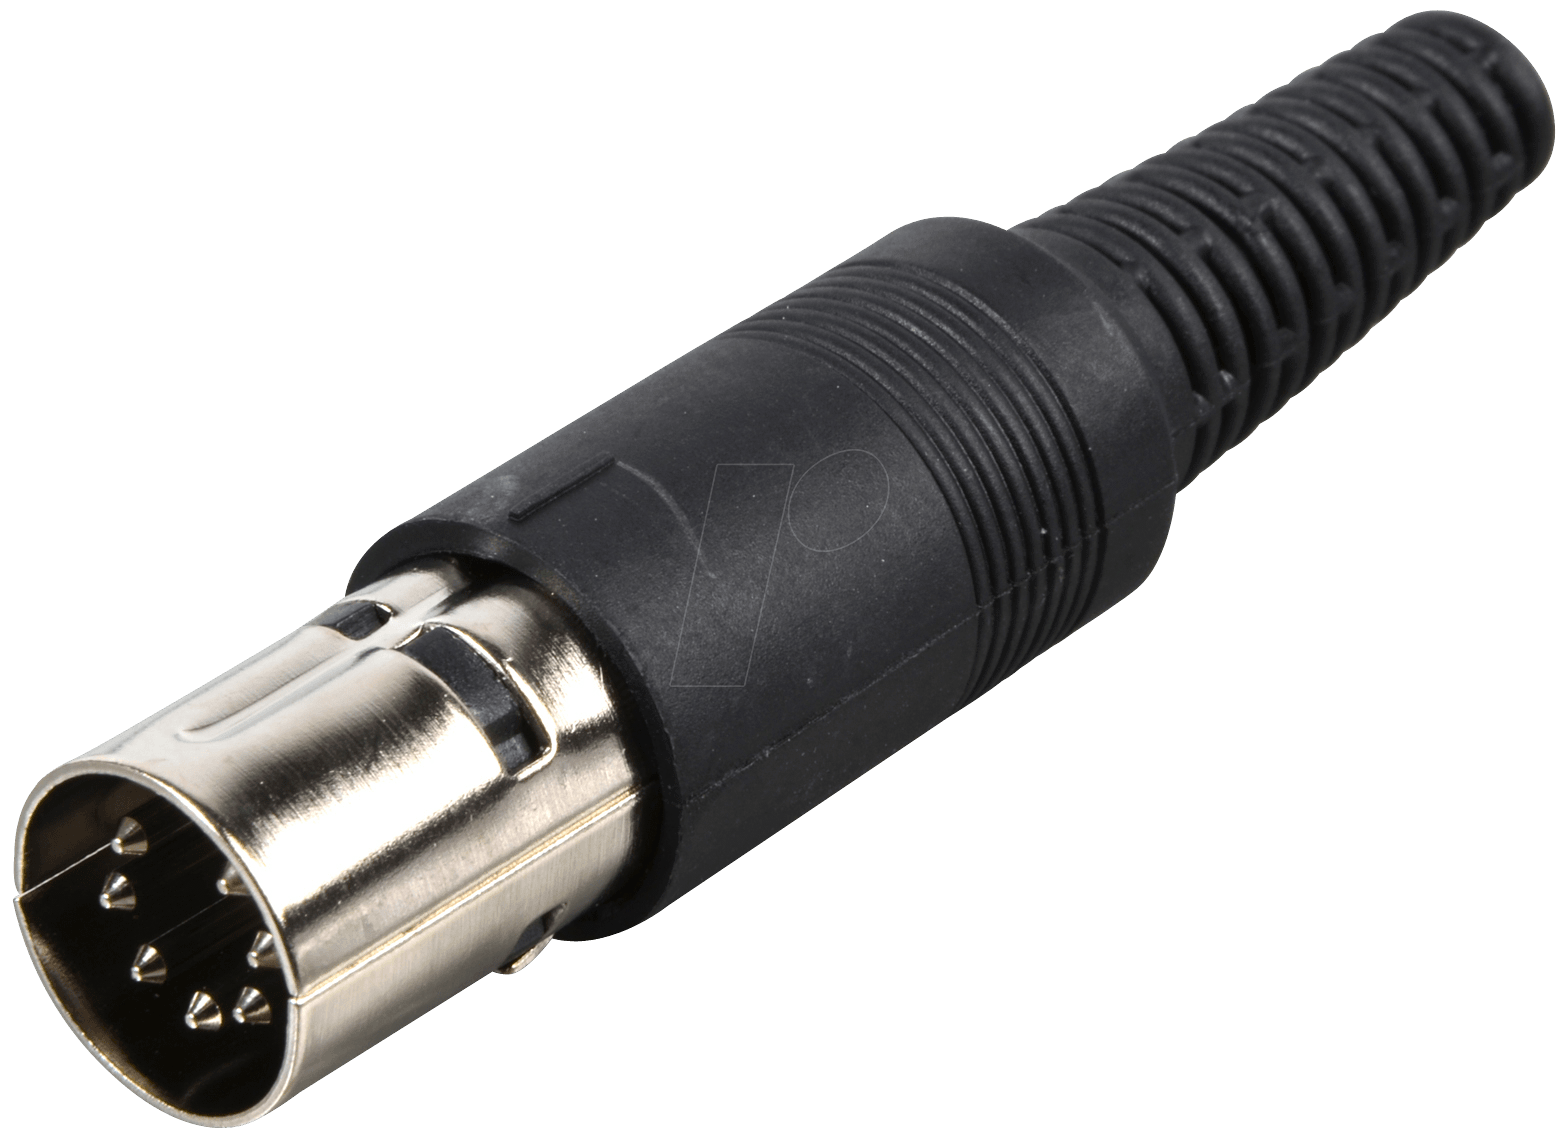
- 10 Din socket with a minimum of 4 pins, I used 7 pin version
- 10 Din connector with a minimum of 4 pins, that fits in the sockets, I used 7 pin version
- Small blank wire of connector to connect the ledstrip/led pcb to the din connector
- 2-component glue to fixate the din connectors in the test tubes
- 10 glass test tubes ( look for laboratory glass work)
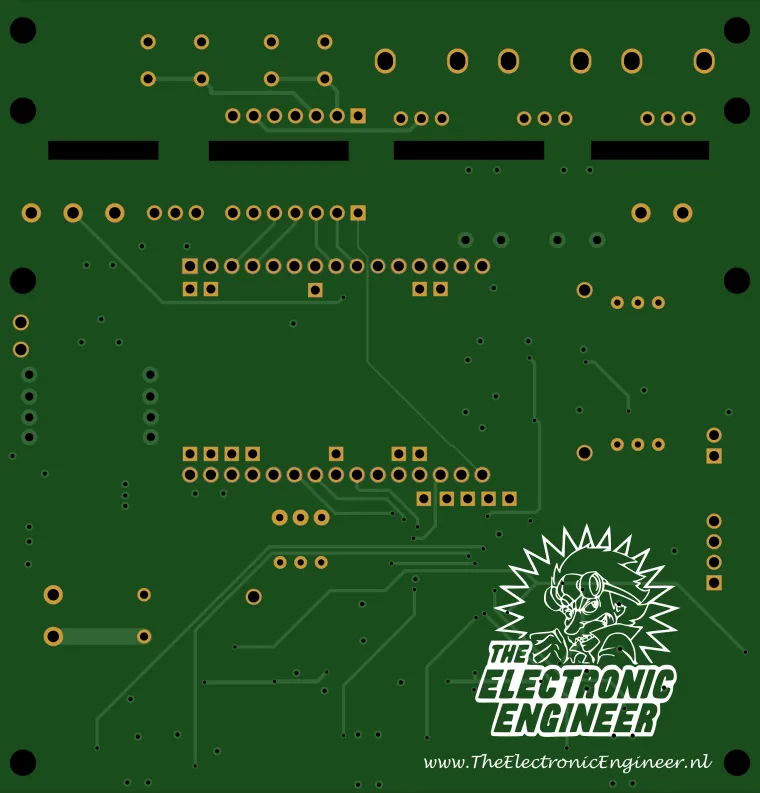
- PCB with electronics. You can buy it here: BUY PCB
Step 1: Prepairing the Led PCB's or Ledstrips
If you bought ledstrip than you have to cut it to lenght so that it fits the test tubes. IF you bought a LED PCB ( BUY it HERE, you will need 5 sets) then you have to solder on all the WS2812 LEDS first.
Step 2: Completing the Test Tubes

- Disassemble the DIN audio connector and discard all but the actual connector ( the pins in its fixure)
- Print the diffuser on a standard paper and cut it to size.
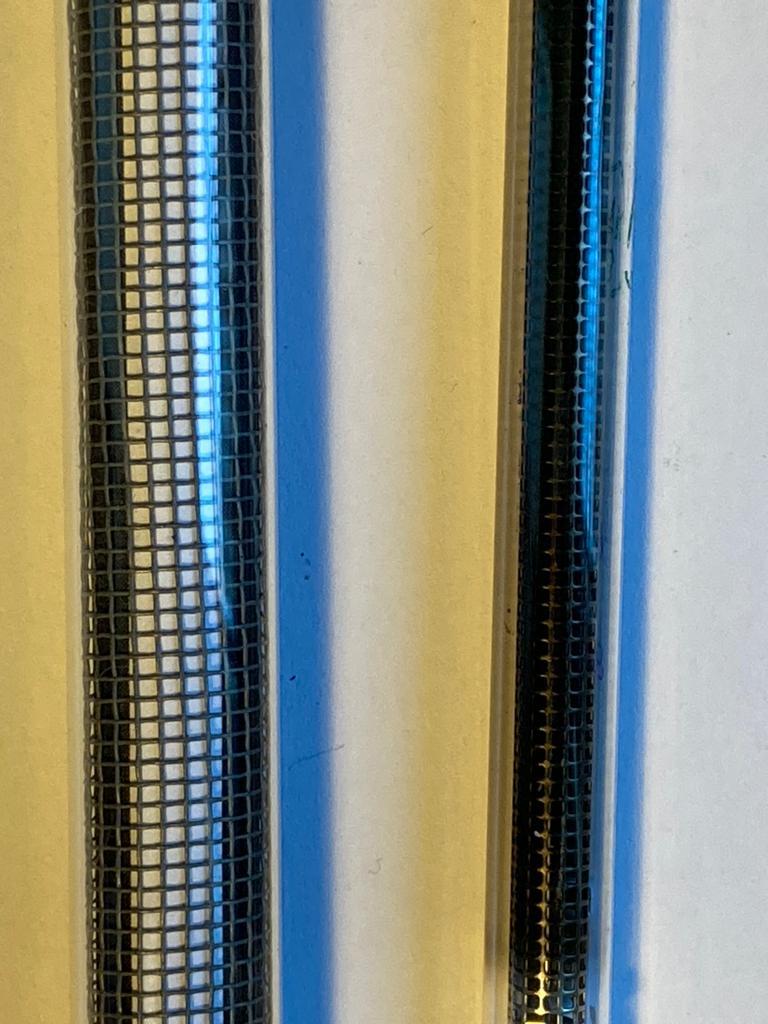
- Cut the maze to size, both maze and paper should cover the complete inside of the PCB ( a small slit at the backside of the pcb is allowed.
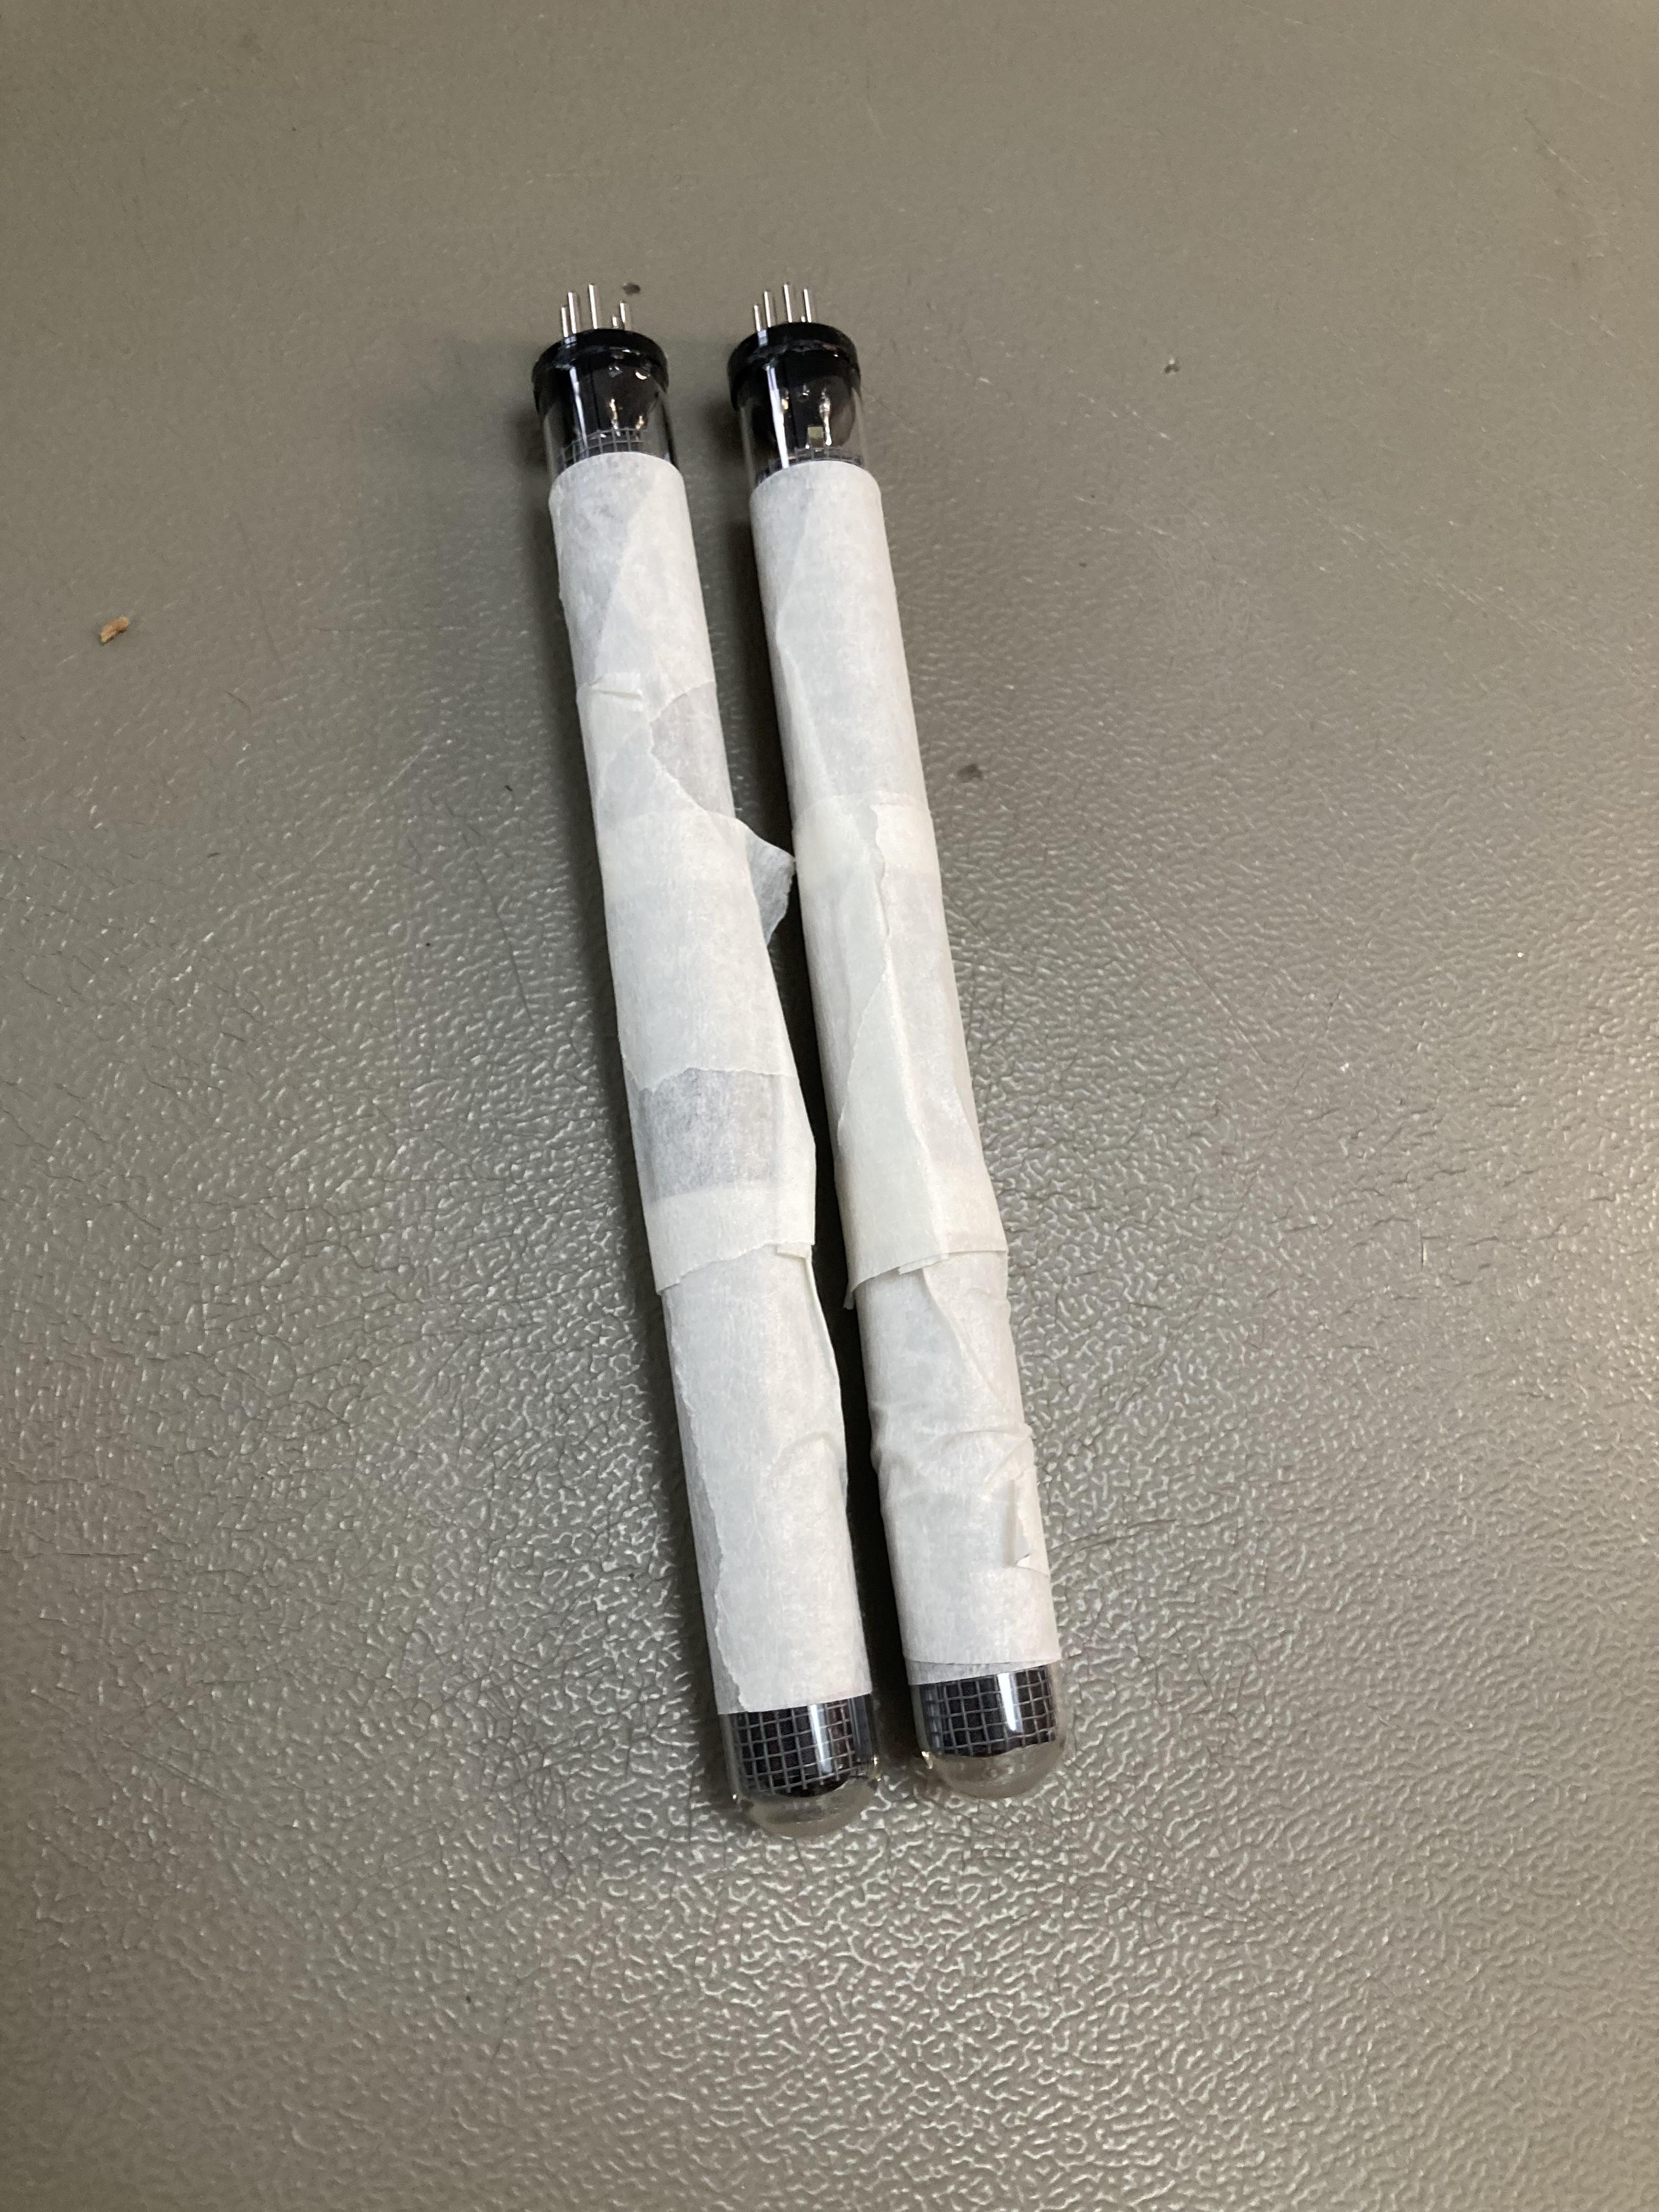
- Place the maze and paper inside the tube
- For Better defusing of the light; put a round beat on top of each pcb so that it will not touch the glass.
- Connect the Din connector to the LED PCB using strong wire or pins from a angled header.
- Place the PCB in the tube and glue it together
- Spray paint the ends of each tube if you like.
 |
 |
 |
 |
 |
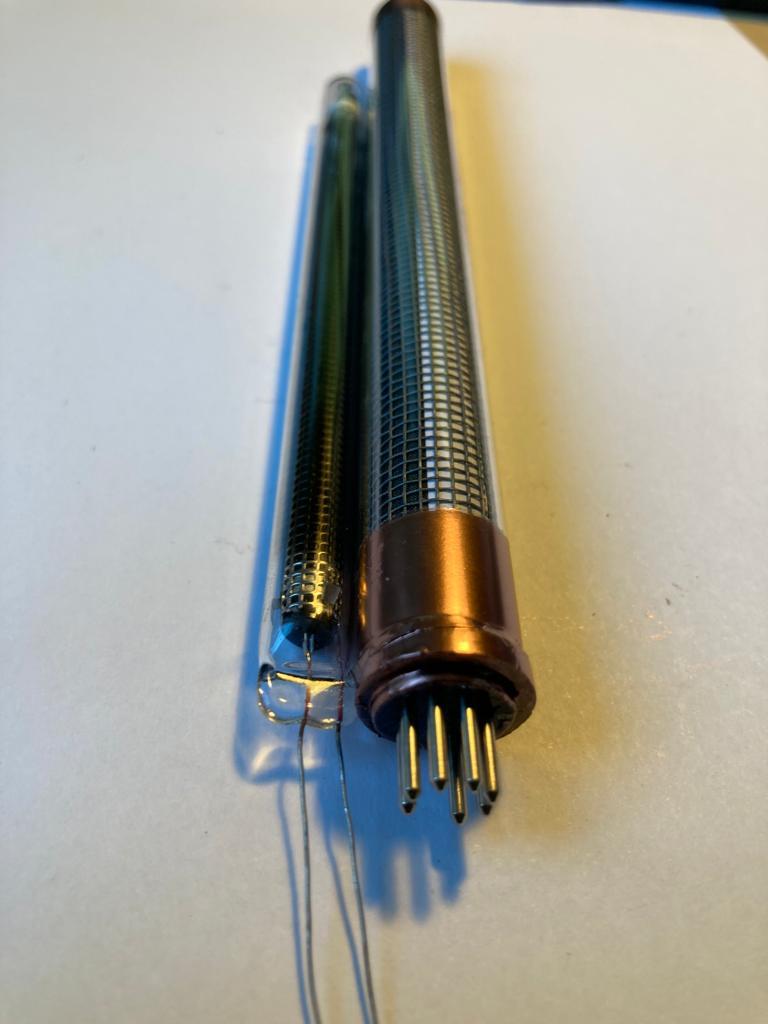 |
Step 3: The Housing
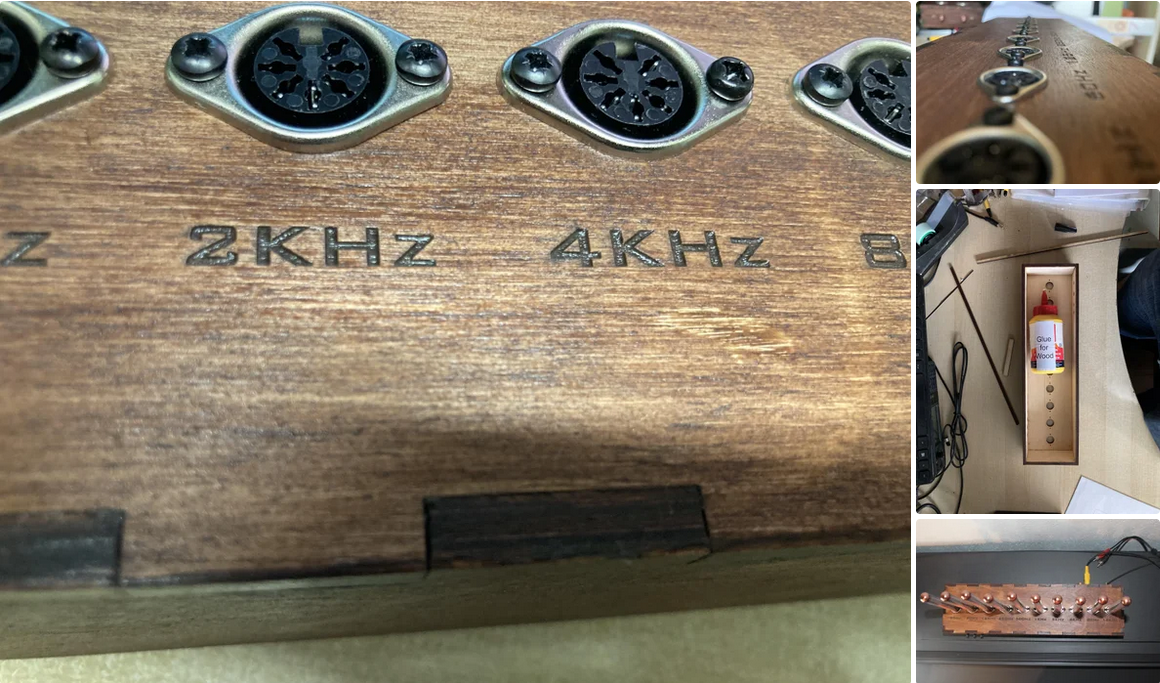
- I designed a housing that I made of 6mm plywood and I used a lasercutter to cut it all out.
- You can use my design or find/ create your own. It's totally up to you.
Step 4: Operating the VU Meter
You can use the microphone in to connect a small condenser microphone or you can connect your audio device to the line input connectors. Although the signal from the microphone is amplified on the PCB, it might not be strong enough. Depending on your microphone, you can adjust resistor R52; decreasing it’s value will amplify the signal more. In my prototype I replaced it with a resistor of 0 Ohm ( I shorted it). However, when using a different mic, I had to increase it again to 20K. So it all depends on your mic.
Mode button
The mode button has 3 functions:
Short press: change pattern(mode), there are 12 available patterns from which the last one is a fire screensaver.
Fast triple press: The VU meter that is displayed on the top row can be disabled/enabled
Pressed/ hold while booting: This will reset your stored WIFI settings. In case you need to change your WIFI settings or in case your system keeps rebooting, this is where to start!
Select Button
The select button has 3 functions:
Short press: Toggle between line-in and microphone input.
Long press: Press for 3 seconds to toggle “the auto change patterns” mode. When enabled, the pattern that is shown changes every few seconds. Also, when the button is pressed long enough, the Dutch national Flag will be shown. That’s how you know you’ve pressed long enough!
Double press: The direction of the falling peak will change.
Brightness Potmeter
You can use this to adjust the overall brightness of all leds / display. WARNING:Make sure you use a power supply to match the current for the brightness that you set. For sure, the ESP32 onboard regulator cannot handle all leds at full brightness. It is best to use an external powersupply that can handle 4 to 6 A. If you are using the USB cable that is connected to the ESP32, you might end up with a burning sensation coming from the ESP32 Board.
Peak Delay Potmeter
You can use this to adjust the time it takes for a peak to fall down to / rise up from the stack
Sensitivity Potmeter
You can use this to adjust the sensitivity of the input. It’s like cranking up the volume for lower signal inputs.
Serial Monitor
The serial monitor is your friend, it displays all info on booting, including your web server IP address.
Screensaver
When the input signal goes quet, a screensaver will kick in after a few seconds and the display / leds will show a fire animation. As soon as the input signal is back, the unit goes back in to normal mode
Step 5: Connecting the Wires
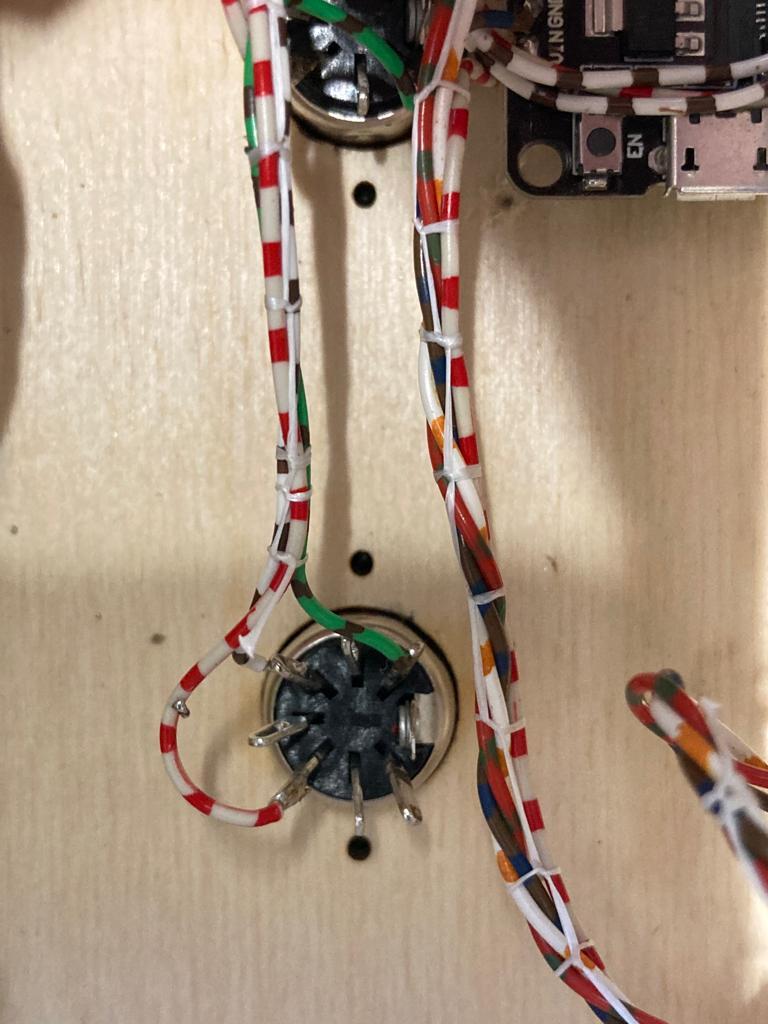
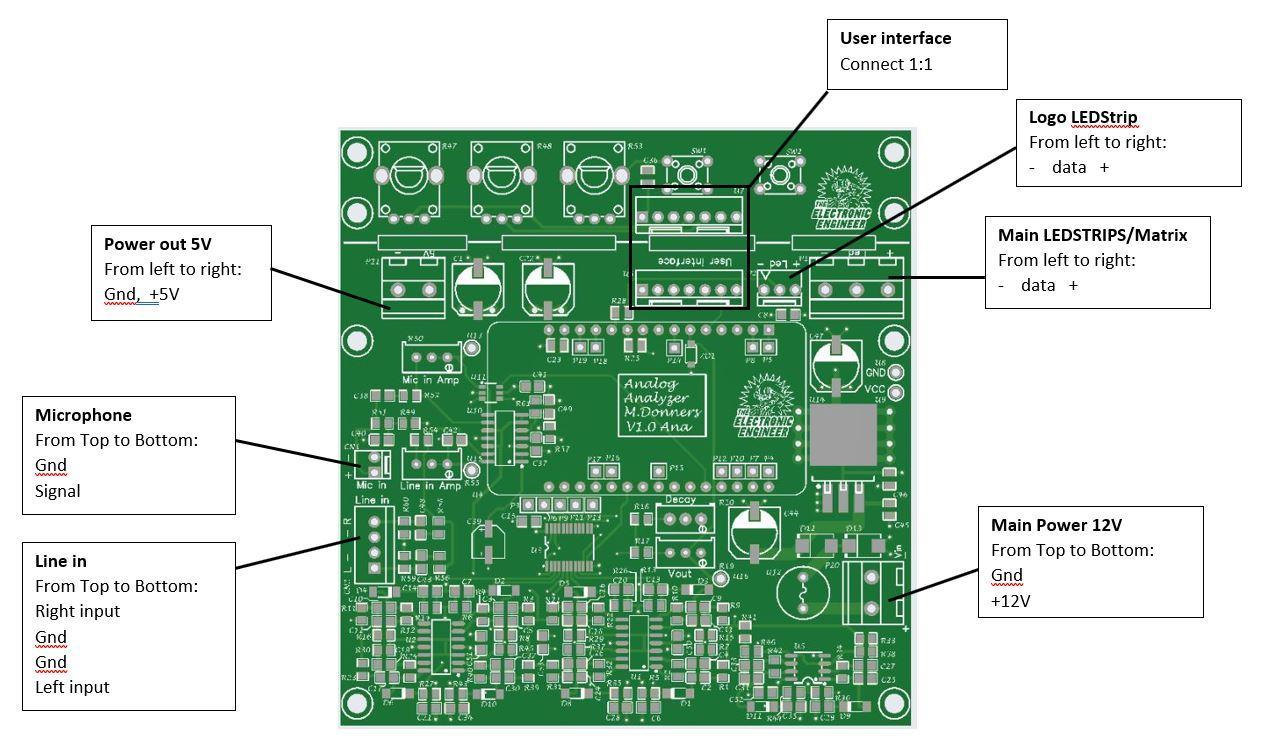

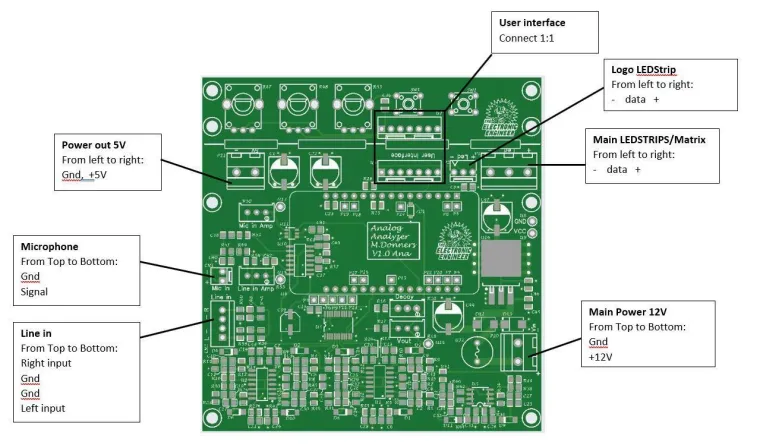
The wiring is not that difficult.
I used shielded wire to connect the microphone and the audio input and I used some general wire for everything else.
Give some extra attention to the power lines that feed the LED Strips. You must wire the data lines in series, meaning that the data out of one strip will be connected to the data in of the next. Etc. You can also do that with the power lines.
In the photo's you'll see what might look like some chaotic wiring. Make sure you tie them down nicely using some Tyraps or simular.
The wiring is straight forward:
- Power
- Audio in
- Microphone in
- Ledstrip for logo
- Ledmatrix/ Ledstrips
- Front operating panel to main PCB
Step 6: Here You Can Download the Sketch
Download the sketch from my github here:
donnersm/Analog-Analyzer: Analog Analyzer with ESP32 (github.com)
Step 7: Prepairing Arduino IDE for ESP32
 |
 |
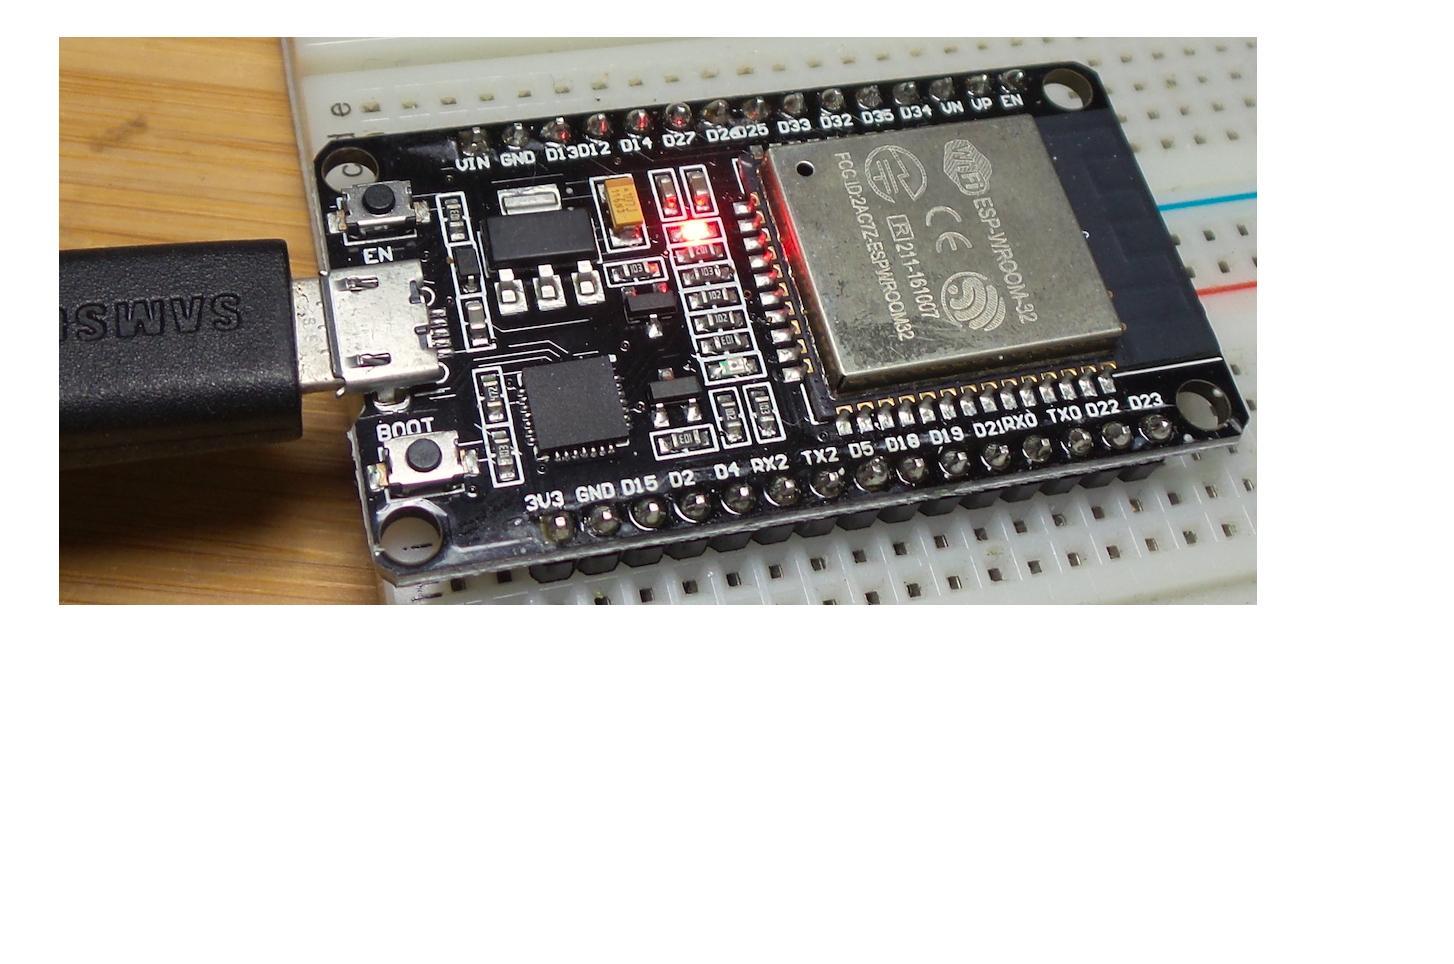
I used the Arduino IDE. It is freely available online and it does the job. You can also use Visual Studio or some other great IDE. However, it is important the right library and it is best not to install what you don't need as it might give you errors when compiling. Make sure that your Arduino IDE is set for using the ESP32. If you don't know how to do so, google or look it a youtube video. There are some very clear instructions and setting up the IDE is not hard. You can do it! In a nutshell, it comes down to this:
- In the Ide preferences window, look for the line: Additional Boards Manager and add the following line;
https://dl.espressif.com/dl/package_esp32_index.json
- Go to your board manager and look for ESP32 and install the ESP32 from Espressif Systems.
- Select the correct board before you compile and you are good to go
When your Arduino IDE ( or whatever you use) is ready set go....you can continue compiling the sketch.
When compiling is done without error, you can upload the sketch to your ESP32. If you cannot get it to upload while USB is set correctly, try taking the ESP32 out of it's socket and try again ( you did use sockets when soldering this to the PCB, right?)
If you cant get it to compile in the first place, try to see if any of the libraries are missing and install them if needed.
I used the following libraries:
- FastLED_NeoMatrix at version 1.1
- Framebuffer_GFX at version 1.0
- FastLED at version 3.4.0
- Adafruit_GFX_Library at version 1.10.4
- EasyButton at version 2.0.1
- WiFi at version 1.0
- WebServer at version 1.0
- WebSockets at version 2.1.4
- WiFiClientSecure at version 1.0
- Ticker at version 1.1
- WiFiManager at version 2.0.5-beta
- Update at version 1.0
- DNSServer at version 1.1.0
- Adafruit_BusIO at version 1.7.1
- Wire at version 1.0.1
- SPI at version 1.0
- FS at version 1.0
Remark: I had some trouble compiling when I started. Turned out that Arduino IDE had many libraries activated and it decided to choose the wrong ones whenever it had to choose between libraries. I solved it by uninstalling the Arduino IDE and re-installing it from scratch.
Also, since some libraries are included with others, maybe this helps. Try sticking to these first:
- #include <FastLED_NeoMatrix.h>
- #include <Adafruit_GFX.h>
- #include <pixeltypes.h>
- #include <EasyButton.h>
- #include <WiFi.h>
- #include <WebServer.h>
- #include <WebSocketsServer.h>
- #include <Ticker.h>
- #include <WiFiManager.h>
Step 8: The Web Interface

This firmware uses a webinterface that needs to be configured.
If you haven't used the web manager on this ESP32 before and there are now settings stored from a previous design in it's memory, after booting, the webmanager will take over.
If it keeps rebooting, there is a big change that settings are stored that are not working. Maybe from a previous build or maybe you made a typing error in your wifi password? You can force the ESP32 to boot to WIFI manager by holding down the mode button while powering on.
You can see the web address you need to connect to in the serial manager. However, first you need to connect to the access point it has created. ESP32 no password is required. You can do this by using any device with a browser like phone or tabled.
After that, visit the web address that is given by IP number in the serial monitor and follow the instructions to setup your WIFI access. When done, manually reboot your ESP32.
After booting, the new P address will be visible in the serial monitor. Visit this new ip adress with your browser to see the analyzer web interface.
If the wifi manager doesn't appear after booting, or if you need to change your WIFI settings, you can press and hold the mode button while pressing the reset button.
When your WIFI connection is set up, you can access you webserver's IP address to see the live spectrum analyzer.
It will show you all 10 channels in real time.
Step 9: Show and Tell Your Friends About Your Amazing Build
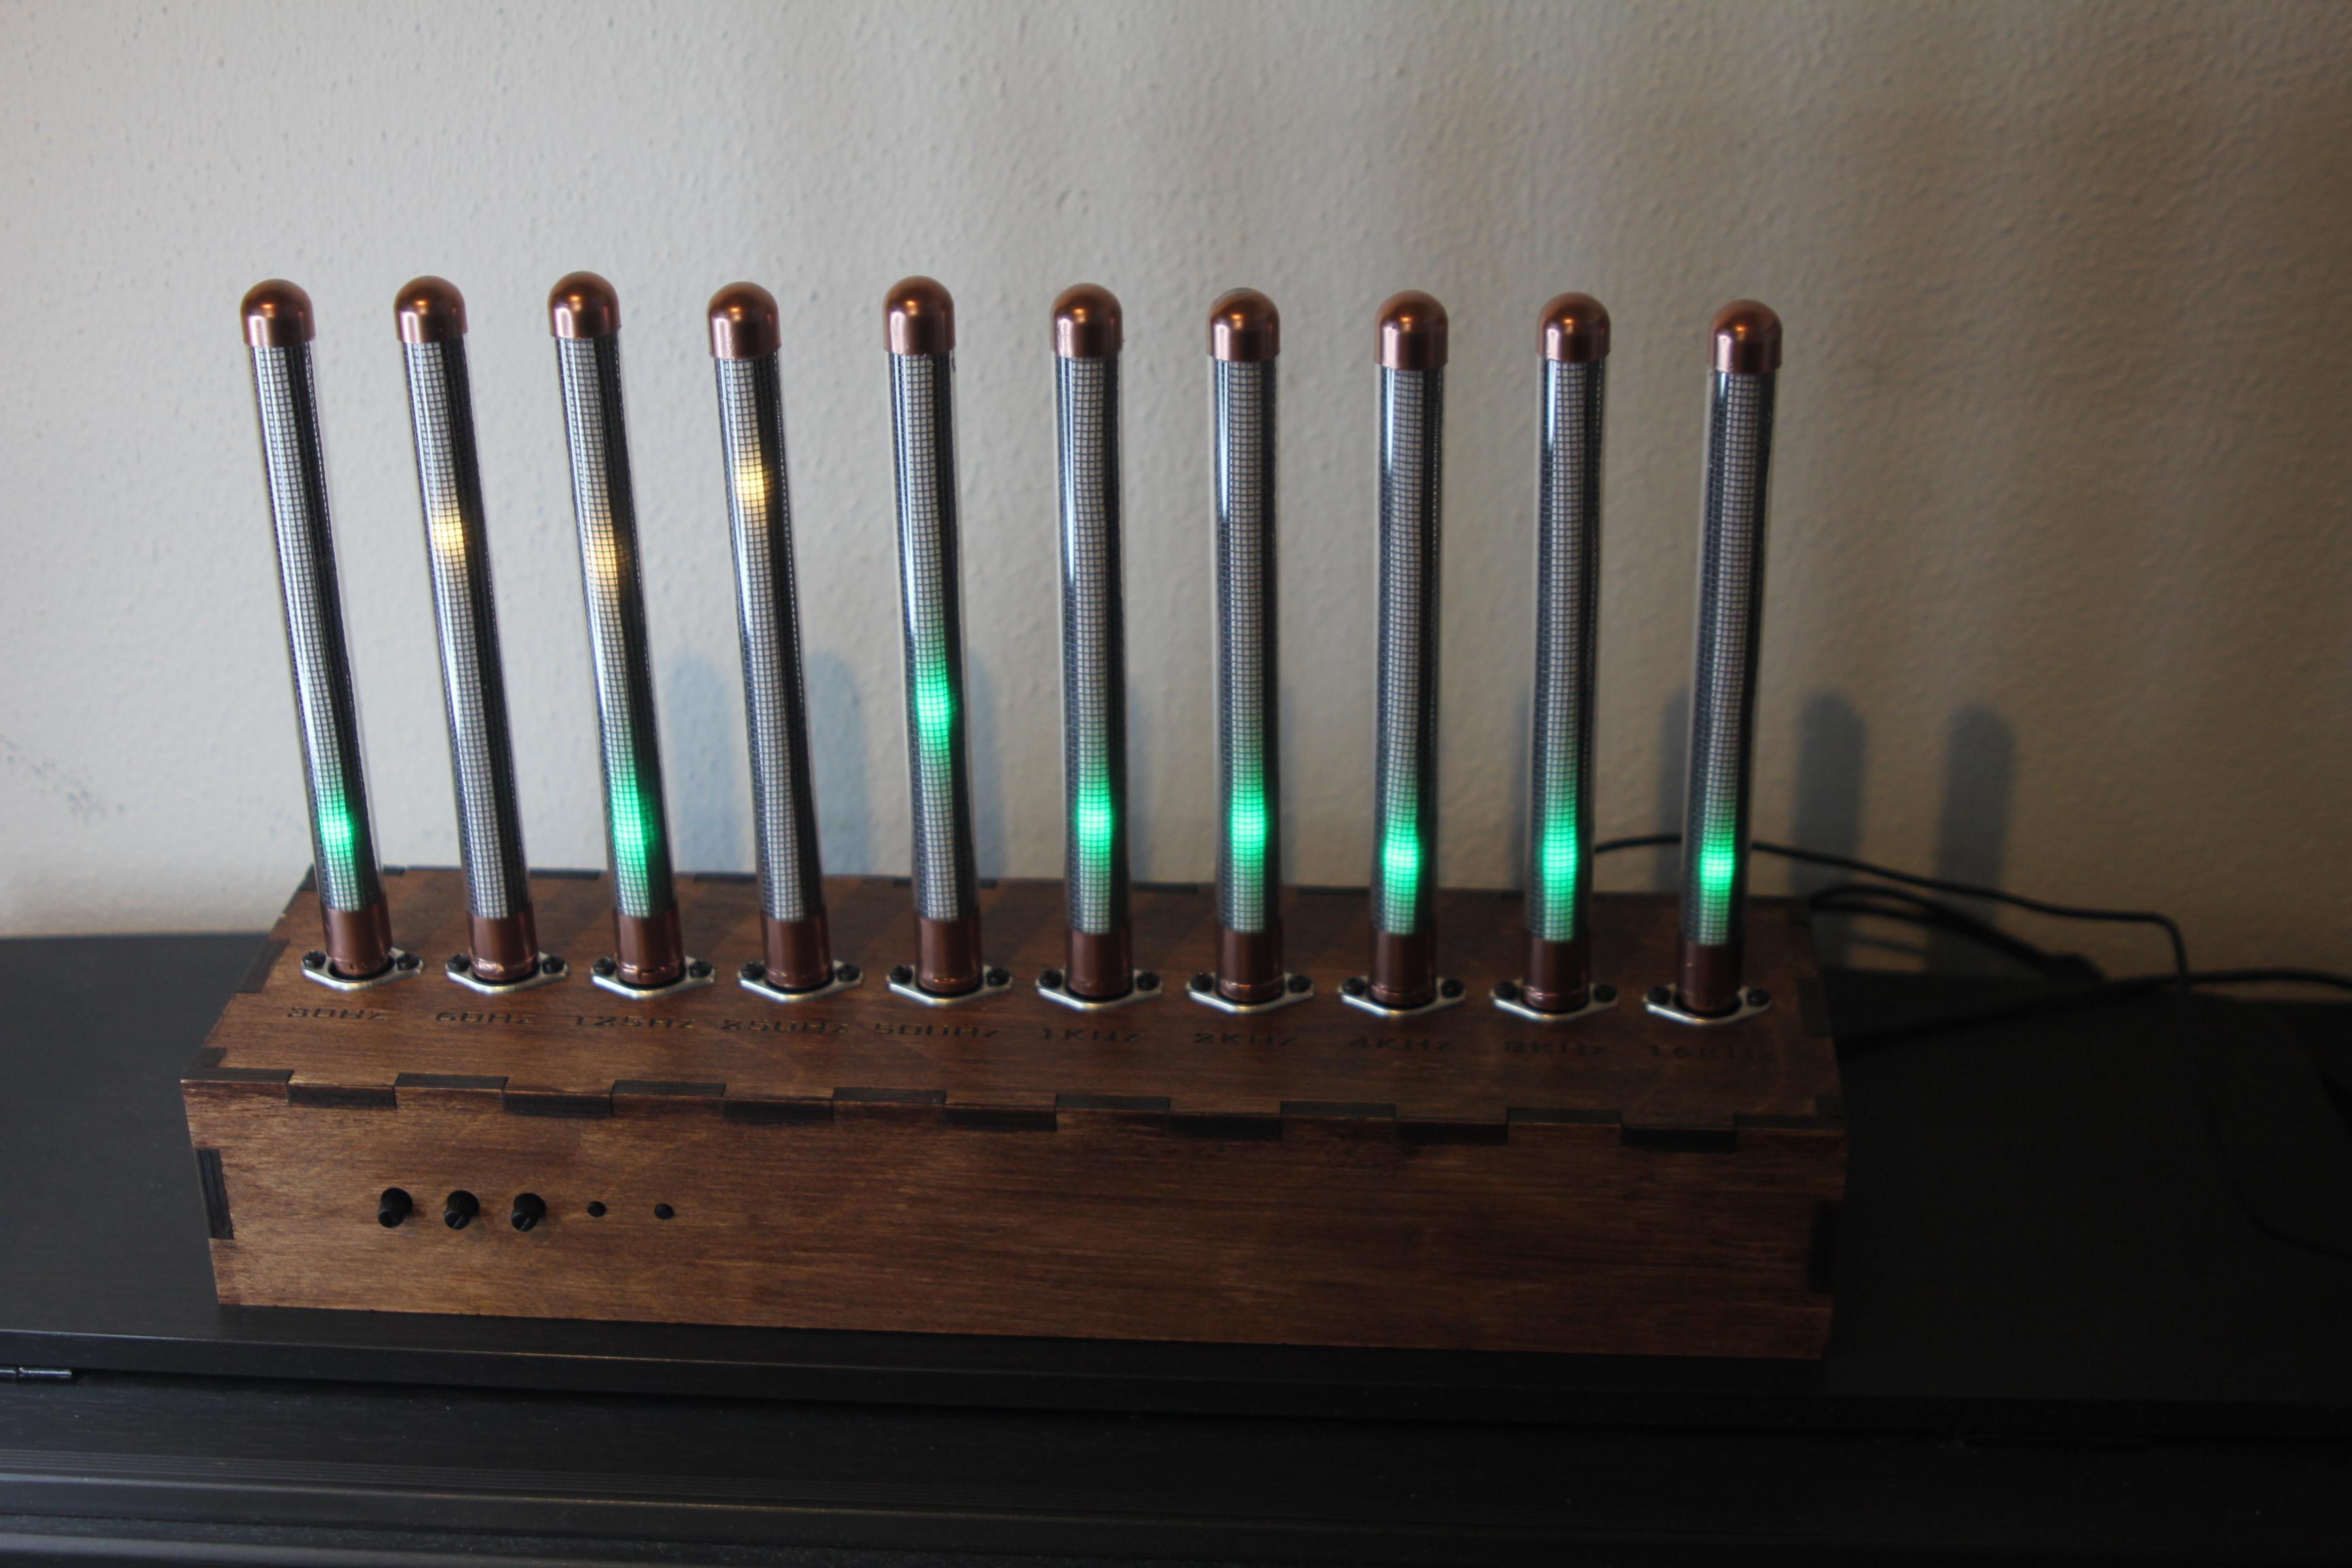

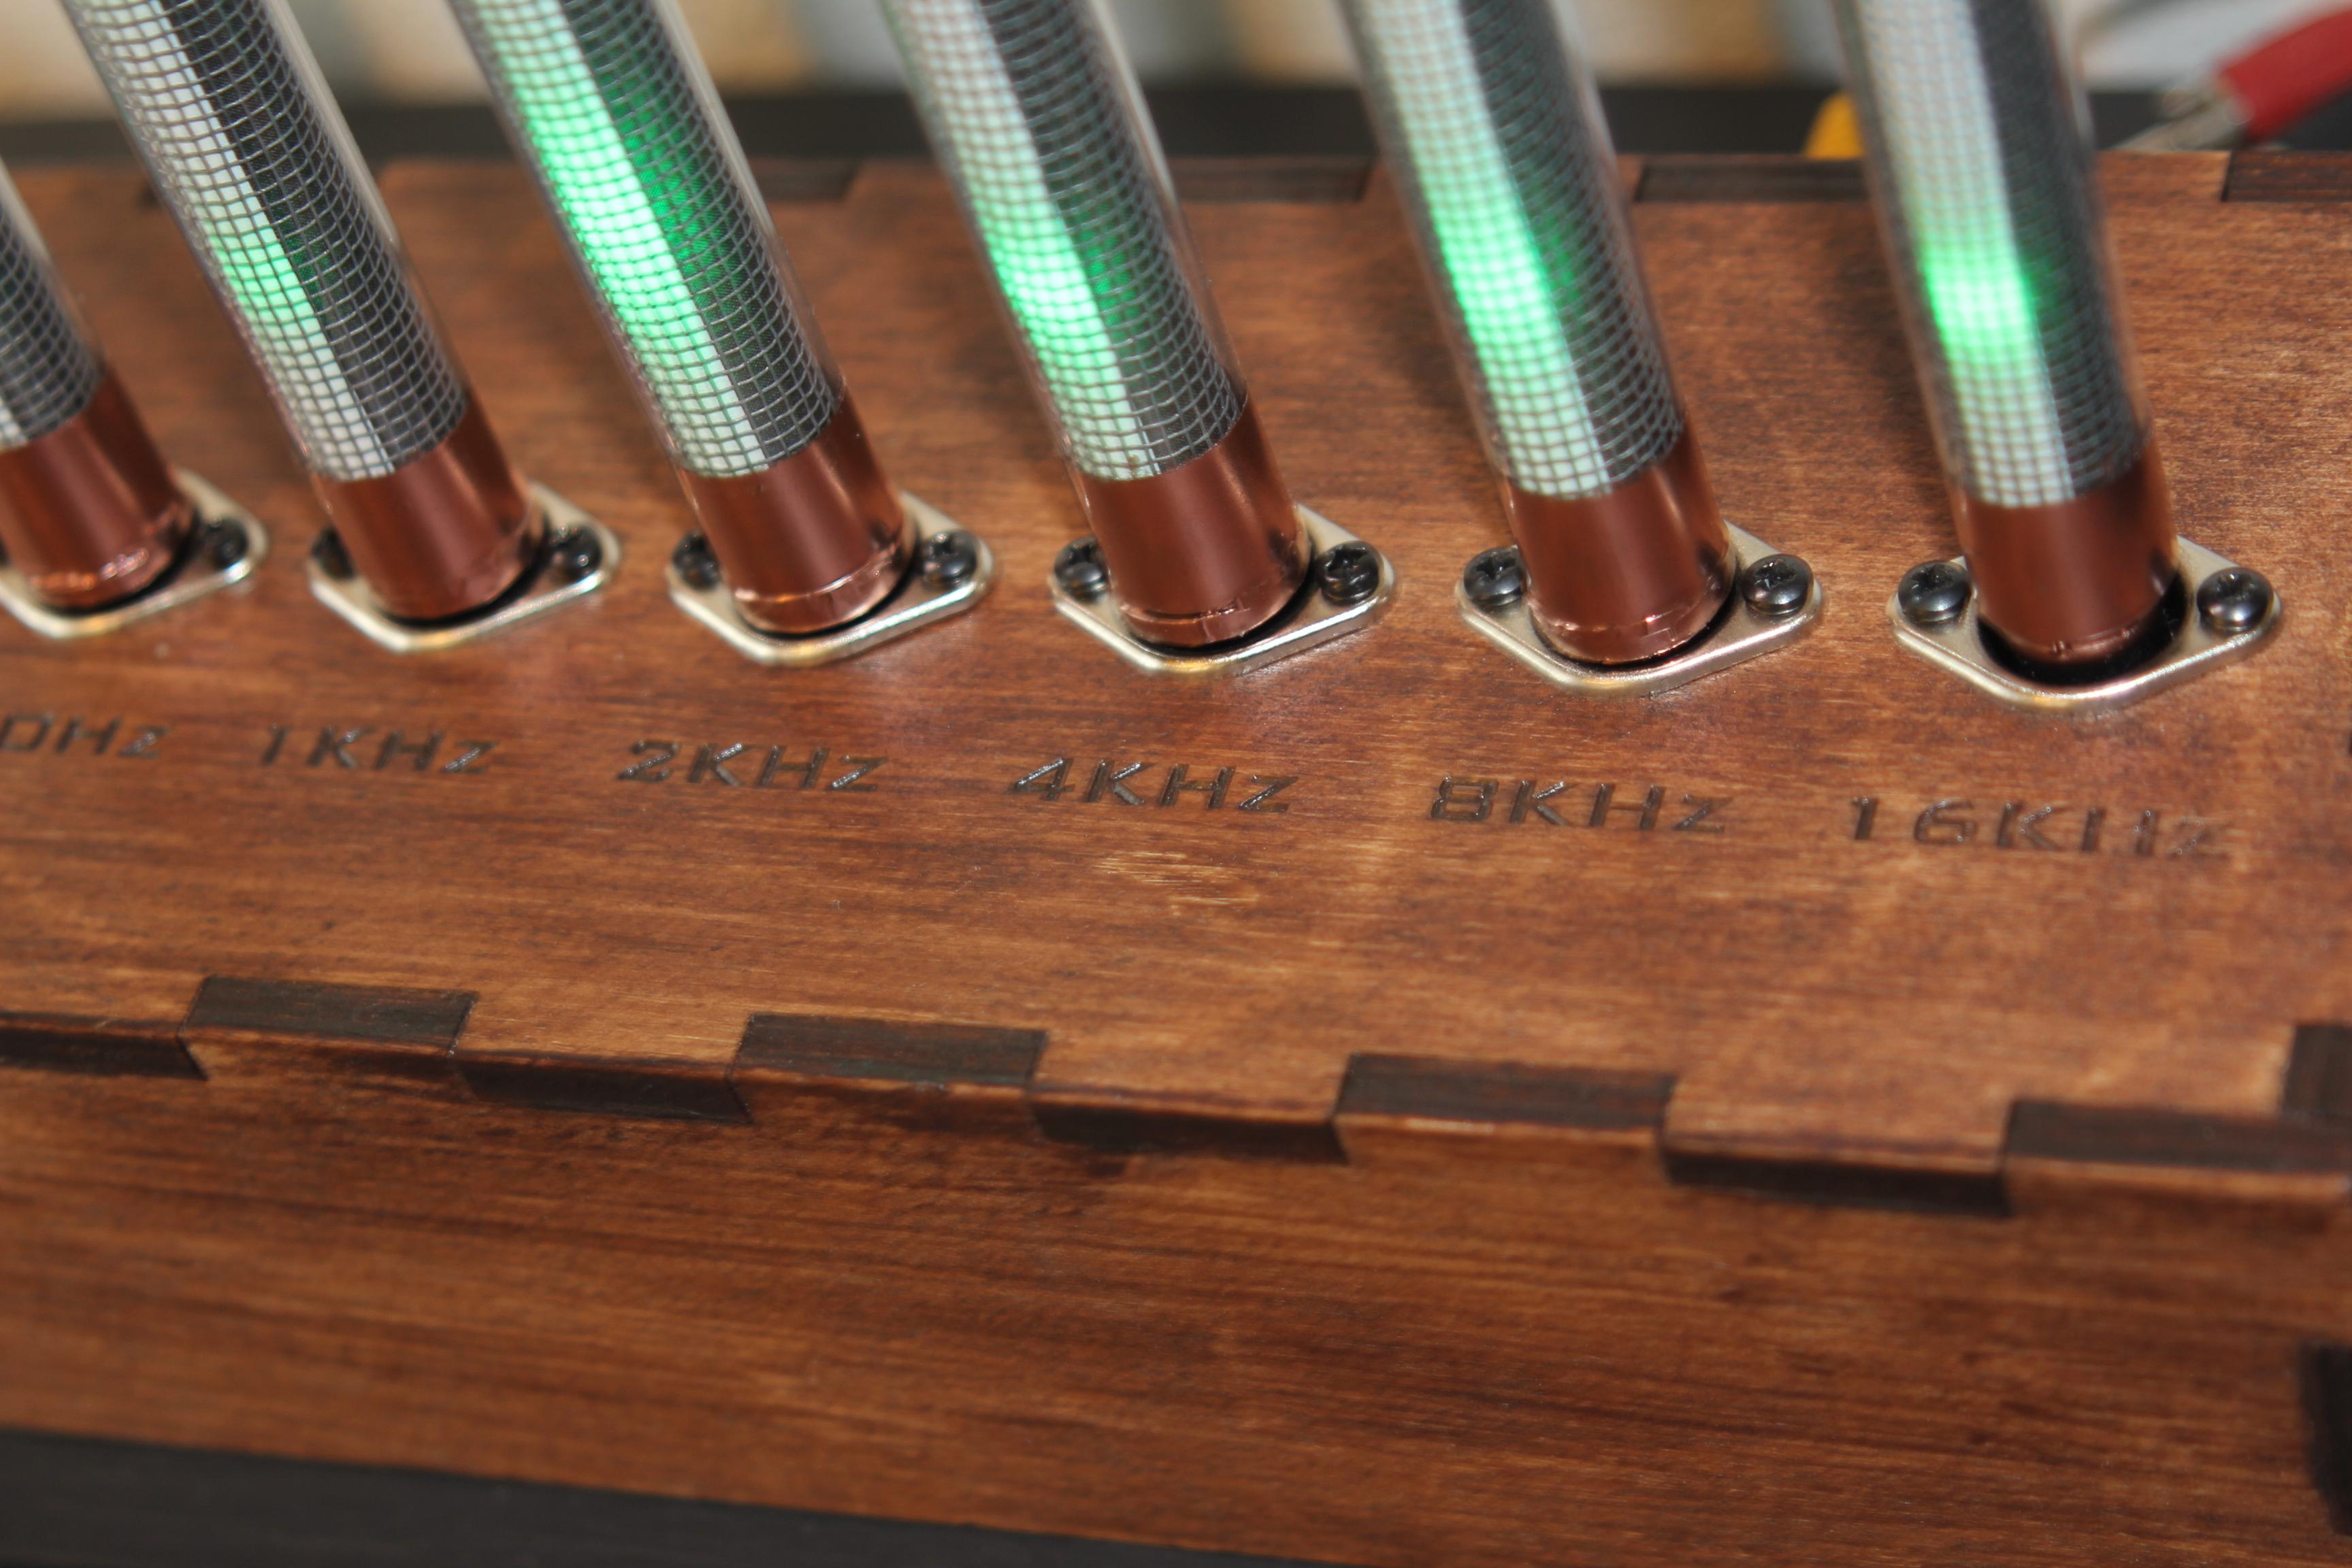

At this point, you were able to build an amazing device: A fully functional Spectrum analyser. It's a nice display in your living room isn't?
Don't forget to show your friends and family. Share it on social media and feel free to tag me!
https://www.youtube.com/watch?v=jqJDQzxXv9Y
🔀Let's connect
☕ You like me work, please buy me a coffee to help me to burn the midnight oil.


