Elecrow's 2nd Electronics Design Contest is Heating Up! Win $6,000 cash + Maker products + Official sponsorship! Share your designs today! [Learn More]

user-img

Christopher Norulak

  • 1 Projects
  • 2 Followers
  • Mar 24,2025
+ Follow

Smart Button using the RP2350

A button that can be used for automation and temperature and humidity monitoring

Smart Button using the RP2350
 
  • thumbnail-img
  • thumbnail-img
  • thumbnail-img
 

Hardware Components

  • DHT22

    X 1
  • Keyboard Switch

    OUTEMU
    X 1 fenxiang
  • Mechanical keyboard keycaps

    X 1

Tools, APP Software Used etc.

  • Solder Wire, Lead Free

  • Arduino IDE

    Arduino IDE

    Arduino

Story

This project is all about using the RP2350 to communicate changes either with a switch to act as a switch in Home Assistant, or changes with temperature/humidity using a DHT22 sensor.


First things first, download Arduino IDE, add the RP2040/RP2350 board definitions and take out your components.

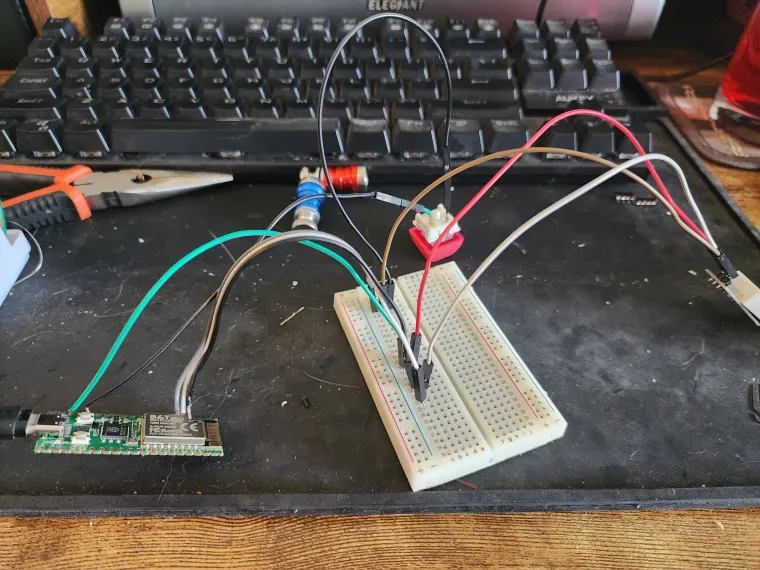
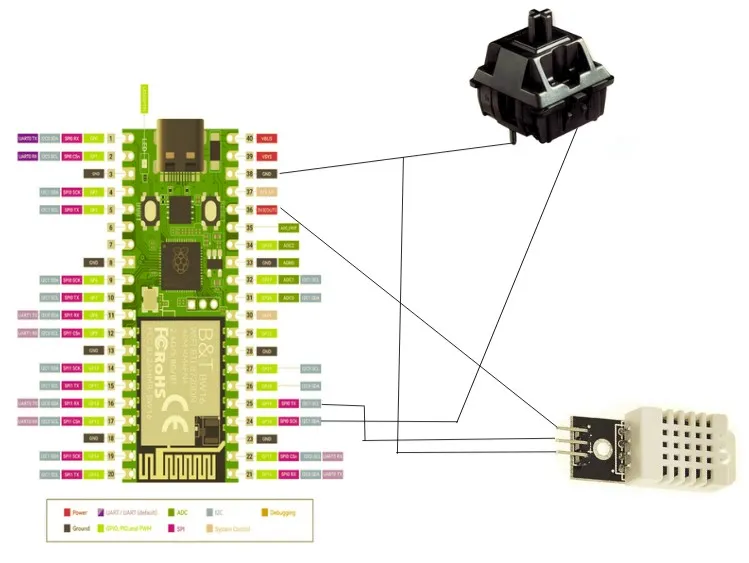
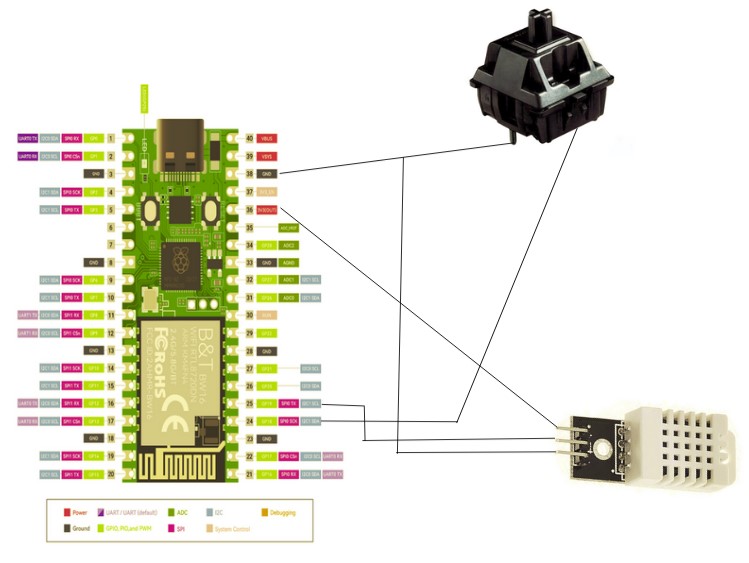
First, solder wires to a 3.3V pin, a GND pin, and two other GPIO pins of your choice (I'll be using #18 for the button, and #19 for the DHT22 sensor).

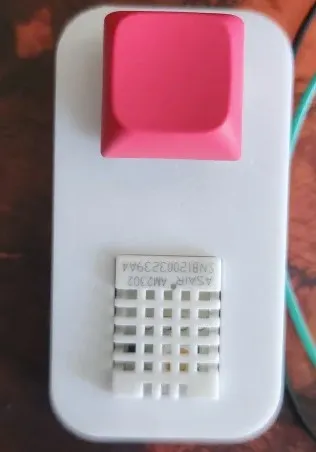
We're going to connect the mechanical keyboard switch to GND and #18. Next, connect the DHT22 to 3.3V (on the +), GND (on the -), and #19 for the "Out".

(Note: The DHT22 sensor I'm using has a breakout board with a builtin resistor)

Schematic

After that, hold the boot key and plug in the board to our computer.

Open the Arduino IDE and use the following code:

#include <DHT22.h>
#define  Serial2_RX 5
#define  Serial2_TX 4
#define pinDATA 19
DHT22 dht22(pinDATA); 

const int buttonPin = 18;     // the number of the pushbutton pin
const int ledPin =  25;      // the number of the LED pin

// variables will change:
int buttonState = 0;          // variable for reading the pushbutton status

void setup() {
  // initialize the LED pin as an output:
  pinMode(ledPin, OUTPUT);
  // initialize the pushbutton pin as an input:
  pinMode(buttonPin, INPUT);
}

void loop() {
  Serial.println(dht22.debug());

  float temp = dht22.getTemperature();
  float h = dht22.getHumidity();
  buttonState = digitalRead(buttonPin);

  // check if the pushbutton is pressed. If it is, the buttonState is HIGH:
  if (buttonState == LOW) {
    // turn LED on:
    digitalWrite(ledPin, HIGH);
  } else {
     // turn LED off:
    digitalWrite(ledPin, LOW);
  }
}

After that, click the upload button. Once it's fully compiled and uploaded the code to the board, pressing the switch should turn on the LED on the board.


Future updates to this guide will include sending the button presses and temperature/humidity data to Home Assistant via MQTT, as well as CAD files for a 3D printed case.

Smart Button using the RP2350

A button that can be used for automation and temperature and humidity monitoring

82
 
2
0
0
These revenues will go back into supporting creators, contests, and the open source ecosystem, and more.

Share your project on social media to expand its influence! Get more people to support it.

  • Comments( 0 )
  • Like( 2 )
/1000
Upload a photo:
You can only upload 1 files in total. Each file cannot exceed 2MB. Supports JPG, JPEG, GIF, PNG, BMP

You May Also Like

View All
Add to cart
Board Type : GerberFile :
Layer : Dimensions :
PCB Qty :
Different PCB Design
PCB Thickness : PCB Color :
Surface Finish : Castellated Hole :
Copper Weight : 1 oz Production Time :
Total: US $
As a sharing platform, our community will not bear responsibility for any issues with this design and parameters.

PCB Assembly

PCBA Qty: BomFile:
NO. OF UNIQUE PARTS: NO. of Components:
Assembly Cost: US $
As a sharing platform, our community will not bear responsibility for any issues with this design and parameters.
Add to cart
3dPrintingFile : Size :
Unit : Volumn :
3D Printing Qty : Material :
Total: US $12.99
As a sharing platform, our community will not bear responsibility for any issues with this design and parameters.
Add to cart
Acrylic Type : AcrylicFile :
Dimensions: Engrave:
Acrylic Qty :
Acrylic Thickness:
Acrylic Color:
Total: US $12.99
As a sharing platform, our community will not bear responsibility for any issues with this design and parameters.
Add to cart
CNC Milling File : Size:
Unit: Volumn:
CNC Milling Qty : Material:
Type of Aluminum: Surface Finish:
Tolerance:
Surface Roughness:
Total: US $12.99
As a sharing platform, our community will not bear responsibility for any issues with this design and parameters.
Add to cart
Item Price Qty Subtotal Delete
Total: US $0.00
Certified Product | Supported Purchase: Full After-sales Protection