Holiday Notice: Elecrow staff will be on holiday starting October 1st (GMT+8). PCB & PCBA orders will resume delivery from Oct. 4th, and Product orders from Oct. 7th. Orders can still be placed as usual. Enjoy the holidays!

Add to cart
Board Type : GerberFile :
Layer : Dimensions :
PCB Qty :
Different PCB Design
PCB Thickness : PCB Color :
Surface Finish : Castellated Hole :
Copper Weight : 1 oz Production Time :
Total: US $
Elecrow community is a shared platform and we are not responsible for any design issues.

PCB Assembly

PCBA Qty: BomFile:
NO. OF UNIQUE PARTS: NO. of Components:
Assembly Cost: US $
Elecrow community is a shared platform and we are not responsible for any design issues.
Add to cart
3dPrintingFile : Size :
Unit : Volumn :
3D Printing Qty : Material :
Total: US $12.99
Elecrow community is a shared platform and we are not responsible for any design issues.
Add to cart
Acrylic Type : AcrylicFile :
Dimensions: Engrave:
Acrylic Qty :
Acrylic Thickness:
Acrylic Color:
Total: US $12.99
Elecrow community is a shared platform and we are not responsible for any design issues.
closed
user-img

Vladimir Glukhov

Published: Jul 08,2024

LED control system on Raspberry Pi/ Banana Pi

This small project can be interesting for beginners in electronics or robotics.

ccc ccc
Copyright Info

Attribution-MIT License

Read More⇒
  419
  2
  0
cover-img
 
  • thumbnail-img
  • thumbnail-img
  • thumbnail-img
  • thumbnail-img
  • thumbnail-img
  • thumbnail-img
  • thumbnail-img
 

Tools, APP Software Used etc.

  • Raspberry Pi

Story

This project is about controlling LED's through local device.

This project shows how the user can use local services to control external devices with the user-friendly interface.

The code can be found in this link - https://gitlab.com/Vladimir_Glukhov/led-control - read the instruction here about how to install the soft.

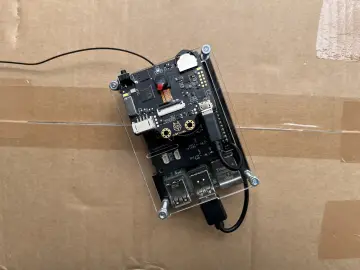
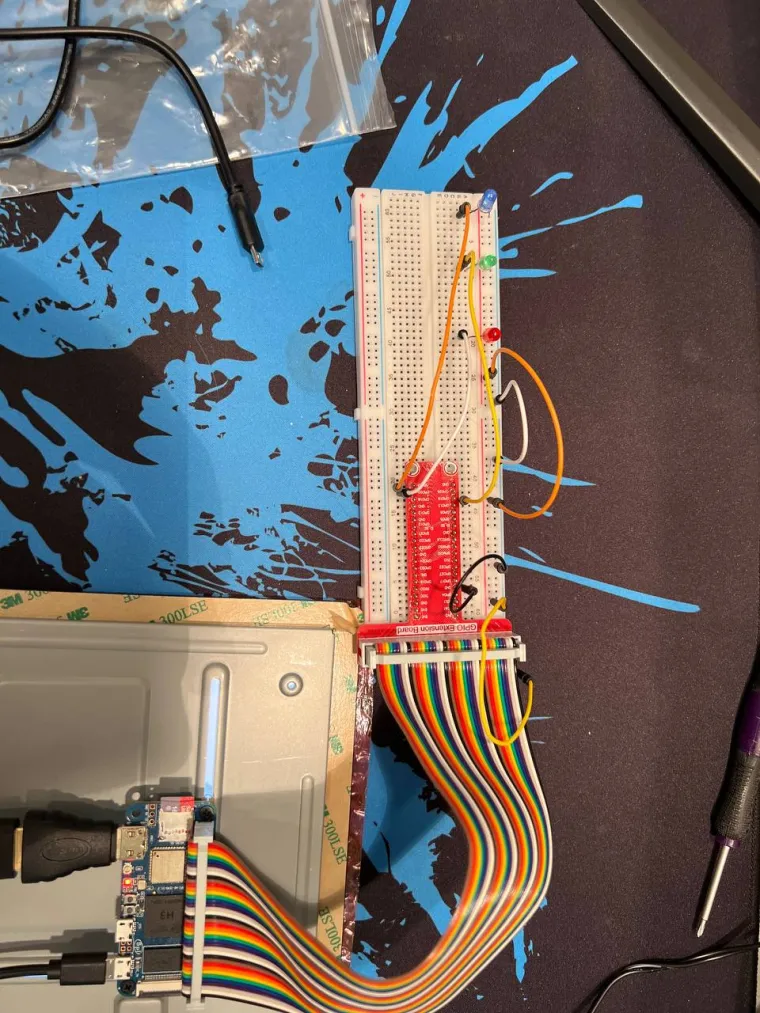
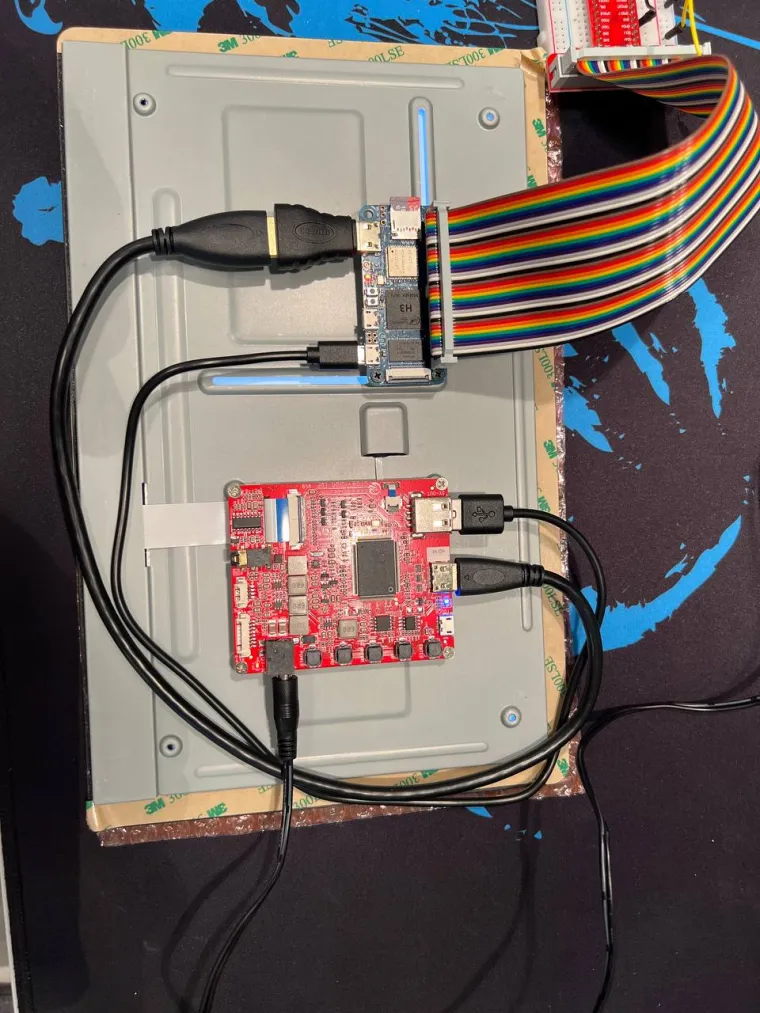
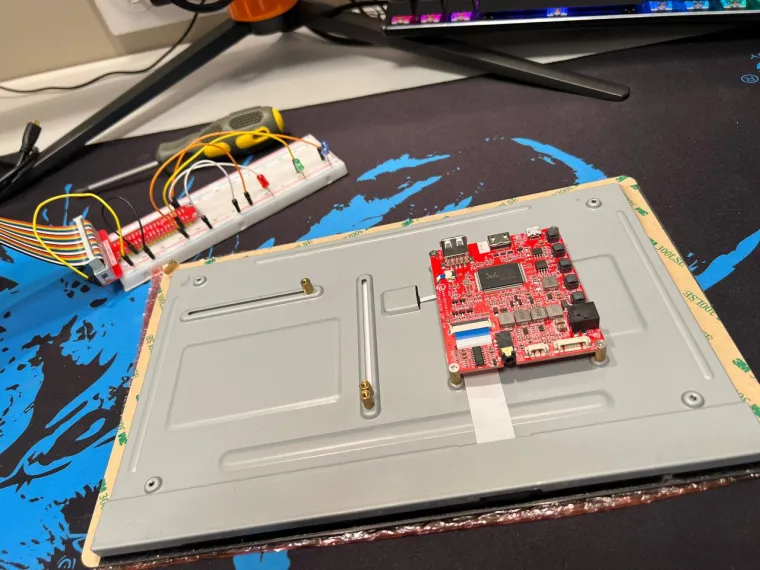
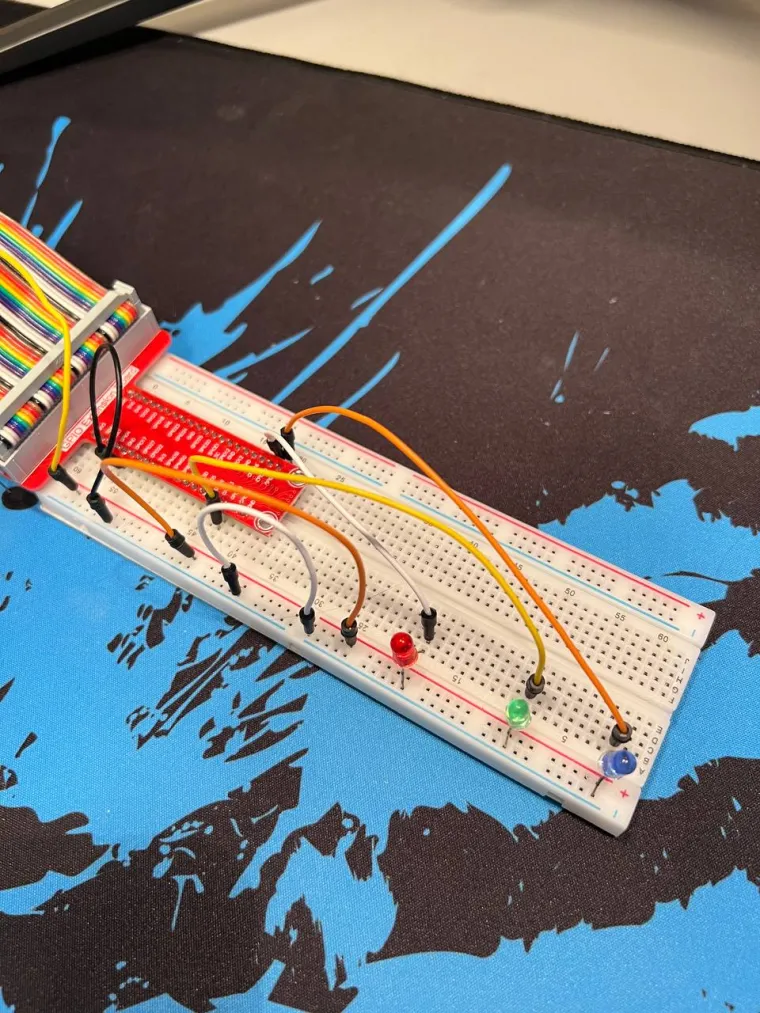
The hardware main set:

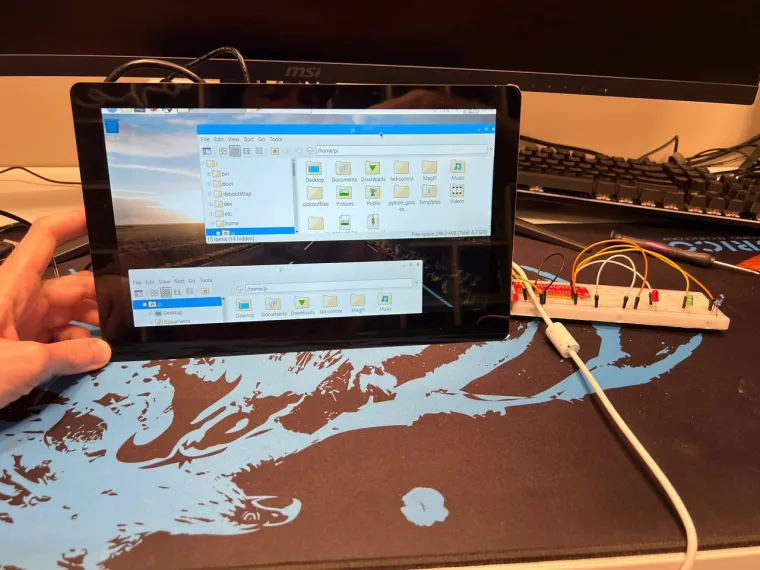
1) Elecrow touch screen.

2) Raspberry Pi or Banana Pi mini PC

3) breadboard, 3 led's, a few special wires for breadboard

At first, connect all wires to the PC. Be sure you use correct USB for touch (without it, it won't work).

Then, connect power supply and wait for loading.

After loading, go to the project folder and execute two commands in terminal (should be two terminal's windows)

'node server' and 'node robot-client'

After this, you can open a chromium browser and go to https://localhost:8080 and control your LED's!

Additionally, you can make a kiosk-mode and run chromium in full screen after system loading.

Code
  • LED controls system

    https://gitlab.com/Vladimir_Glukhov/led-control
    View
user-img

Vladimir Glukhov

+ Follow

Topic

View All
touchscreen raspberrypi LED
  • Comments( 0 )
  • Like( 2 )
/1000
Upload a photo:
You can only upload 1 files in total. Each file cannot exceed 2MB. Supports JPG, JPEG, GIF, PNG, BMP

You May Also Like

View All