


![First steps with LVGL and SquareLine Studio [CrowPanel 1.28]](https://www.elecrow.com/media/qb/share/projects/image/2025/04/20250416/voila_59715213567ffcce24f2e6_q80.webp)

Story
Hello makers!
Today we are taking our first steps with LVGL and SquareLine Studio.
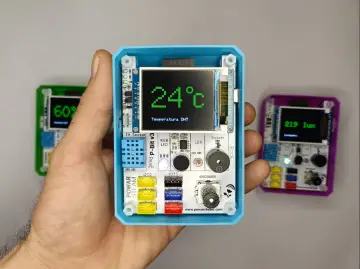
Last time I started CrowPanel ESP32 C3 and using Arduino IDE 2.3.4 I ran some basic sketches. Let's move on because this CrowPanel can offer us more. 🤓
Let's start with:
1. Set-up our basic needs together with Arduino;
2. Install LVGL library for Arduino IDE;
3. Install SquareLine Studio graphics designed tool;
4. First instructions in SquareLine Studio.
- The first step is to gather some files in the same directory, and for this please download the ESP32_1.28_Arduino_Demo archive (https://www.elecrow.com/wiki/CrowPanel_ESP32_1.28-inch_Round_Display.html), if you haven't done so yet. Next go to Examples → LvglWidgets and copy the header and cpp files (CST816D). Open Arduino IDE and save a simple empty sketch, locate the directory and paste the files above. Also in this directory please create two other directories in which at some point we will save some files from SquareLine Studio (I called them "square line files" and "ui files" from the user interface).

-
The next thing is to install the Lvgl library in the Arduino IDE (I've already shown how to install a library, but it's nothing special, I'm sure you can do it): https://www.arduinolibraries.info/libraries/lvgl . LVGL (Lightweight Versatile Graphics Library) is an open-source library used to create graphical interfaces on embedded devices. The library works on most microcontrollers that meet the minimum required resources - 32kB RAM and 128 kB of flash memory. The library also provides dozens of layout examples that can be adapted depending on the use-case. In a slightly different way I wanted to install Lvgl v8.3.11, you will see later why I did this. Download the archive, and copy the files to "libraries" in the Arduino IDE, make sure they are called "Lvgl".
-
Let's move on to installing a new tool, SquareLine Studio v1.5.0: https://squareline.io/downloads . A short description provided by the developer goes something like this: "SquareLine Studio is specially developed for designers so as to implement their plans in the most efficient way and to take the most off the programmers' shoulders. SquareLine Studio uses the fully open source LVGL UI library which makes it possible to control the whole project because there is no Lib file generated code set. Meanwhile, it gives great performance on low performance devices. " (https://docs.squareline.io/docs/introduction/overview/) I suggest you create an account on their website because after you install the program you will need to enter your own license.
-
Now let's open SquareLine Studio and take a few steps.

If you have successfully installed the tool, when you open it you will be at this point where:
• we are creating a new project;
• we are working in the Arduino IDE, so you will select this;
• we are using the Lvgl v8.3 library;
• we are also using the TFT_eSPI library (https://docs.arduino.cc/libraries/tft_espi/#Releases).

On the right side we have:
• Project Description, I wrote the name of the Arduino sketch;
• Project name;
• very important, enter the path to the directory, in this case it is the one called "square line files";
• Resolution;
• Shape;
• Color depth;
• LVGL version;
• and finally click on Create button.
And voila:

It wasn't that hard, was it? But we still have a few settings to make.

Go to File → Project Settings and in this window check the properties, then in the "File Export" area:
• "Project Export Root" is the previous path, in my case to the "square line files" directory;
• "UI Files Export Path" is the path to the other directory, in my case it's "ui files";
• "LVGL Include Path" actually refers to saving some data in a file, optionally named "lvgl.h" .

And finally click on "Apply changes". So far we are at the same level, I am learning at about the same pace as you. The interface of the tool does not seem complicated to me, so I started to observe what is around. I clicked on some buttons and created a green circle:

Next, I clicked Widgets → Basic → Text Area and inserted some text into the center of my virtual display, then I started customizing it.

When you are ready click on Export → Export UI Files which automatically saves the files in your Arduino sketch directory, in my case it is the directory called "ui files".

What do you think, do you like it? What would you create? Well, we will continue soon. 😉