
Story
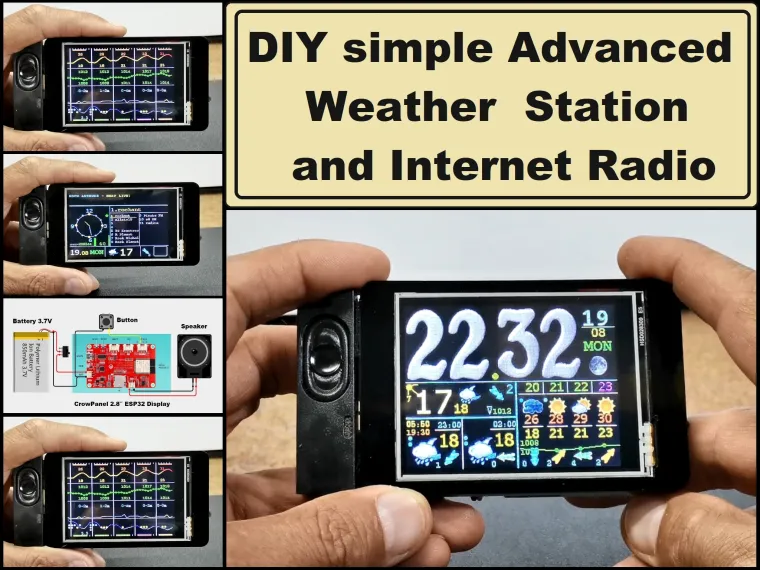
ELECROW crow panel 2.8 inch esp32 display module is ideal for making simple but also relatively complex projects, where no soldering of components is required. In addition to the ESP32 microcontroller and Touch display, this module also contains an audio amplifier, an SD card reader, and even a lithium battery charger circuit.
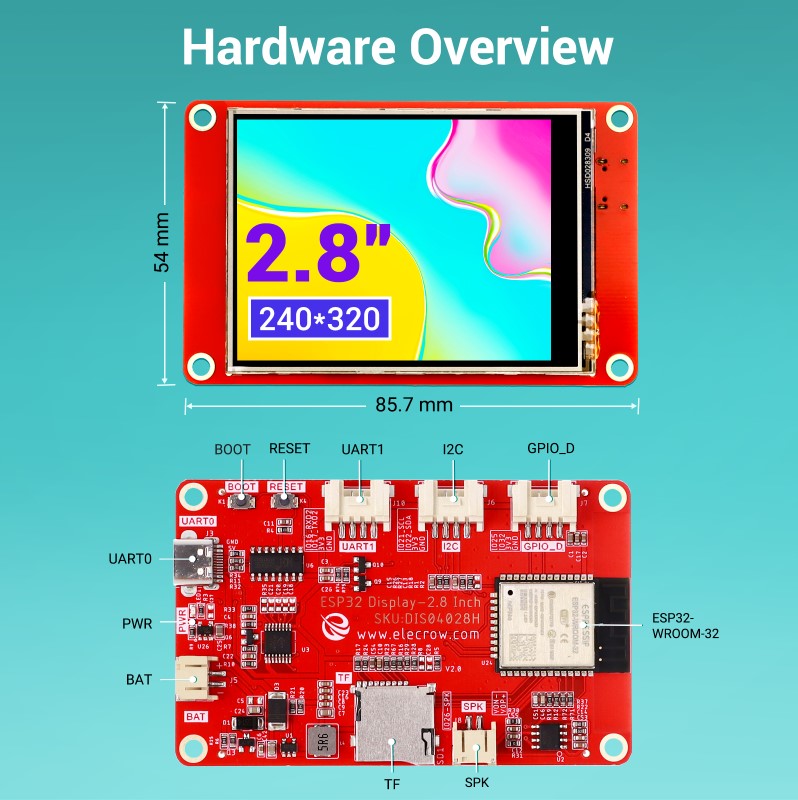
If necessary, a large number of external modules can be connected to this module because it contains UART, I2C and GPIO ports, which makes this inexpensive device universal. Recently, in one of my videos , I presented you an Internet Radio project where eigh of these modules only needed a speaker, a battery and a switch.
For the device that I will present to you this time, we will only need one more button.
Building an internet weather station is a popular project among electronics enthusiasts. To display the local weather conditions, no sensors are used, but the requested information is received via the Internet. In particular, we will use the data from the OpenWeatherMap project which has an API that enables users to request weather data for your location. For this purpose, we need to create an API key on the OpenWeatherMap page that allows us 1,000 API calls per day for free.
The author of the original project is Andrey Ushakov , and all credits go to him. He was also provide a link to the code. However, the archive is full of many different versions, and other data. In addition, the code is relatively complex and has too many options, such as the type of microcontroller used, MP3 player, FM radio, support for external sensors, different types of displays, the option of two displays for greater visibility, infrared control, calendar, and many others. It was really hard to navigate through all the code versions, options, and information. That's why I decided to modify the code so that it would completely match the previously mentioned Display module. I will try to explain all the steps in detail, so that even those with less experience in this field can make the device. After all, this is the biggest advantage of this compact Display module.
- First we need to enable display module in the Arduino environment. For this purpose we go to Arduino IDE - File - Preferences - where we add the ESP32 URL to "Board Manager URLs" as follows:
(https://raw.githubusercontent.com/espressif/arduino-esp32/gh-pages/package_esp32_index.json)

Now click "Tool-->Board-->Board Manager", and search for "esp32". This project requires it to be installed version 1.0.6 ESP32 package.
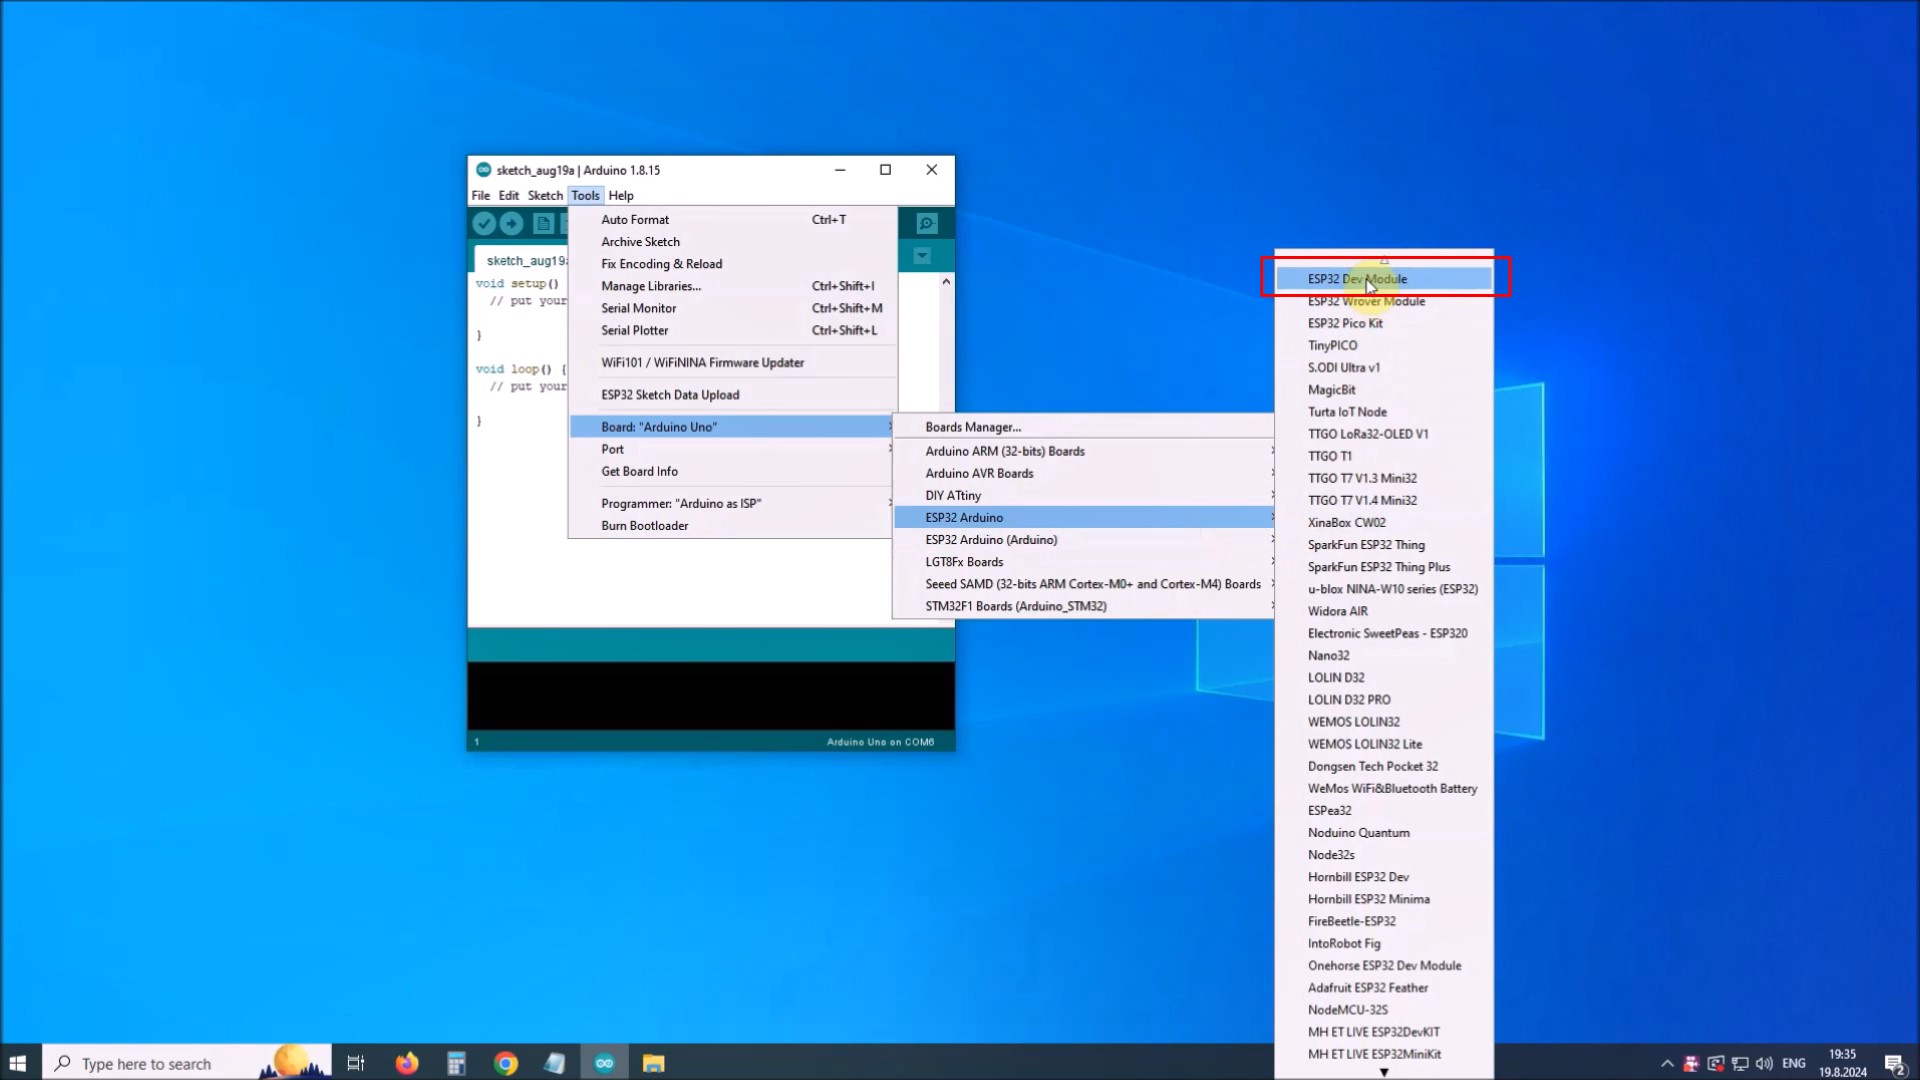
Next, on Arduino IDE -> Tools -> Boards manager -> ESP32 Arduino we choose: ESP32 Dev Module Module, and set the parameters as given in the image

With this, the procedure for entering support for the specific Display Мodule in the Arduino IDE is completed.
Next you need to Install ESP32 Filesystem Uploader. For this purpose we go to Documents - Arduino - Tools and here we copy the "ESP32FS" folder given below.
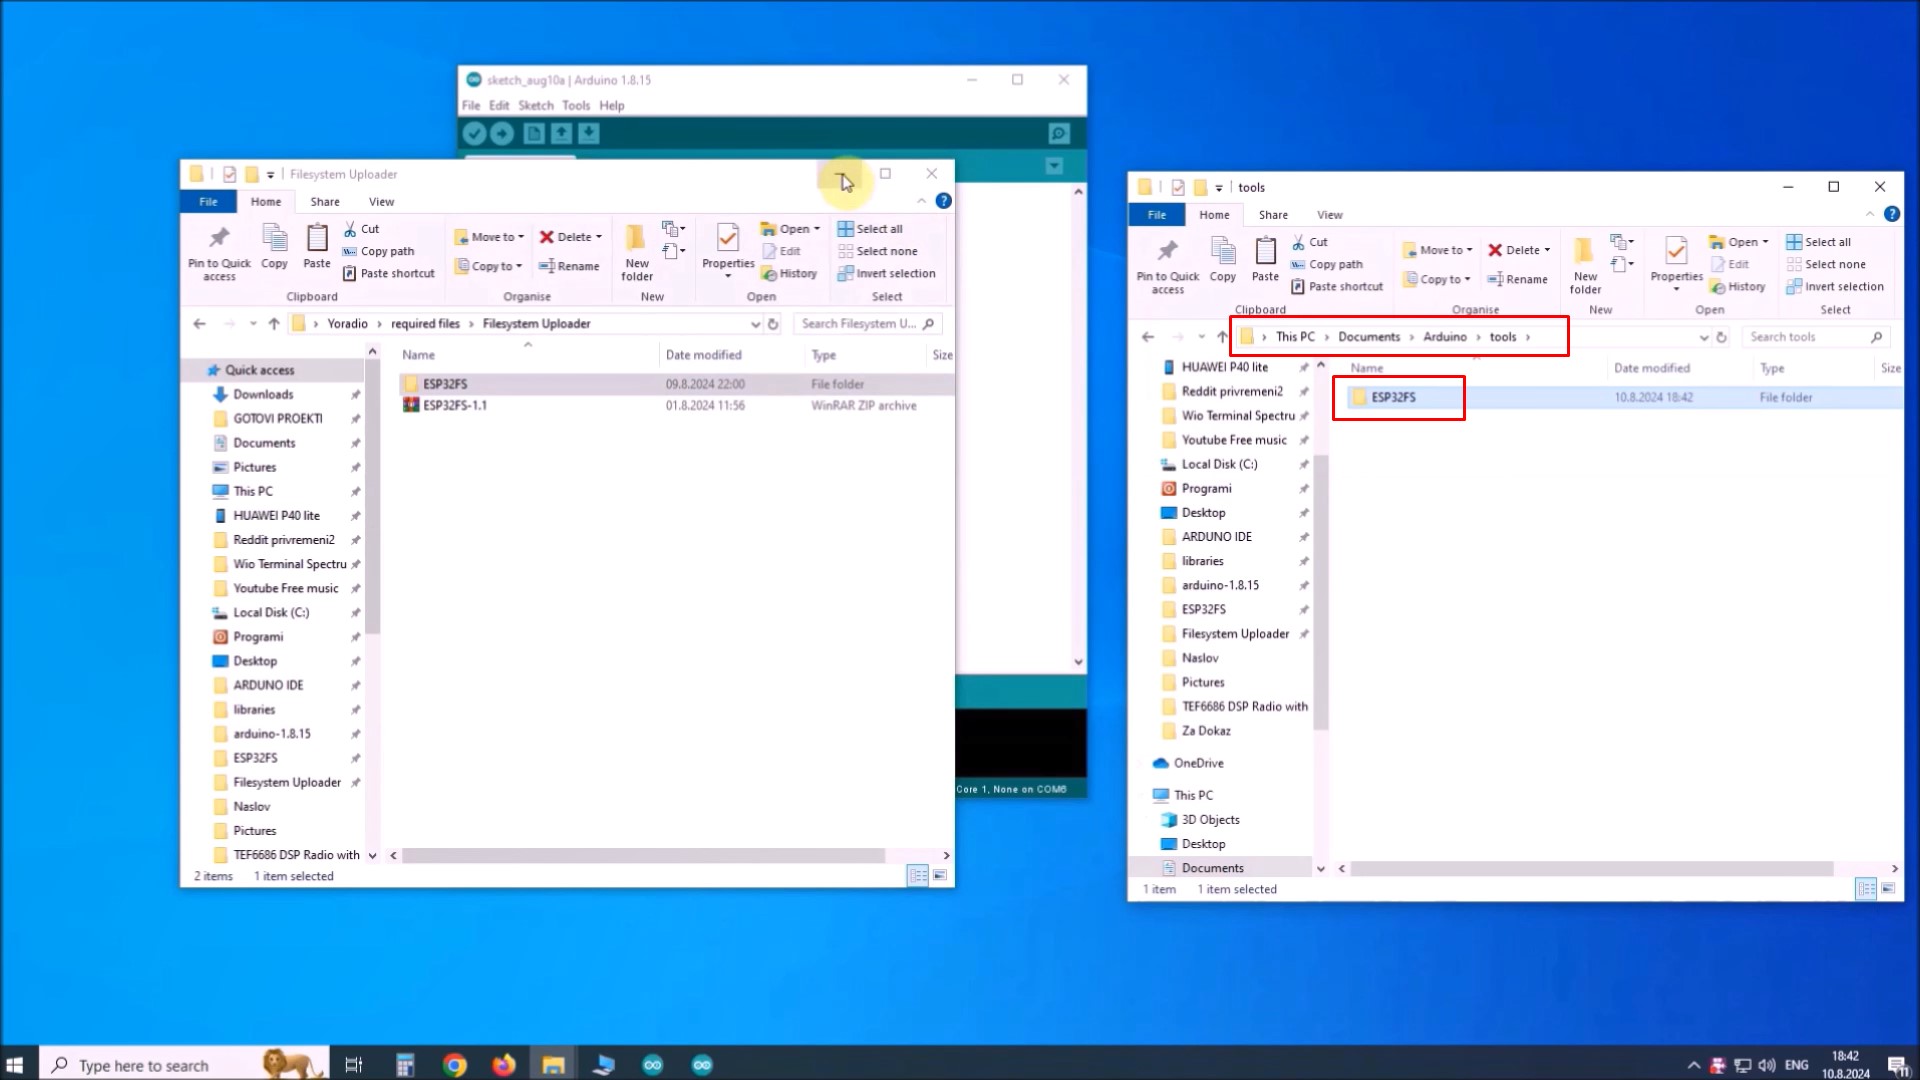
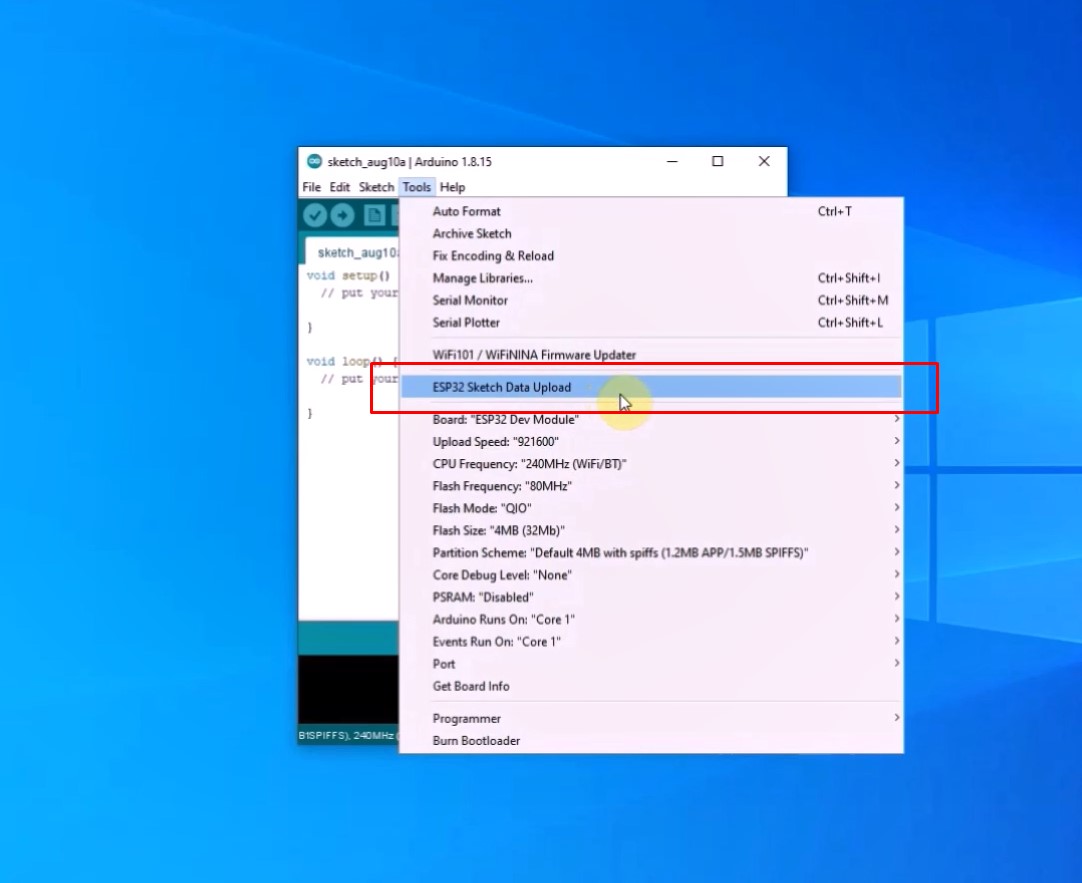
To check if the plugin was successfully installed, open your Arduino IDE. Select your ESP32 board, go to Tools and check that you have the option “ESP32 Sketch Data Upload“.

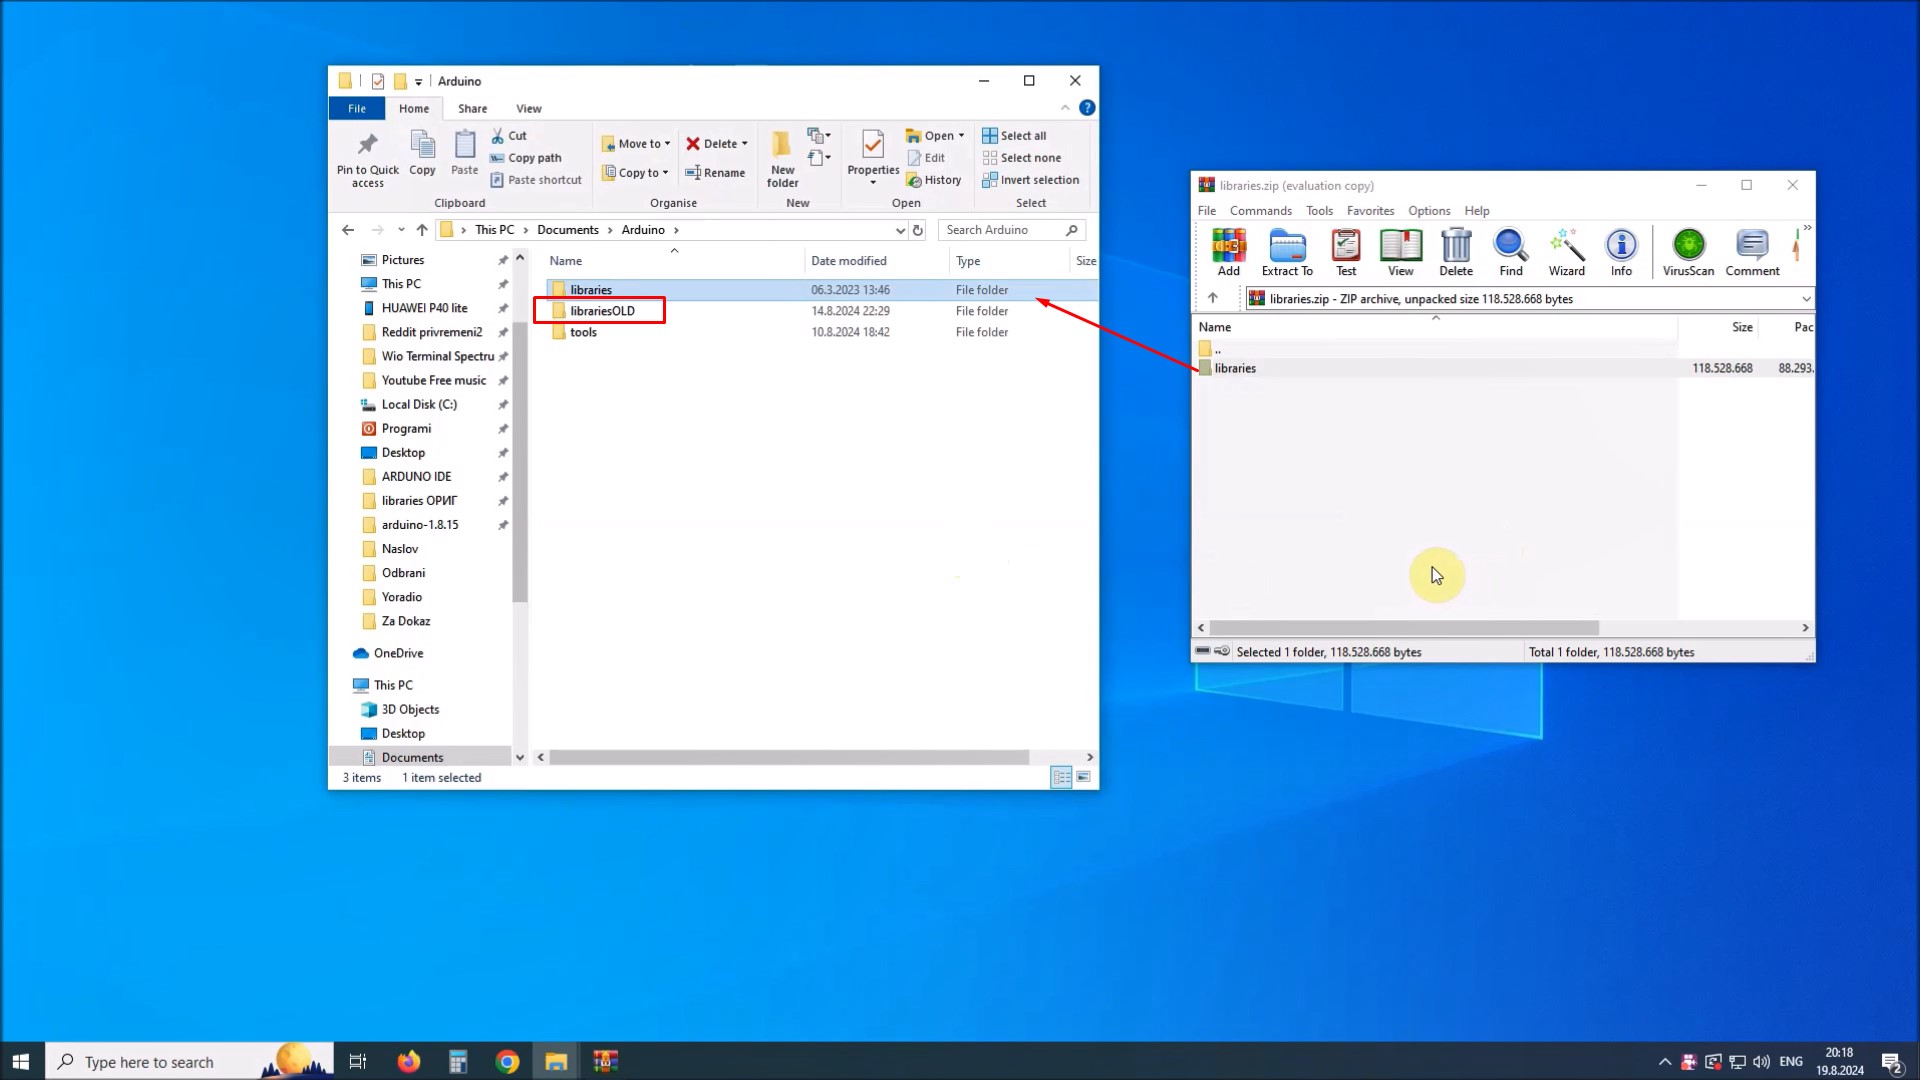
Next is the installation of the libraries. The zip file contains all the libraries needed for this project. In order not to have a conflict with previously installed different versions, I recommend you to use this temporary procedure. In documents - arduino, we rename the Libraries folder to LibrariesOld. Now here we extract the Libraries folder which is in the given zip file. In this way, the code will compile without errors. After that, we return the original Libraries folder.
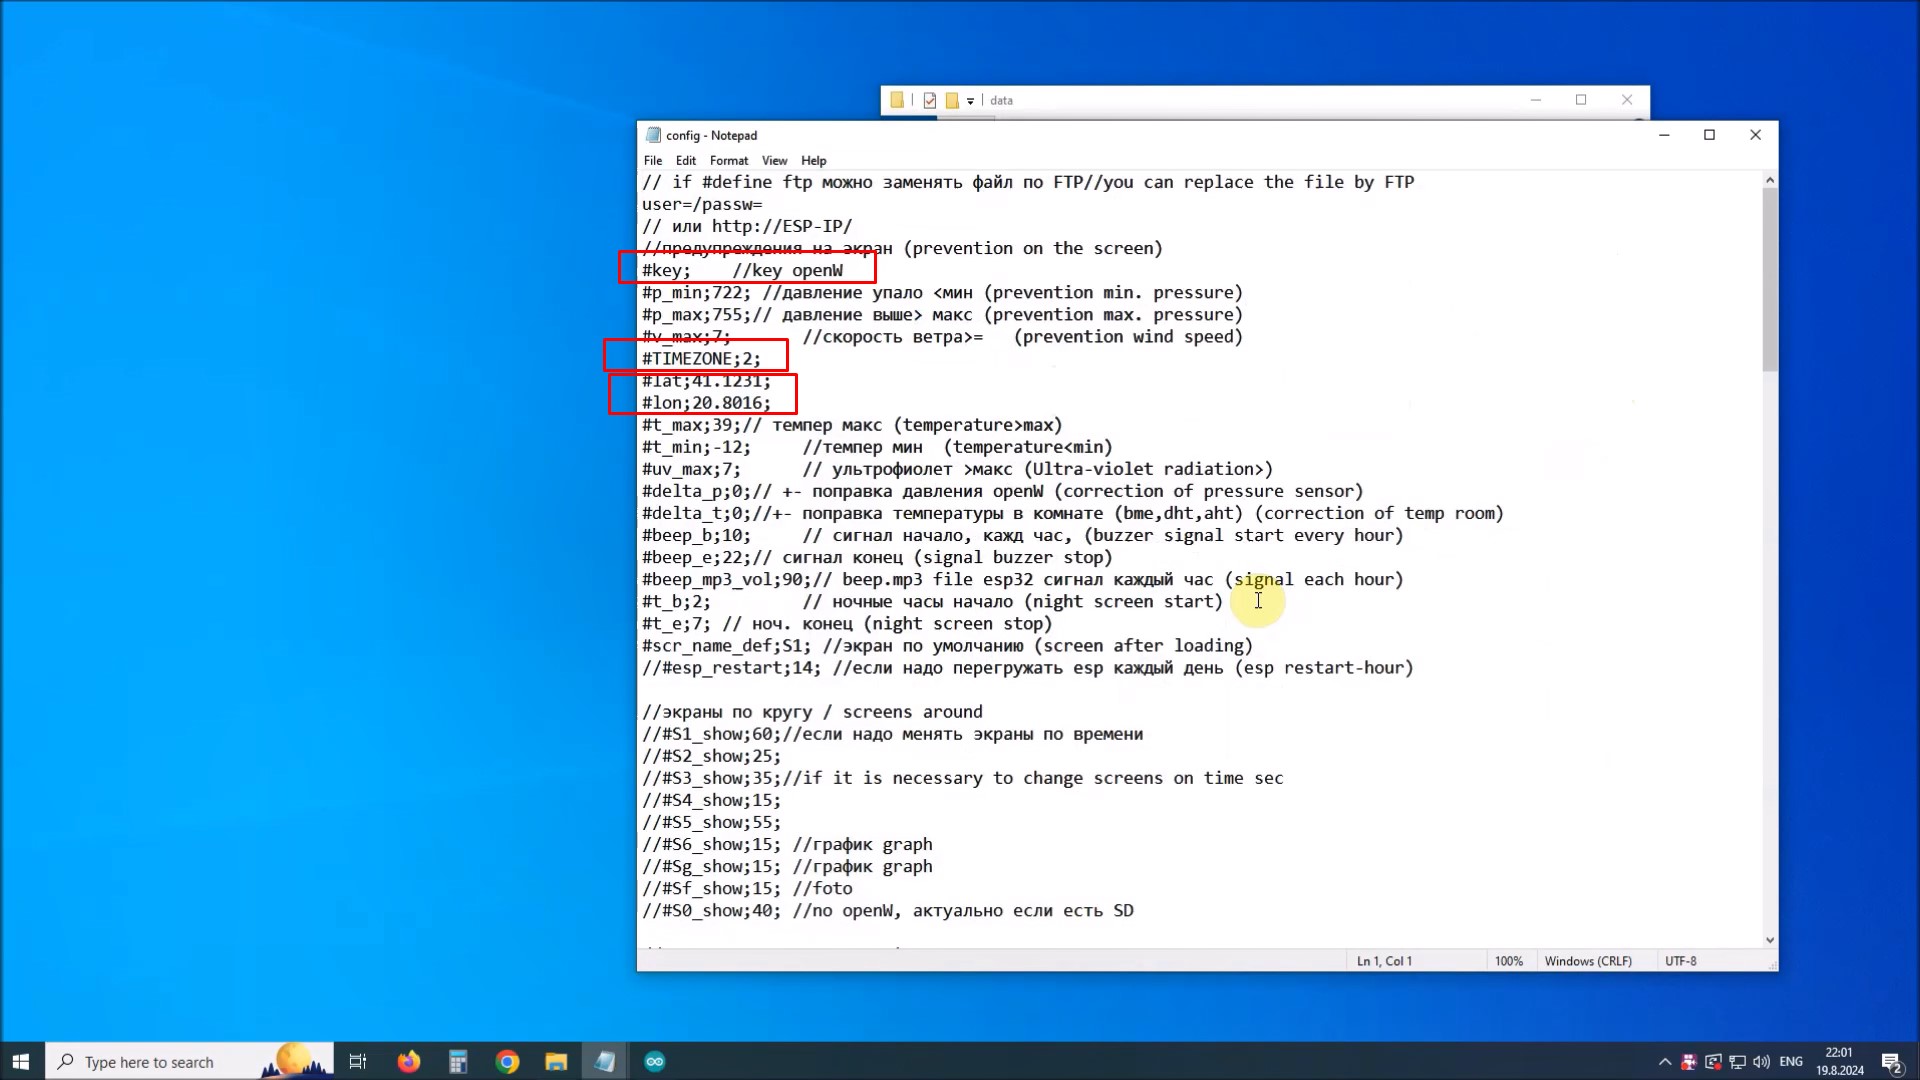
Before starting the installation, we first need to modify the "Config.txt" file, which is located in the meteo - data folder. Here we need to enter API key, timezone, as well as latitude and longitude for the given location. We need to enter the same data in the code in the appropriate place.
Next we open the "meteo.ino" file which is located in the folder of the same name. We go to Tools, select the appropriate COM port associated with the module and then press "ESP32 sketch data Upload"
After this, we press the upload button and with that the installation of the code will be finished.
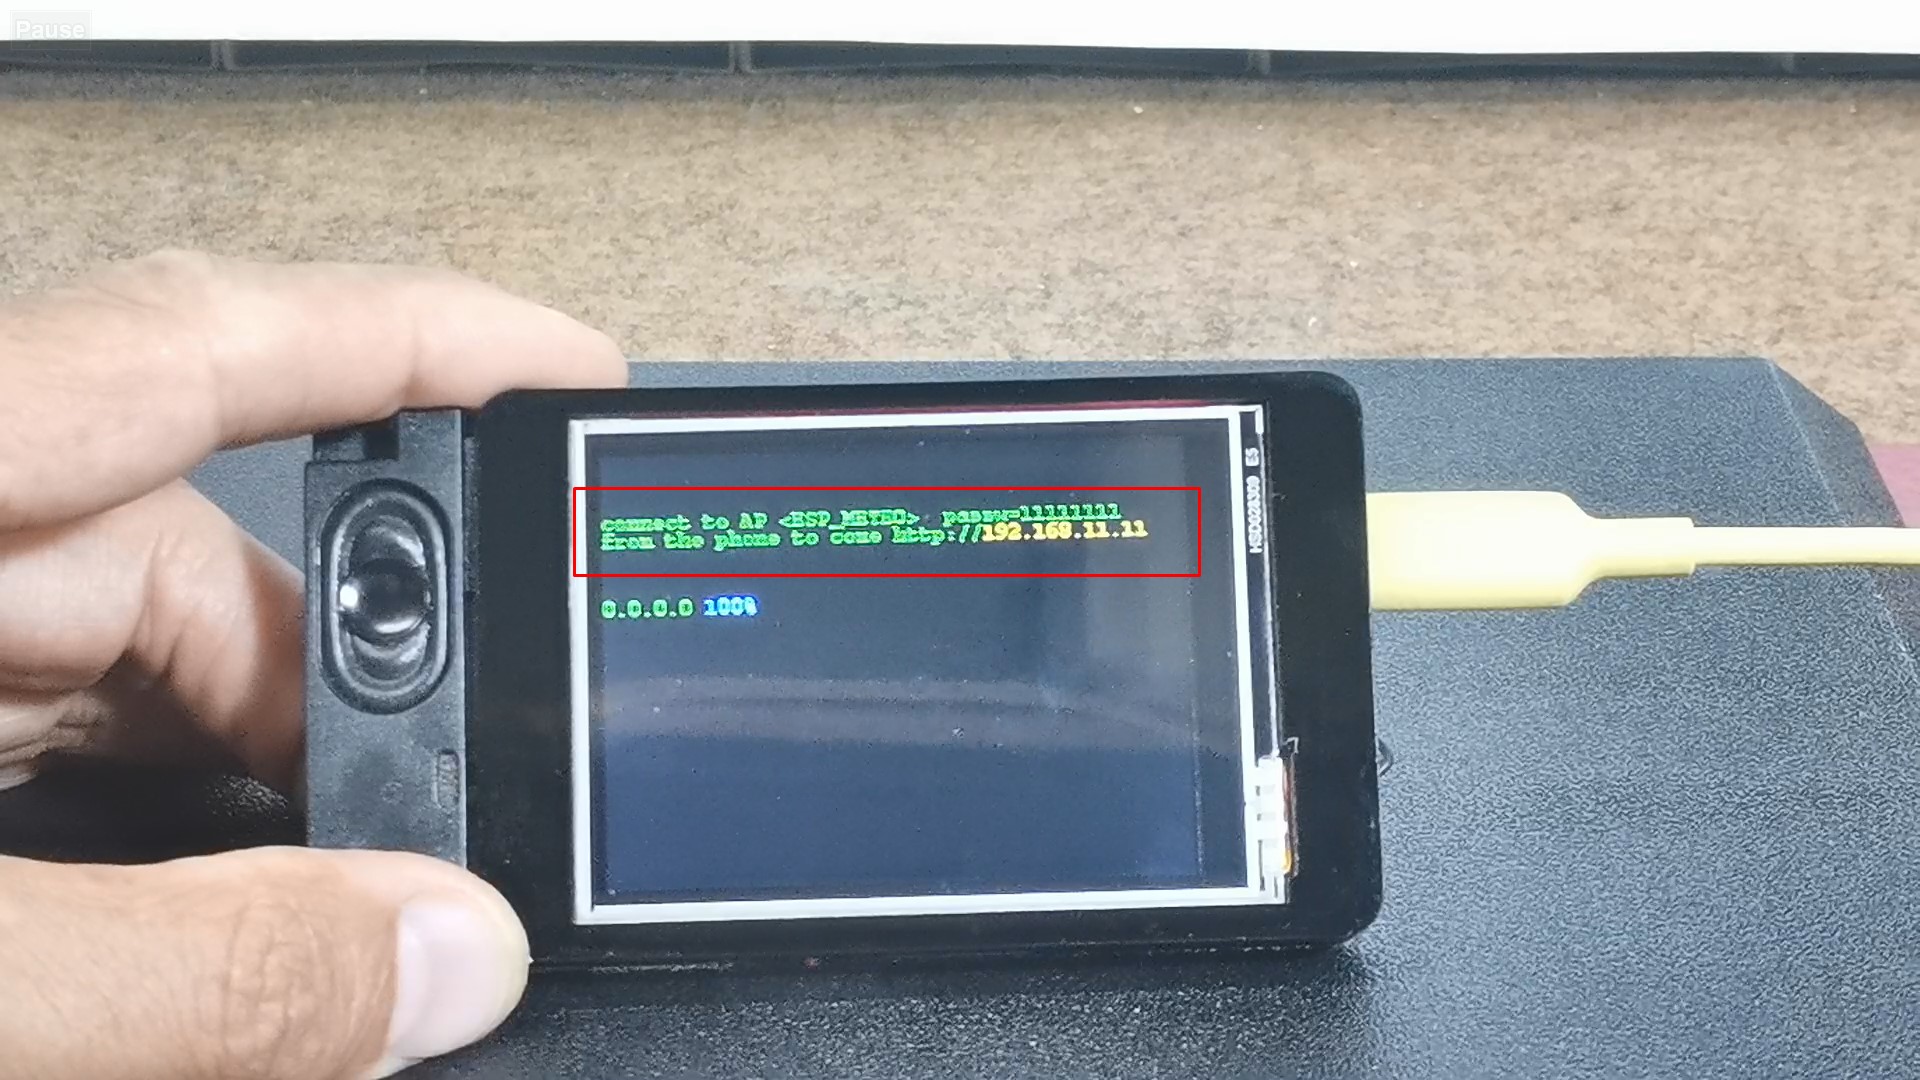
When the device is started for the first time, a message appears on the screen that a Wi-fi access point with the name ESPMeteo and a corresponding password (password: 11111111) has been generated.
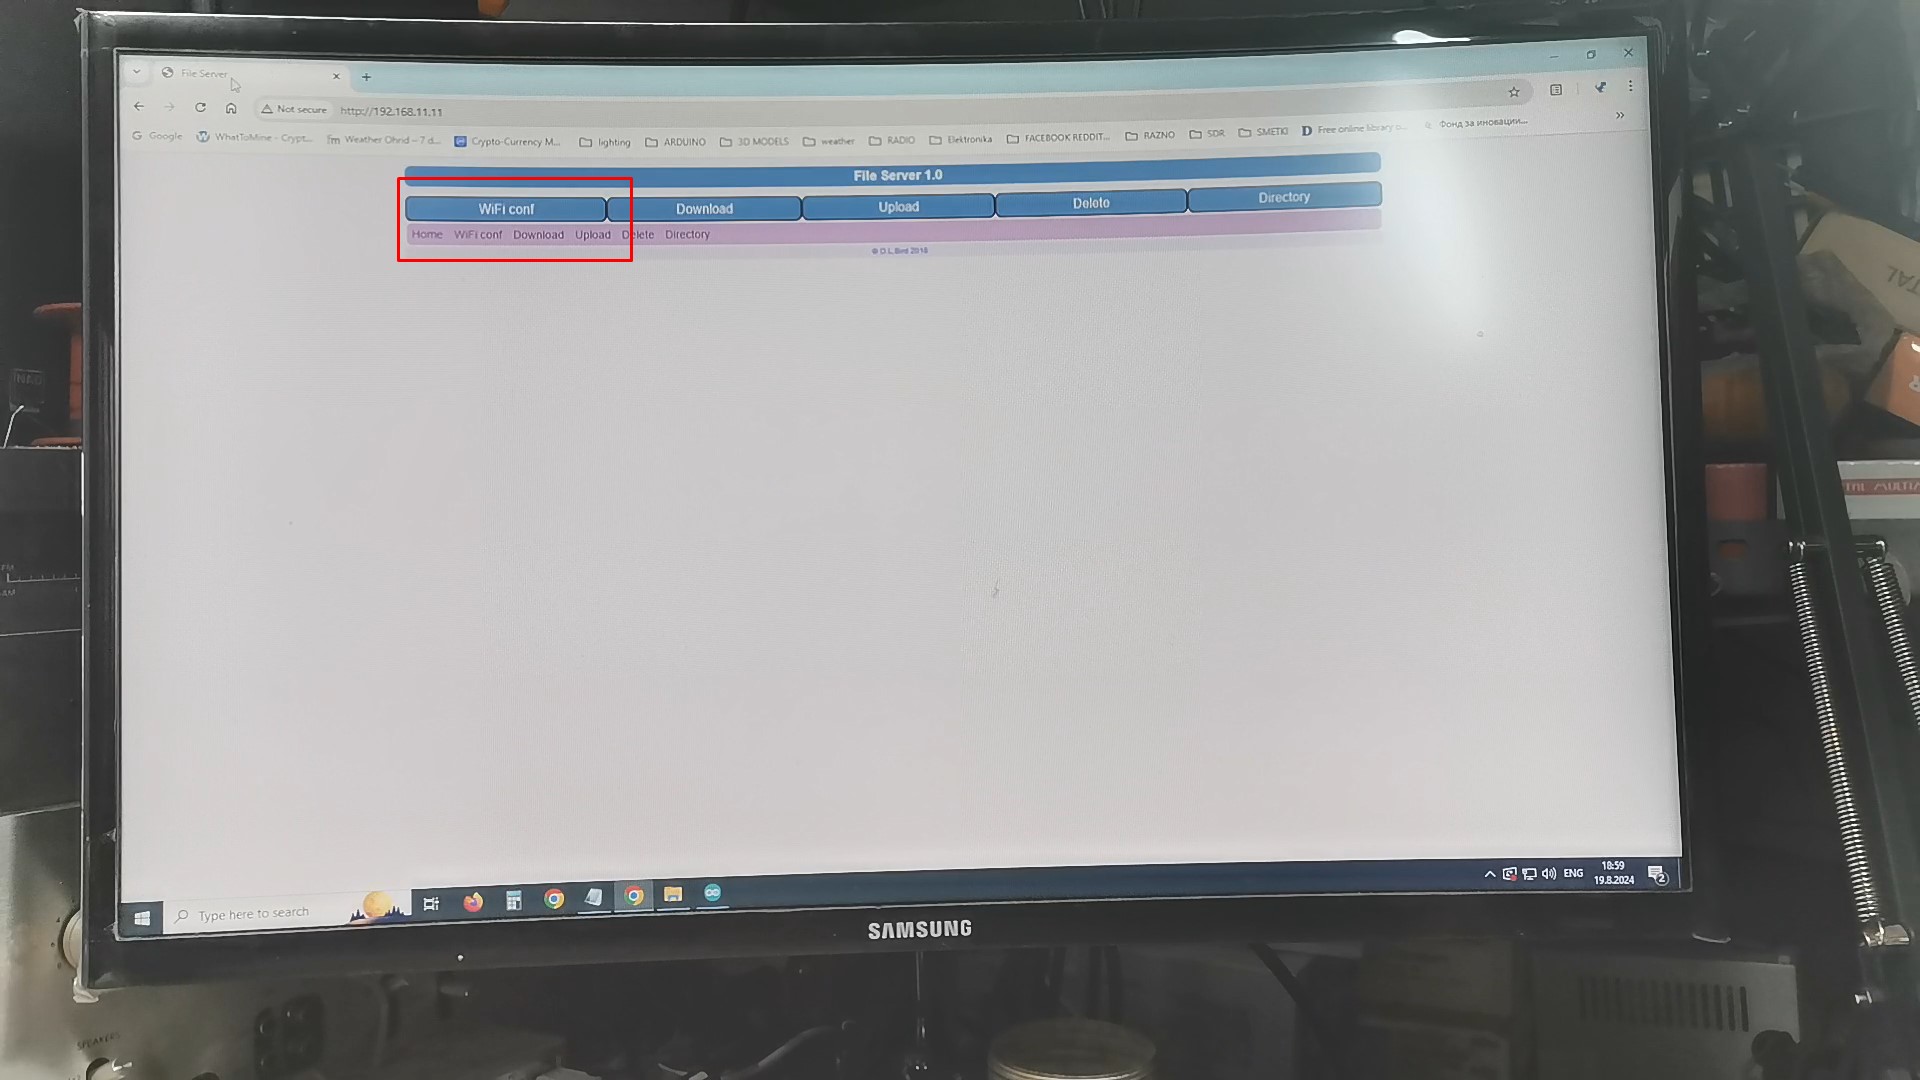
Now we need to connect to this access point and enter the address 192.168.11.11 in a web browser. Here we enter the credentials of our local Wi-Fi network.
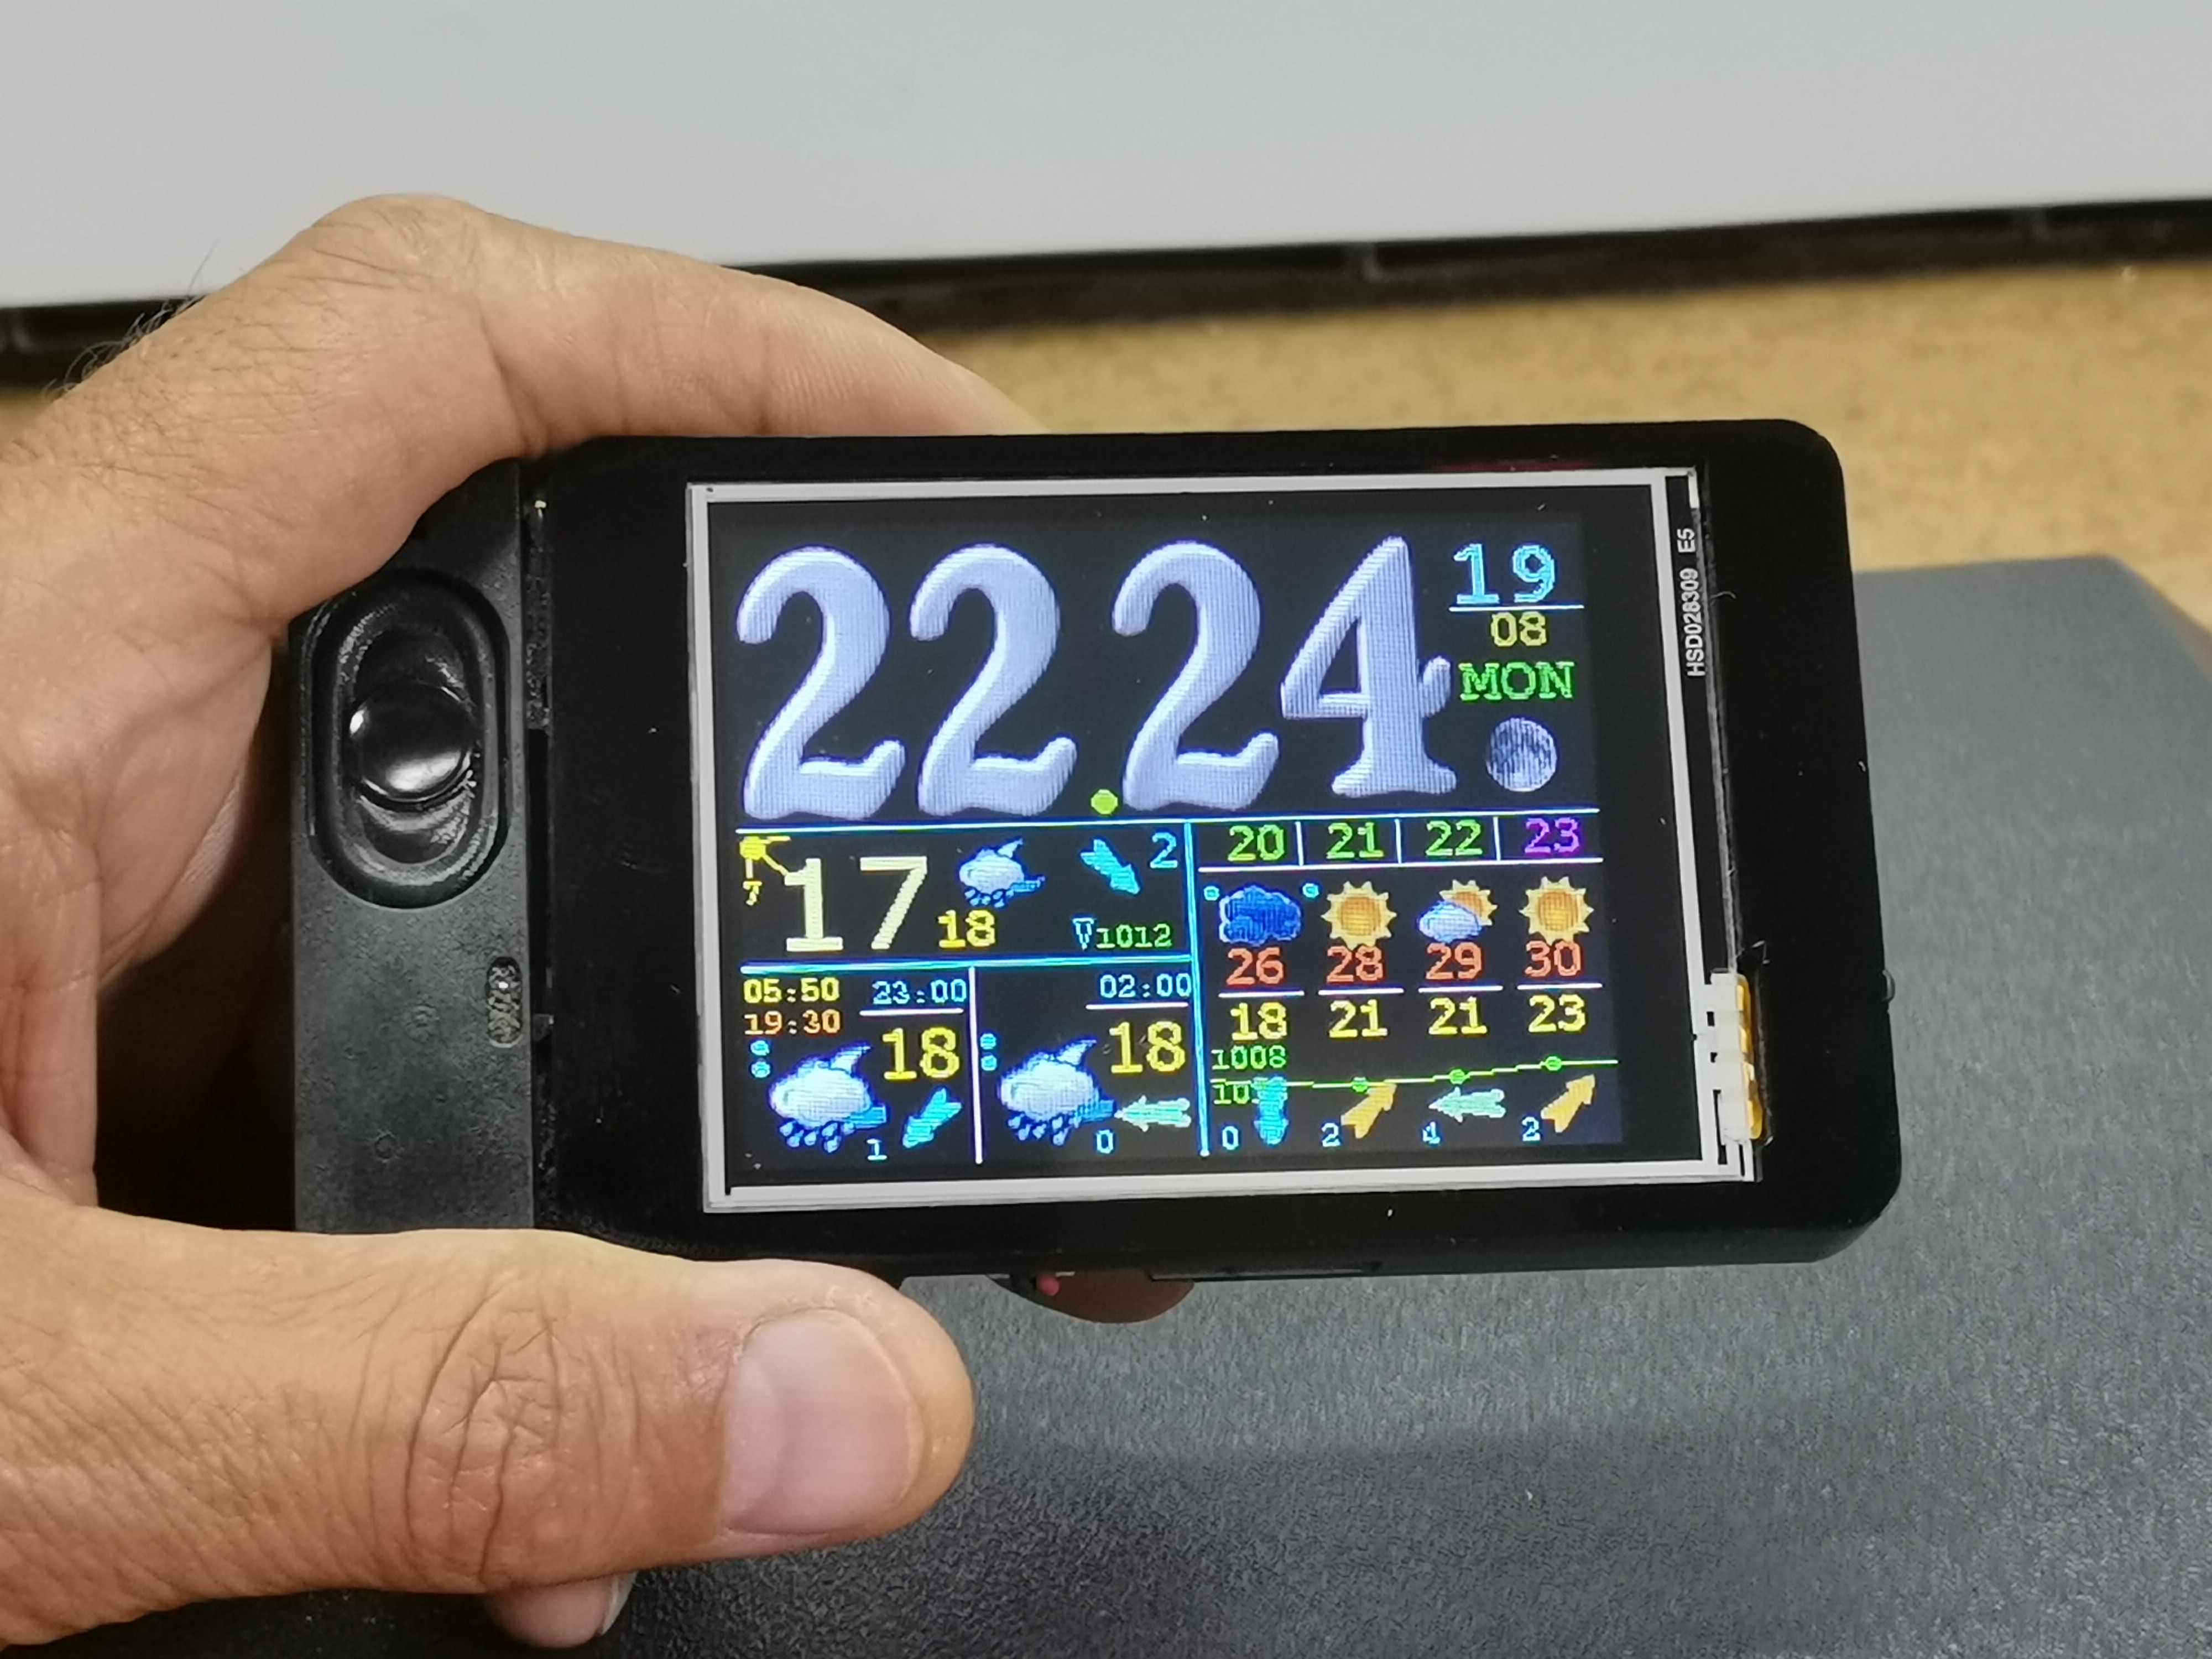
After this, we turn on the device and the screen first shows data about the IP address and Wi-Fi signal strength, and after a few moments the main screen with a basic informations appears. It contains a medium-sized clock, date, current weather with UV index, wind speed and direction and air pressure, sunrise and sunset time, forecast for the next 3 and 6 hours, as well as for the next four days. Really a lot of useful weather information on one screen.
By pressing the button, we move through several screens containing different weather informations and graphs.

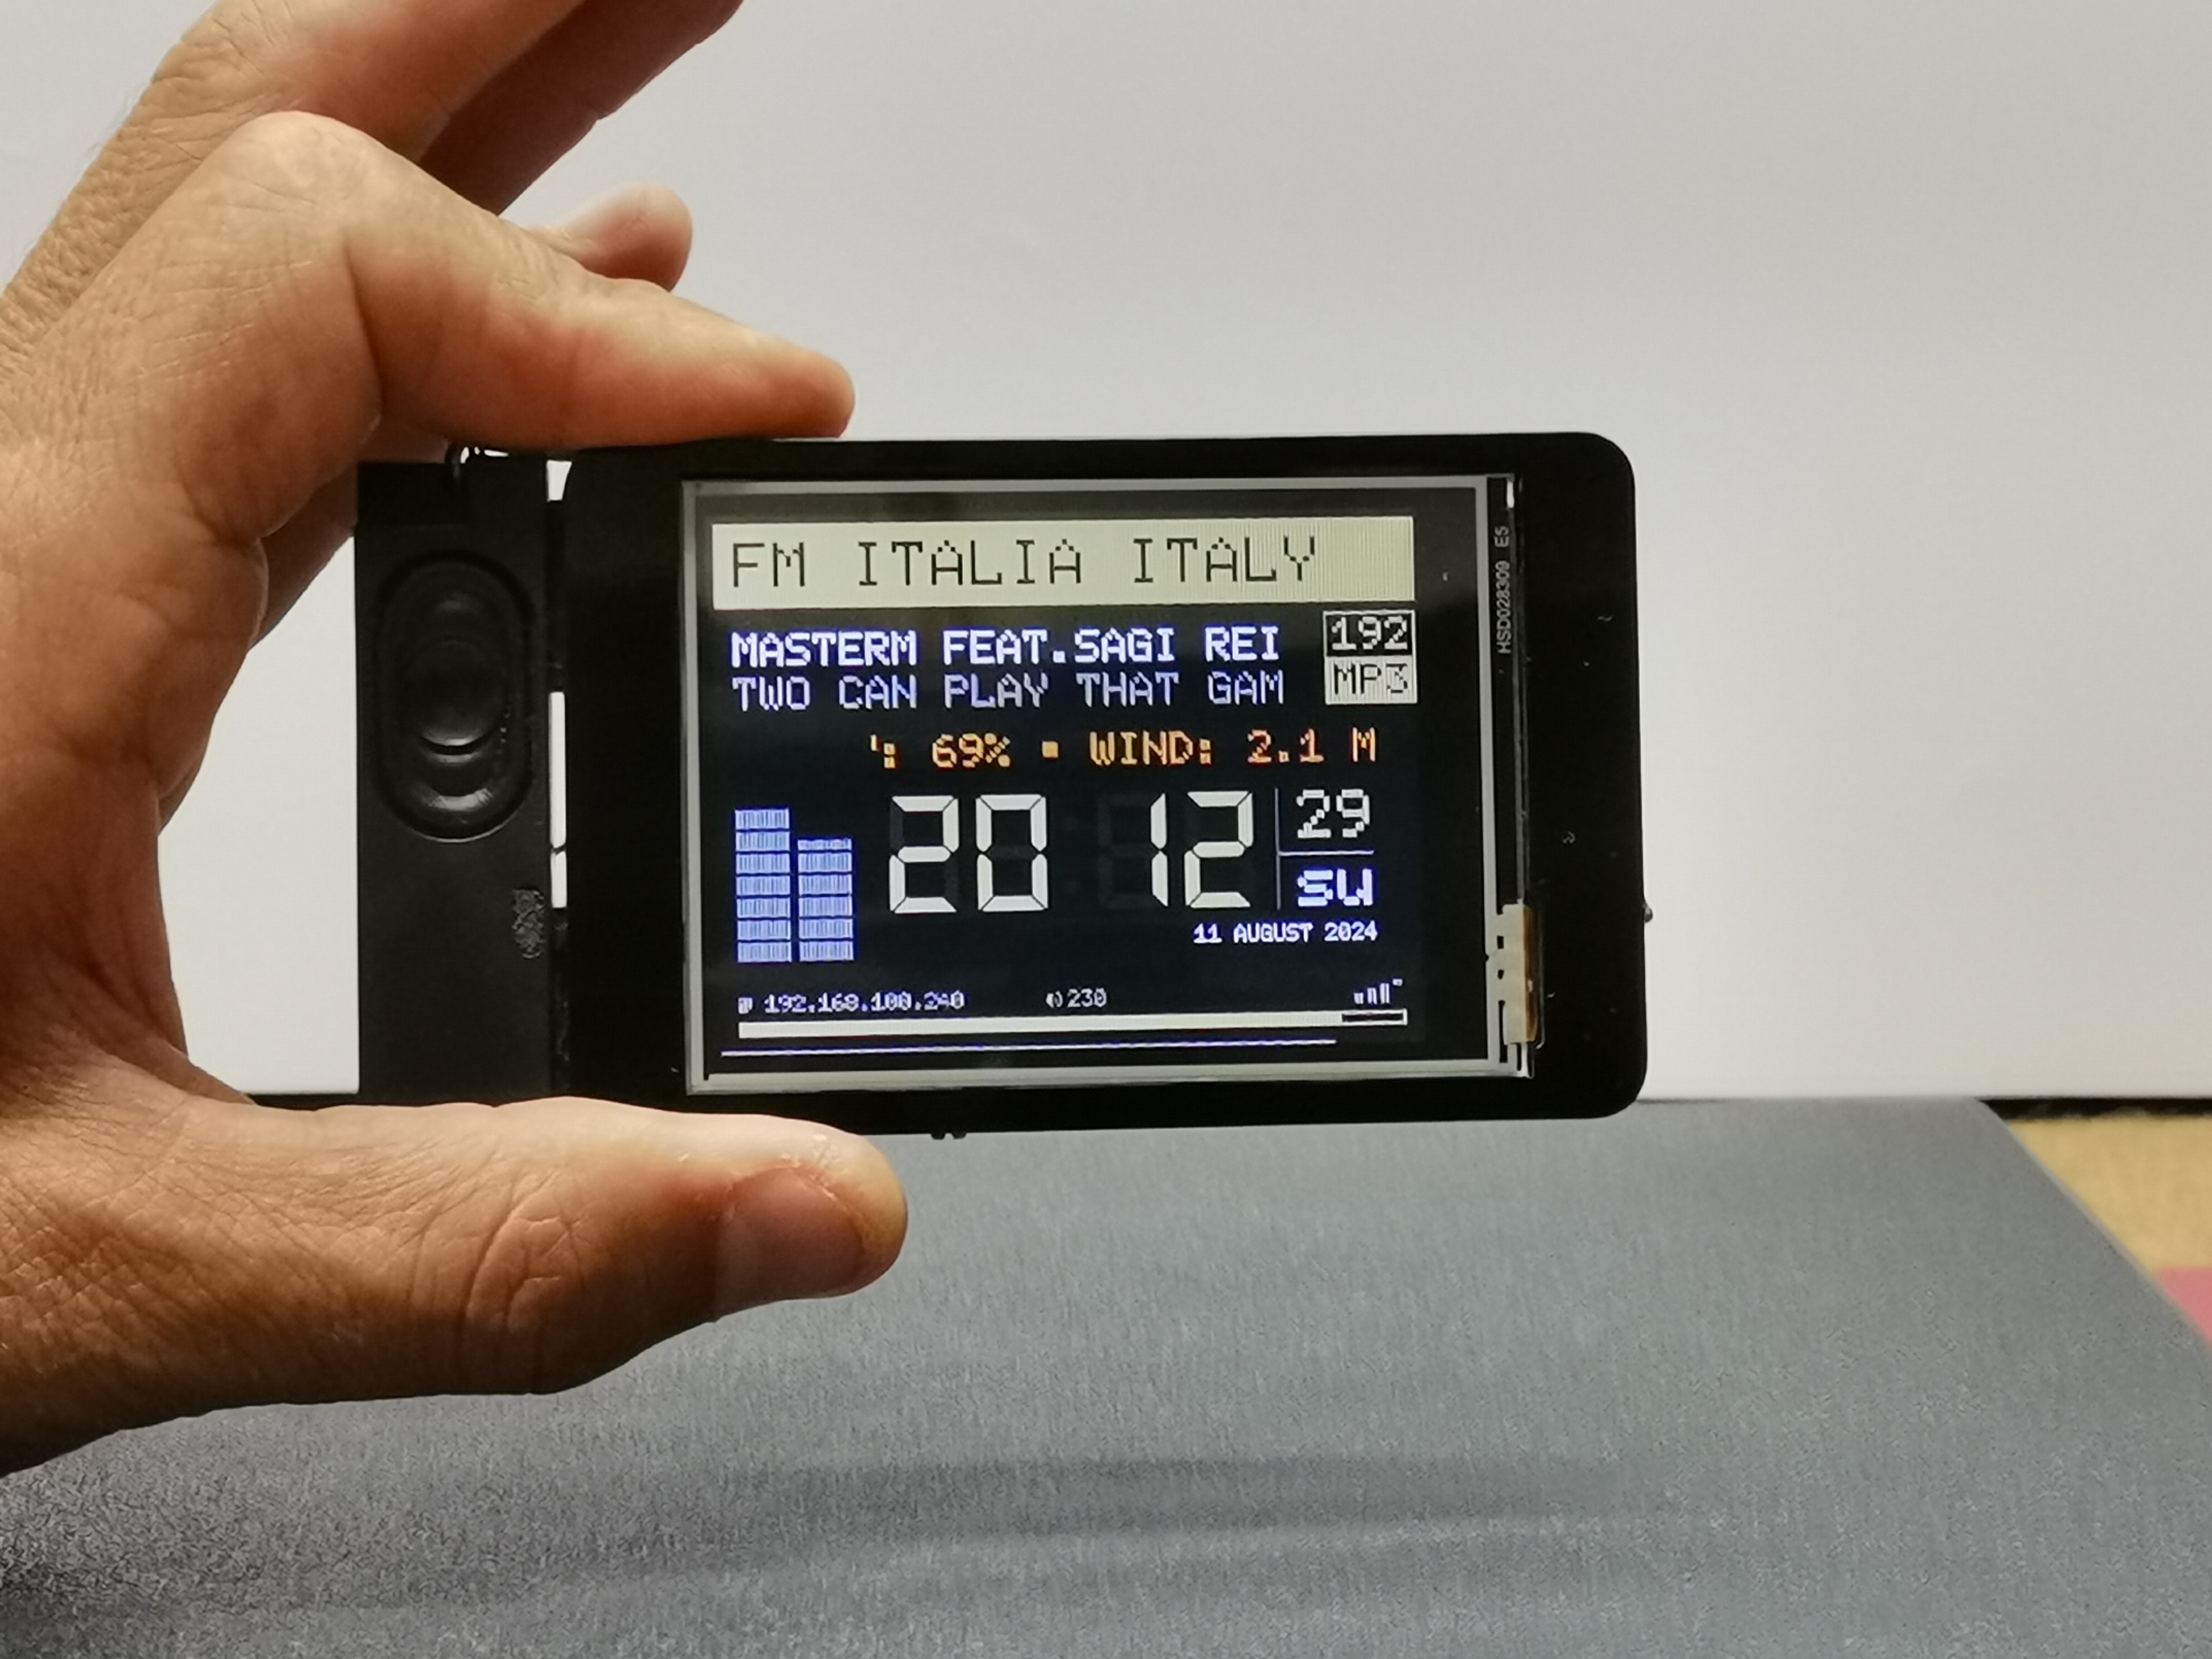
As I mentioned before, this module also contains an audio amplifier, so this time I also activated the Internet Radio part of the code, which uses the I2S protocol and there is no need to use an external audio decoder. The Internet radio menu is entered and exited with a double click.
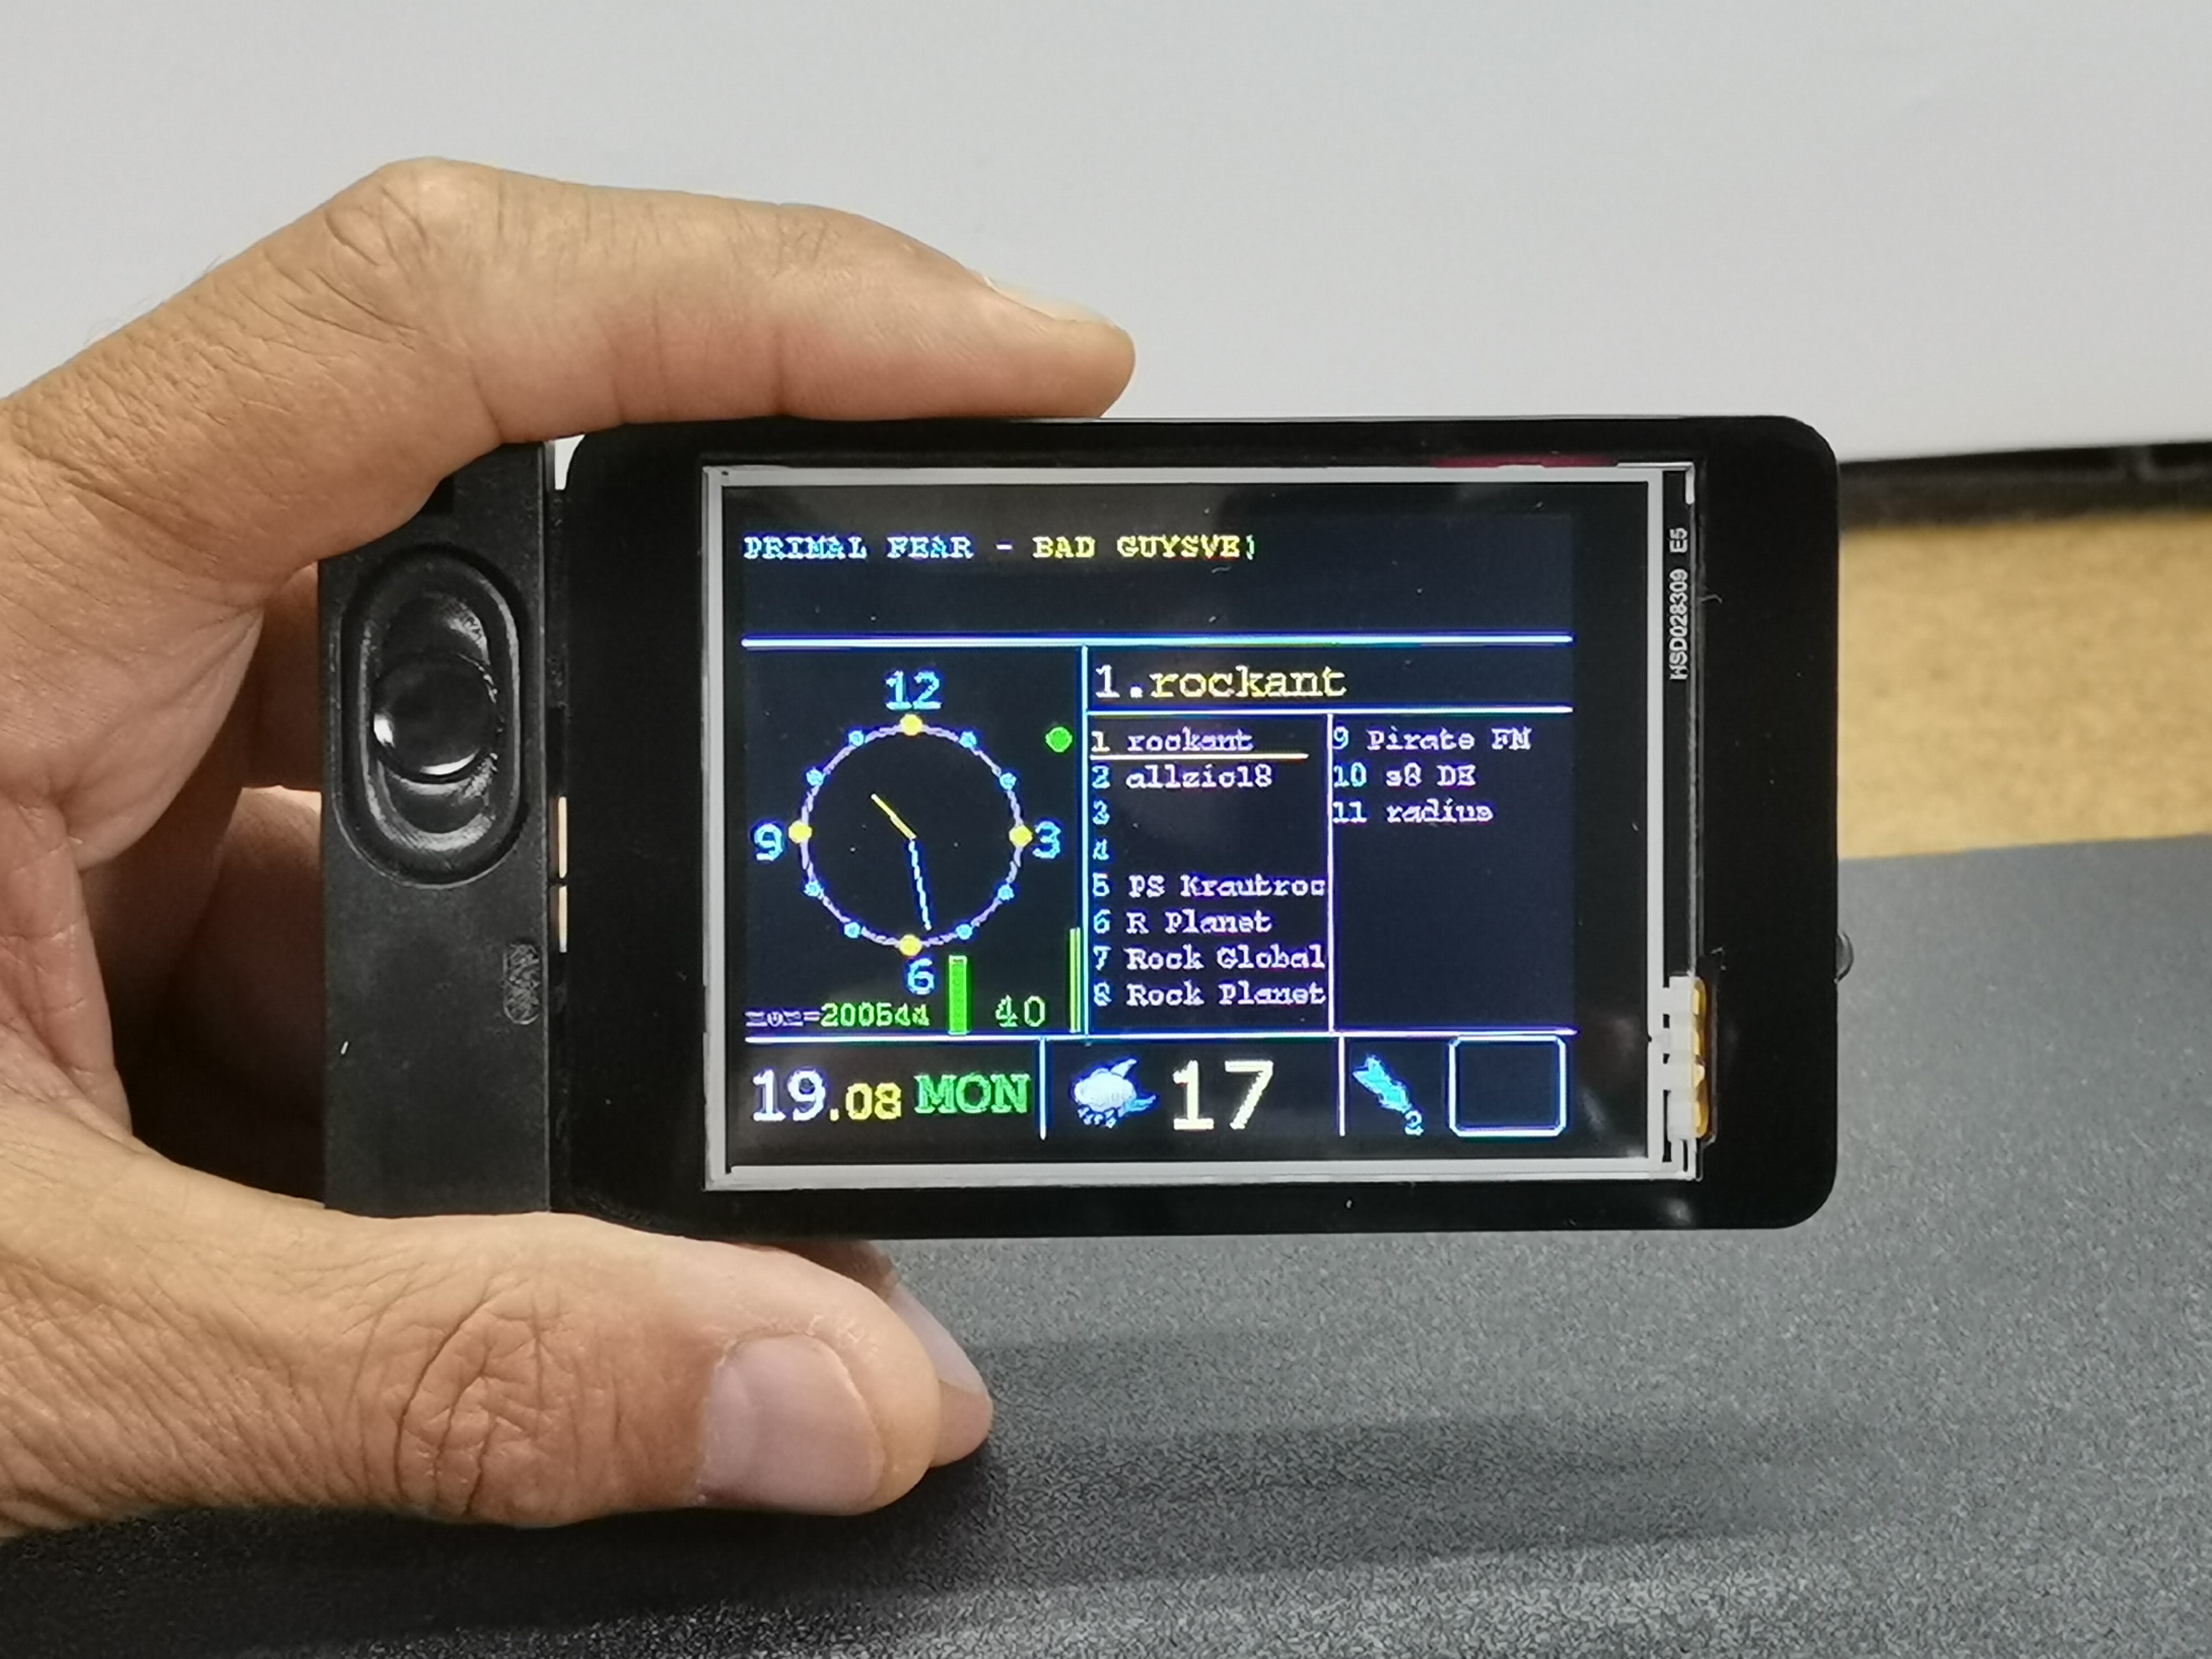
As you can see, here we have a small analog clock and a list of Internet stations that can be activated in sequence with the click of a button. It is important to note that multiple groups of Internet stations with different genres can be formed, and groups can be accessed by triple clicking.
The streaming addresses as well as the names of the internet radios are entered in the meteo - data - i_stat.txt folder. These are the different groups of internet stations

And finally a short conclusion.
I think this is the most advanced internet weather station that you can easily make yourself thanks to the Elecrow display module. Internet radio is also a bonus, which does not have many options due to only one button used in the project, but is therefore fully functional and easy to set up.
This small, practical and inexpensive display module is ideal for making audiovisual applications with ESP32 quickly, without soldering, and without much knowledge if the code is previously prepared specifically for it.

Code files at: https://www.hackster.io/mircemk/diy-simple-advanced-weather-station-and-internet-radio-7552ff