


Story
Dedicated to those who seek to merge technology and decoration, in this project we are going to integrate CrowPanel E-paper into Home Assistant. Find full instructions in Aguacatec!
https://aguacatec.es/integrar-crowpanel-e-paper-en-ha/
Electronic Ink Screens
I've wanted to do a project with an electronic ink or "e-Ink" screen for a long time. I simply believe they offer all the advantages of any screen, but they also have the ability to integrate more easily into your decor. This is because they work differently from traditional screens (LCD, LED, OLED…) as they are designed to mimic the appearance of printed paper, providing a more comfortable reading experience and lower energy consumption.
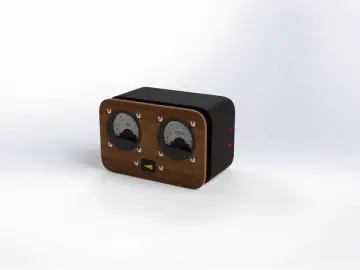
In conclusion, I think they are a perfect component for creating devices that don't have such a "technological" look. For example, you can integrate them perfectly into a traditional frame, and no one will notice.
⚠️ I recommend that before making a purchase, you verify that documentation is available for the component and how to implement it, as many electronic ink screens are supported in ESPHome.
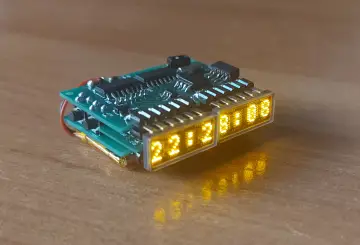
In my case, I am going to use the CrowPanel ESP32 4.2” E-paper by Elecrow, a 4.2-inch screen (400×300 pixels). It is a screen with all components pre-soldered onto an ESP32-S3 board (making it perfect for projects like Bermuda). Additionally, it includes a port for connecting a battery, a memory card slot, and physical controls.

It is worth mentioning that, as of today, it does not have official support with ESPHome. However, we have managed to "trick" ESPHome by studying the device's component diagram and using the Waveshare E-Paper Display component.
ESPHome Configuration
Now we need to ‘flash’ the screen with ESPHome and the corresponding configuration, which we will extract directly from the documentation on the Waveshare E-Paper Display component and PR#6209. To do this, follow these steps:
-
Connect the screen to your computer via the USB-C port.
-
In Home Assistant, access the ESPHome add-on from the side menu and click on “New device.” Click “Continue” and give it a name (for example, “ePaperDisplay”).
-
Click “Next” and then select the “ESP32-S3” option as the device type. You will see that a new device has been created in the background.
-
Click “Skip” and then click on the “Edit” link in the block corresponding to the device you just created.
-
Add to the end of the code the lines you will find in aguacatec.
-
When you finish editing the code, click “Save” and then “Install.” Select the “Manual download” option and wait for the code to compile.
-
Once finished, select the “Modern format” option to download the corresponding
.binfile. -
Now go to the ESPHome page and click “Connect.” In the pop-up window, select your board and click “Connect.”
-
Click “Install” and select the
.binfile obtained in step 7. Again, click “Install.” -
Return to Home Assistant and go to Configuration > Devices and Services. Normally, your device will have been discovered and will appear at the top, waiting for you to click the “Configure” button. Otherwise, click the “Add Integration” button, search for “ESPHome,” and enter your board's IP in the ‘Host’ field. As always, I recommend assigning a fixed IP in your router to avoid future failures if it changes.
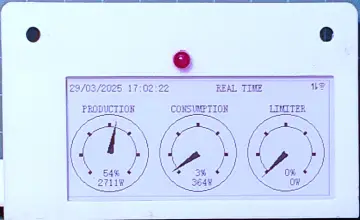
After waiting a few seconds, you should see the following message on the screen. From here, the results depend on your creativity!