


Story
Arduino projects are not only educational but also incredibly fun! In this tutorial, we'll guide you through the process of creating a classic snake game using Arduino. Along the way, you'll learn to leverage the Joystick module to control the game's movements.
Supplies
Step 1: Understanding the Joystick Module


The Joystick module comprises two sliding potentiometers and a button, with five pins: GND, +5V, VRx, VRy, and SW. Moving the joystick alters the potentiometer resistances, thereby changing the corresponding voltage values of VRx/VRy. Pressing the joystick button triggers the SW signal to go low. To interpret joystick movement, we utilize Arduino's ADC channel to convert analog outputs into digital values, allowing us to discern direction and movement.
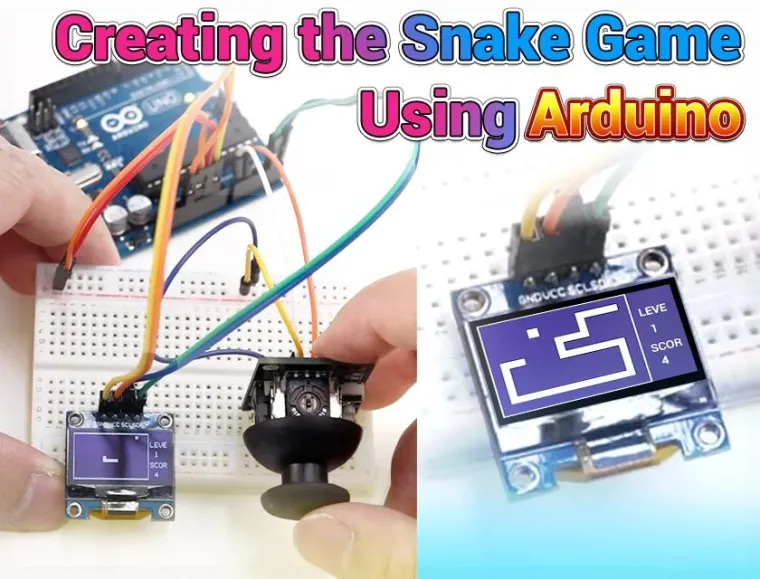
Step 2: Connecting the Components

Refer to the wiring diagram provided. Note that theOLED screen operates at 3.3V, while the Joystick module requires 5V. Confusing these could damage the OLED or cause voltage mismatches, disrupting subsequent steps. To streamline the wiring process, I recommend utilizing abreadboard. This allows for secure placement of modules, preventing any potential damage or compatibility issues like loose or messy connections, and making the overall operation much more straightforward.
Step 3: Writing the Program


With the wiring complete, we can proceed to program the Arduino Board to interpret data from the Joystick pins and visualize the snake's movements on the OLED screen. We'll utilize the Arduino IDE. Before coding, ensure you've installed the necessary libraries to interface with the Joystick module and the display. In this project, we use the Adafruit_SSD1306 library for OLED functionality.
With the libraries installed, we can start coding. I've divided the code into two main sections: control and display. The control segment focuses on scanning the joystick's directional keys and extracting direction data using the keyScan function.
The display section manages the snake's movement and the sporadic appearance of food items. The snake's movement is dictated by the direction data obtained from keyScan, while the randomly appearing food needs to avoid colliding with the snake. Given the modest real-time demands of this game, these three functions are placed within the loop function for iterative execution.
Once the code is done, upload it to the Arduino Board and observe the results.
Check out the code on my GitHub for further exploration.
Step 4: Observing Results

After uploading and running the code on the Arduino Board, if the direction of your joystick's movement doesn't align with the snake's movement on the display, it's likely due to incorrect wiring of the X and Y connections. Correcting this should resolve the issue. However, if issues persist, you can modify the logic part of the code within the keyScan function until the snake moves accurately with joystick input.
Step 5: Leveling Up
Congratulations on creating your snake game! For an added challenge, consider adding a second Joystick module to control a second snake in this mini-game. You can also adjust parameters such as the size and quantity of randomly appearing food items, or introduce timed bombs that players must avoid. This project offers endless possibilities for creativity and learning.
Enjoy your gaming journey with Arduino!


