


![First steps with LVGL and SquareLine Studio [CrowPanel 1.28]](https://www.elecrow.com/media/qb/share/projects/image/2025/04/20250416/voila_59715213567ffcce24f2e6.webp)


Story

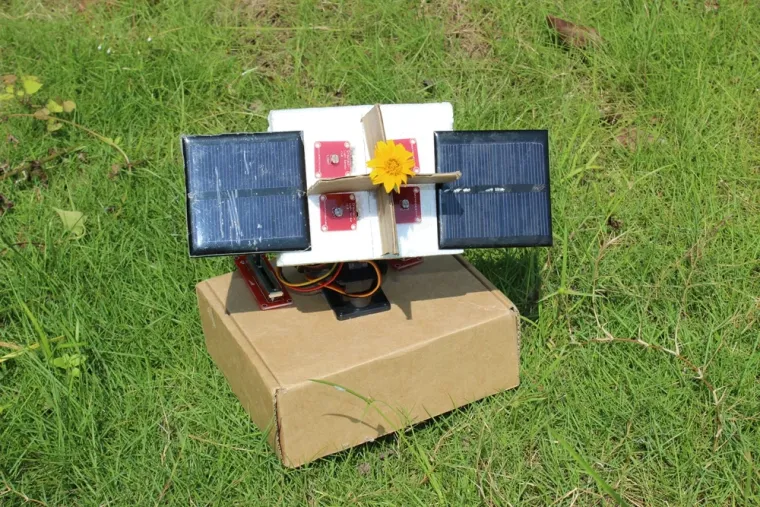
Maker is always sensitive to the new and funny things. One day, I watched a video, in which the sunflower moves along with the sun. I had a sudden insight then. Why can't I make a electronic device inmitating this biomechanism.
In the following days, I began to carry out my solar tracker project. I selected the crowtail as the microcontroller board, and picked up the componets and accessories in our warehouse. Then, I assembled these parts together. At last, I tested with the led on my phone. You know what, it worked perfectly.
I was so excited and posted the demo video on the social media. I was surprised that many people liked and shared this video, and some of them even sent me messages saying that they want to make this projects too.
So I redid this projects and make a specific tutorial to let more people make this project. Here we go.
(The code we used is referred to geobruce's application: https://www.instructables.com/id/Arduino-Solar-Tracker, and we make adjustment for pan- tilt use.)
Step 1: Preparation

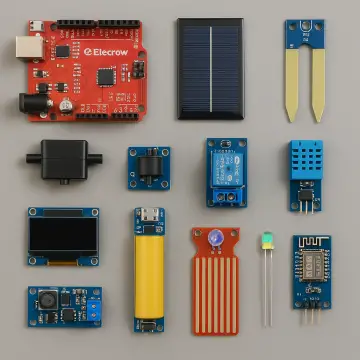
The materials we need is listed below.
Cardboard x 2
Foam board x 1
Stick x 1
Crowtail- Linear Potentiometer x 2
Step 2: Make the Head of the Device


Firstly, we need to cut the two cardboards as the pictures shows, just for half of cardboard. Then the pieces of cardboards can be assembled as a cross shape. At last, paste the stick with the cross, it will play a role as "head", and always point to the sun. On the other hand, it can make the device beautiful and stable.
Step 3: Install 4 Light Sensors


Piercing 4 suitable holes to install the 4 sensors, then dig one mid-hole to thread the stick. I numberd these sensors so that we can distinguish their different seat.
Step 4: Connect the Sensors With Cables


Use the glue gun to fix the stick to the foam, and then plug the cables into the sensors
Step 5: Fix the Stick to the Pan-tilt


We fix the stick to the pan-tilt. the seat of sensor should keep consistent with the picture. sensor “1“ and sensor ”2” located below site.
The pan-tilt is an assembled device with 9G servos. It can cotrol the vertical and horizontal rotation with 180 degrees.fix the the solar pannel on the foam
At last fix the the solar pannel on the foam. (Notice: the two solar pannels is just for decoration, without power supply function.)
Step 6: Upload the Code


Take out our Crowduino and Crowtail- base shield then stacking them together. Before we start to connect the cables onto base board, we need to upload the program code into crowduino, a micro usb cable is neccessary. Connect the crowduino to our computer, and open the Arduino IDE, click here to download the code and open it with Arduino IDE, then upload.
(Notice that this code is written by geobruce, for more info check his site http://xprobe.net )
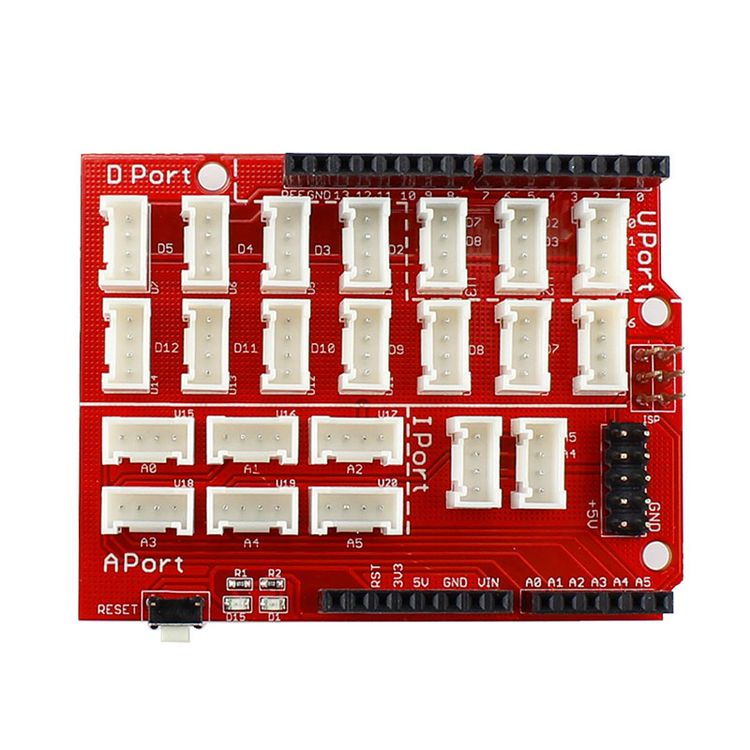
Step 7: Connect 4 Sensors to the Shield


Now we can start connections. At first, connect the cables of sensors to the shield, with the numbers one-one correspondence as above picture shows.
1-4 cables: Cable "1" to A0; Cable "2" to A1; Cable "4" to A2; Cable "3" to A3.
Step 8: Connect the Potentiometer to the Shield


Connect two potentiometers to A4 and A5 socket of the shield.
There is no difference between the two potentiometers, but you should know that which one connect with the A4 port is acts the role of controling the delay of reaction time, and A5 for servo rotational speed.
Step 9: Connect the Pan-tilt to the Shield

Down servo(Horizontal movement) connect with D9, up sevo(Vertical movement) connect with D10.
Step 10: How to Power It.


The crowduino is the main controller board of this project. We can power this board with an USB power bank or a DC adapter, It's depended on you whether it is to be a mobile device or a fixed device.
Step 11: Have a Try!

Now, close the box, it seems that it can't wait to chase the sunlight, OK. take it easy baby, let's have a test for you now.
I take it to a dark room, then open the phone flshlight, WOW! look at this cute guy!
It looks difficult but is actually quite simple, just do it!And you may help him to looks more powerful and cool!