


Story
My father is a building worker, he works quite hard to make money to bring us up. He has to work on high place under the burning sun. He often goes out early and comes back at dusk. These days are the hottest and I am so worry about him working outside. Thus I bought him a cap that can prevent the strong ultraviolet ray for him. At the same time, he works on high place, the phone and watch are not allowed, so I decide to remake this cap that can not only provide the time information but also warn the behind vehicle for him when he comes back late.
Step 1: Module Preparing and System Designing

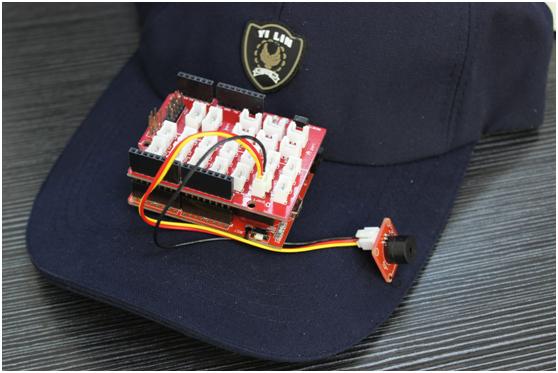
I surfed the internet to buy the materials needed. First of all, I bought this cap, it looks quite good and suitable for my father. Then I need the following things:
1. Crowduino X1 It is 100% Arduino compatible
2. Base Shield X1 It has stranded interfaces for convenient connection.
3. UV Sensor X1 It is used to measure the UV intensity of the environment.
4. Buzzer It is for making alarm sound to remind people.
5. RTC X1 It is based on the clock chip DS1307 and can provide the right time in low power consumption.
6. RGB-LED X1 It has the warning function. Users can control all the LED with only one microcontroller pin.
7. OLED X1 It is used to display the time information and the UV intensity.
8. Battery X1
Step 2: Sew the Crowduino Onto the Cap
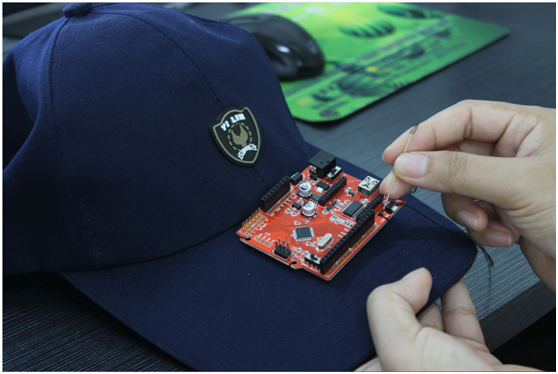
I find out some needlework and sew the Crowduino onto this cap’s marginal ridge carefully to make it steady.
Step 3: Install a Buzzer and RGB-LED
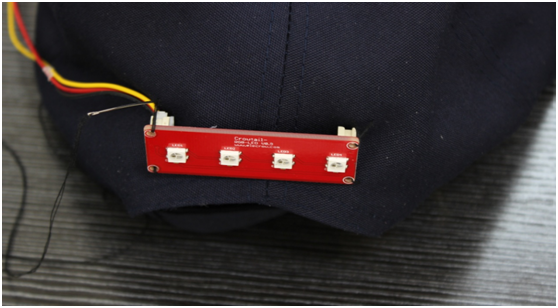

I first plug the Base Shield onto Crowduino and then connect the buzzer to this Base Shield with Digital ports D4 in front. Then I sew the RGB-LED at the back of cap.
This RGB-LED has the function of warning and when reach the designed time, it will start blinking automatically.
Step 4: Install the UV Sensor and RTC.
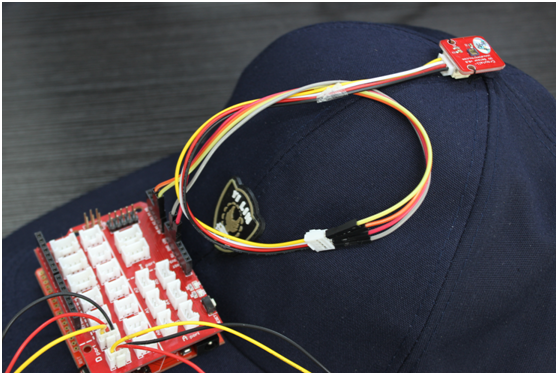

Then I sew the UV Sensor on the crown and it can help to detect the UV intensity and remind my father to have a rest if UV are too high. The RTC can provide correct time information so that my father can know the time when working on high place without a watch.
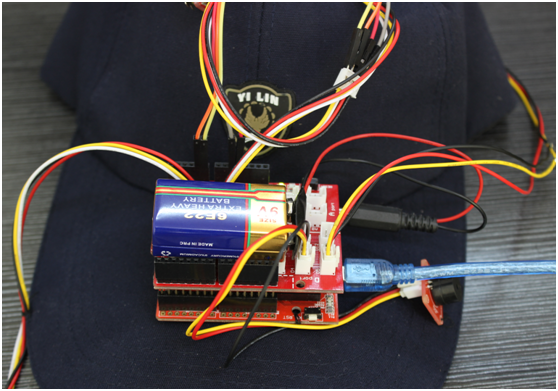
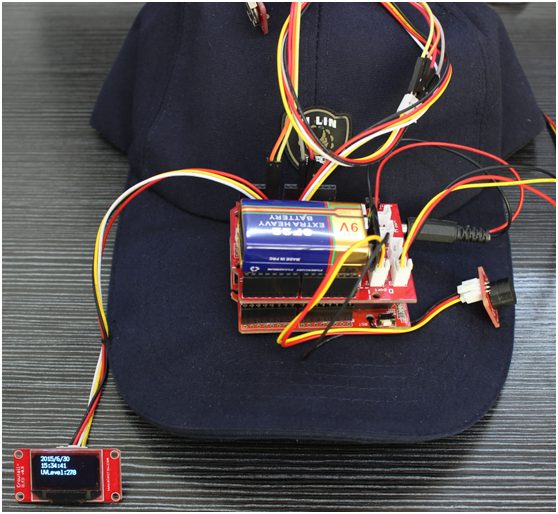
Step 5: Install an OLED and Power Supply
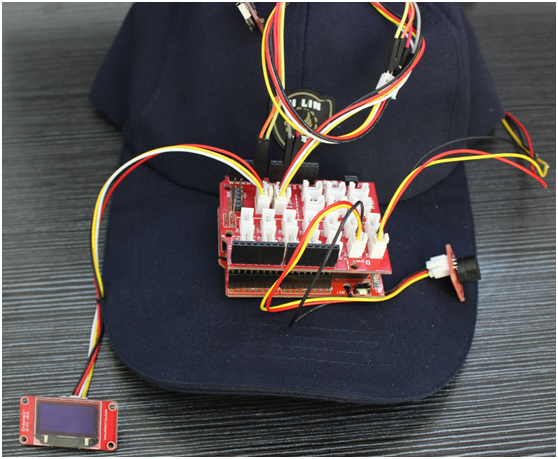
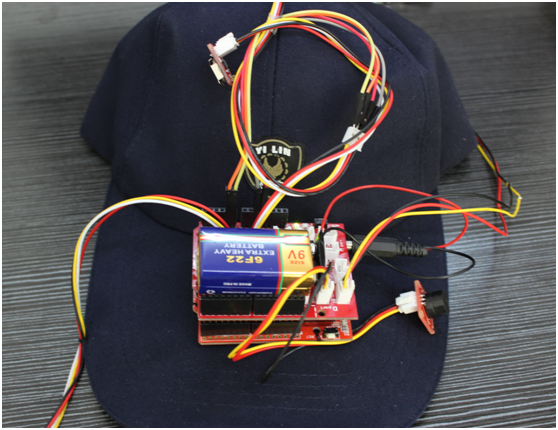
Add a OLED with IIC Port to display the time information and UV intensity. The OLED can be hung down in front. By the way, don’t forget the power supply!
Step 6: Start the Program
1. Open the program to detect the UV intensity with USB to connect computer. If the UV are too high, it will ring alarm and remind my father to have a rest.
2. The OLED can display the time information for my father.
3. After 8:00, the RGB will shine prompting that there are vehicle behind.
Step 7: Download the Program
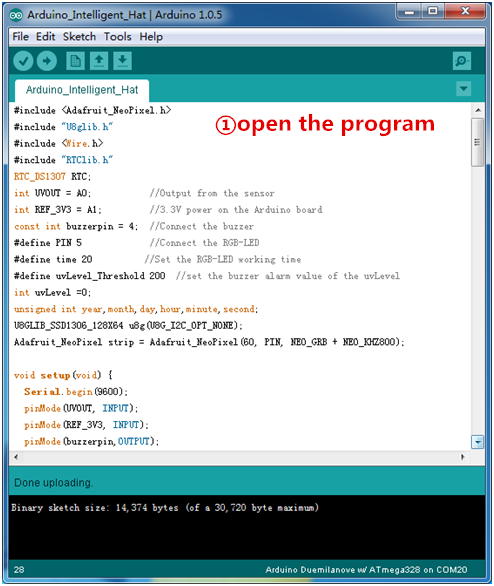


Follow the steps as pictures and download the program from the below attachment.
Step 8: Have a Try!
After program downloaded successfully, I take this cap for father to have a try! I am so great that he like it very much. The most importantly, it can help him a lot and i don't need to so worry about him with this kind of cap.