Currency
Toggle Nav

How to Set Up Raspberry Pi 5 for AI Projects & Machine Learning
March 21, 2025
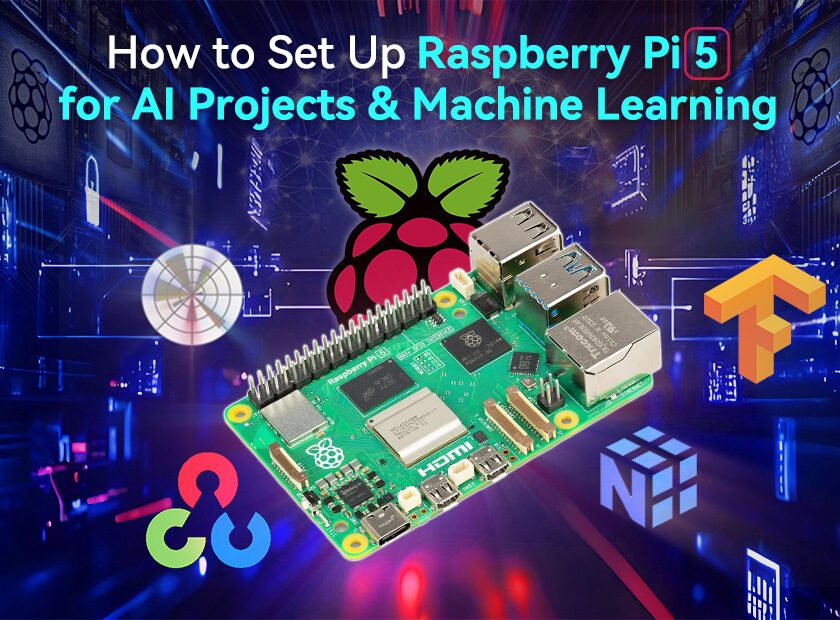
How to Set Up Raspberry Pi 5 for AI Projects & Machine Learning
Unlike a few years ago, Artificial Intelligence and Machine Learning are no longer just for high-end servers and powerful GPUs.
With the Raspberry Pi 5, you can dive into AI and ML right from your desk, no matter if you are a hobbyist, student, or developer who wants to experiment with smart applications affordably.
Let’s dive into the details and explore how to get started with AI and ML on your Raspberry Pi 5!
Why Use Raspberry Pi 5 for AI and Machine Learning?
Compared to previous models, the Pi 5 version brings significant improvements, which makes it more capable of handling AI and ML tasks:
● More Power – A quad-core Cortex-A76 processor at 2.4GHz gives it a serious performance boost.
● More RAM – Being available in 4 and 8 GB RAM, the Pi 5 allows for better model execution.
● PCIe Support – Allows faster storage and even AI accelerators for better computing.
● Improved GPU – The VideoCore VII GPU helps with image processing and light ML workloads.
● Lower Cost – Just a fraction of the price of traditional AI hardware.
While the Pi 5 model won’t replace a dedicated AI workstation, it is an excellent low-cost platform for learning, prototyping, and small-scale AI applications. If you're looking to explore Raspberry Pi 5 AI projects, this device provides a great starting point.
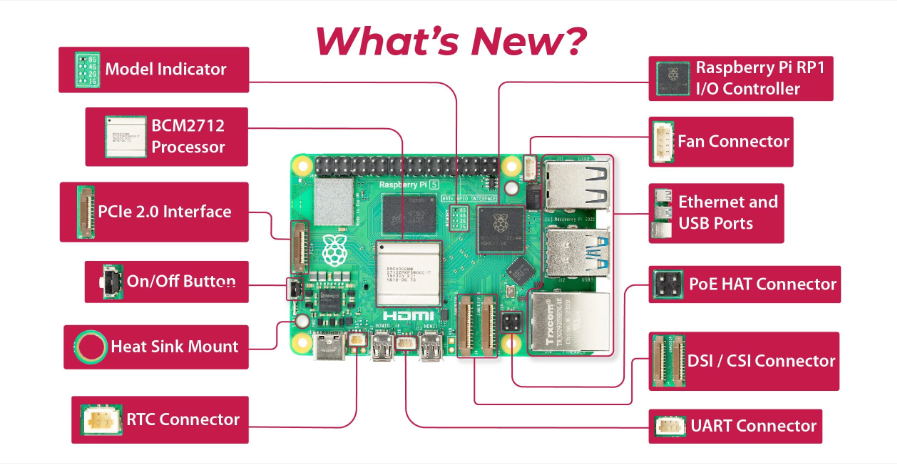
raspberry pi 5 interfaces
What You Need to Get Started
Before diving in, ensure that you have the following:
● Raspberry Pi 5 (4GB or 8GB recommended)
● Power Supply (USB-C, 5V, 5A recommended)
● MicroSD Card (32GB or larger for OS and ML models)
● External Storage (Optional) – SSD via PCIe for faster model loading
● Camera Module (Optional) – For image recognition projects
● USB AI Accelerator (Optional) – Google Coral TPU or Intel Movidius Neural Compute Stick for better performance when working on the Raspberry Pi 5 AI and machine learning setup.
● Internet Connection – For installing dependencies and downloading models
Setting Up Raspberry Pi 5 for AI and ML
1. Install Raspberry Pi OS
For the best performance, we advise you to use Raspberry Pi OS 64-bit.
● Download Raspberry Pi OS (64-bit) from the official site.
● Flash it onto your microSD card using Raspberry Pi Imager.
● Boot up your device and update everything using: sudo apt update && sudo apt upgrade -y
2. Install Python and AI/ML Libraries
Python is the best choice for AI and ML, so install the essential packages like this:
sudo apt update && sudo apt upgrade -y
sudo apt install python3-pip -y
pip3 install numpy pandas matplotlib opencv-python tflite-runtime
● NumPy & Pandas – For handling data
● Matplotlib – For creating graphs and visualizing data
● TensorFlow Lite – A lightweight interpreter designed to run machine learning models efficiently on the Raspberry Pi
● OpenCV – For image processing, computer vision tasks, and working with video streams.
When planning a Raspberry Pi 5 machine learning setup, these libraries will be essential for our AI projects.
Running AI and ML Models on Raspberry Pi 5
1. Running a Pre-Trained Model with TensorFlow Lite
● First, download a sample image classification model: wget
● Using Python, load and run inference on an image with the following code:
import tensorflow.lite as tflite
import numpy as np
from PIL import Image
model_path = "mobilenet_v2_1.0_224_inat_bird_quant.tflite"
interpreter = tflite.Interpreter(model_path=model_path)
interpreter.allocate_tensors()
input_details = interpreter.get_input_details()
output_details = interpreter.get_output_details()
image = Image.open("test_image.jpg").resize((224, 224))
input_data = np.expand_dims(np.array(image, dtype=np.float32) / 255.0, axis=0)
interpreter.set_tensor(input_details[0]['index'], input_data)
interpreter.invoke()
output_data = interpreter.get_tensor(output_details[0]['index'])
print("Prediction:", output_data)
This script will load a TFLite model, process an image, and output a classification prediction—ideal for those exploring Raspberry Pi 5 AI projects.
2. Image Recognition with OpenCV and a Pi Camera
If you also have a camera module, you can use OpenCV for real-time image processing.
First, install OpenCV using: pip install opencv-python
Then, run a face detection script:
import cv2
face_cascade = cv2.CascadeClassifier(cv2.data.haarcascades + "haarcascade_frontalface_default.xml")
cap = cv2.VideoCapture(0, cv2.CAP_V4L2)
while True:
ret, frame = cap.read()
gray = cv2.cvtColor(frame, cv2.COLOR_BGR2GRAY)
faces = face_cascade.detectMultiScale(gray, 1.1, 4)
for (x, y, w, h) in faces:
cv2.rectangle(frame, (x, y), (x+w, y+h), (255, 0, 0), 2)
cv2.imshow("Face Detection", frame)
if cv2.waitKey(1) & 0xFF == ord("q"):
break
cap.release()
cv2.destroyAllWindows()
This script will capture video from the camera and detect faces in real-time, a fun project for those working on Raspberry Pi 5 AI projects.
Boosting AI Performance with Coral TPU or Neural Compute Stick
The Raspberry Pi 5 is a powerful device but still a bit limited for intensive AI tasks. When building a Raspberry Pi 5 machine learning setup, these accelerators can significantly improve processing speeds:
● Google Coral USB Accelerator – Works with TensorFlow Lite and greatly speeds up inference.
● Intel Movidius Neural Compute Stick 2 – Supports OpenVINO models.
To install Google Coral Edge TPU runtime, use:
echo "deb https://packages.cloud.google.com/apt coral-edgetpu-stable main" | sudo tee /etc/apt/sources.list.d/coral-edgetpu.list
curl https://packages.cloud.google.com/apt/doc/apt-key.gpg | sudo apt-key add -
sudo apt update
sudo apt install libedgetpu1-std python3-edgetpu
The libedgetpu1-std package installs the runtime for the Coral USB Accelerator, while python3-edgetpu is required to use it from Python with TensorFlow Lite.
Now you can run TensorFlow Lite models much faster!
Some Interesting AI/ML Projects for Raspberry Pi 5
Want to put your Pi 5 device to good use? You can try some of the following Raspberry Pi 5 AI projects:
● Smart Security Camera – Detect motion and recognize faces.
● AI-Powered Weather Station – Use ML to predict weather patterns.
● Voice Assistant – Build your own AI assistant using speech recognition.
● Object Detection Robot – Use a camera and AI to recognize objects.
Summary
With Raspberry Pi 5, AI and ML are more accessible than ever.
Whether you are running lightweight models with TensorFlow Lite, processing images with OpenCV, or boosting performance with an AI accelerator, it is a great platform for exploring artificial intelligence on a budget.
If you're interested in Raspberry Pi 5 AI projects, now is the perfect time to get started. Set up your Raspberry Pi 5 machine learning setup, experiment with AI models, and turn your ideas into reality!
Ready to bring AI to life? Grab your Pi 5 and start experimenting.