Currency
Toggle Nav

Getting Started with ESP32 Dev Environment Setup | CrowPanel
June 05, 2024
Setting Up the CrowPanel Development Environment
Lesson 1: Getting Started
Hi everyone, welcome to the first lesson of Crow Panel. This tutorial will cover:
- Setting up the CrowPanel Development Environment
- Installing the ESP32 Board Package
- Configuring Compilation Information
- Connecting the Board to Your Computer
- Uploading Code and Using the Serial Port
Supplies
Elecrow CrowPanel - the ESP32 Display
Software: Arduino IDE
Step 1: Setting Up the Development Environment
I use the Arduino IDE for this project. Follow these steps to download and install the Arduino IDE:
Download the Arduino IDE:
- Visit the Arduino software page.
- Choose between Arduino IDE 2.3.2 (the latest version) and 1.8.19 (the classic version). The installation steps are the same for both. The only difference between them is the interface. This time, I will demonstrate how to install the latest version.
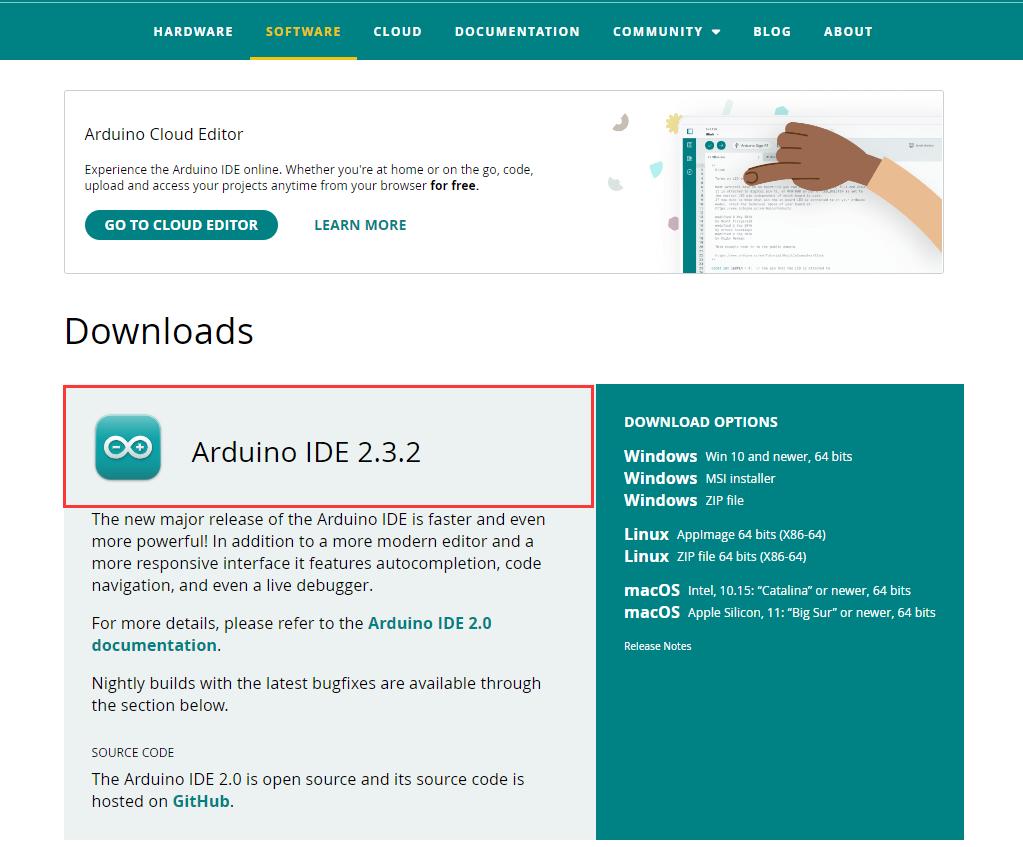
Arduino IDE 2.3.2
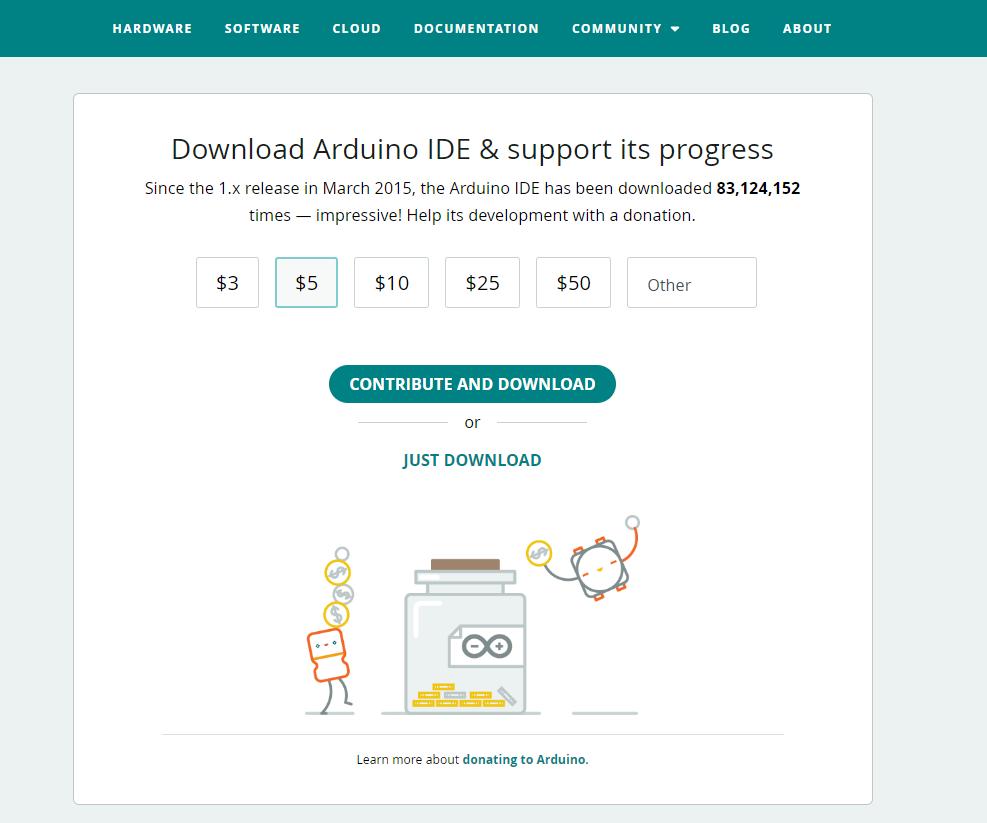
- Select the Windows version and choose one of the following installation methods:
- EXE program: Allows custom installation paths.
- MSI program: Automatically installs using the default path (recommended for beginners).
- Compressed file: Can be used directly after extraction.
Install the Arduino IDE:
- For this tutorial, I use the MSI program. Click the MSI installer download link, then click "JUST DOWNLOAD" (or "CONTRIBUTE AND DOWNLOAD" to support Arduino).
MSI installer downloading
- After downloading, run the MSI installer. It will automatically install the Arduino This process takes a few minutes.
- Once installed, the Arduino IDE icon is on my desktop.
![]()
After installed, it will be on Desktop
Step 2: Installing the ESP32 Board Package
After installing the Arduino IDE, I have an editor that allows me to write and upload code. Now I need to install the ESP32 Board Package, making the Arduino IDE capable of developing for the ESP32. Please follow these steps to install the necessary board package:
- Open the Arduino IDE.
- Go to File > Preferences.
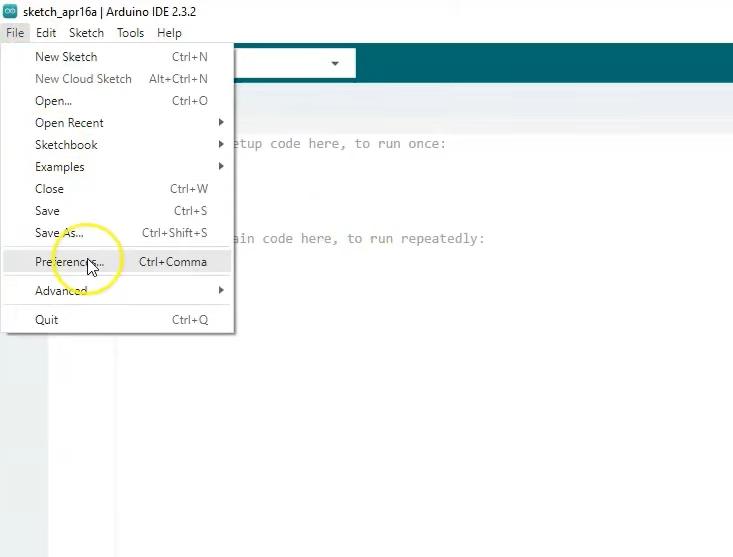
- In the "Additional boards manager URLs" field, click the button on the right and paste the following URL(by Espressif Systems): https://espressif.github.io/arduino-esp32/package_esp32_index.json
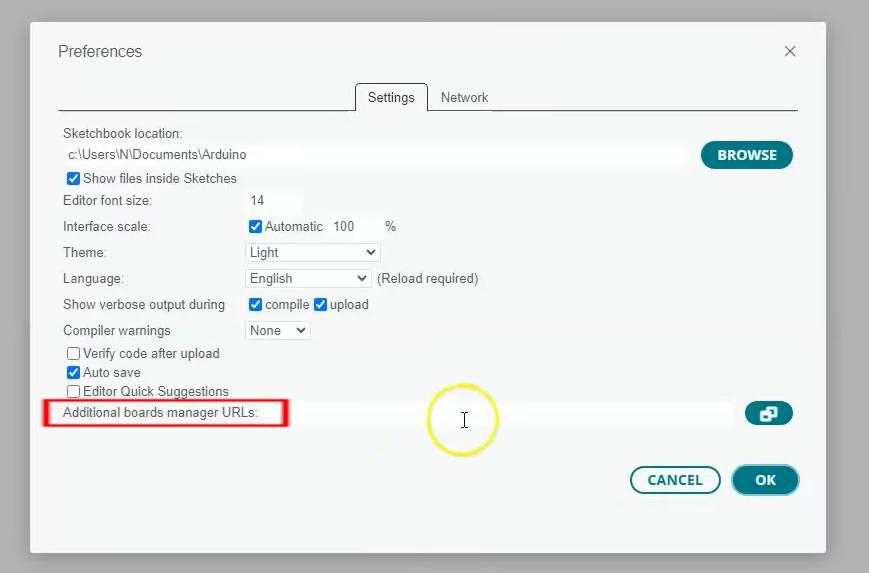

- Click "OK" to save the settings. The Arduino IDE will download the JSON file, indicated by a progress bar in the lower right corner. When the download is complete, the progress bar will automatically disappear.
Install the ESP32 Board Package:
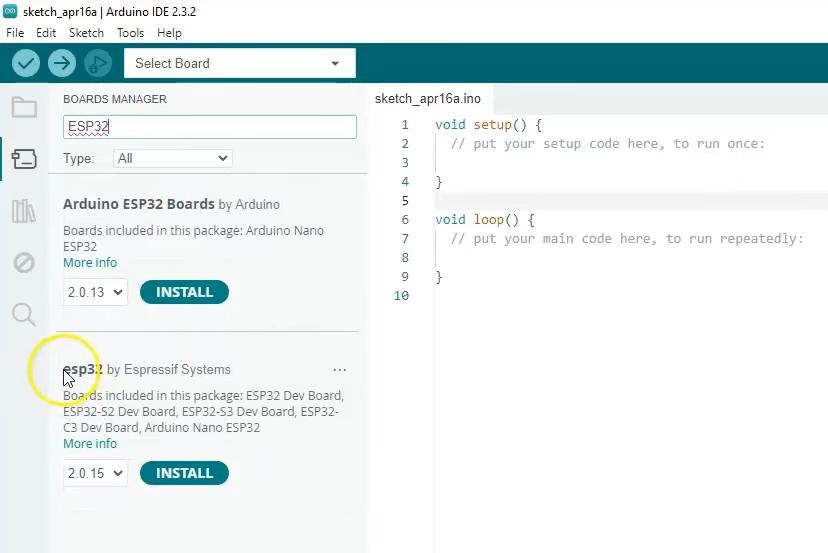
- Go to Tools > Board > Boards Manager.

- Search for "ESP32" and find the package provided by Espressif Systems.
- Select version 2.0.15 and click "Install". (You can choose other versions. However, to reduce strange bugs, I recommend that you use version 0.15 as mine.)
Step 3: Configuring Compilation Information
Before uploading the code, I need to configure the compilation information to ensure my program runs correctly:
Open the Course File: find the provided code for the first lesson.
Select the Correct Board:
Go to Tools > Board and select the corresponding chip (you can find this table on the CrowPanel page) from the ESP32 package we have installed:
- 4-inchand 2.8-inch displays: Select ESP32-WROOM-DA Module.
- 5-inchdisplay: Select ESP32-WROVER Module.
- 3-inch, 5-inch, and 7-inchdisplays: Select ESP32S3 Dev Module.

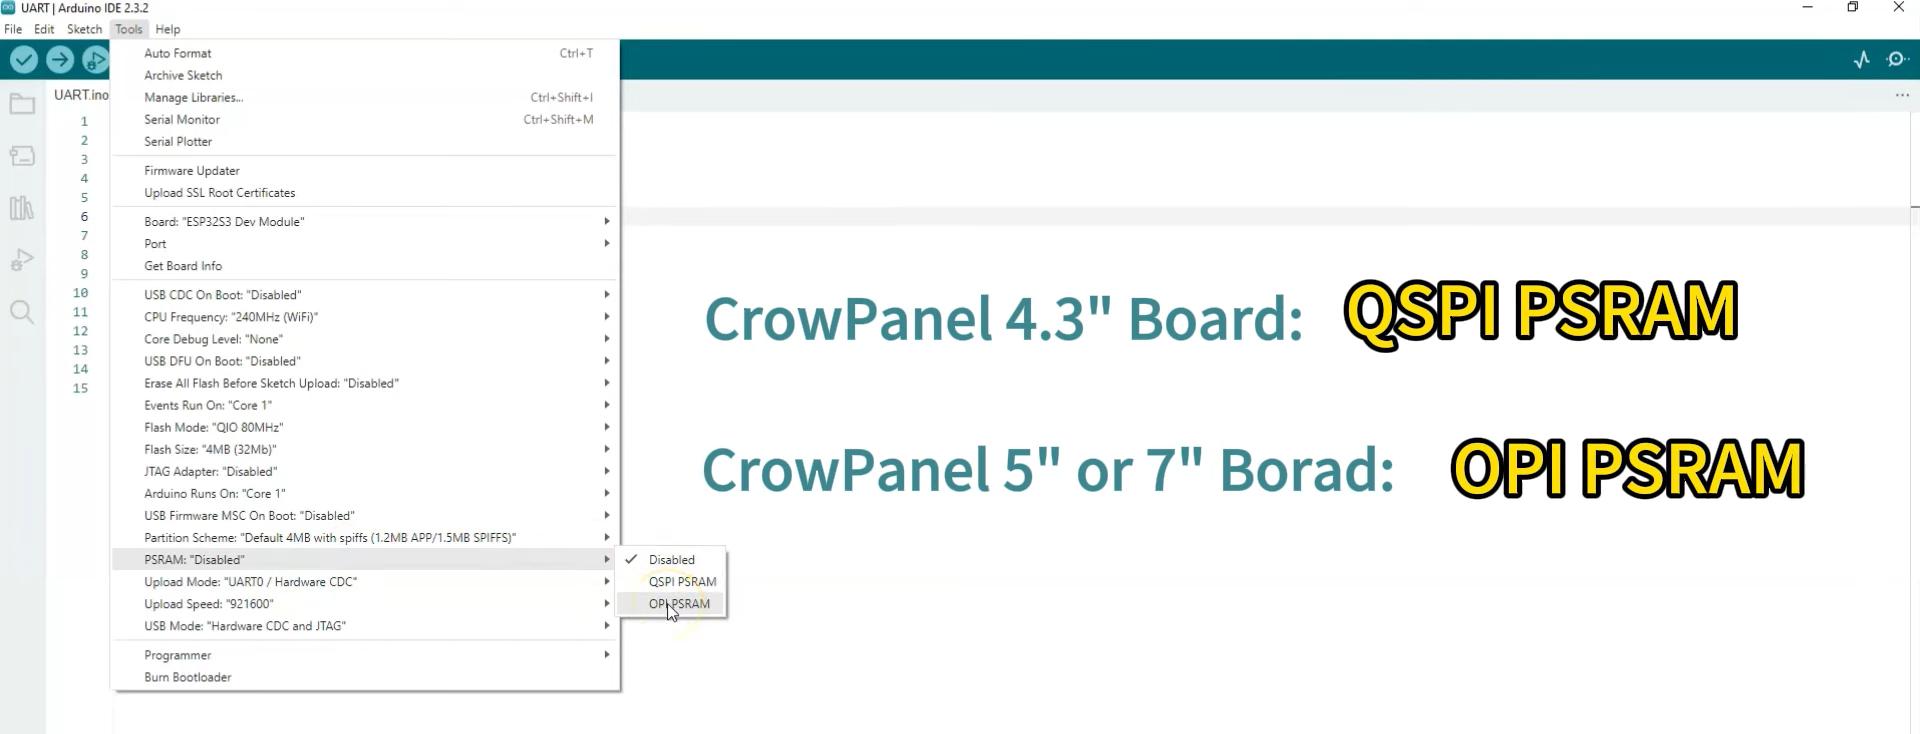
Additional Configuration for Larger Displays:
- For 3-inch displays: Set PSRAM to QSPI PSRAM.
- For 5-inch and 7-inch displays: Set PSRAM to OPI PSRAM.
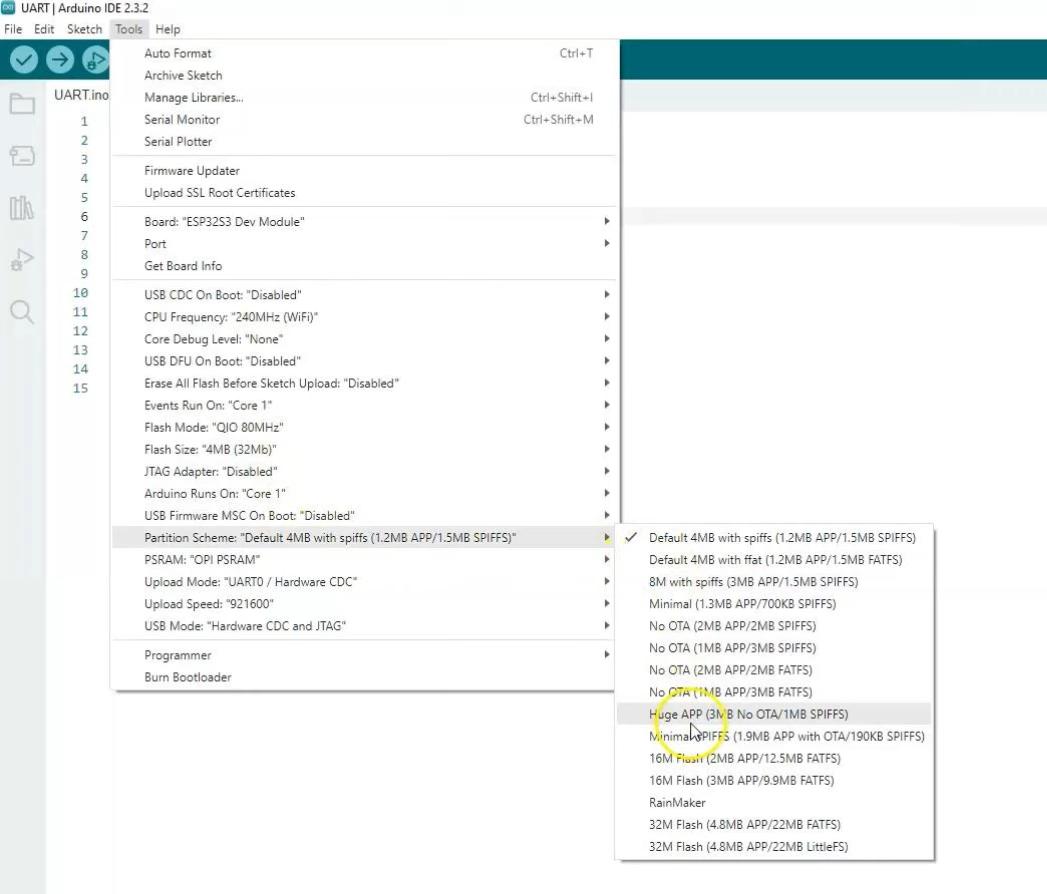
- Go to Partition Scheme and select Huge APP. This will provide a larger memory space for storing code, but generally speaking, keeping the default option is sufficient for storing most of the code when not using the LVGL library.
Step 4: Connecting the Board to Your Computer
Connect the Board:
- Use a USB Type-C cable to connect the board to your computer.
- Identify the correct COM port in Tools > Port. If your COM1 existed before the board was connected, this is not the number of the board. Choose the correct COM port, mine is COM 6. But yours may be COM 3, COM 8, etc., determined by the system.
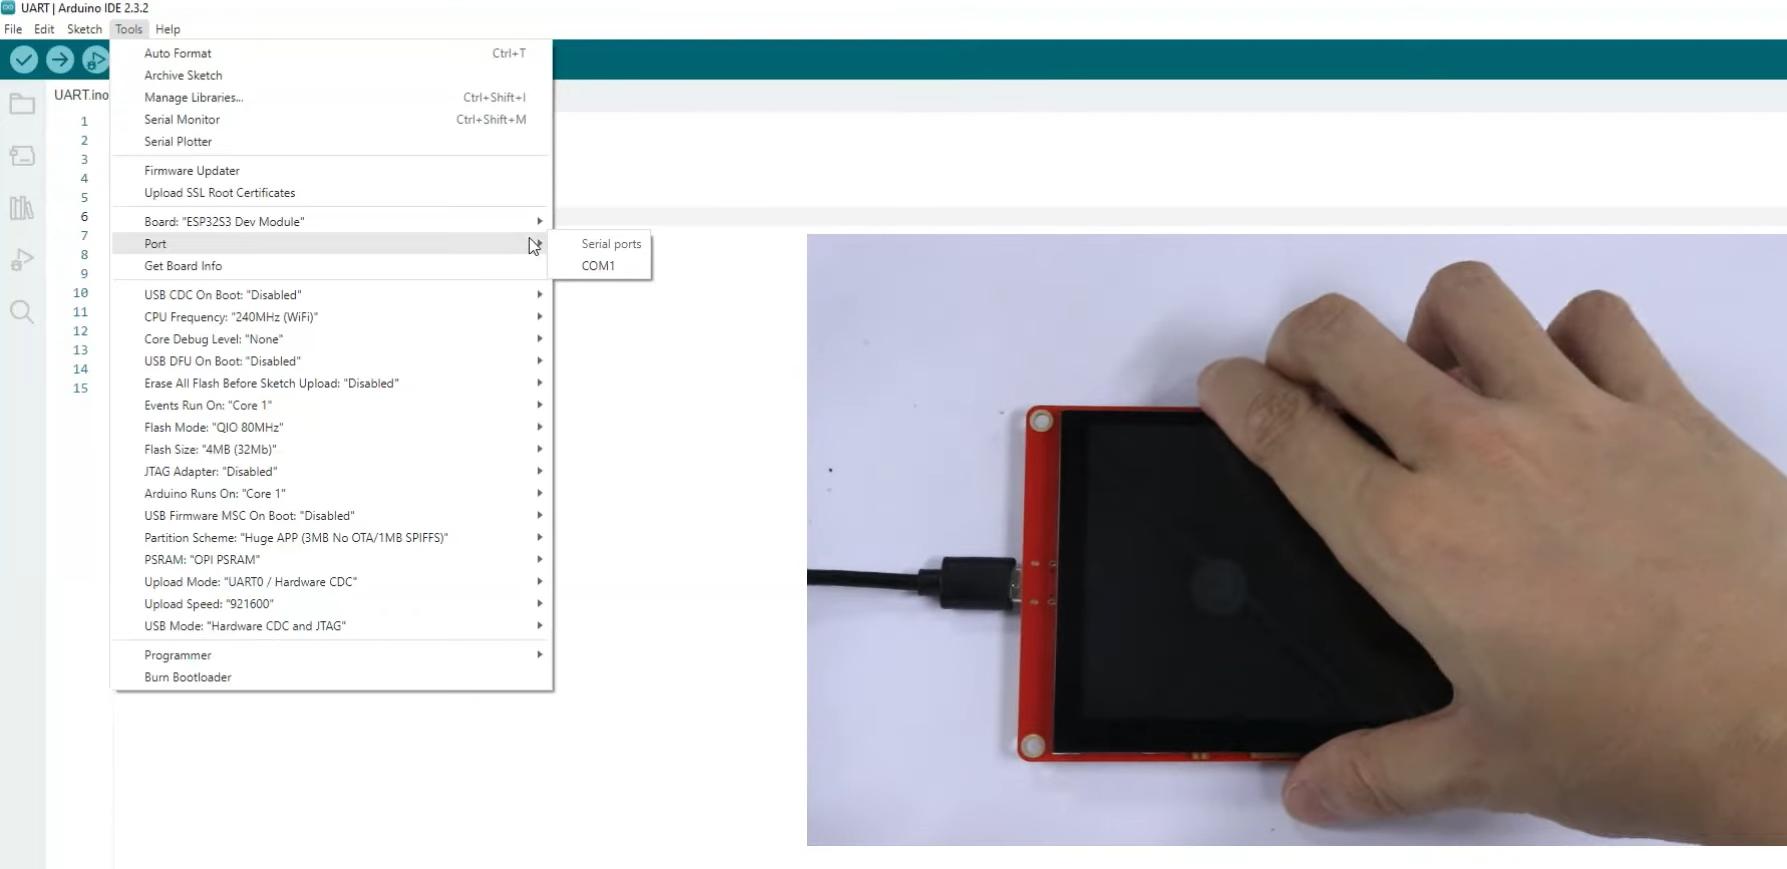
- If your computer cannot recognize the connected serial port after connecting to the board, it may be because you have not installed the CH340 driver. You need to install it first. The installation tool for this driver is in the Tool/CH340 folder.
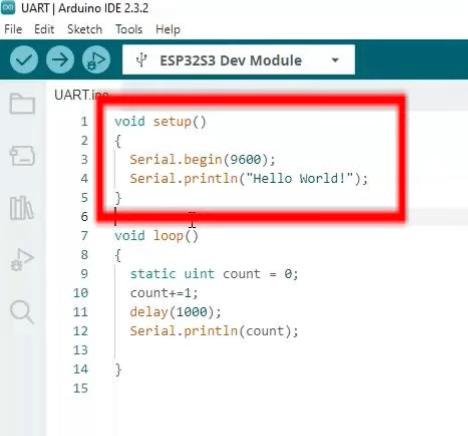
Step 5: Uploading Code and Using the Serial Port
Write and Upload Code:
- In the Arduino IDE, open the code file. The code includes a setup function to initialize the serial port and a loop function for continuous operation.
- Set the baud rate to 9600 in the Serial.begin function.
Compile and Upload the Code:
- Click the upload button in the top left corner of the Arduino
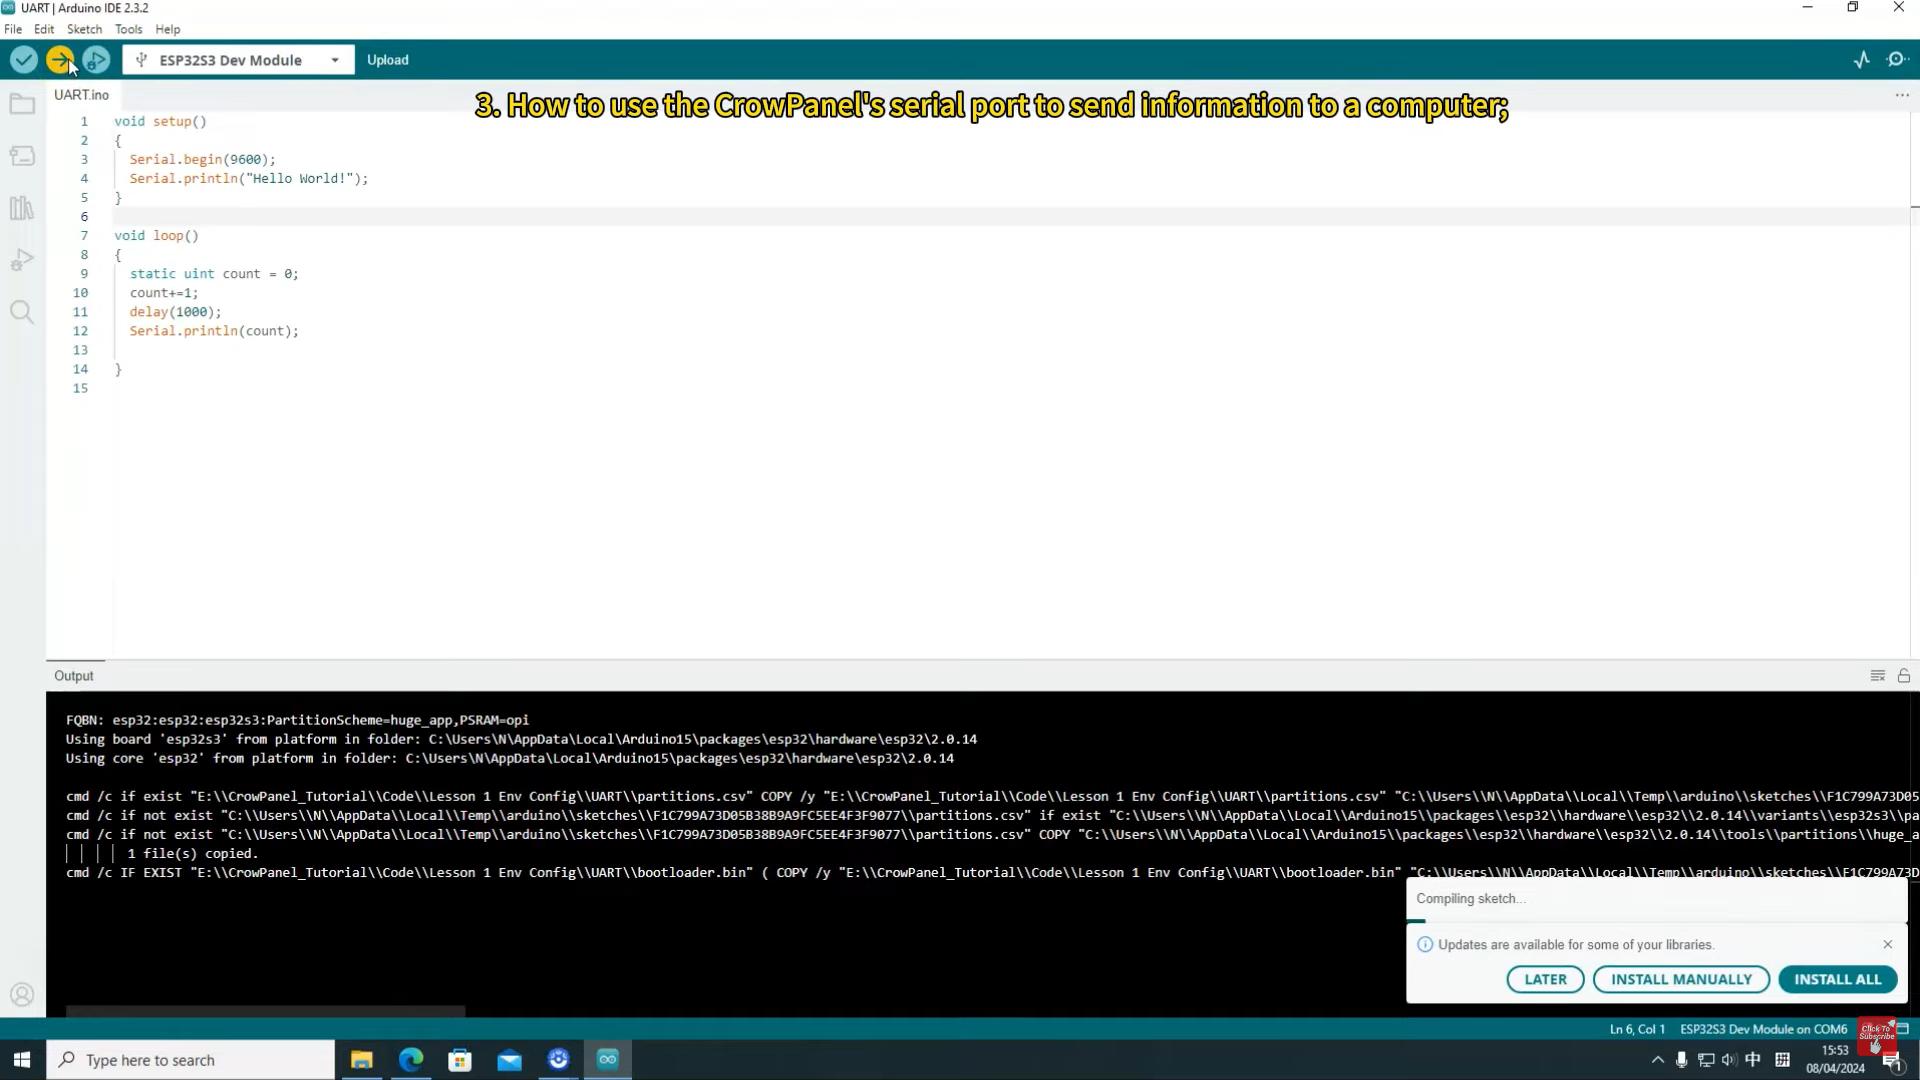
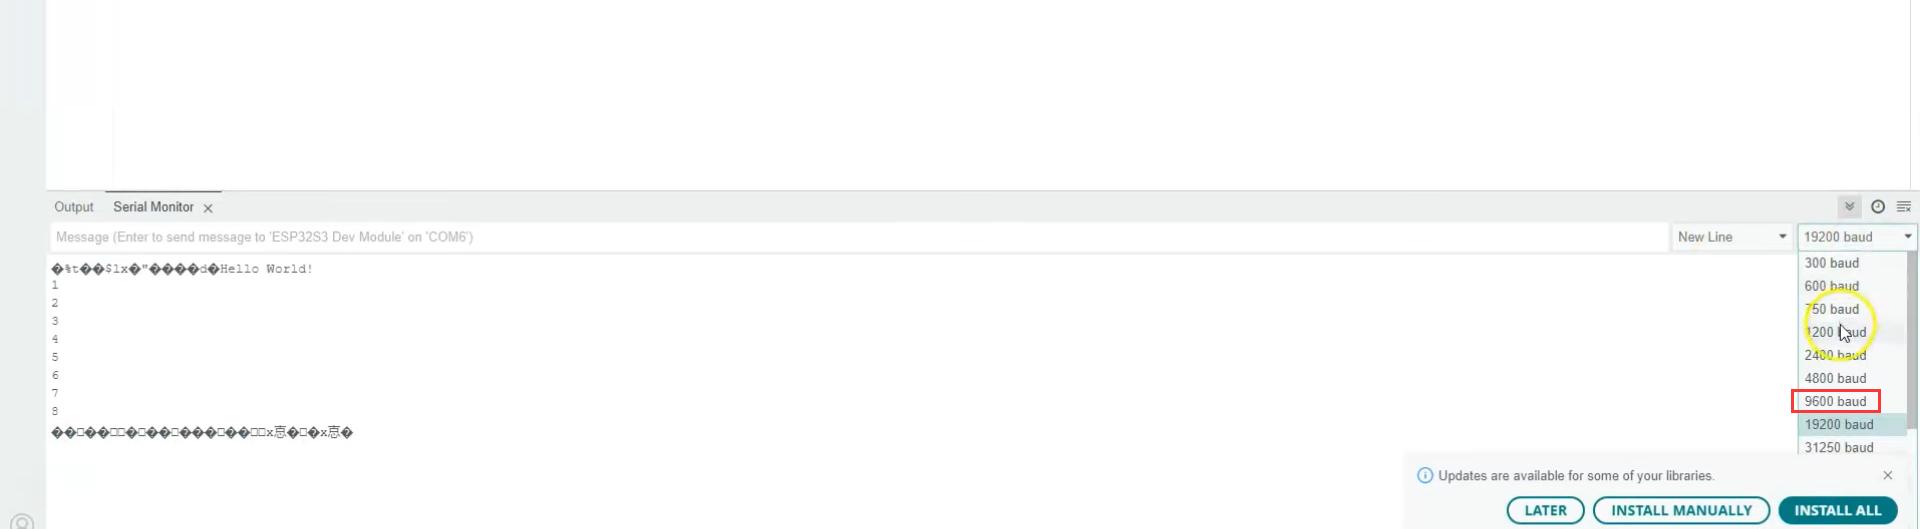
Monitor Serial Output:
- After uploading, open the serial monitor by clicking the magnifying glass icon in the top right corner.
![]()
- Ensure the baud rate in the serial monitor matches the one in our code to avoid garbled text.
That's the end of the lesson - Setting Up the Development Environment with CrowPanel. If you found this lesson helpful, remember to stay tuned for more tutorials at Elecrow.
You can also find more video tutorials on Elecrow’s YouTube channel. See you next time!
[New] - Join Our ESP32 Display UI Contest Now

Elecrow and SquareLine are thrilled to announce the Elecrow HMI × SquareLine UI Contest!
※※ Timeline: December 5, 2025 - March 6, 2026
※※ Your Challenge: Design stunning UI for Elecrow ‘CrowPanel ESP32 HMI Displays’ using 'SquareLine Studio/Vision' (So if you're using SquareLine Studio to design the UI for your CrowPanel Display, don't miss it!)
This is a great opportunity to win cash prizes, exclusive software license, and have your UI showcased globally, becoming a classic case study and gaining recognition!
Learn More: https://www.elecrow.com/crowpanel-squareline-contest.html