Currency
Toggle Nav

CrowPanel Advanced Tutorial - How to Make an AI Chatbot Project
March 20, 2025
CrowPanel Advanced Tutorial - How to Make an AI Chatbot Project
Ever wanted your own AI chatbot project? Now you can build one! In this tutorial, we’ll use the CrowPanel ESP32-S3 Advanced HMI Display to create a voice-interaction chatbot that connects to Wi-Fi, communicates via WebSocket, records and plays voice, and even displays real-time statuses on the screen. Let’s bring your AI assistant to life!
Tutorial Overview
This tutorial covers:
1. Code explanation – Understanding the workflow.
2. Generating hex image data – For the display screen.
3. Obtaining an AI model API – Setting up your AI chatbot project.
4. Demonstration – Running the complete project.
Setup & Required Files
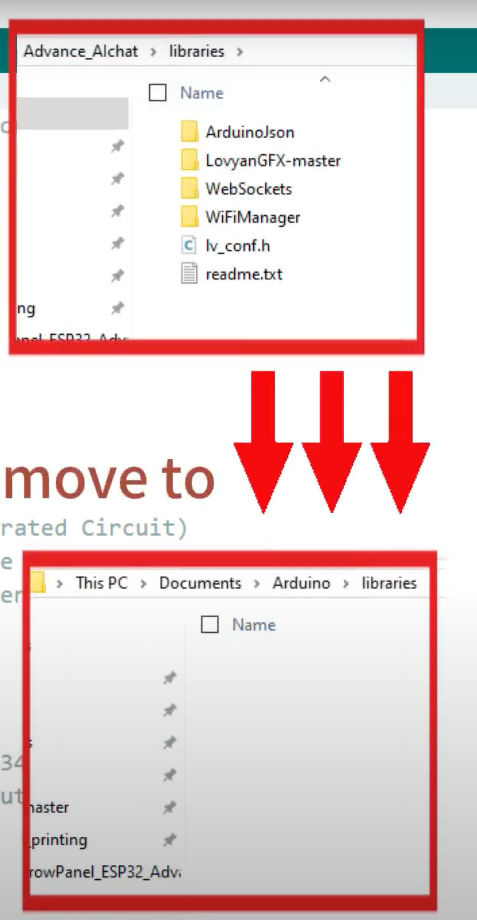
Open the tutorial folder, which contains:
● libraries – Arduino libraries are needed.
Software Version
ESP32: 3.0.2
Button: 1.0.0 (The Button libraries here need to be downloaded from the Library Manager.)
Python: 3.10.6
● display-picture – Image files.
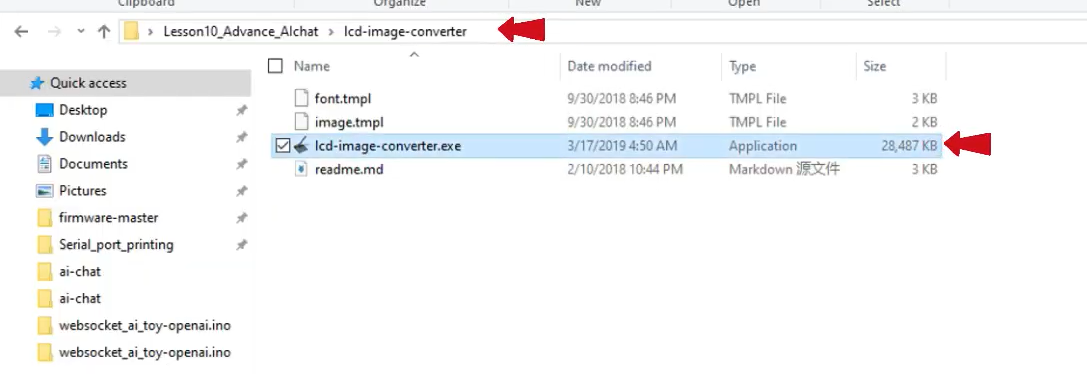
● lcd-imager-converter – Image conversion tool.
● Code – Arduino and Python files for the ESP32 AI project and server.
Installing Libraries
Open Arduino and check the required libraries at the beginning of the code. These libraries are included in the downloaded files and should be placed in the correct Arduino library directory.
Code Walkthrough
1. Initializing Components
● Wi-Fi & WebSocket – Set up Wi-Fi and connect to the server by specifying the IP address.
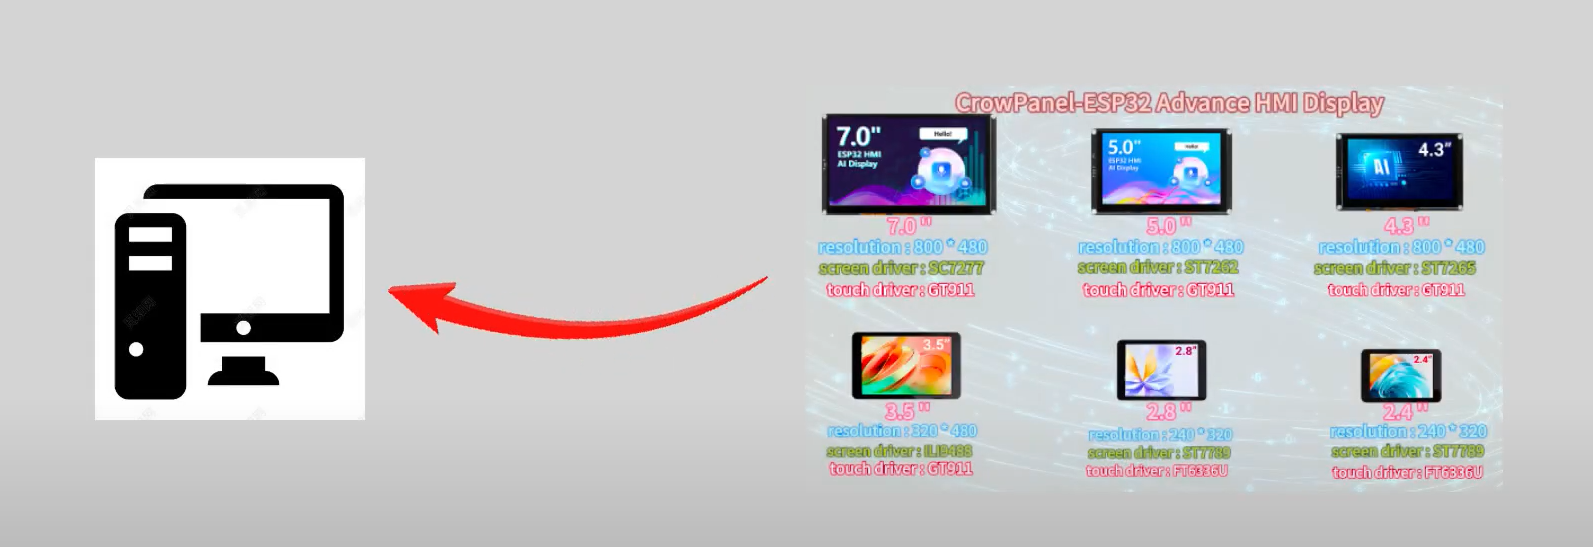
● Screen Setup – Adjust parameters according to the display size (you can find the parameters on the product page and update img.h.

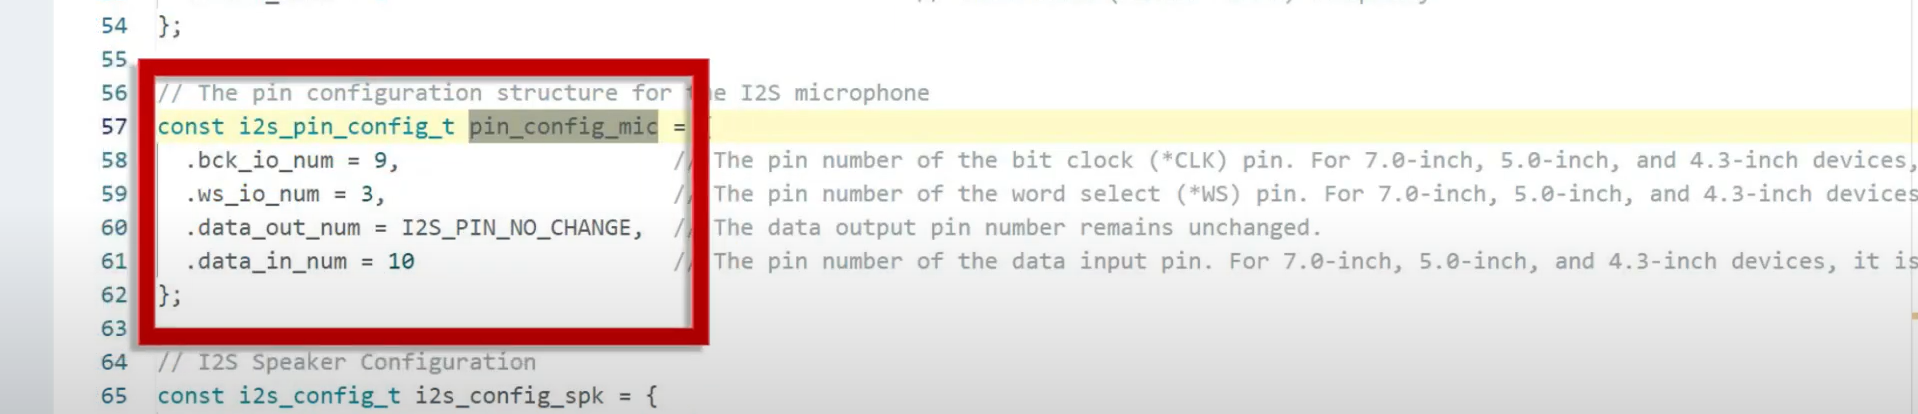
● Microphone & Speaker – Ensure correct pin configuration for your hardware.
For small-sized development boards, these two pins need to be set to amplify the volume.


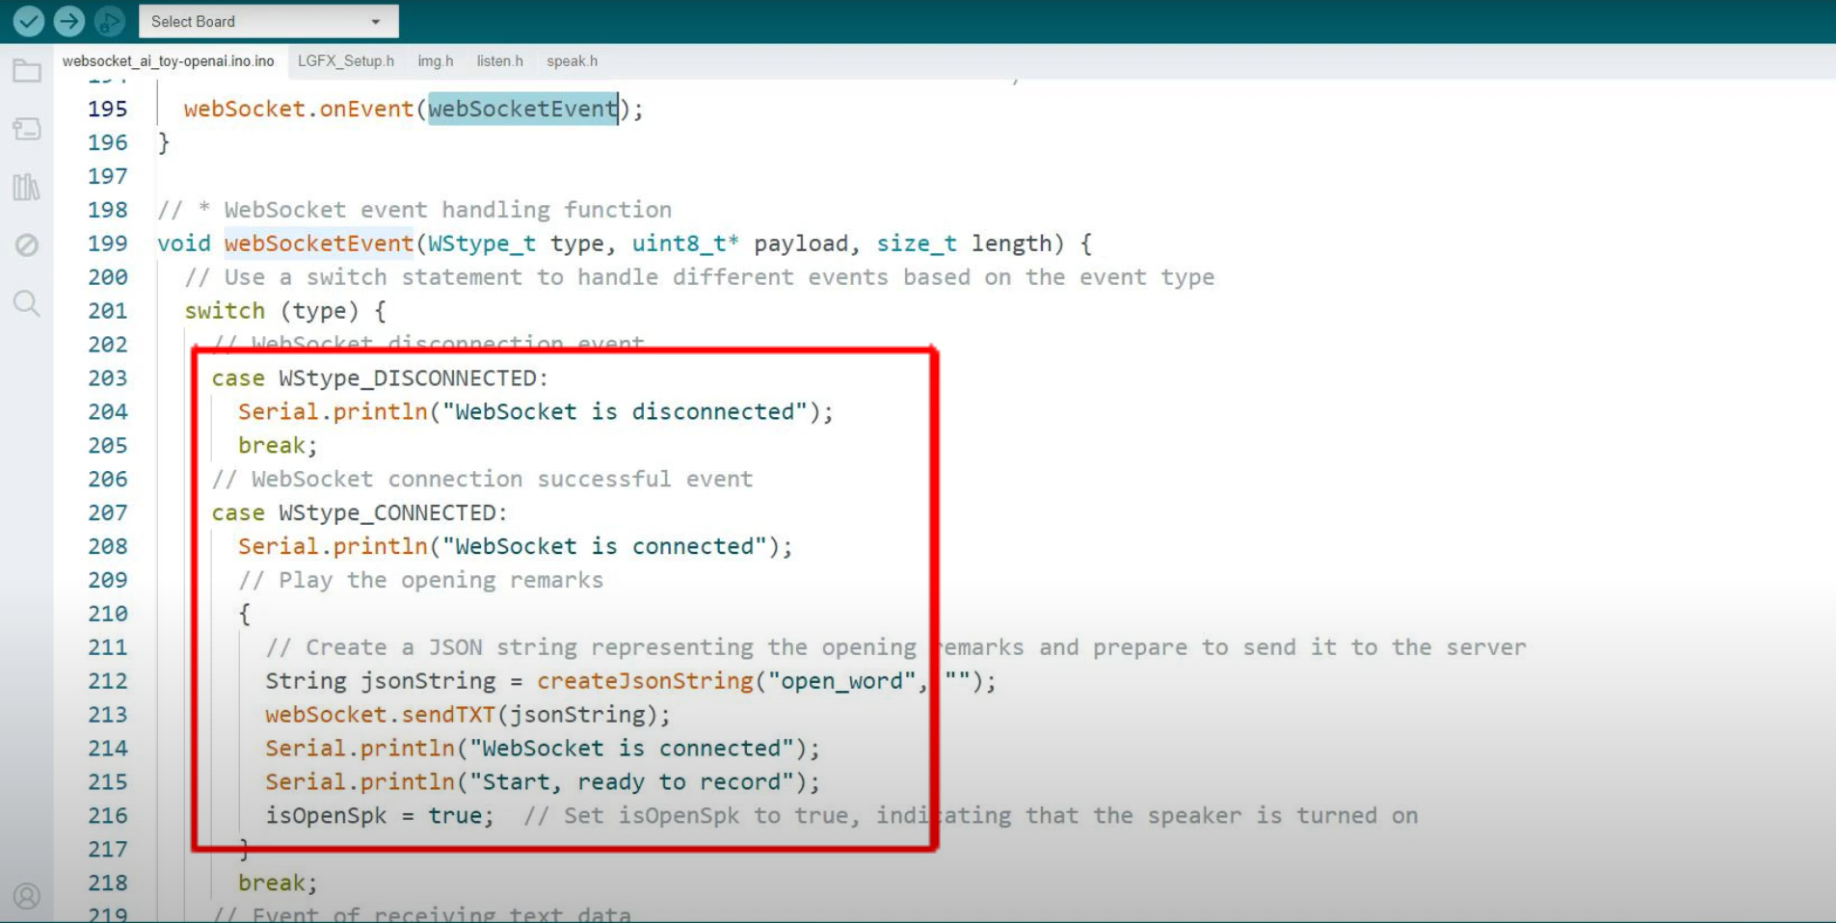
2. Chatbot Workflow
● Pressing the boot key interrupts playback or wakes up the chatbot in your project.
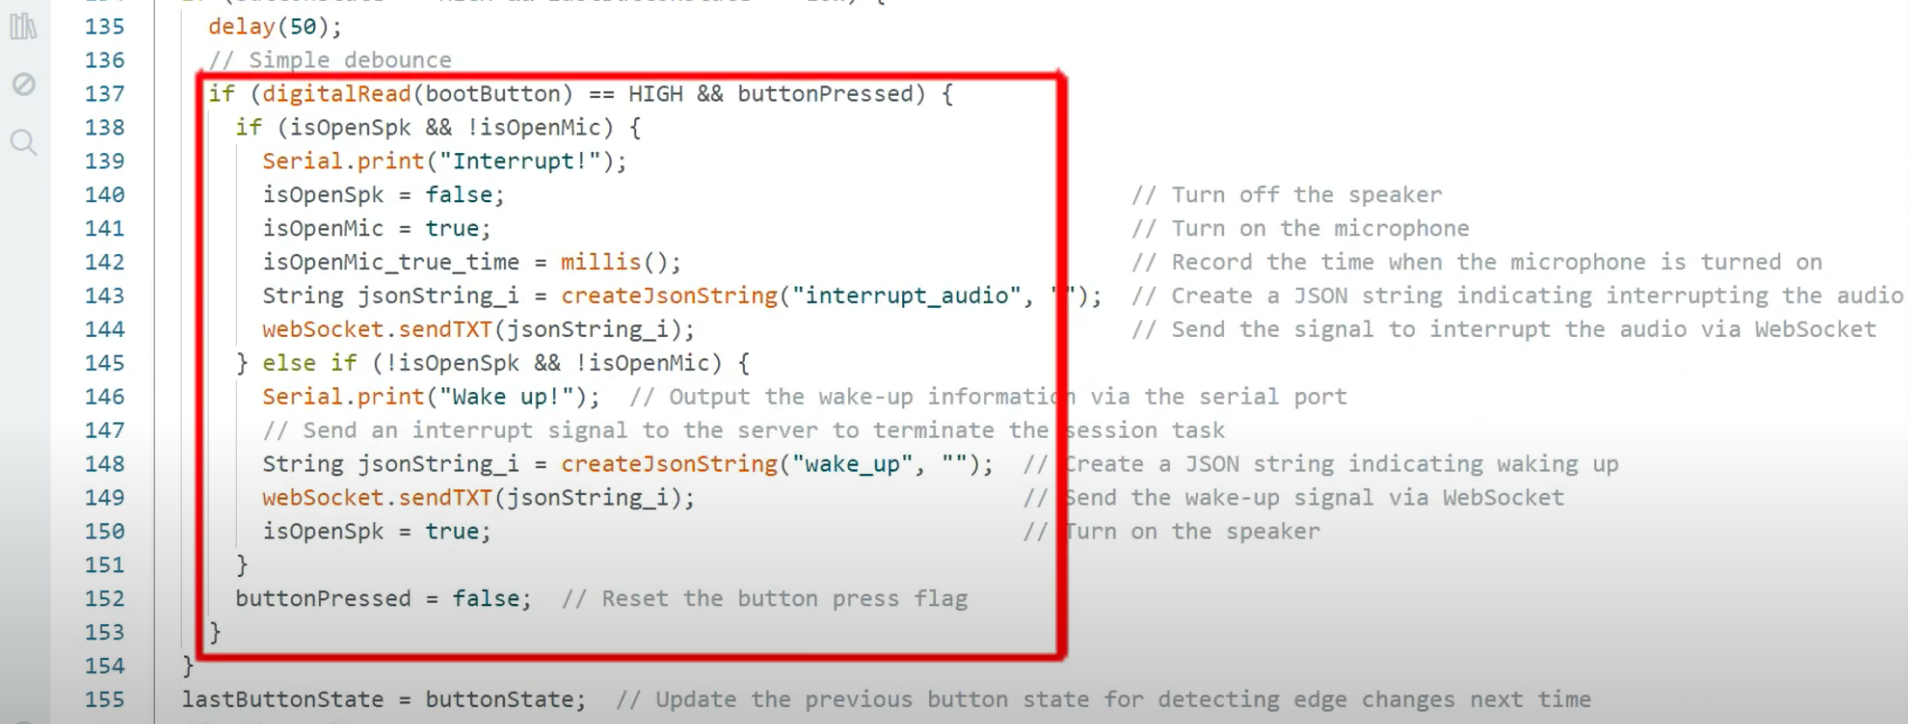
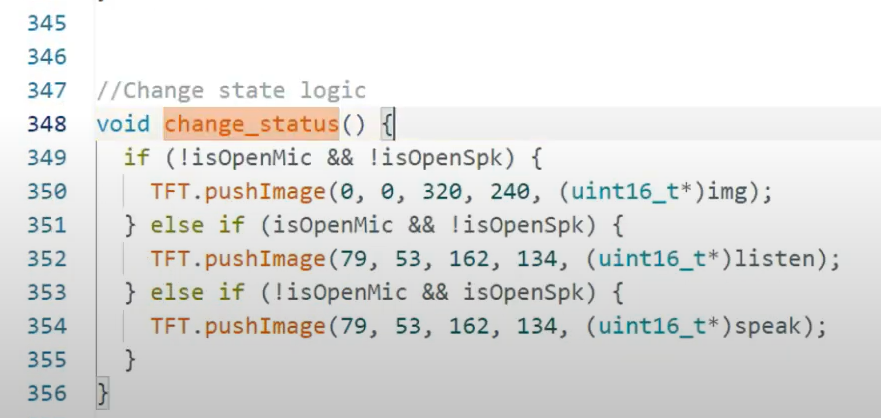
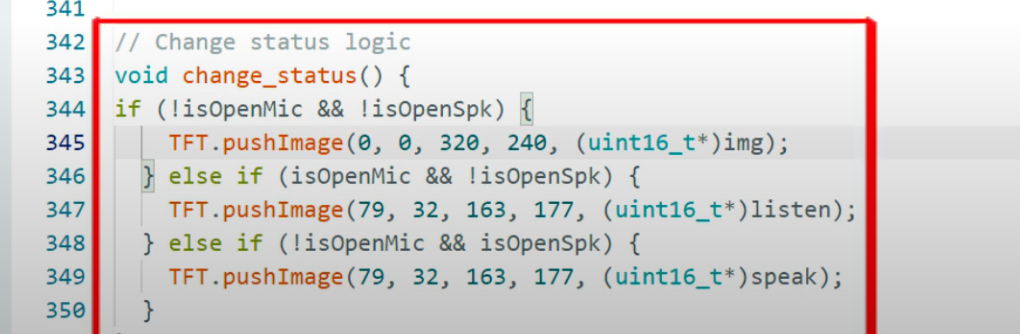
● The robot icon updates based on speaker status.
● The server event loop in ws.py processes JSON data and controls playback.


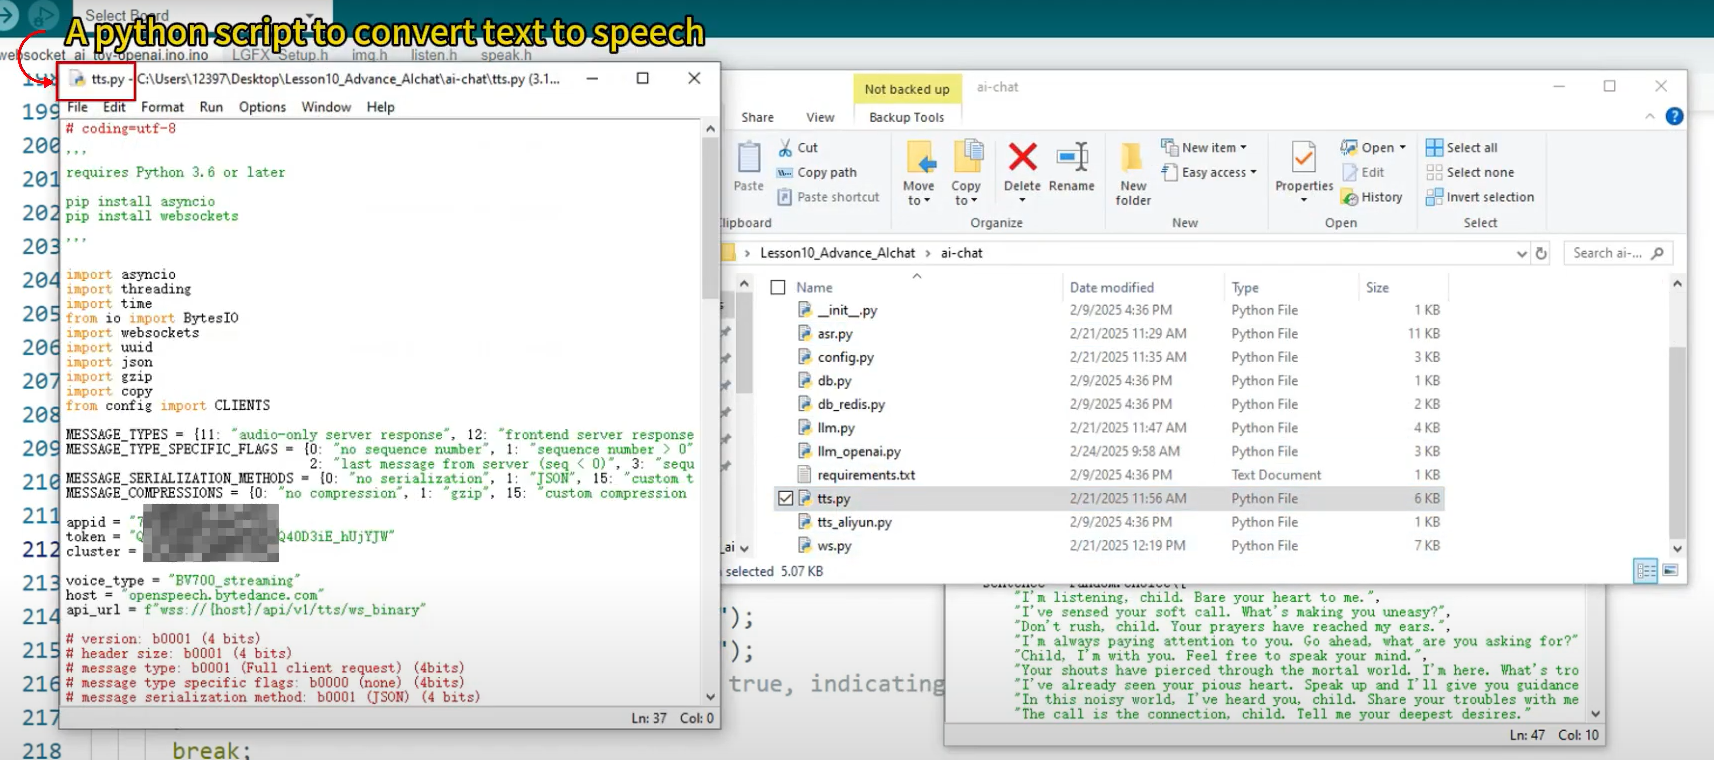
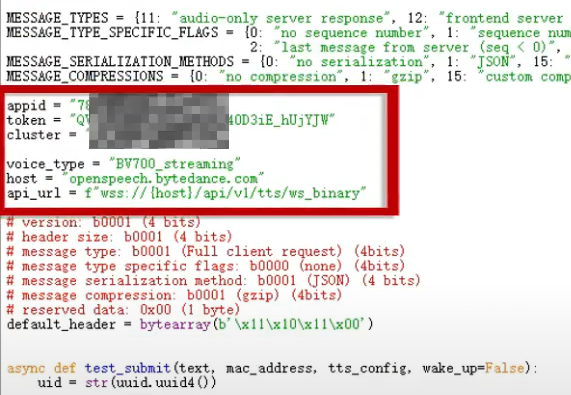
● tts.py converts text to speech. Update the API key, URL, and other needed in this file.
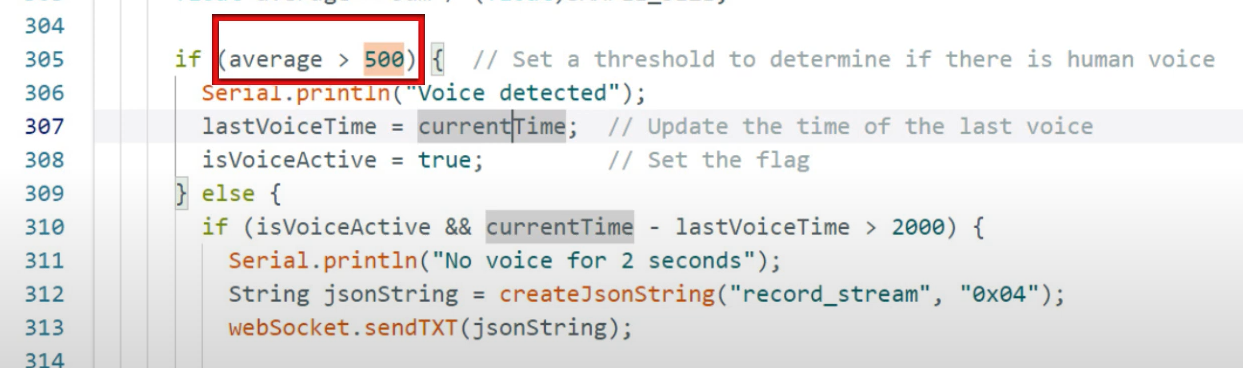
● This parameter sets the microphone's detection threshold. You can lower it to make quieter speech recognizable in your chatbot project.
● The board controls the speaker and mic for text data and plays audio for binary data, processing it using asr.py (speech-to-text). Also update the API key, URL, and other needed in this file.

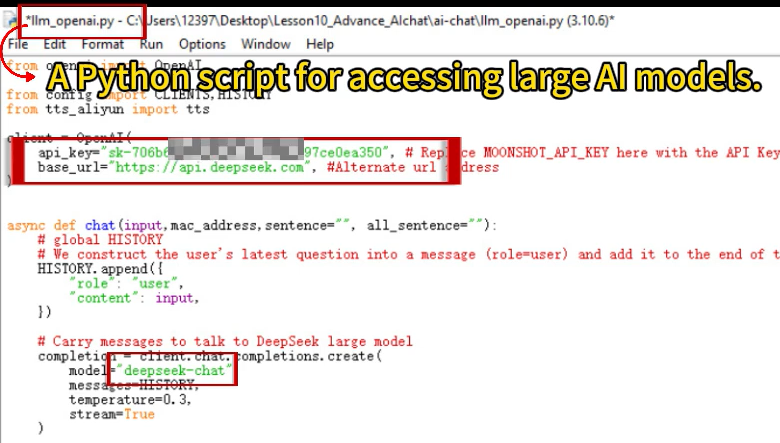
● The chatbot logic runs in llm_openai.py. Change the model, API URL, and key accordingly.
● In the config.py file, you’re the director! Customize the character to your liking, deploy it to the server, and watch it come to life, chatting with your development board in this AI chatbot project. It’s going to be exciting!

Setting Up API Keys
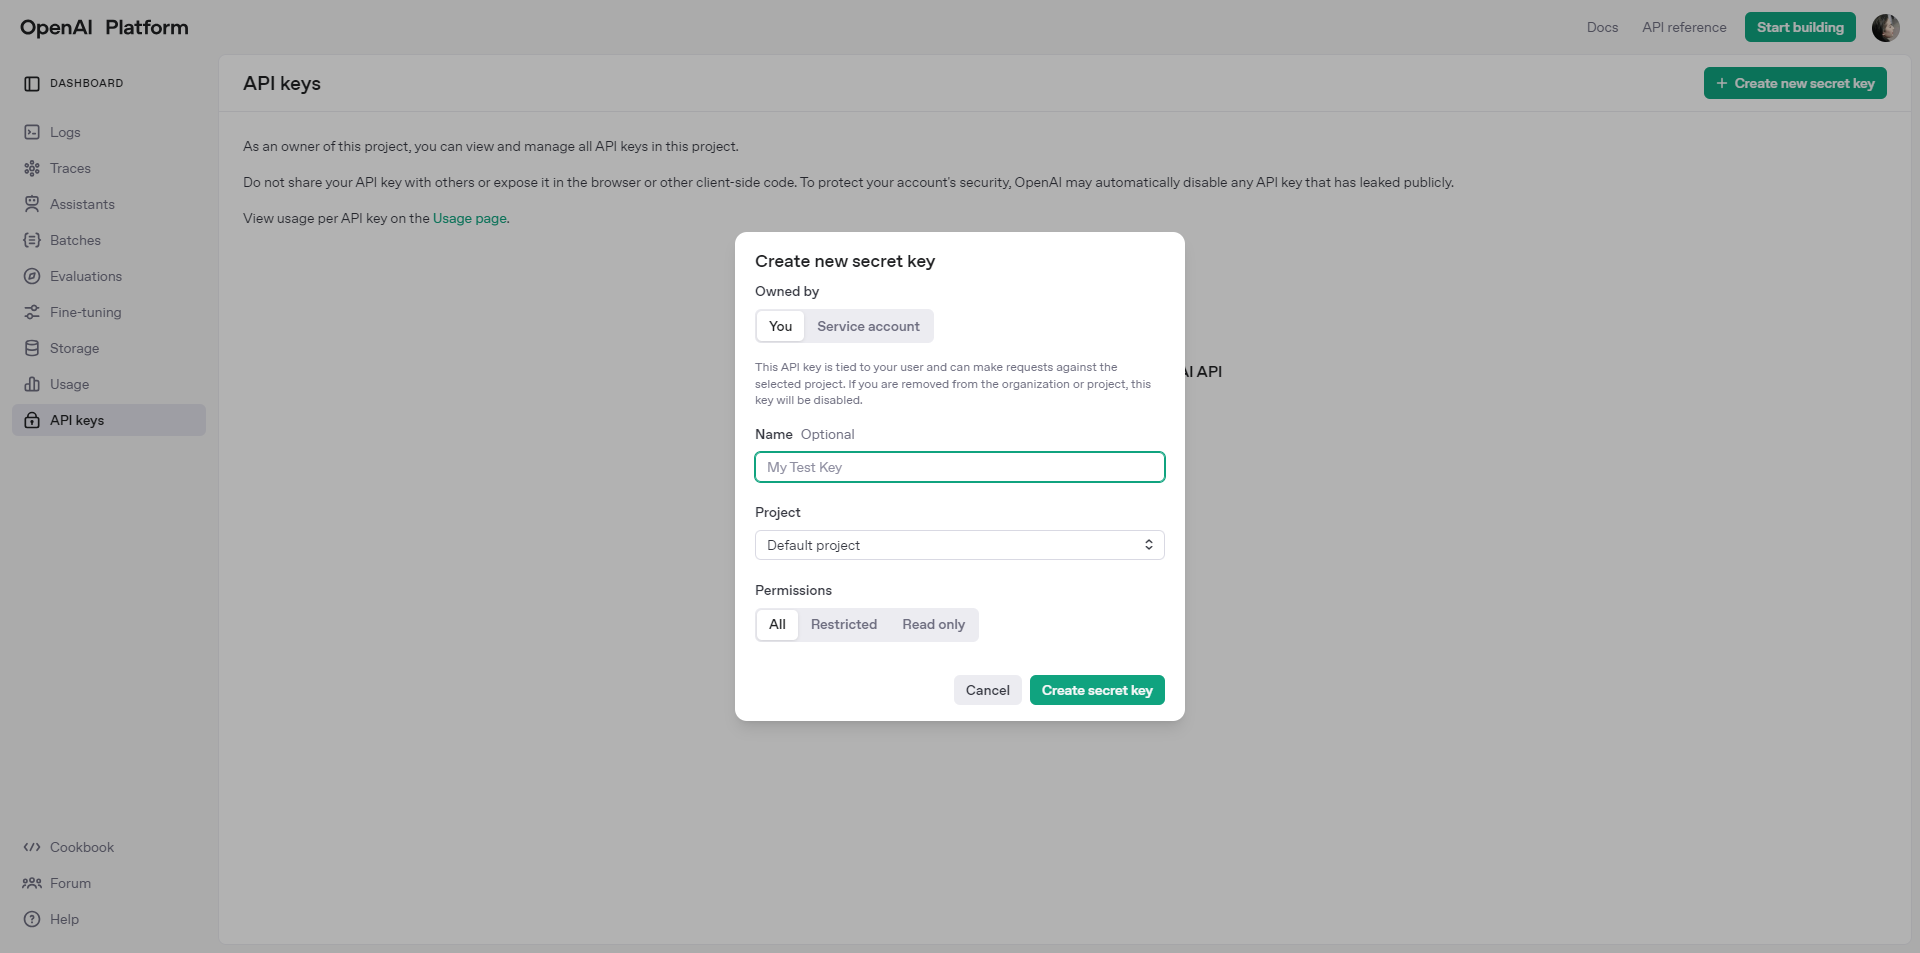
OpenAI (Large Model AI API)
1. Log in to OpenAI and go to API Keys.
2. Click Create New Secret Key and save it.
3. Use this key in your code.
Volcano Engine (Speech-to-Text & Text-to-Speech)
1. Log in to Volcano Engine and go to the console.
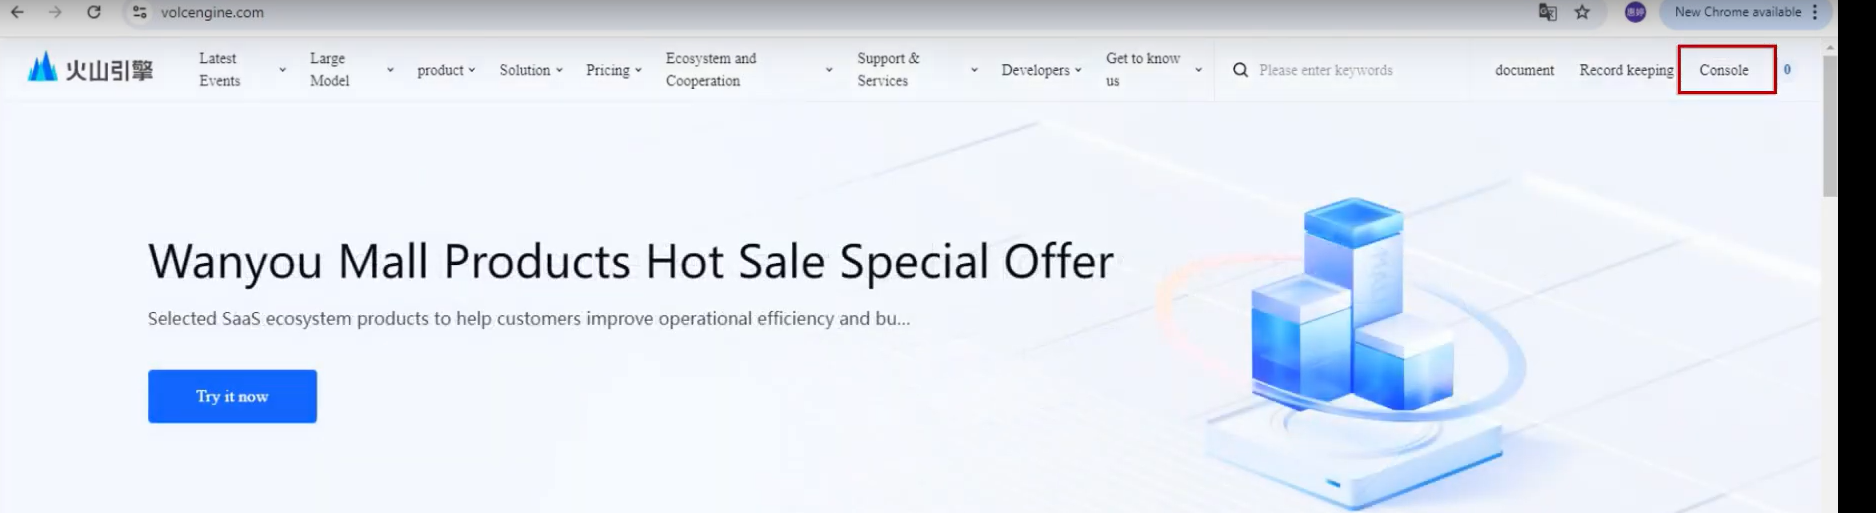
2. Search keywords like 'voice' in the search bar.
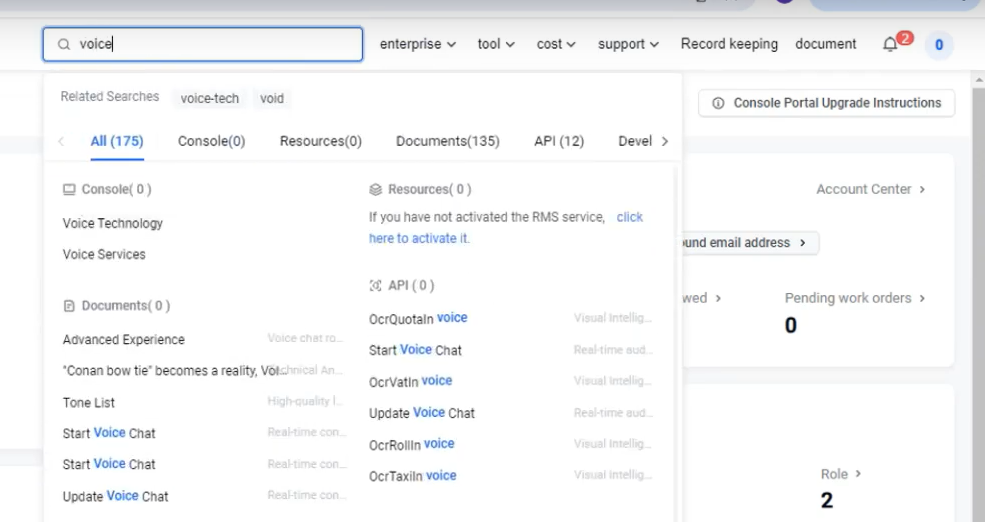
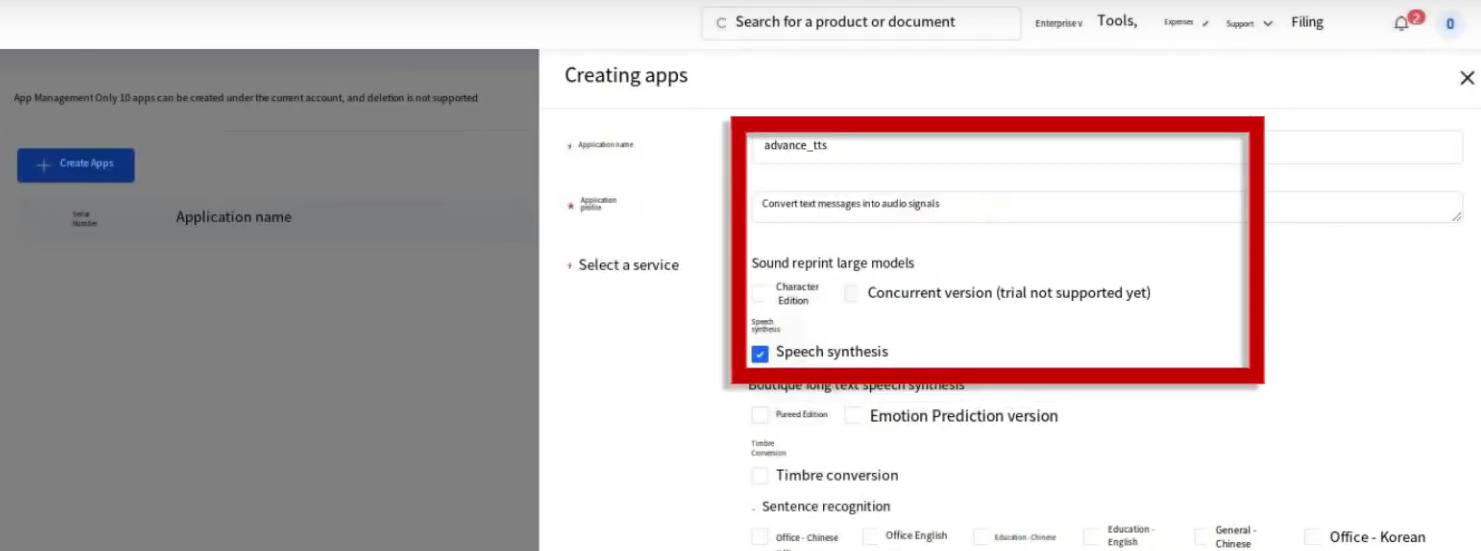
3. Create a New Application and obtain the App ID & Secret Key.
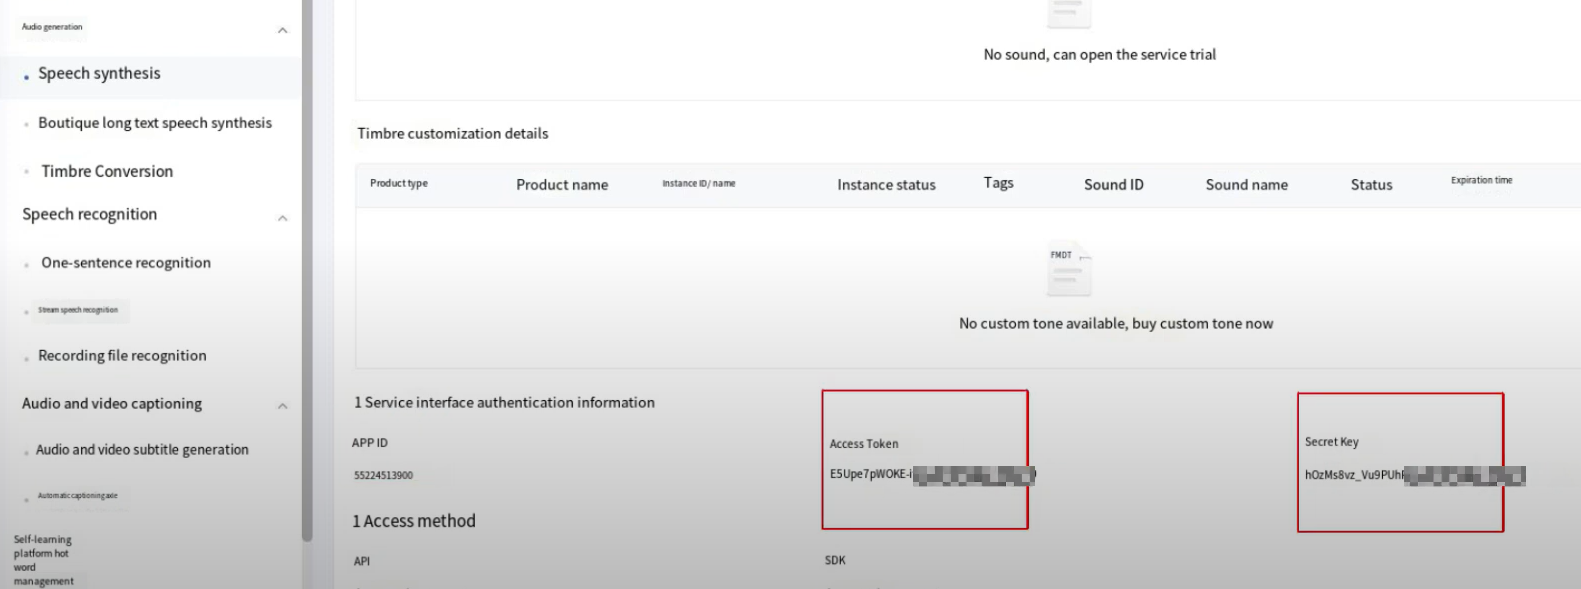
4. Follow the API documentation for integration.
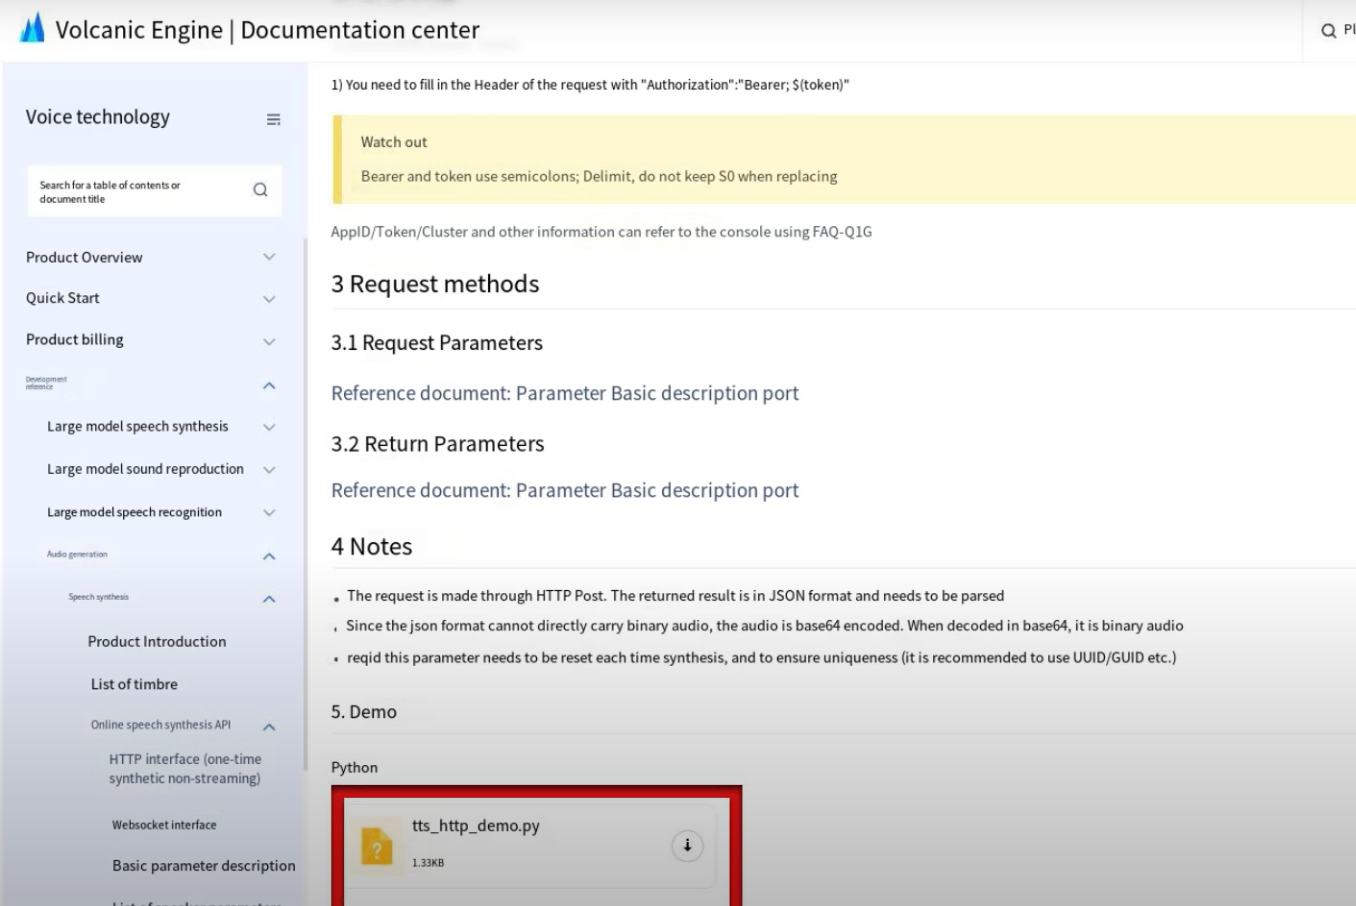
Image Conversion for Display
1. Open the image conversion tool.
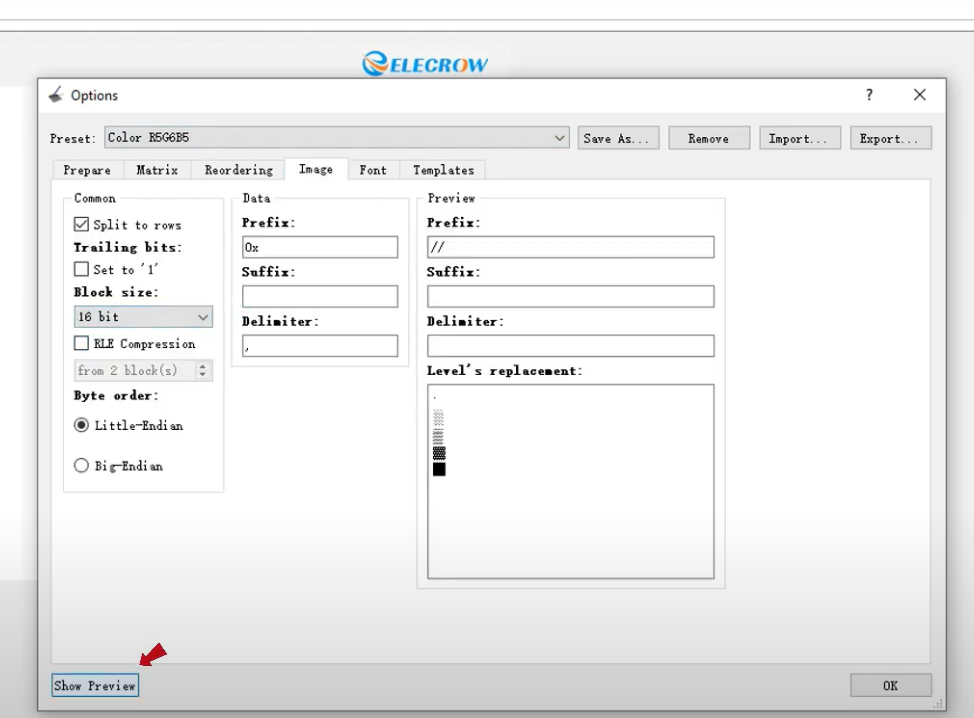
2. Select an image (the image size cannot exceed 2MB). Click on 'Options' -> 'Conversion'. The Preset is R5G6B5 and choose a 16-bit block size.
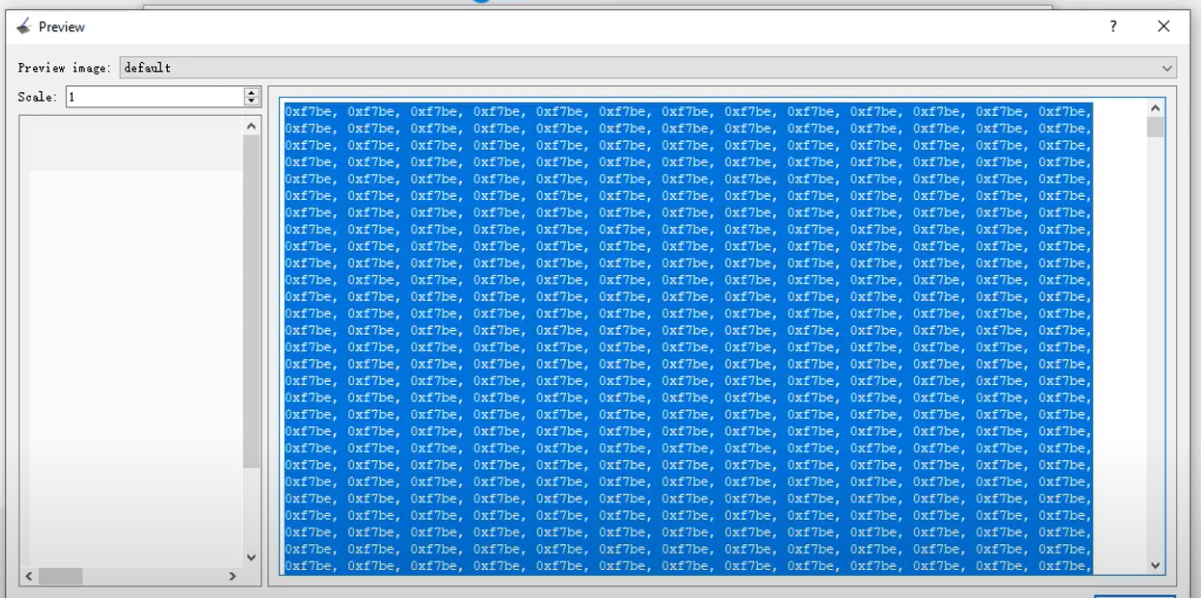
3. Click Show Preview, copy the generated data array, and replace it in the Arduino code.
4. Update the image size and coordinates in the main code file.
Running the Chatbot
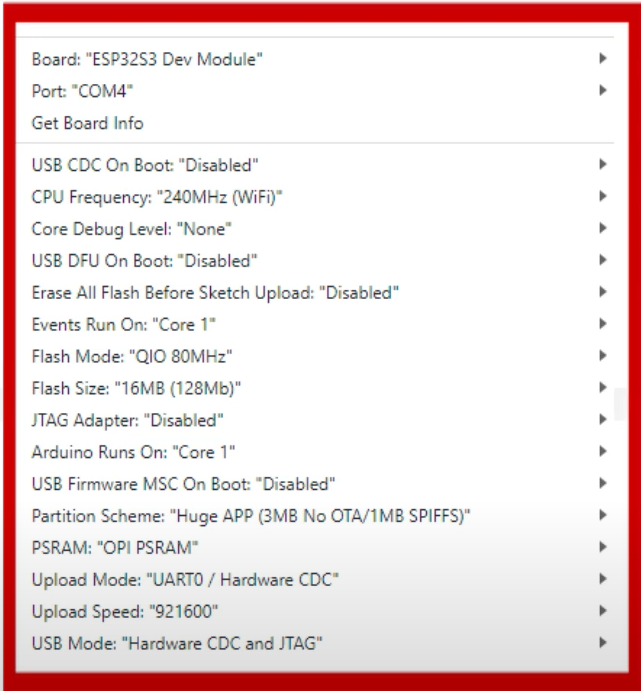
1. Connect the ESP32 HMI display to your computer and open the Arduino project. (Note: set the function select keys of the development board to 00)
2. Upload the code after setting the correct display size.
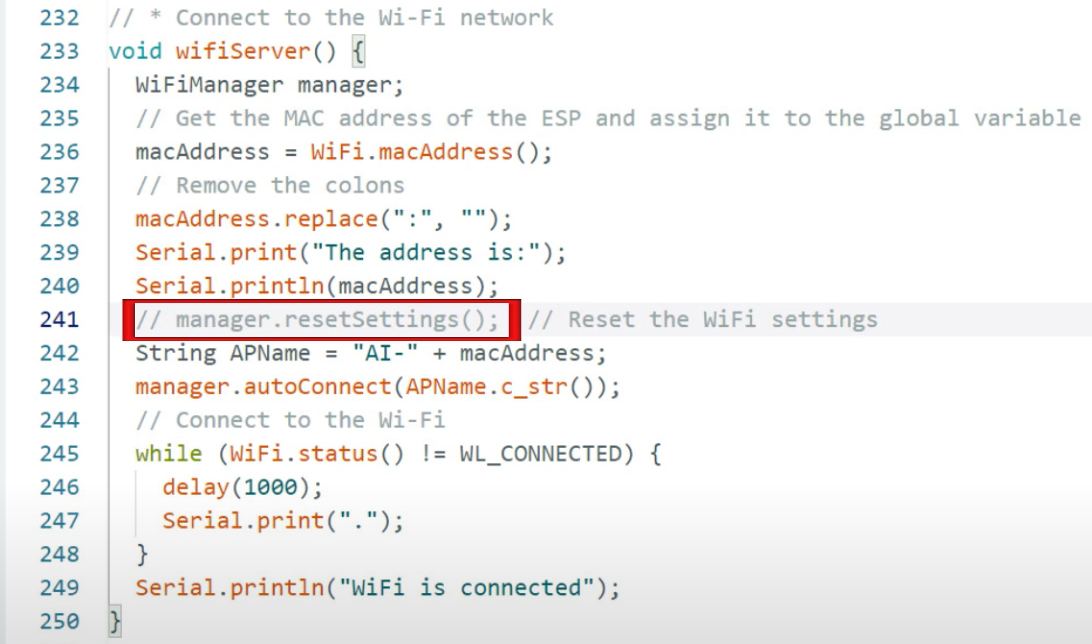
3. Configure Wi-Fi: Uncomment the relevant code for first-time setup and upload.
a. Use a mobile phone to connect to the ESP32’s Wi-Fi (name starts with "AI").
b. Enter your Wi-Fi passwords.
Once you're done, the screen will light up—that means you're connected!
4. Connecting the Board to the PC Server
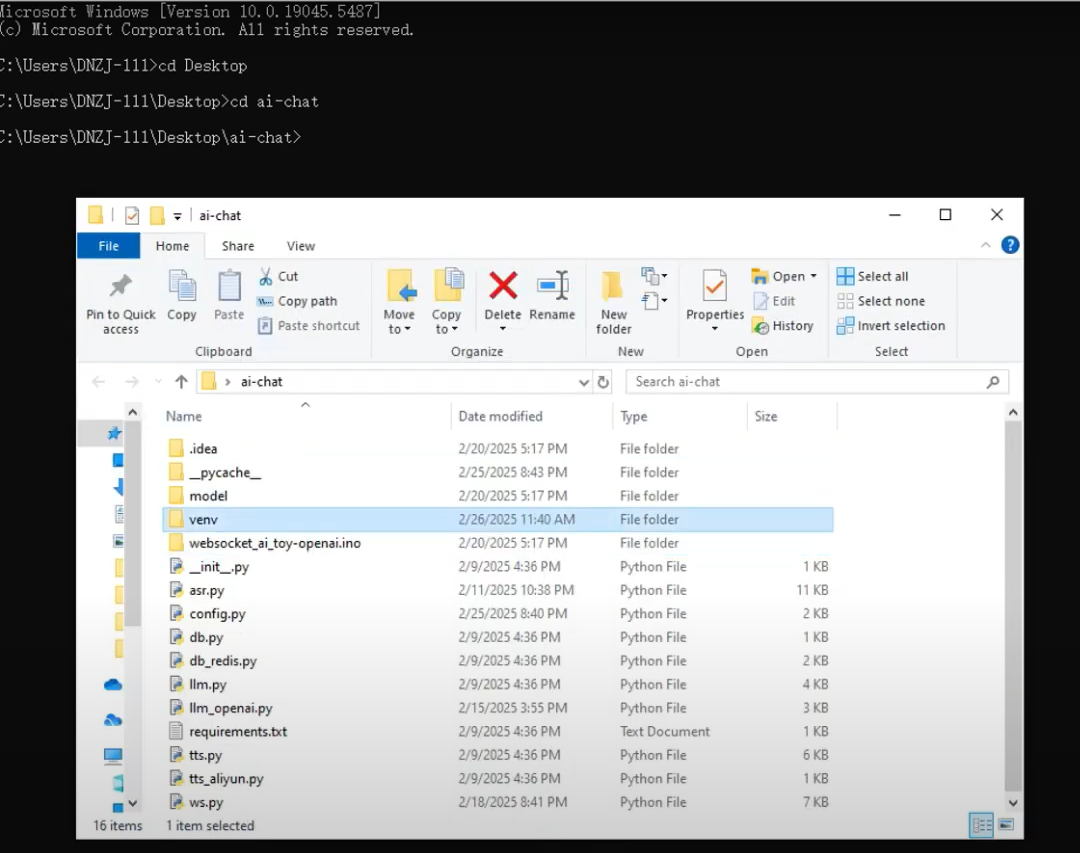
a. Open the Windows command prompt and navigate to the root directory of the server-side code.
b. If there is a venv folder, delete it.
c. Enter the following commands in order:
i. Create a virtual environment for the Python project.
python -m venv venv
ii. Activate the virtual environment.
.\venv\Scripts\acticate
iii. Install dependencies from the requirements.txt file.
pip install -r requirements.txt
iv. Update pip (only if prompted).
python -m pip install --upgrade pip
v. Install OpenAI dependencies.
pip install openai dashscope
vi. Start the server.
python ws.py
Once the server is running, you should see the development board begin recording.
Your chatbot is all set to chat! Dive in and bring your AI chatbot project to life!
For more exciting tutorials, check out Elecrow YouTube channel!
CrowPanel Advance HMI Course Github Link