Currency
Toggle Nav

Create a Stunning UI with SquareLine Studio for ESP32 Display | LVGL Tutorial
November 10, 2023
Create a Stunning UI with SquareLine Studio for ESP32 Display | LVGL Tutorial
Prologue
Welcome to our tutorial blog, where we'll take you on a step-by-step journey to unlock the full potential of your ESP32 display boards. In this comprehensive guide, we'll delve into the art of crafting visually captivating user interfaces using SquareLine Studio and integrating them seamlessly with the power of LVGL. Whether you're a design enthusiast just starting out or a seasoned pro, you're about to embark on a creative adventure that will elevate your design skills to new heights.
Supplies
Software: Squareline Studio, Arduino
Step 1: Design Your UI Project Through the SquareLine Studio
Let's embark on our journey to design our UI project:
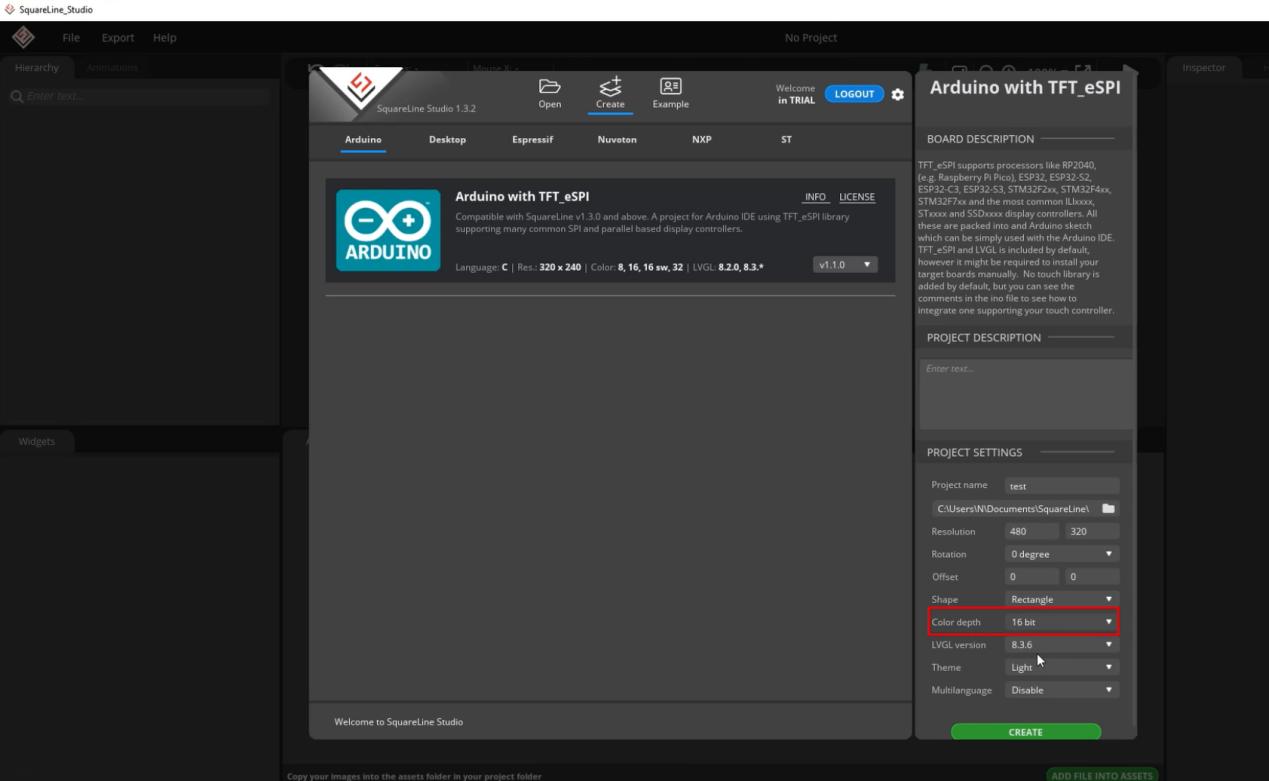
- Select "Arduino with TFT_eSPI" within the SquareLine Studio. Don't forget to add an appealing name to your UI project. Ensure you configure the resolution and color depth to match your specific board. In our case, the board has a resolution of 480x320, which you can verify on Elecrow's website. Likewise, the color depth should be 16-bit for our particular board.
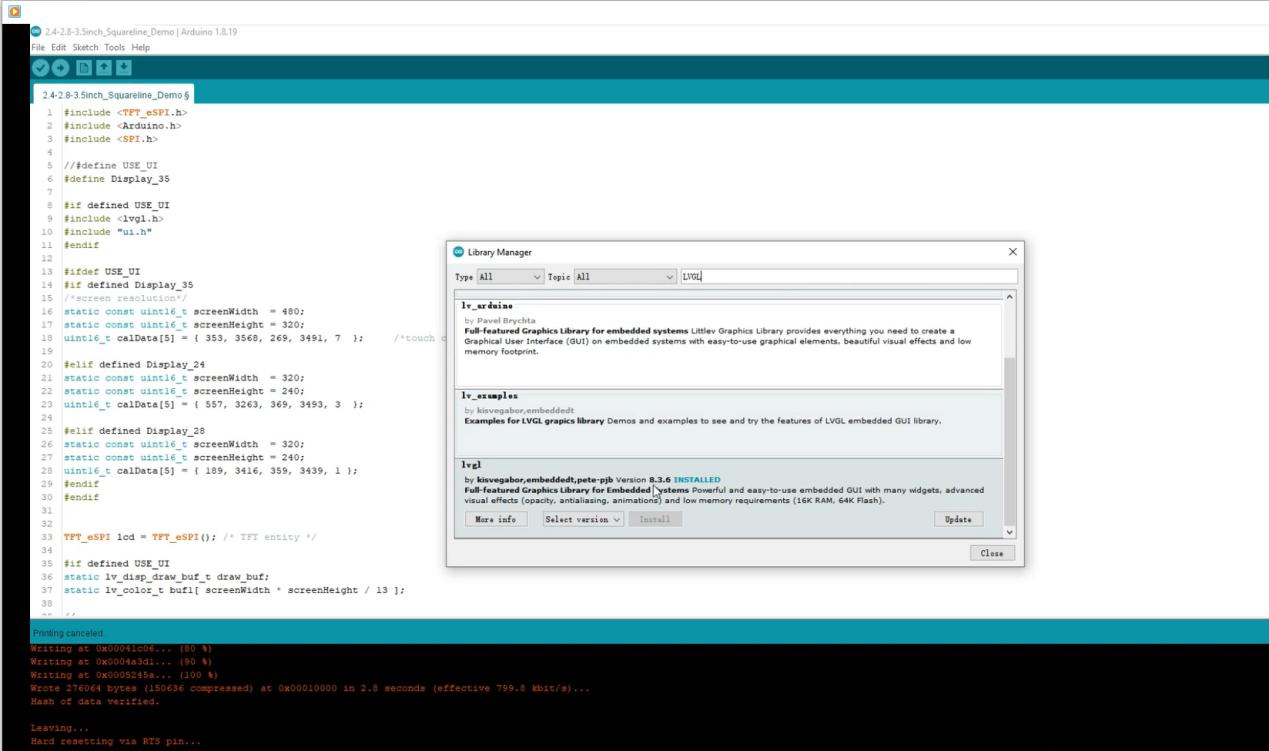
- Set your LVGL version. To determine the LVGL version, navigate to the Arduino software and go to "Sketch" -> "Include Library" -> "Manage Libraries." When searching for "LVGL" here, you'll find its version. In this instance, I'm using version 8.3.6.
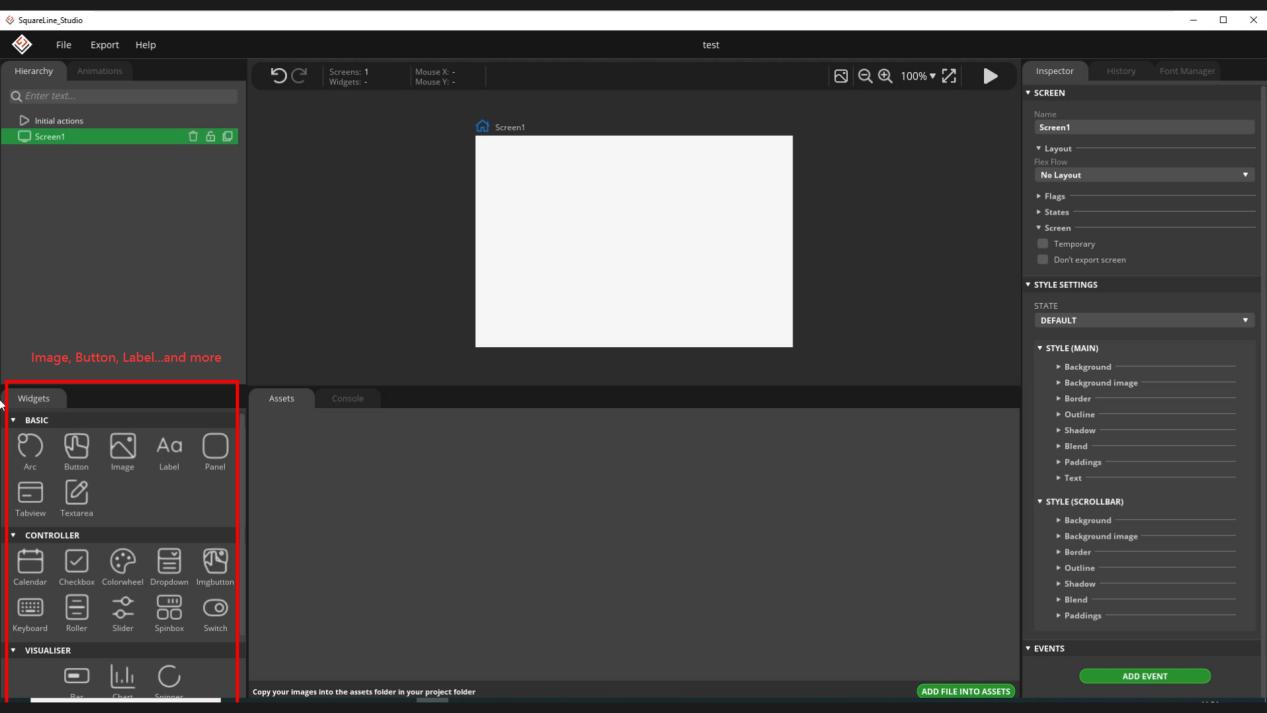
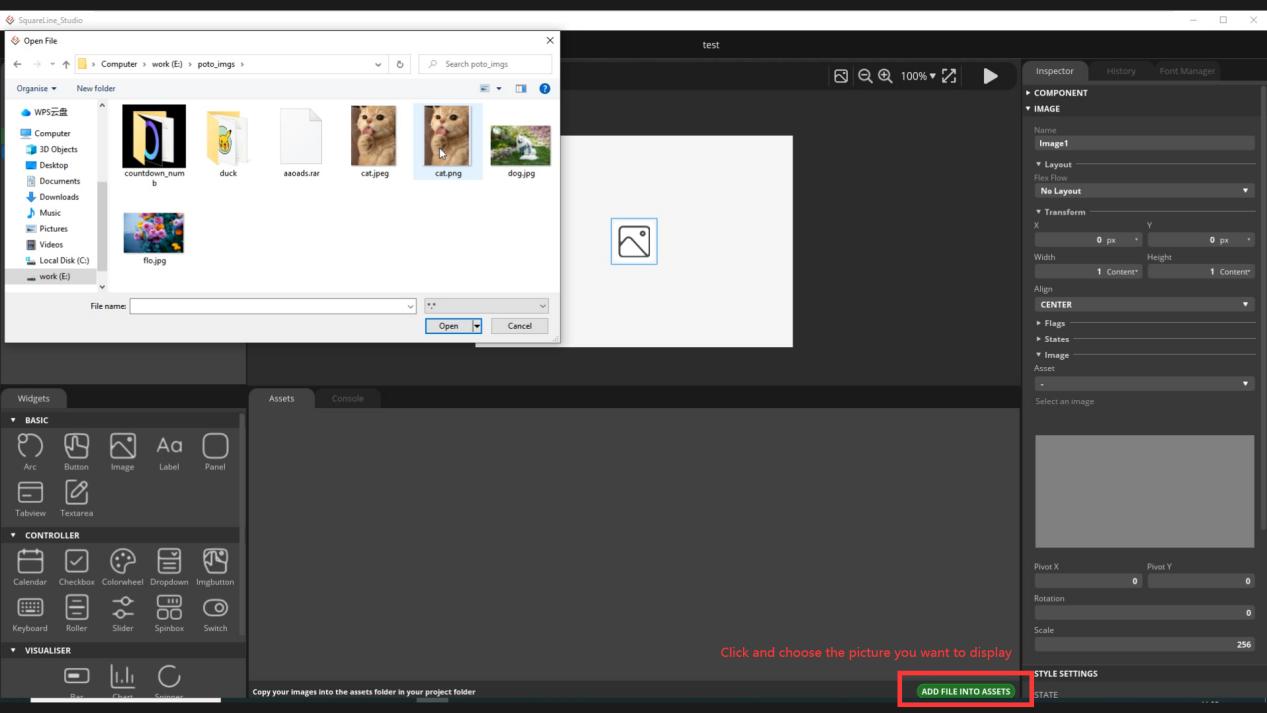
- Click "Create" and "Overwrite" to access an interface offering various widgets for customization, such as images, buttons, and labels. You can add images by selecting "Add Image" and choosing your desired picture. If your image isn't listed, add it by clicking "Add File into Assets." Additionally, incorporate buttons and labels while customizing their appearance and content as you like.
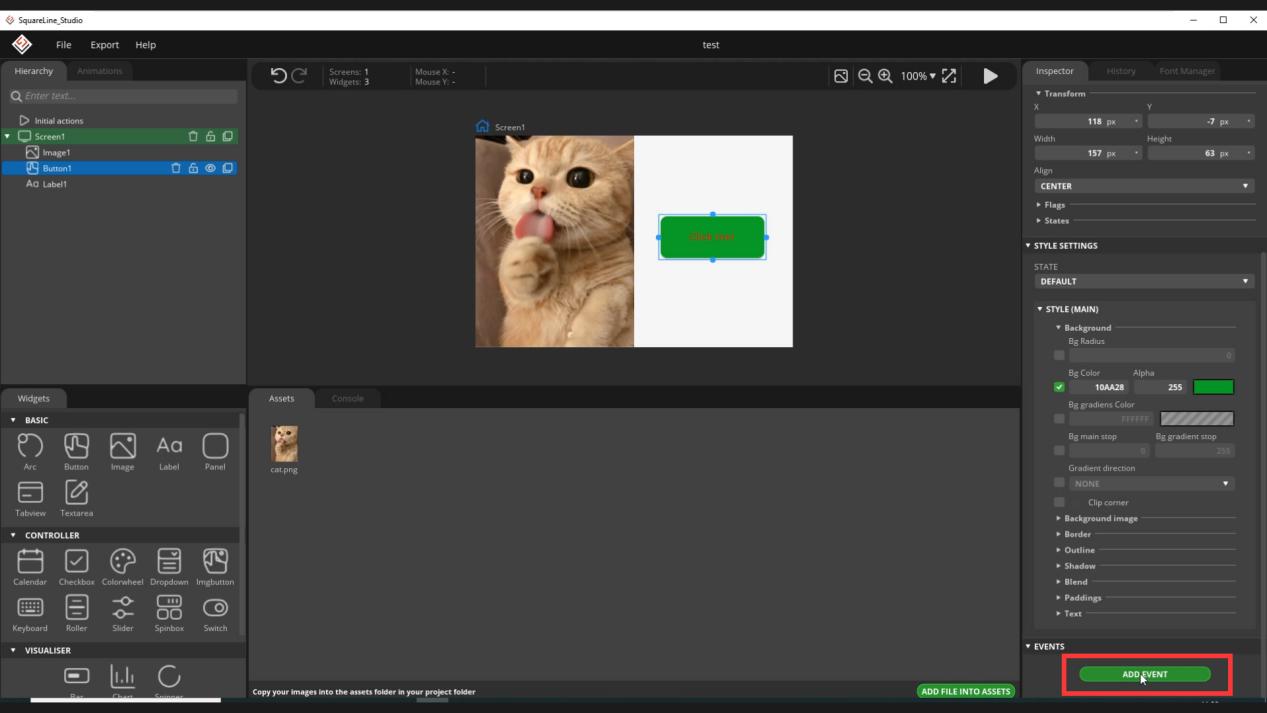
- To assign meaningful actions to your buttons, select them and click on "Add Events" located at the bottom of the right sidebar. Choose the trigger condition and the action you want to execute. Click "Add" to create an action under the event, and add more actions as needed.
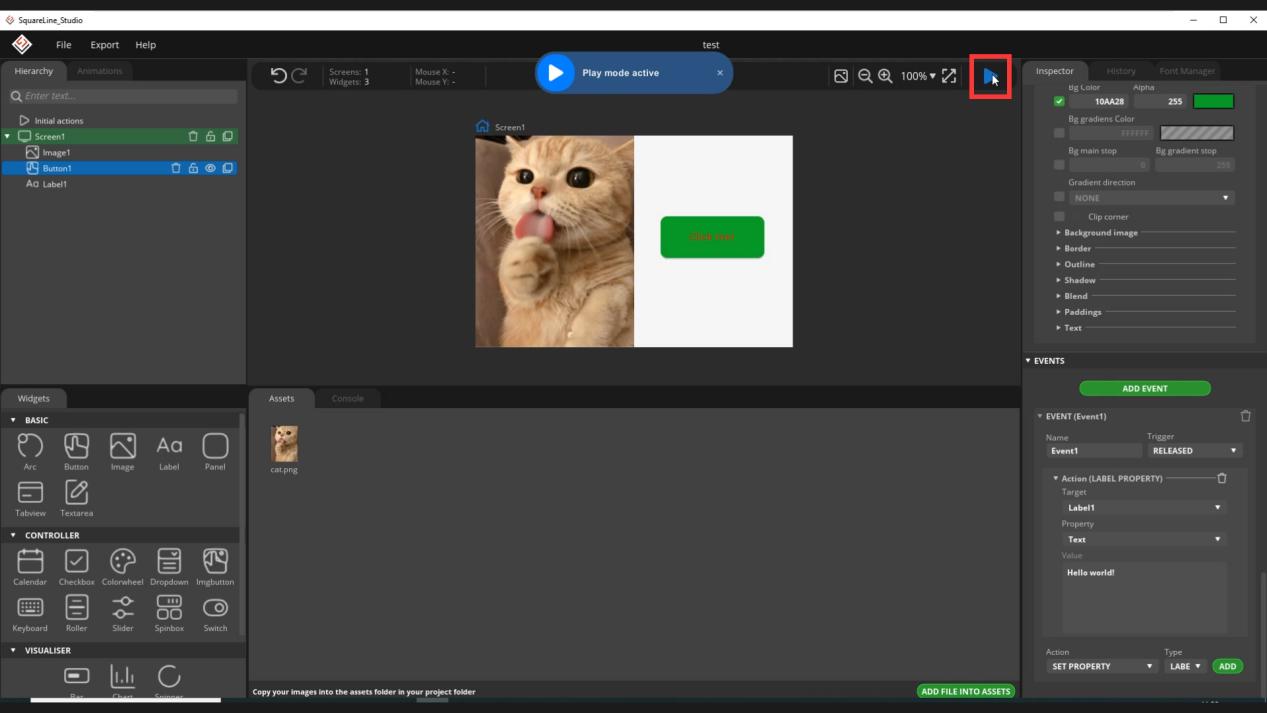
- Click the triangle icon to preview how the interface will appear on your board.
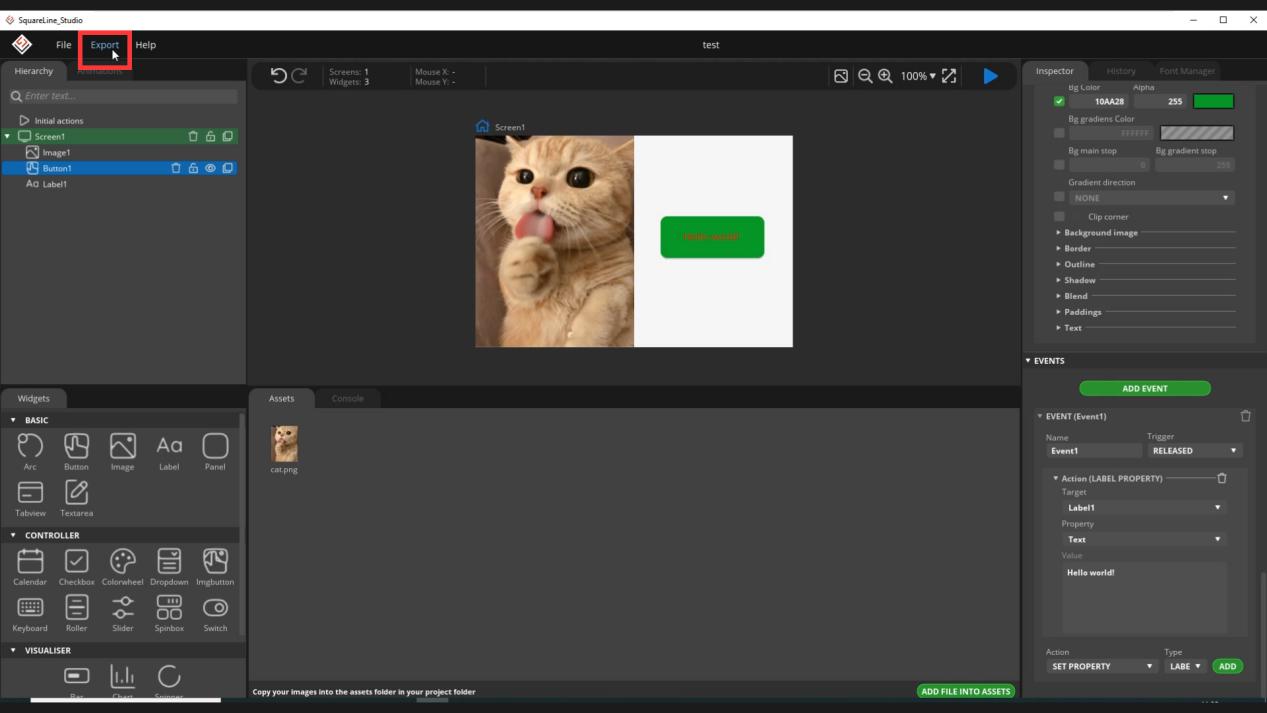
- Once you're satisfied with the setup, export it using the "Export UI File" option.
Step 2: Add the UI to the Project
With our UI project designed in Step 1, this step demonstrates how to integrate it into our project:
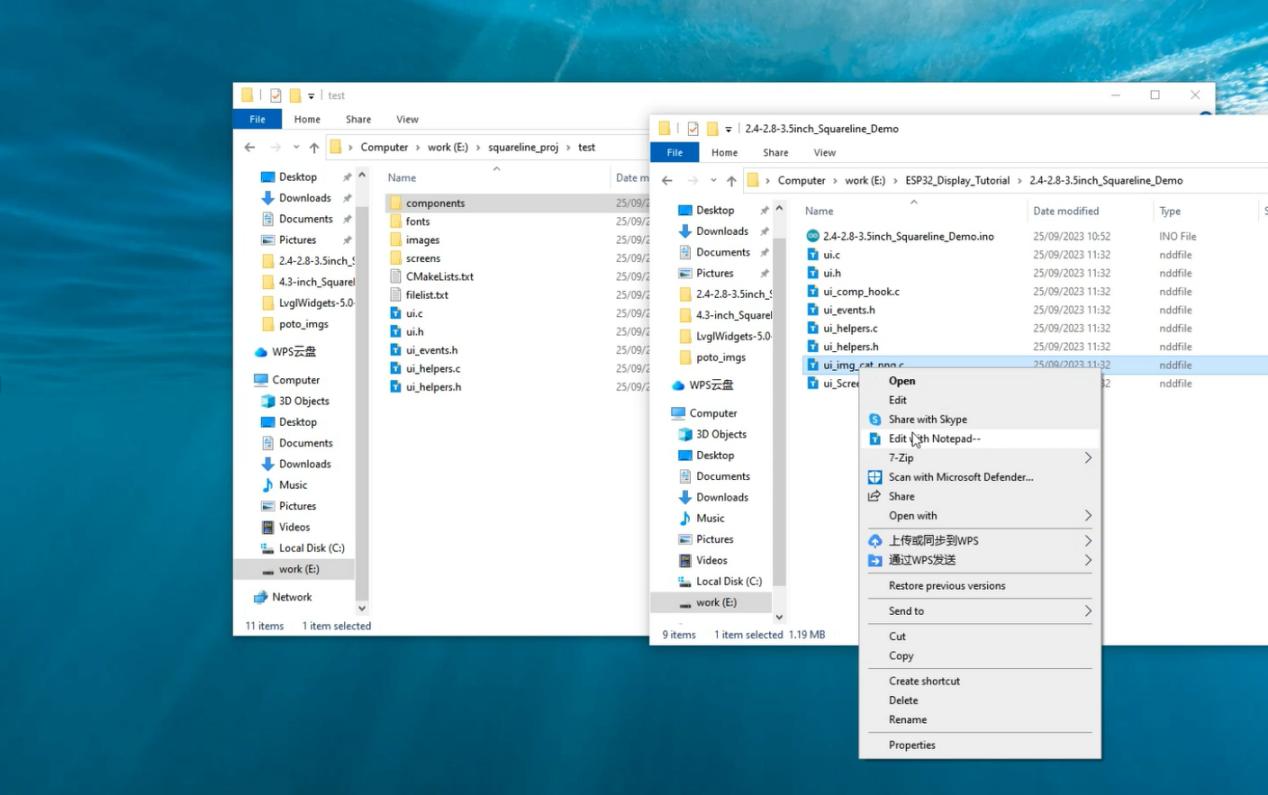
- Locate the exported UI files in the designated UI export path and copy them to the demo file directory. Make modifications to two files, namely "ui_img_cat_png.c" and "ui_Screen1.c," by changing "../ui.h" to "ui.h," and save these changes.
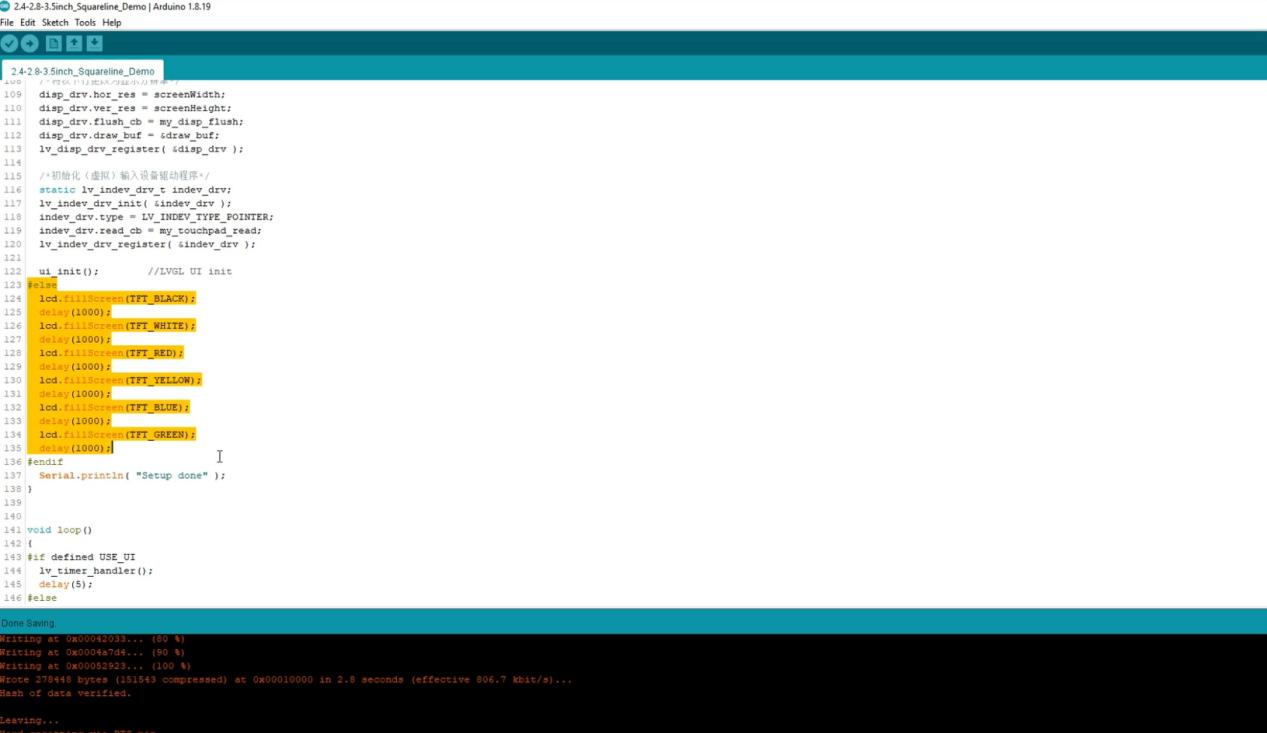
- In the provided code, an essential macro named "USE_UI" is defined. It's important to emphasize that the UI exported from SquareLine Studio will only be compiled when this macro is defined. Without it, an alternative section of the program will be compiled, resulting in a distinct set of colors on the display. This provides an opportunity to evaluate the screen's display functionality.

- Ensure that the 'USE_UI' macro is defined; this is critical because it triggers the LVGL clock every five milliseconds. Omitting this part could lead to LVGL interface crashes during runtime. Additionally, define a board-specific macro to automatically adjust resolution and touch calibration parameters based on your board's specifications. For instance, I am using a 3.5-inch board, and I have the 'Display_35' macro in the code. If you are using a 2.4-inch board, please define 'Display_24' accordingly.
Step 3: Configure the TFT_eSPI Library
After adding the UI to our project, it’s time to flash the program. Now we need to configure the TFT_eSPI library for screen driver support.
- Locate the TFT_eSPI library in the Arduino Library directory. If you're unsure about the library directory's path, open the Arduino software, and click "File" to access "Preferences."
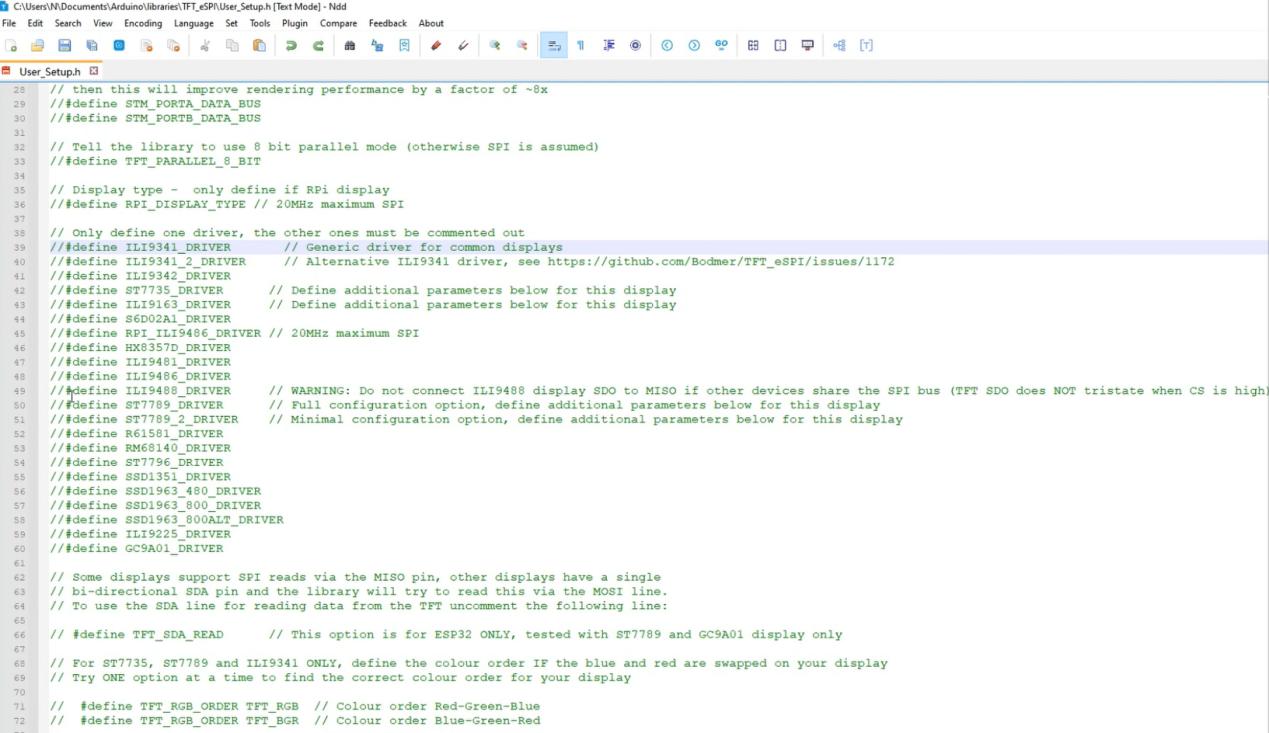
- Open the "User_Setup.h" file and choose the appropriate screen driver for our board, which, in the case of a 3.5-inch board, is "ILI9488." Set the screen resolution to 480x320 for this board. Verify the backlight pin based on your board's circuit diagram. If you're using Elecrow's configuration file, no modifications are necessary. These settings ensure the TFT_eSPI library is configured and ready for use.
Step 4: Configure the Compilation Environment
Configuring the compilation environment is straightforward. Set the board type, flash mode, partition scheme, and PSRAM settings to match your project's requirements:
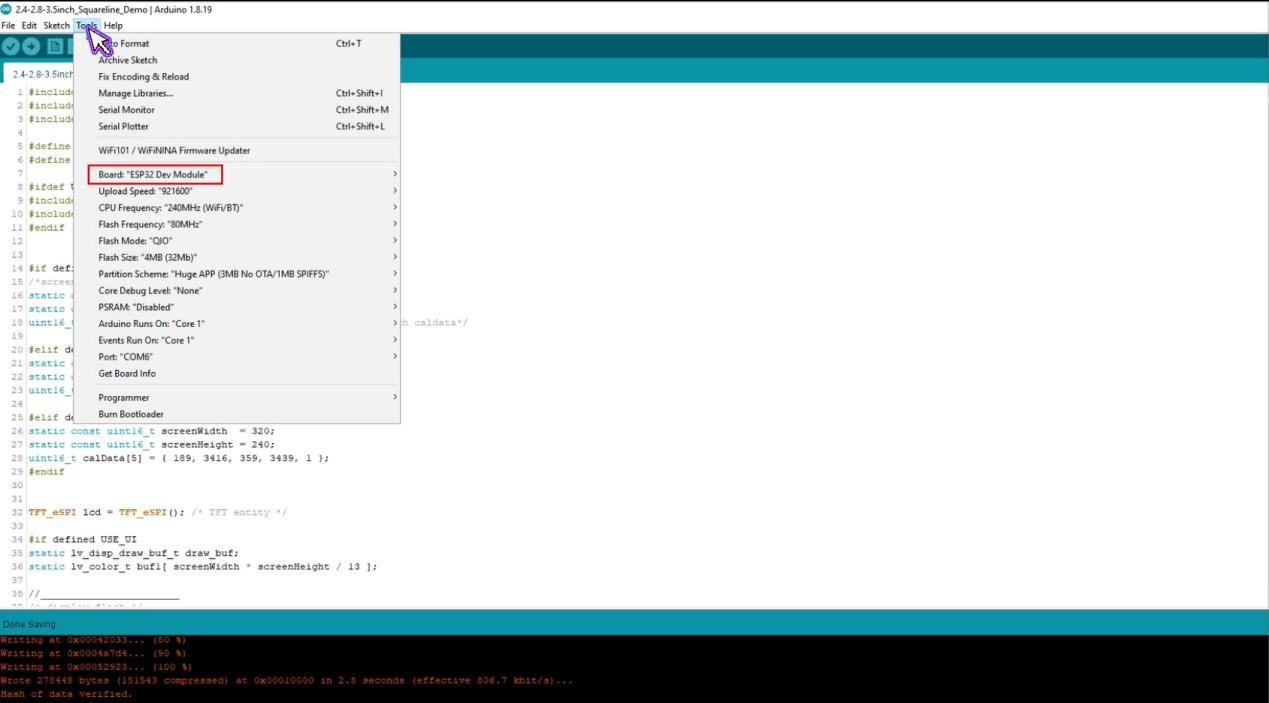
- In the Arduino IDE, navigate to "Tools." Under "Board," select "ESP32 Arduino" and choose "ESP32 Dev Module." Set the "Flash Mode" to "QIO" and select "Huge App" as the "Partition Scheme." For "PSRAM," choose "Disabled."
Step 5: Compiling and Uploading the Code
Before uploading the code, follow these steps:
- Put the board into download mode by pressing and holding the "Boot" button, pressing the reset button, and then releasing the "Boot" button.
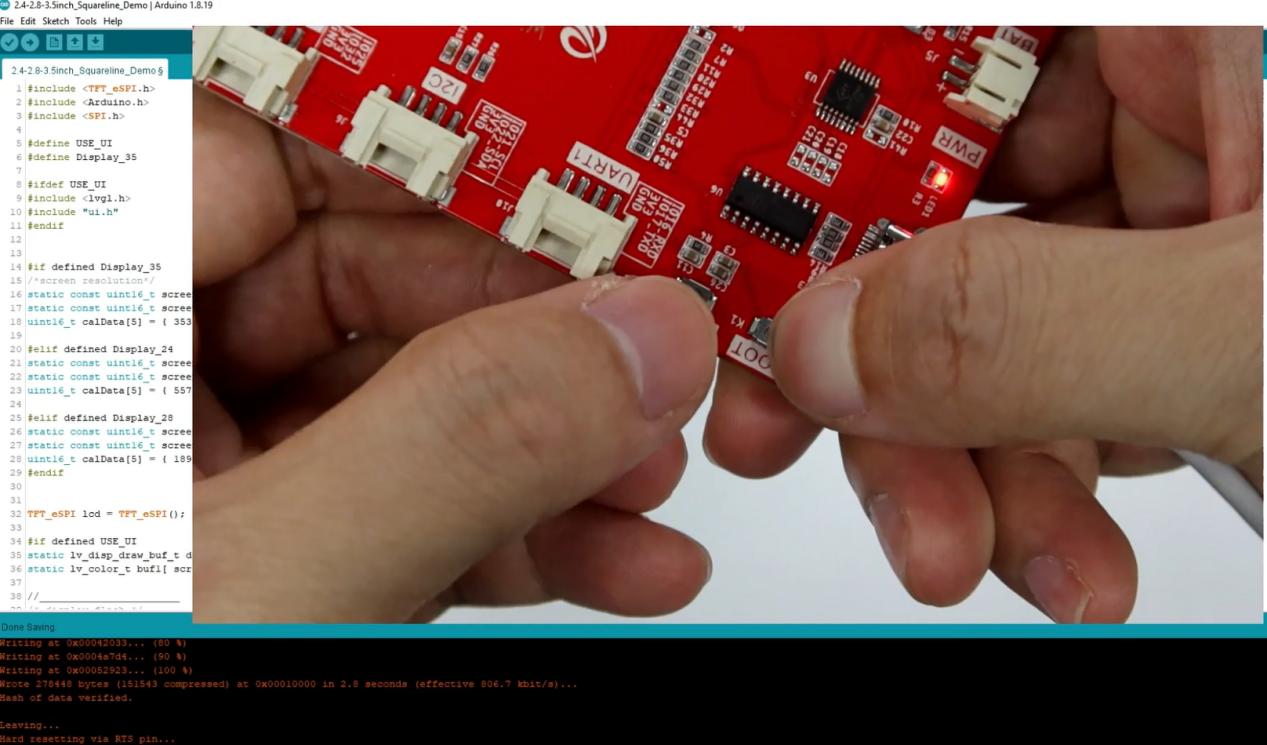
- Proceed to upload the code.
- After a successful upload, review the relevant information in the information bar at the bottom. Now, restart the board to observe the results.
Final words
Hope you find this tutorial inspiring and helpful as you explore the endless possibilities of UI design and project integration. The world of ESP32 displays is yours to explore and conquer. Enjoy the process of creating your unique projects using SquareLine Studio and LVGL integration. Happy designing!