Currency
Toggle Nav

Building a Low-Cost Media Center with Raspberry Pi 5 Step-by-Step
March 11, 2025
Building a Low-Cost Media Center with Raspberry Pi 5 Step-by-Step
If you've ever thought about having a home media center without spending hundreds of dollars on a high-end streaming box, the Raspberry Pi 5 is the ideal and one of the most affordable solutions. It is small and very powerful, which makes it a great choice for streaming movies, playing music, or even running retro games. So, let’s explain everything you need to set up a smooth and responsive media center using Raspberry Pi 5 – without overcomplicating things.
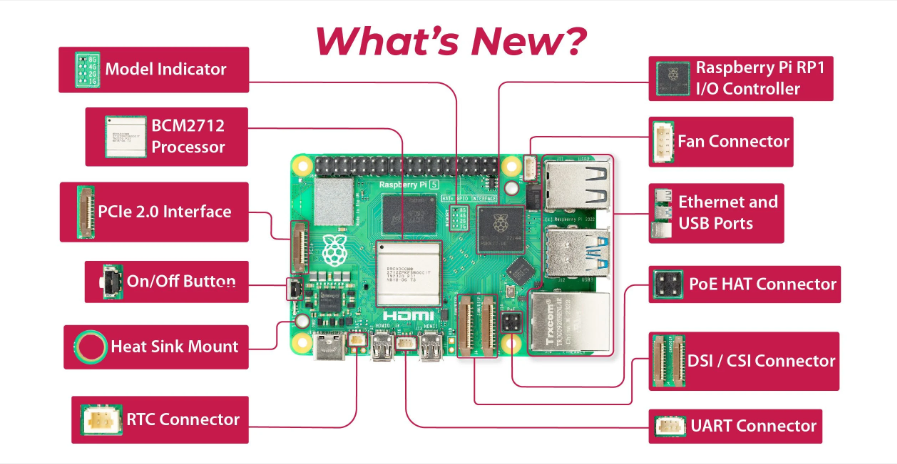
Why Raspberry Pi 5?
Apart from being a favorite for DIY tech enthusiasts for years, Pi 5 takes things to the next level compared to the previous version. It has a faster CPU, improved graphics, and better cooling while still maintaining its compact and low-power design. This leads to smoother video playback, better multitasking, and even support for 4K output. It all comes at just a part of the cost of traditional media boxes, which is a big plus!
Setting Up Your Media Center
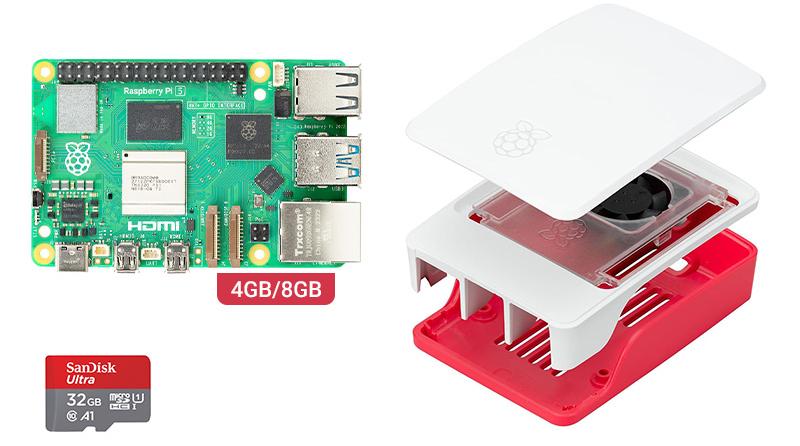
What You Will Need
Before you start, make sure that you have all the necessary components. Apart from the Raspberry Pi 5 itself, you will also need a microSD card (preferably 32GB or more), a good power adapter, an HDMI cable, and a cooling case to prevent overheating. An external hard drive or a USB stick may be useful if you need local storage.
When it comes to software, there are a few good choices. The most popular option is Kodi, which provides a clean, intuitive interface for playing movies, TV shows, and music. If you prefer something more versatile, you can install Raspberry Pi OS and manually set up Kodi or Plex.
Installing the Operating System
The easiest way to start is by using the Raspberry Pi Imager, which you can download from the official website.
After downloading, insert the microSD card into your computer and select the OS you want to install. If you are going for a dedicated media center experience, LibreELEC is a good choice – it’s a lightweight version of Kodi that runs smoothly on the Pi.
Once you finish with the installation, pop the microSD card into the Raspberry Pi, connect your peripherals, and power it on.
The initial setup process is very simple and guides you through basic configurations like language, Wi-Fi, and display settings.
Optimizing for Better Performance
Raspberry Pi 5 already performs quite well, but a few minor tweaks can make it work even better.
For example, if you enable hardware acceleration in the Kodi settings, it will cause smoother playback, especially in high-resolution videos. If you notice any lag, increasing the GPU memory allocation in the Pi’s settings can additionally improve performance.
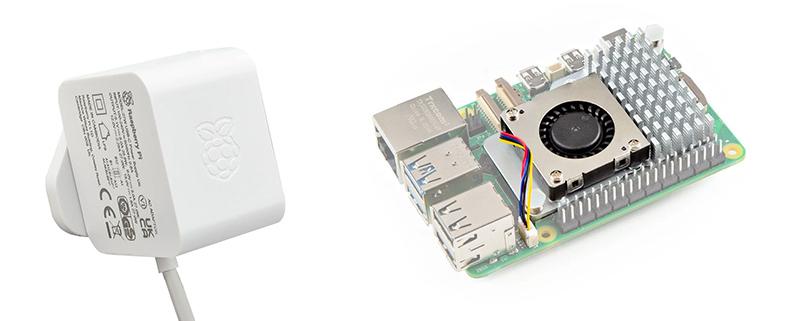
Another crucial factor is cooling. Since Pi 5 is more powerful than previous versions, it also runs hotter. A case with built-in cooling, or at least a small heatsink and fan, can do a good job of preventing overheating during long streaming sessions.
Adding Streaming Services and Local Media
Once you install Kodi, you can start adding your favorite content. If you have a collection of movies or TV shows on an external drive, simply plug it in, and Kodi will organize everything for you.
If you prefer streaming, Kodi has a range of official add-ons that let you watch YouTube, Netflix, and other services. However, certain services might require additional setup to work properly.
If you have a home server or a NAS (Network-Attached Storage), you can connect Kodi to it and stream content without manually transferring files.
Plex is also a good option if you want a more polished interface for organizing and accessing your media library.
Making Navigation Easier
A keyboard and mouse work fine during setup, but for everyday use, a remote can be much more convenient. If your TV supports HDMI-CEC, you can control Kodi using your regular TV remote – no extra hardware is needed. You can also install the Kore app on your smartphone, which turns it into a full-featured Kodi remote.
On the other hand, if you want something more tactile, a small wireless keyboard with a built-in touchpad is a great option. It’s compact, easy to use, and allows you to search for movies much faster than typing on an on-screen keyboard.
Troubleshooting Common Issues
Even with a smooth setup, you might run into minor issues.
For example, if your videos stutter or buffer frequently, check your network connection and make sure that hardware acceleration is enabled in the settings.
If you are experiencing device overheating, a cooling fan can do a great job at lowering the temperature.
And if performance feels a bit sluggish, you can try a fresh install or lower the resolution to 1080p instead of 4K.
Final Thoughts
As you can see, building a media center with Raspberry Pi 5 doesn’t have to be difficult. For a much smaller cost than commercial streaming services, you can have a customizable and powerful streaming system that can even handle light gaming. Plus, it’s quite easy to upgrade or modify if needed.