ATinyGame Handheld Console
- Buy 2 for $19.00 each and save 5%
- Buy 3 for $18.00 each and save 10%
- Buy 5 for $17.00 each and save 15%
- Buy 10 for $16.00 each and save 20%
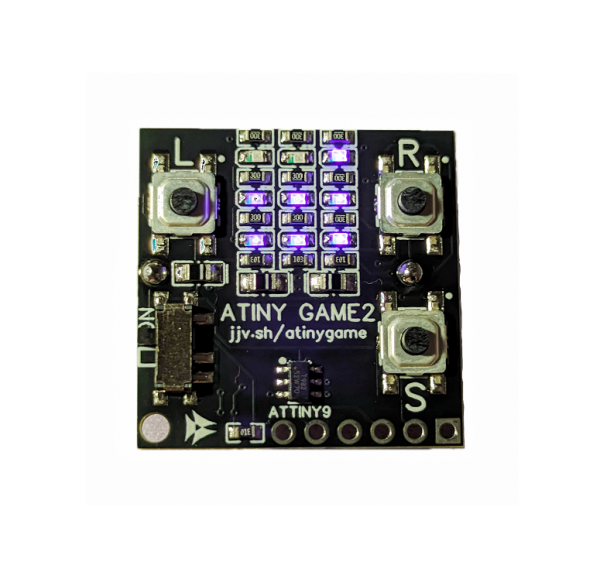
A game console that fits in the palm of your hand, with 3 buttons, 9 pixels, and 5 games.
About
ATinyGame is a game console that fits in the palm of your hand, with 3 buttons, 9 pixels, and 5 games: arcade stacker game, whack-a-mole, memory game, and more! I wanted to make it as simple, compact, and cheap as possible, while still being fun to play. Every game comes with an instruction card, but if you want to get started even quicker, just flip the switch on the left, then press the S button repeatedly to play the stacker game.
But wait, there's more! If you want to try it out before buying it, you can play a simulation of the ATinyGame INSIDE YOUR BROWSER! Just go to jjv.sh/atinygame and click on the buttons on the first image (or use the arrow keys on your keyboard). It's a secret little easter egg I'll let you in on because you are considering giving me money for one of these devices. (Ok it's not thaaat much of a secret.) Note that the simulation shows a picture of version 1, and if you buy it you will get version 2.
It started out as a side project, but now I'm happy that I found a way to make a bunch of them, and ship them around the world! I learned a lot, not only about circuit board design and low level programming, but also making it more efficient to assemble start to finish and turning it into a product.
Feel free to reach out to me with any questions about the product, process, or technology at: jj-elec-support (at) vandymail (dot) com
Technical Info
ATinyGame runs on an ATTINY9 processor, which has 1KB of storage, only 32 bytes of RAM and 16 registers, is 8-bit, runs at about 4MHz, has 4 input/output pins, and costs 50 cents. Connected to those 4 pins are 9 LEDs and 3 buttons in a charlieplex circuit. The way this works is each pin can have an LED or button running to each other pin. So 4 pins, with 3 devices on each, is 4x3=12. To actually use all 12, we have to cycle through and only activate 2 pins at a time, and leave the rest floating by setting them as inputs. Whatever those 2 pins were connected to will be the LED or button that is being controlled. So there is a part of the code that controls all that, and the rest of the code can just read and write some values and doesn't have to think about it.
Speaking of which, the whole thing is written in assembly, because compiled C code was using up too much storage and we only have 1KB. Each assembly instruction is 2 bytes, so we have 512 instructions to work with. About 85 of these are used for the charlieplexing code, which leaves 427 for the 5 games. Coincidentally that's about 85 per game, although some games are much larger than others. See the assembly code here. I used a lot of tricks to reduce the size of the code, which you can read more about one of them here. (That blog post mentions it's a 25 cent computer, well the chip shortage doubled the price. If I make a similar project in the future I will look into other options, I hear there are equivalent chips for around 3 cents. Or I could jump up to $1 and get an RP2040, which is about 1000 times better.)
To actually flash the code onto the chip, I had to build a separate circuit with an arduino so I could send the code over USB, and the arduino would pass it to the chip over SPI, then set certain flags to configure the chip. See the circuit diagram on the github repo. I also had to have some solder pads on the PCB that I leave disconnected to make sure the programming isn't messed up by all the LEDs and resistors that are connected, since it uses the same pins for programming as normal I/O. So after programming it I have to solder the pads to bridge the LEDs and buttons to the microcontroller. Then if I wanted to reprogram it, I would have to desolder those pins, and apply 12V to get the chip into a programmable state. To help with this I made a custom rig with relays instead of the solder pads, so the arduino can disconnect them before sending the program. The arduino also uses another relay to apply 12V when it needs to reset the chip.
Specs
dimensions: 2.54x2.54x1.4cm
battery (included): CR2032

